Podi Idli

Podi Idli
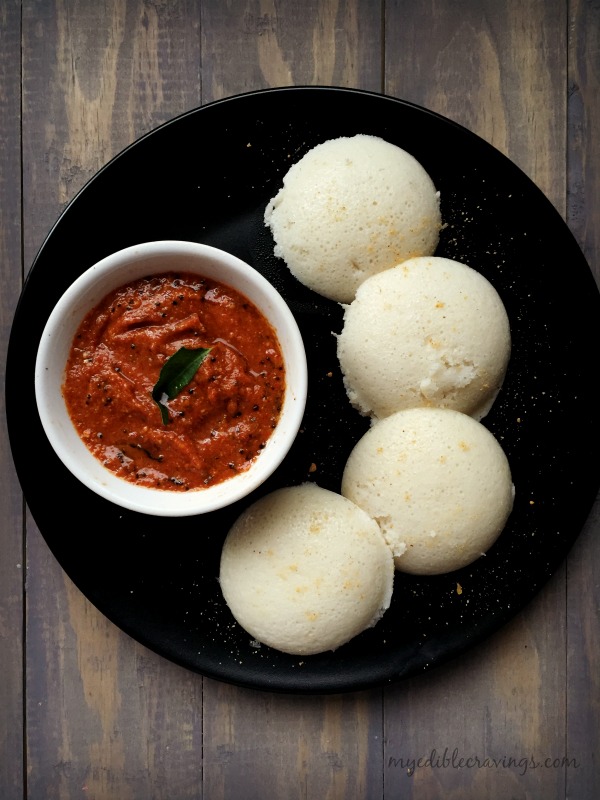
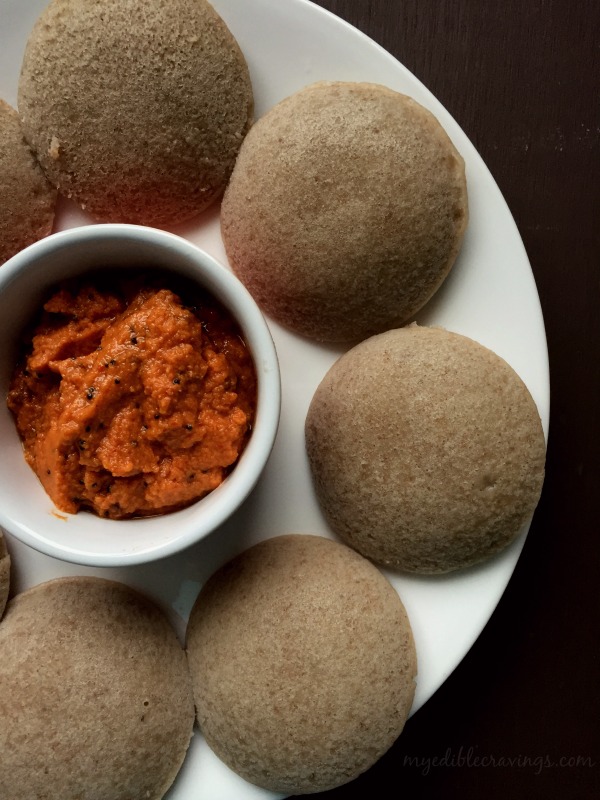
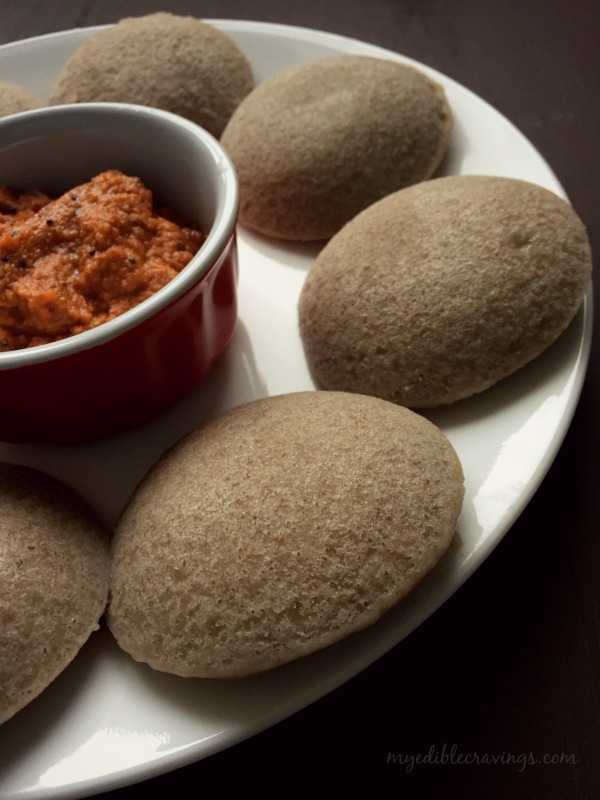
Here is yet another variant of one of the most popular south indian dish, Idli. However, the recipe I have posted here is simple yet tasty. It is made from Milagai Podi or Idli Podi or just Podi, a popular condiment usually had with idli and dosa, called Podi Idli. Podi literally means coarse powder in Tamil. In India, it is popular in Tamilnadu and Andhra Pradesh where it is also called as gun powder because of the spiciness 🙂 Idli podi is somewhat similar to mustard back here, I mean not the texture but the selectiveness in their usage. When you have Podi, you don’t have to worry about any other chutney or side dish for Idli and Dosa; having just them tastes awesome.

podi idliPodi Idli
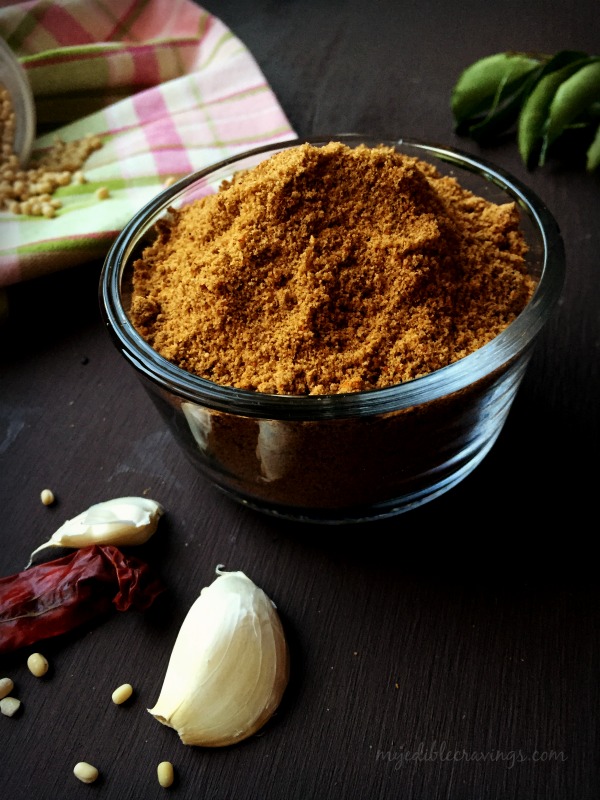
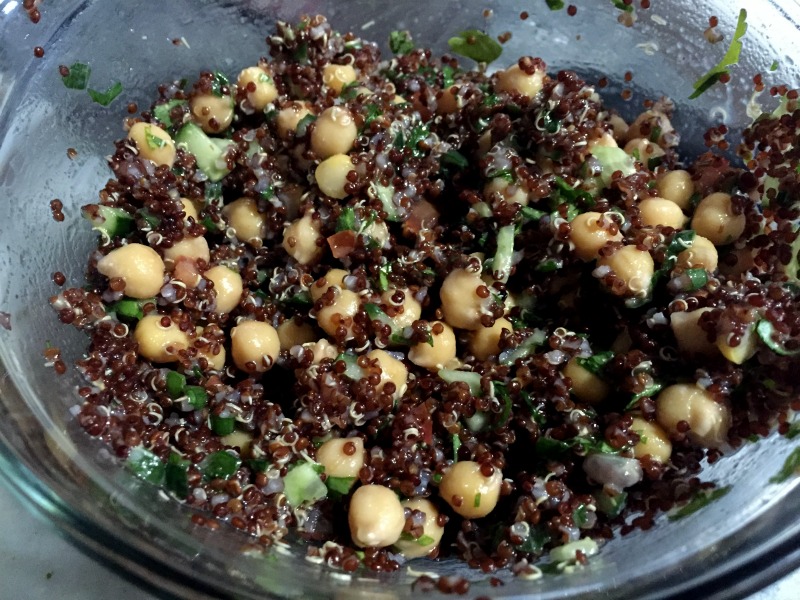
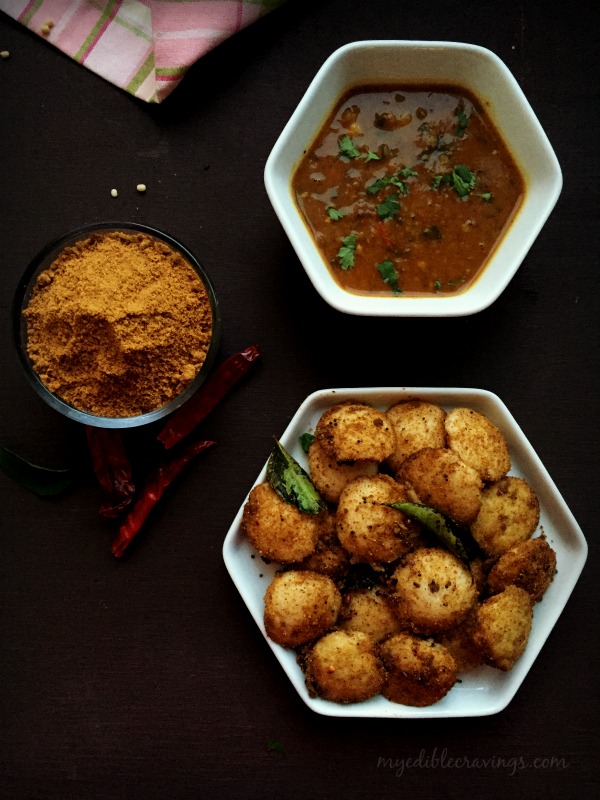
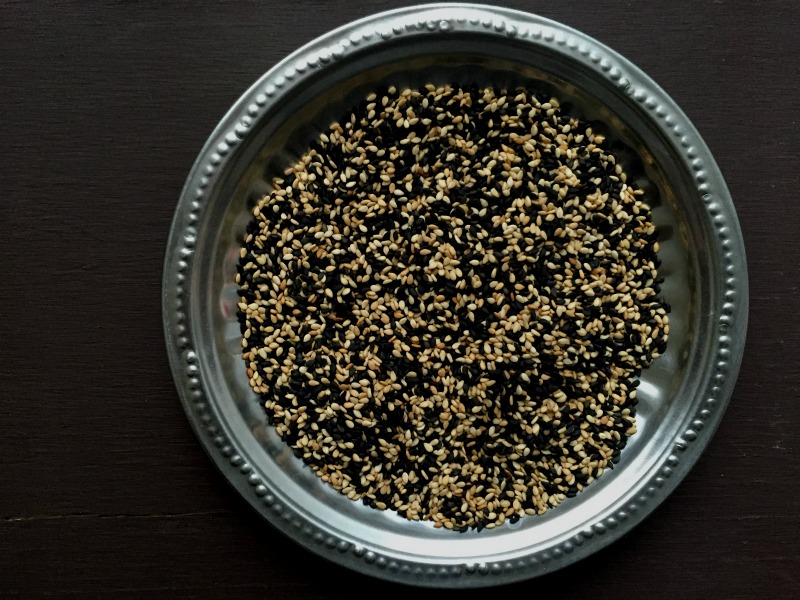
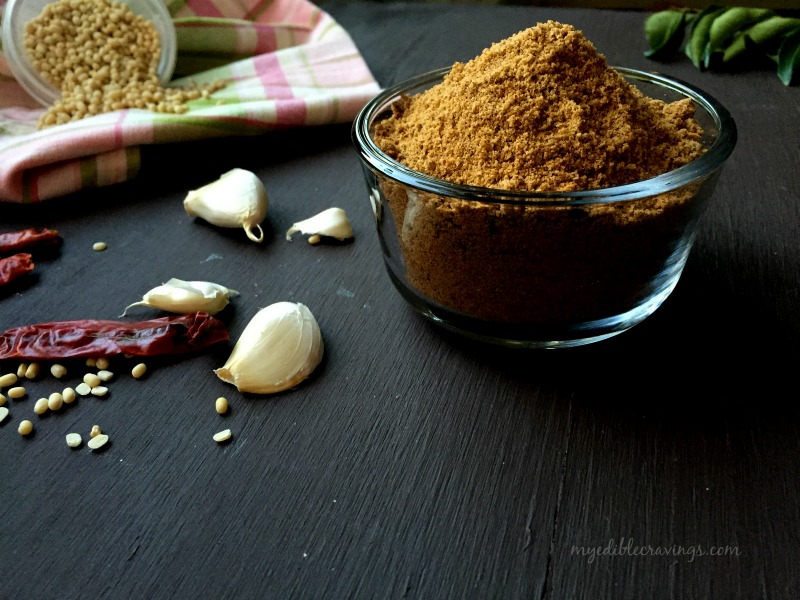
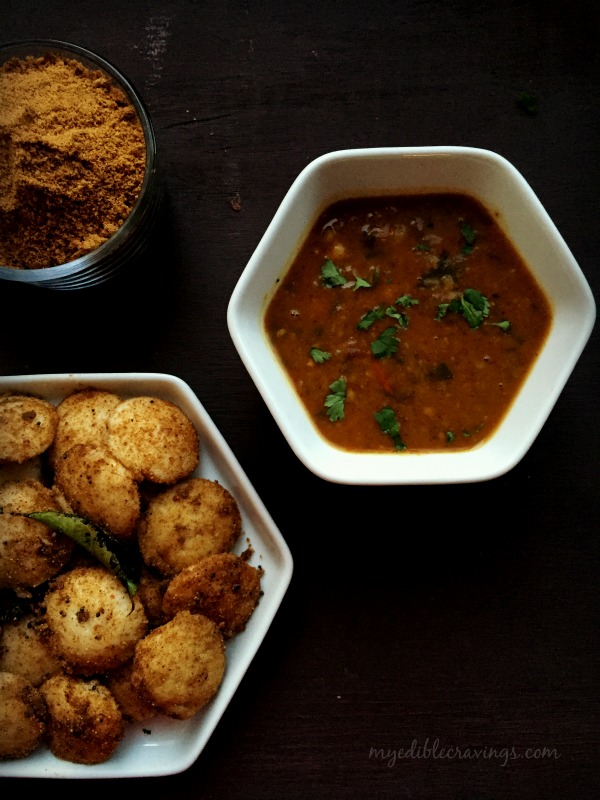
I love my grandma’s idli podi recipe the most and then my Mom’s. The Podi I have used in the Podi Idli recipe here is my Mom’s. There are so many varieties of Podi like Milagai Podi, Ellu Podi (made from sesame seeds), Paruppu podi etc and the interesting part is each of these serve as an accompaniment to a particular main dish 🙂 I have used both black and white sesame seeds to prepare the Idli Podi. Make sure to grind it to a coarse texture since the coarse particles brings out the flavor and adds crunchiness much more than the fine grained powder.

Podi IdliPodi Idli
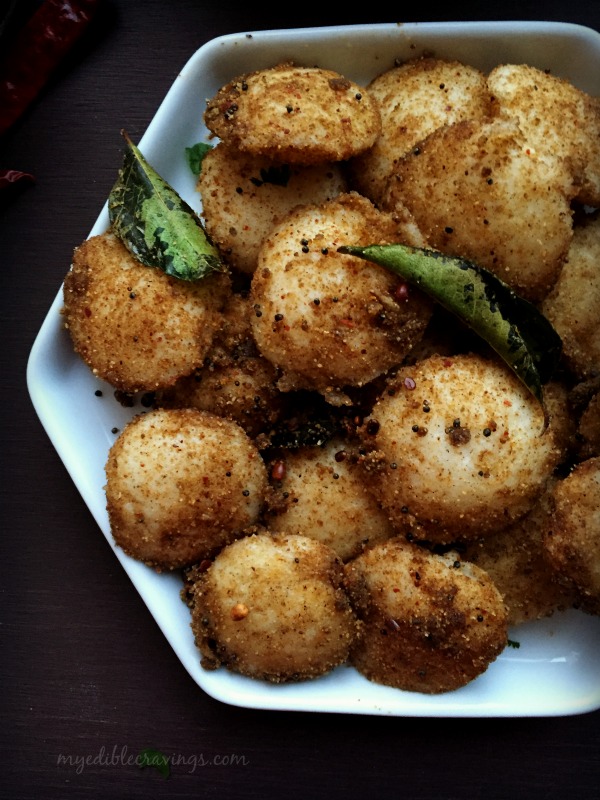
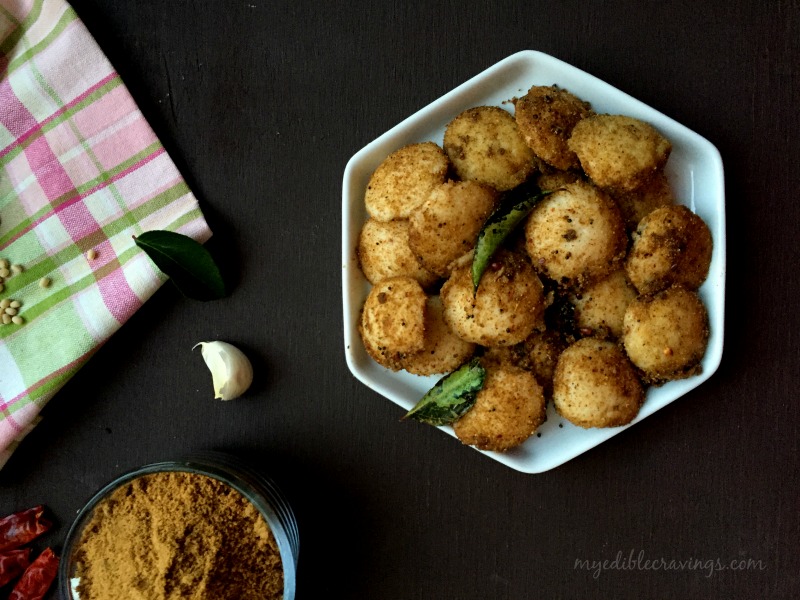
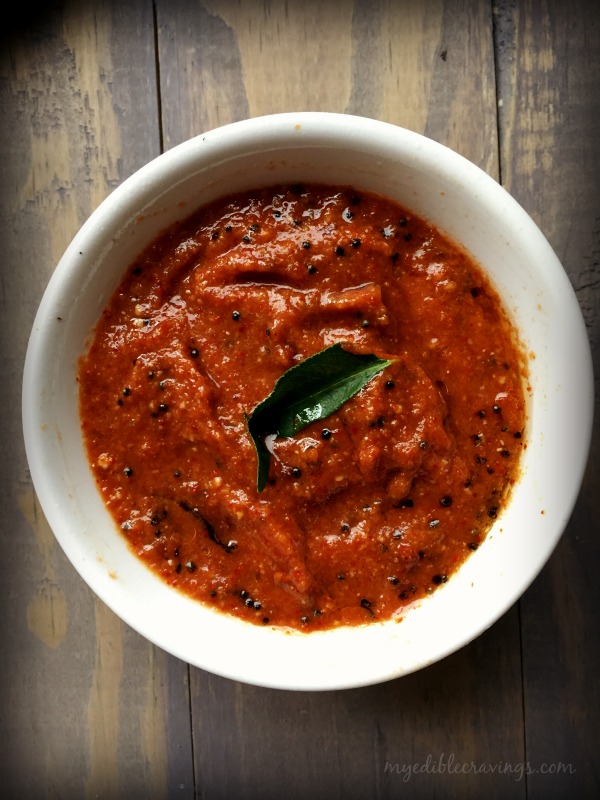
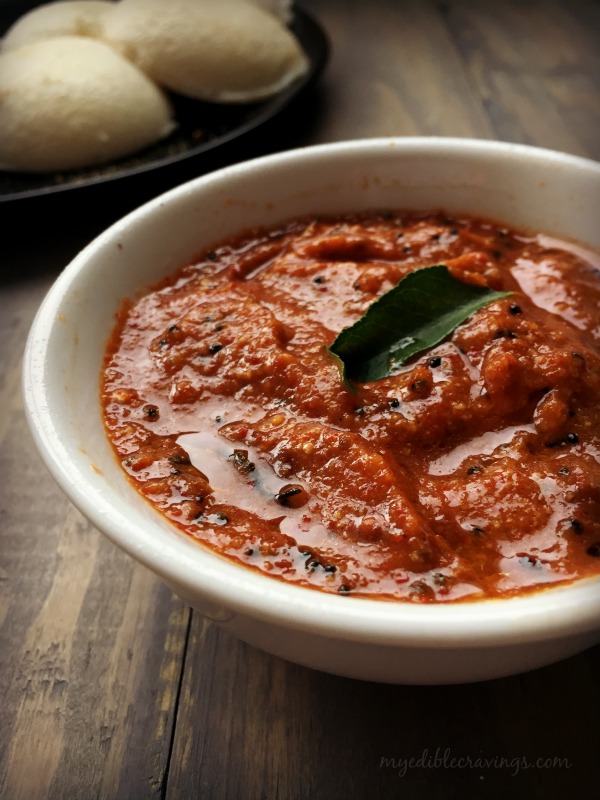
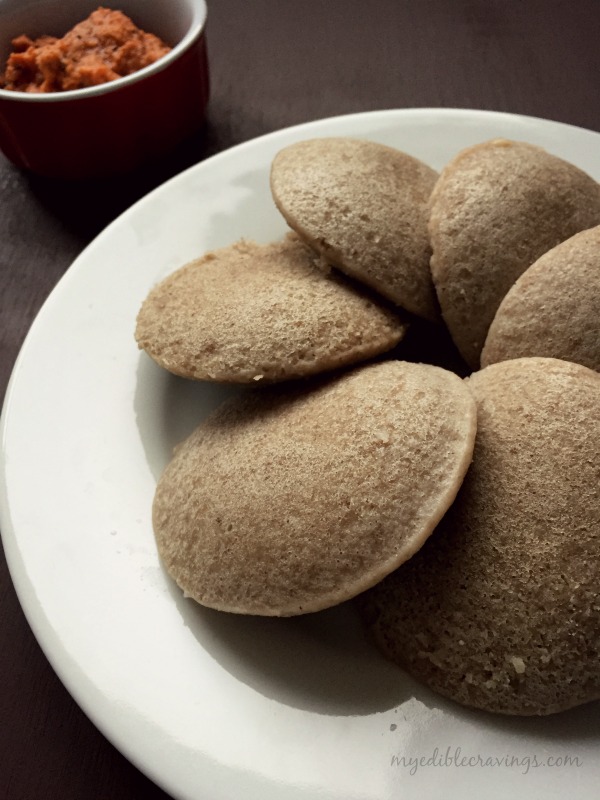
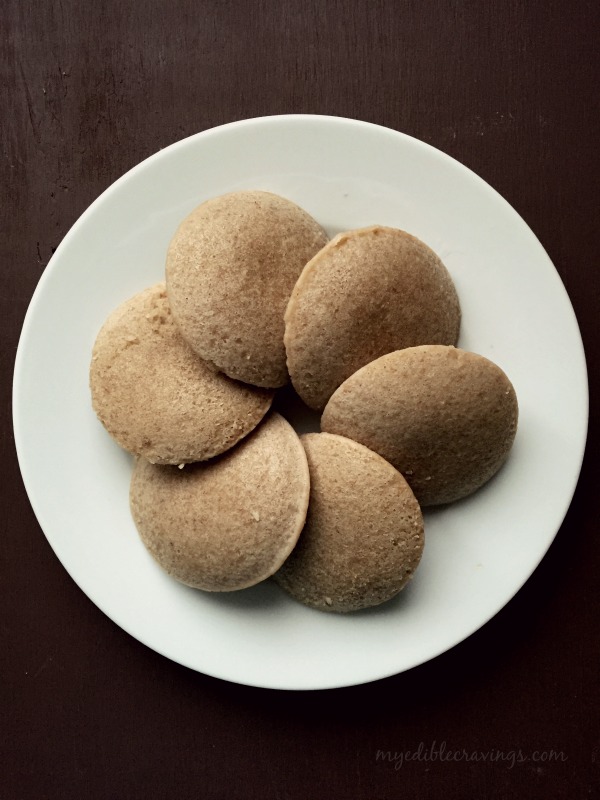
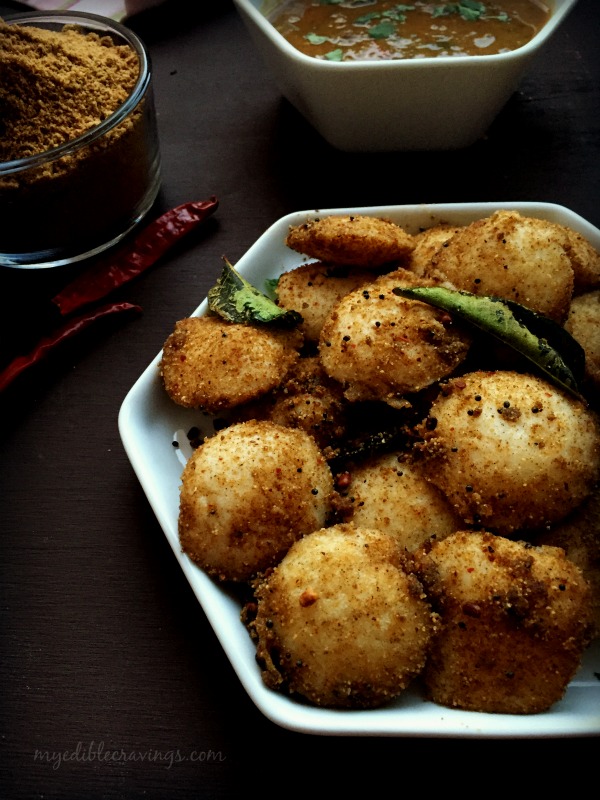
I always prefer having Idli Podi with whatever chutney I make 🙂 This has been my preference since childhood and I used to get an earful from my Mom for that (and still do sometimes) :). Podi Idli is a filling dish and is very easy to make. All you need is an awesome Idli podi and soft idlis. My MIB is a big fan of this recipe 🙂 I have not added onions and green chillis to the recipe since it might then taste similar to another variety of Idli called the Idli Upma (I will post the recipe soon). Podi Idli can be had for breakfast, dinner or just as an appetizer. Try this easy dish in your home and let me know when you would prefer to have it? 🙂

Podi Idli
Recipe type: Main
Cuisine: Indian
Prep time: 
Cook time: 
Total time: 
Serves: 20 mini idlis
 
Ingredients
To make idli podi
  • Whole urad dal - 1 cup
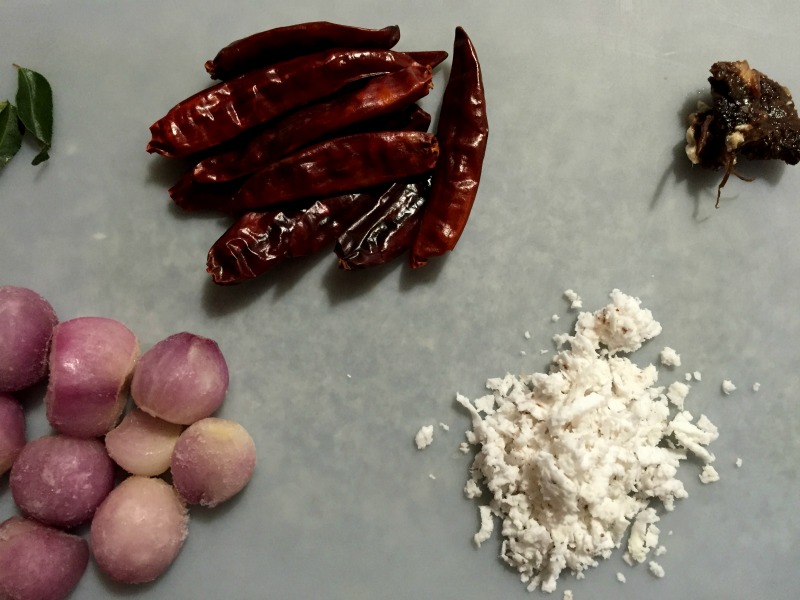
  • Red chilli - 10 to 12 nos
  • Sesame seed - ½ cup
  • Garlic cloves, big - 2 nos + 1 medium
  • Curry leaves - half a sprig
  • Salt - 1 tsp
To make podi idli
  • Idli batter -
  • Oil - ½ to 1 tsp
  • Mustard seeds - ½ tsp
  • Urad dal - ½ tsp
  • Curry leaves - ½ a sprig
  • Idli podi - 2 tbsp
Instructions
  1. Heat a pan in a medium flame and dry roast urad dal until aroma spreads for couple of minutes. Transfer to a plate and let it cool.
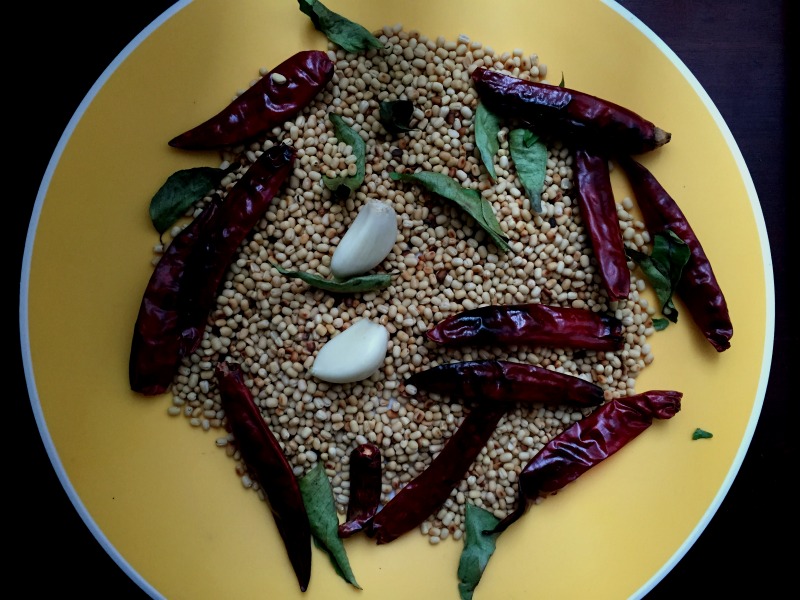
  2. Next dry roast red chilli and garlic seperately until they turn crisp and transfer to the plate.
  3. In the same pan dry roast sesame seeds until it splutters for about a minute. Transfer to a separate plate and let it cool.
  4. Turn off the heat and dry roast curry leaves until they turn crispy.
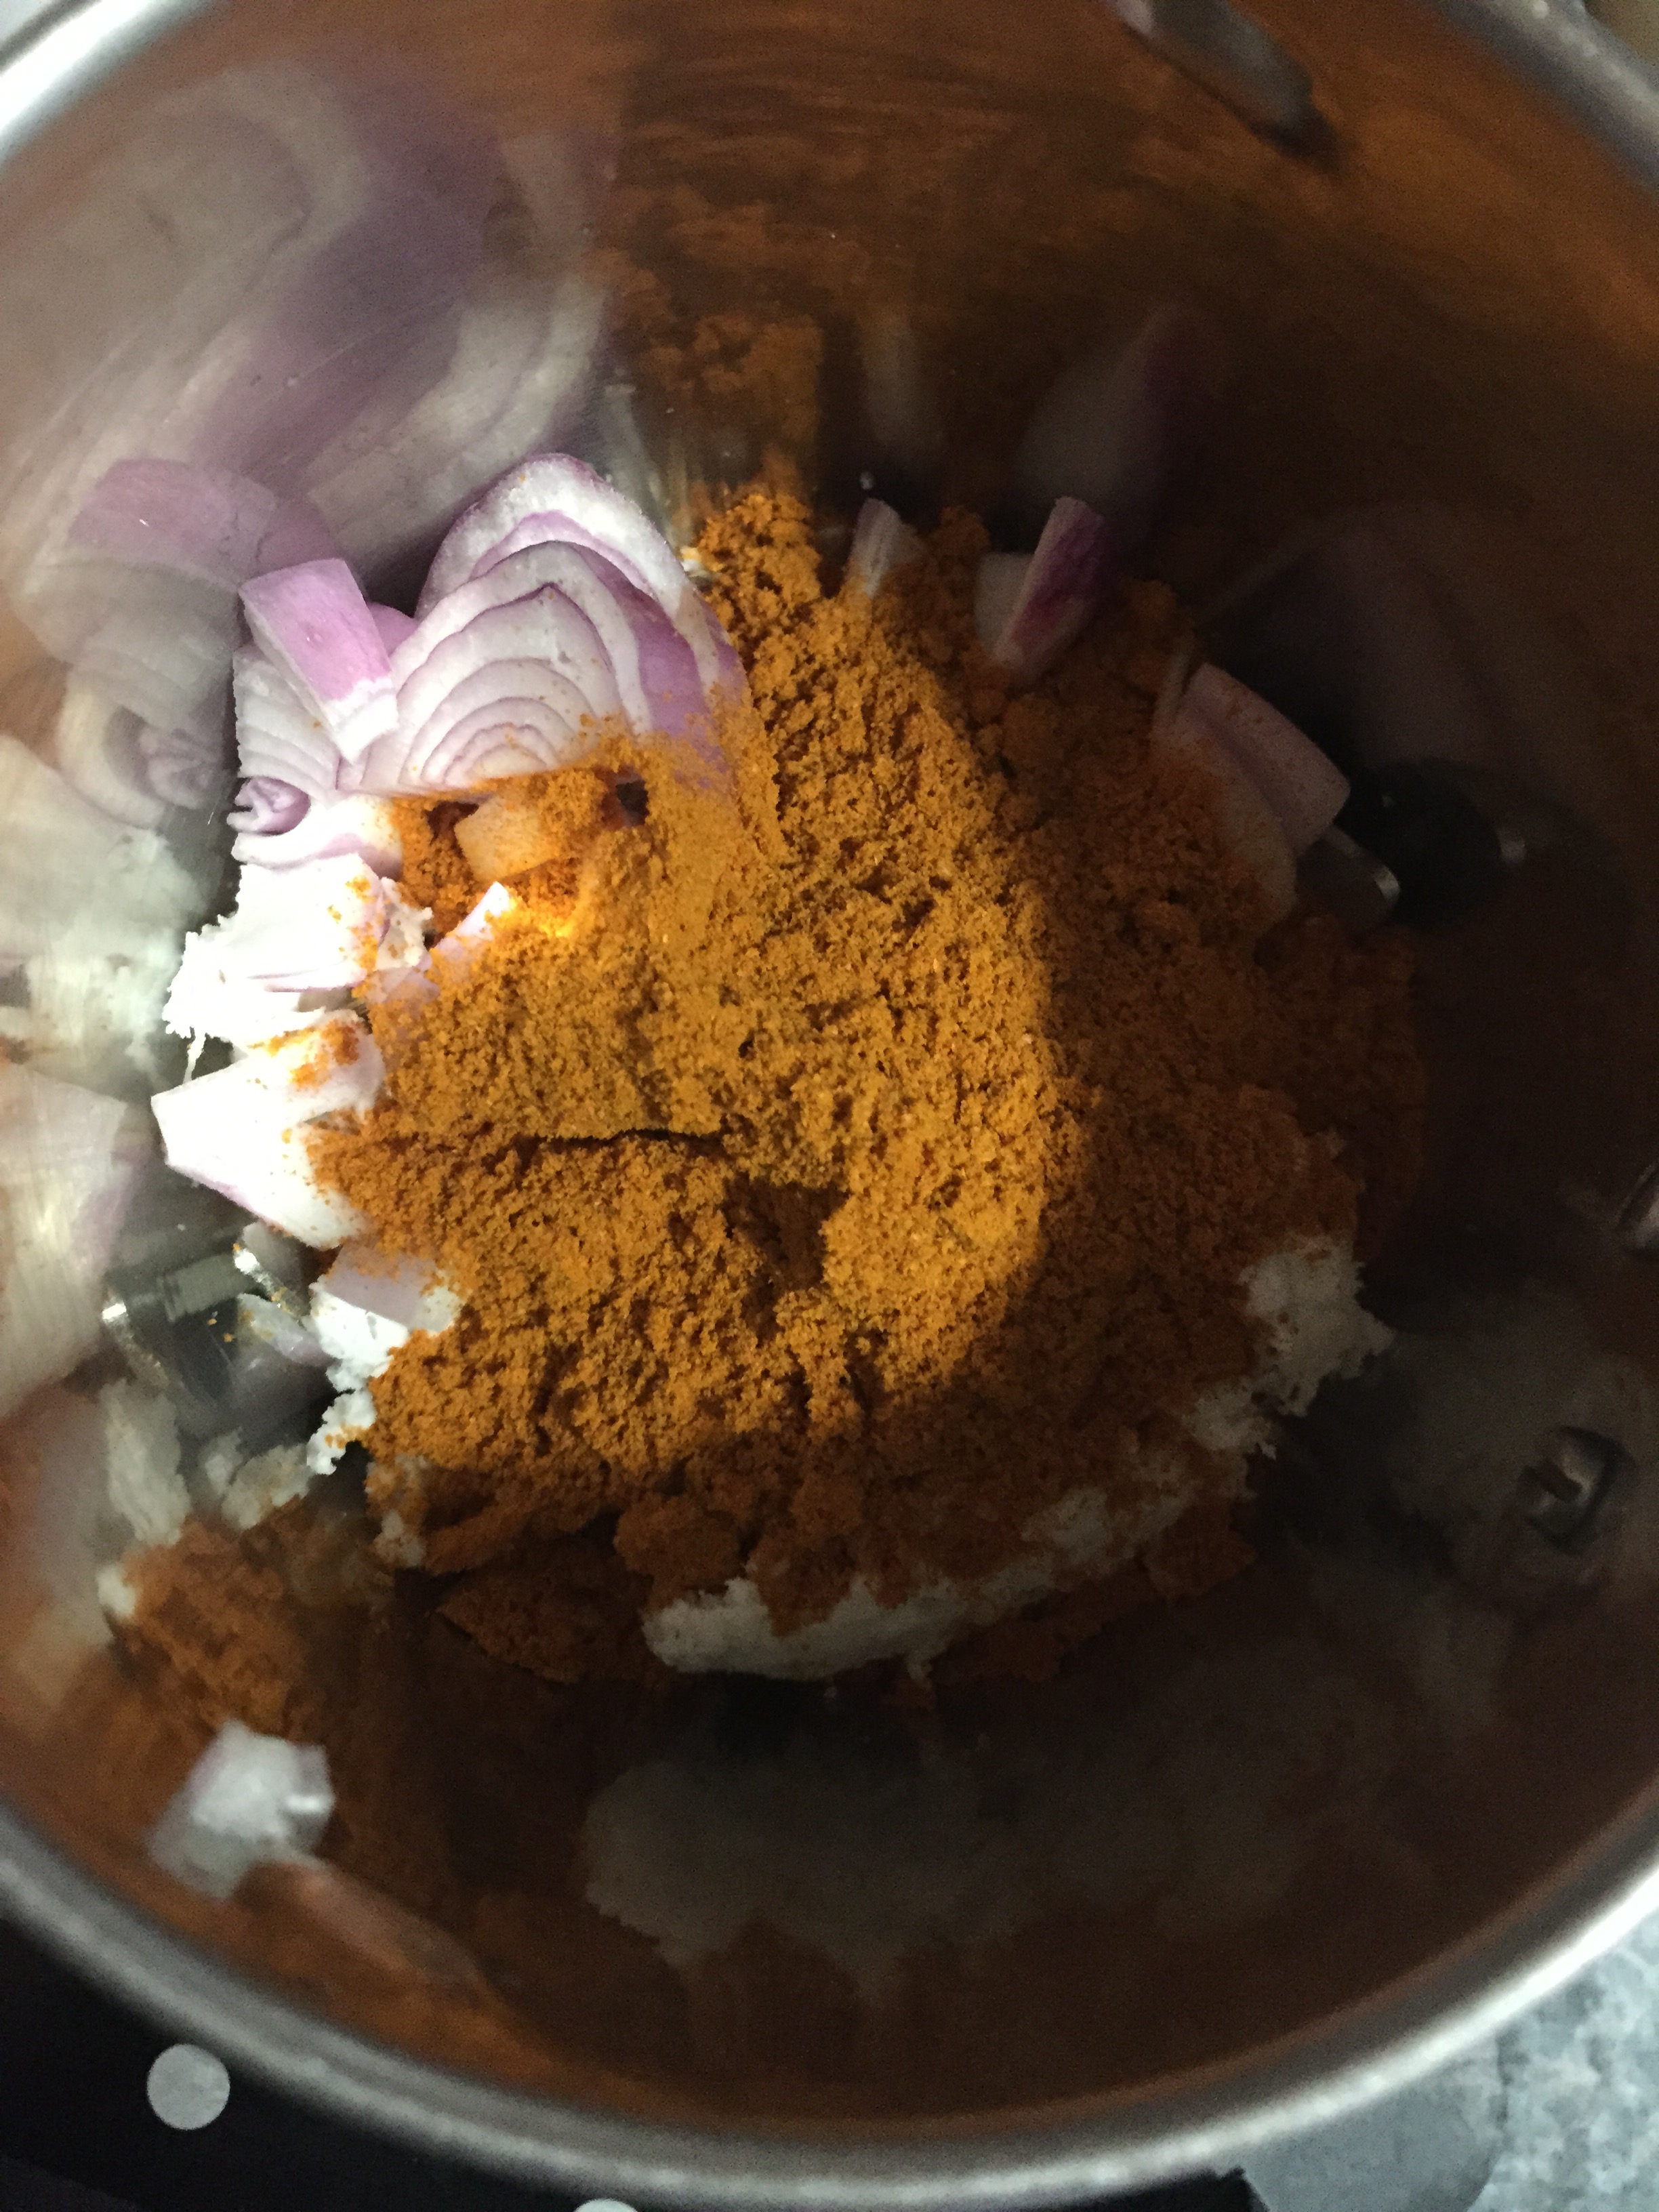
  5. Pulse urad dal, curry leaves and red chilli twice. Add sesame seed, garlic and salt and blend for few seconds to a coarse powder.
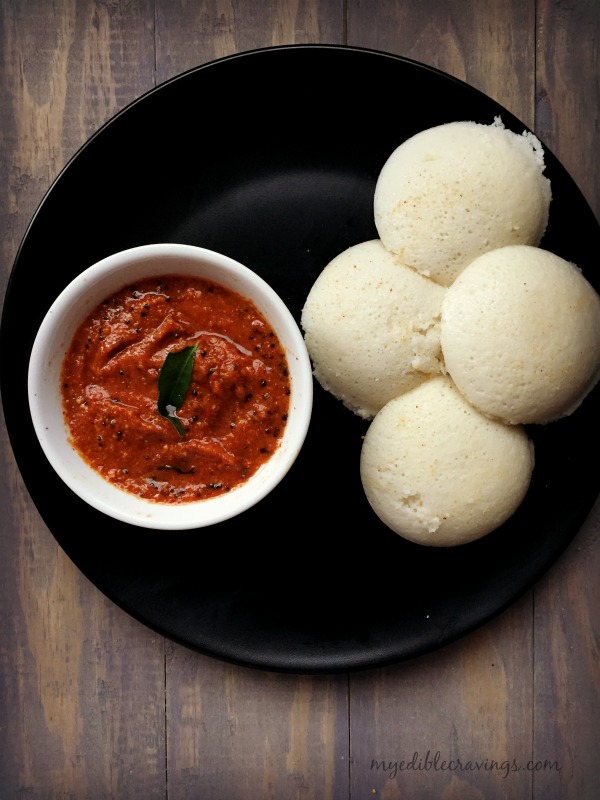
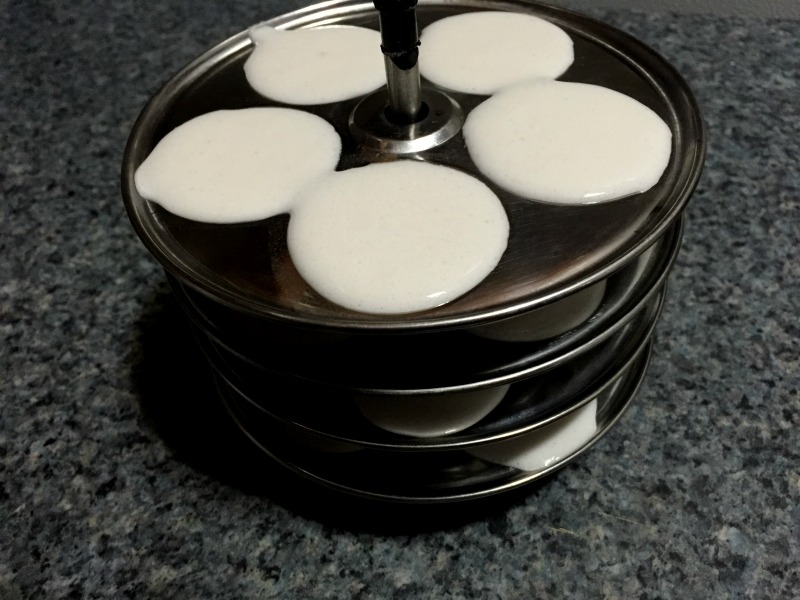
  6. Now pour idli batter in mini idli plates and steam cook for 15 minutes.
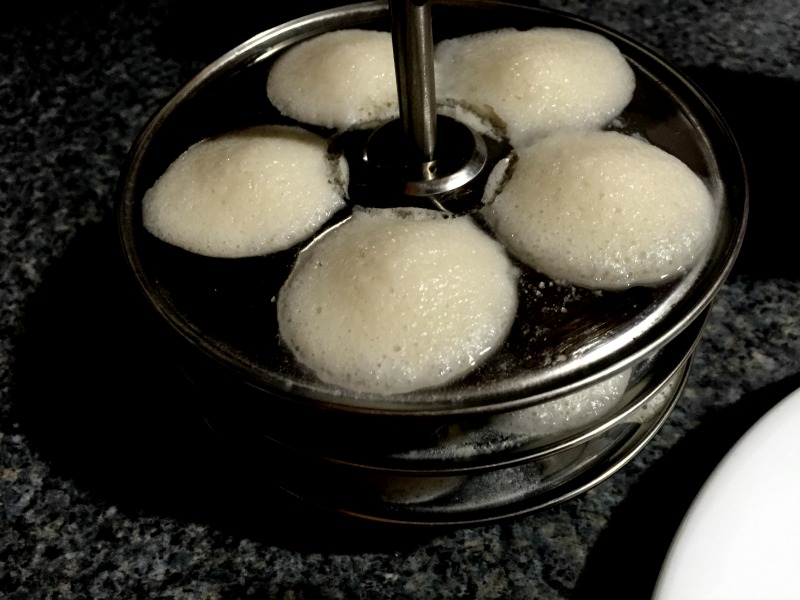
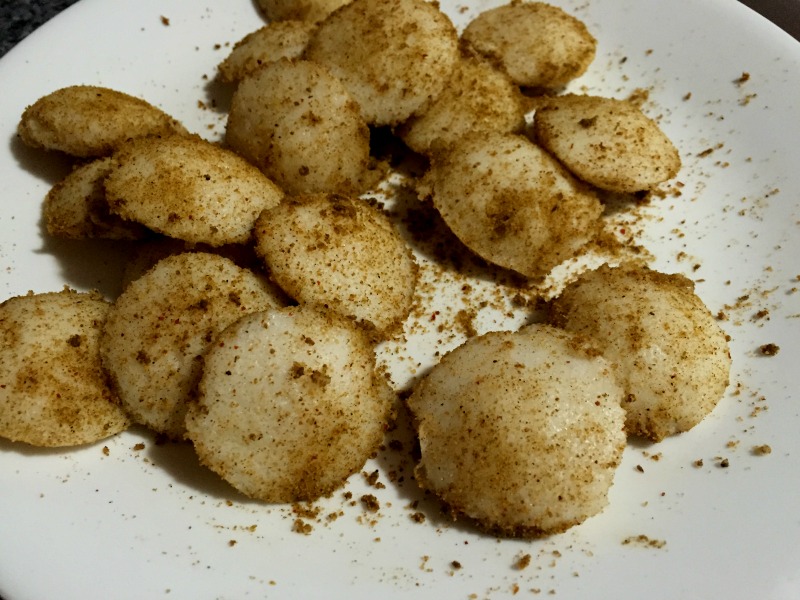
  7. scoop out all the idlis and immediately (when the idlis are still hot) add a tbsp of idli podi and roughly toss them.
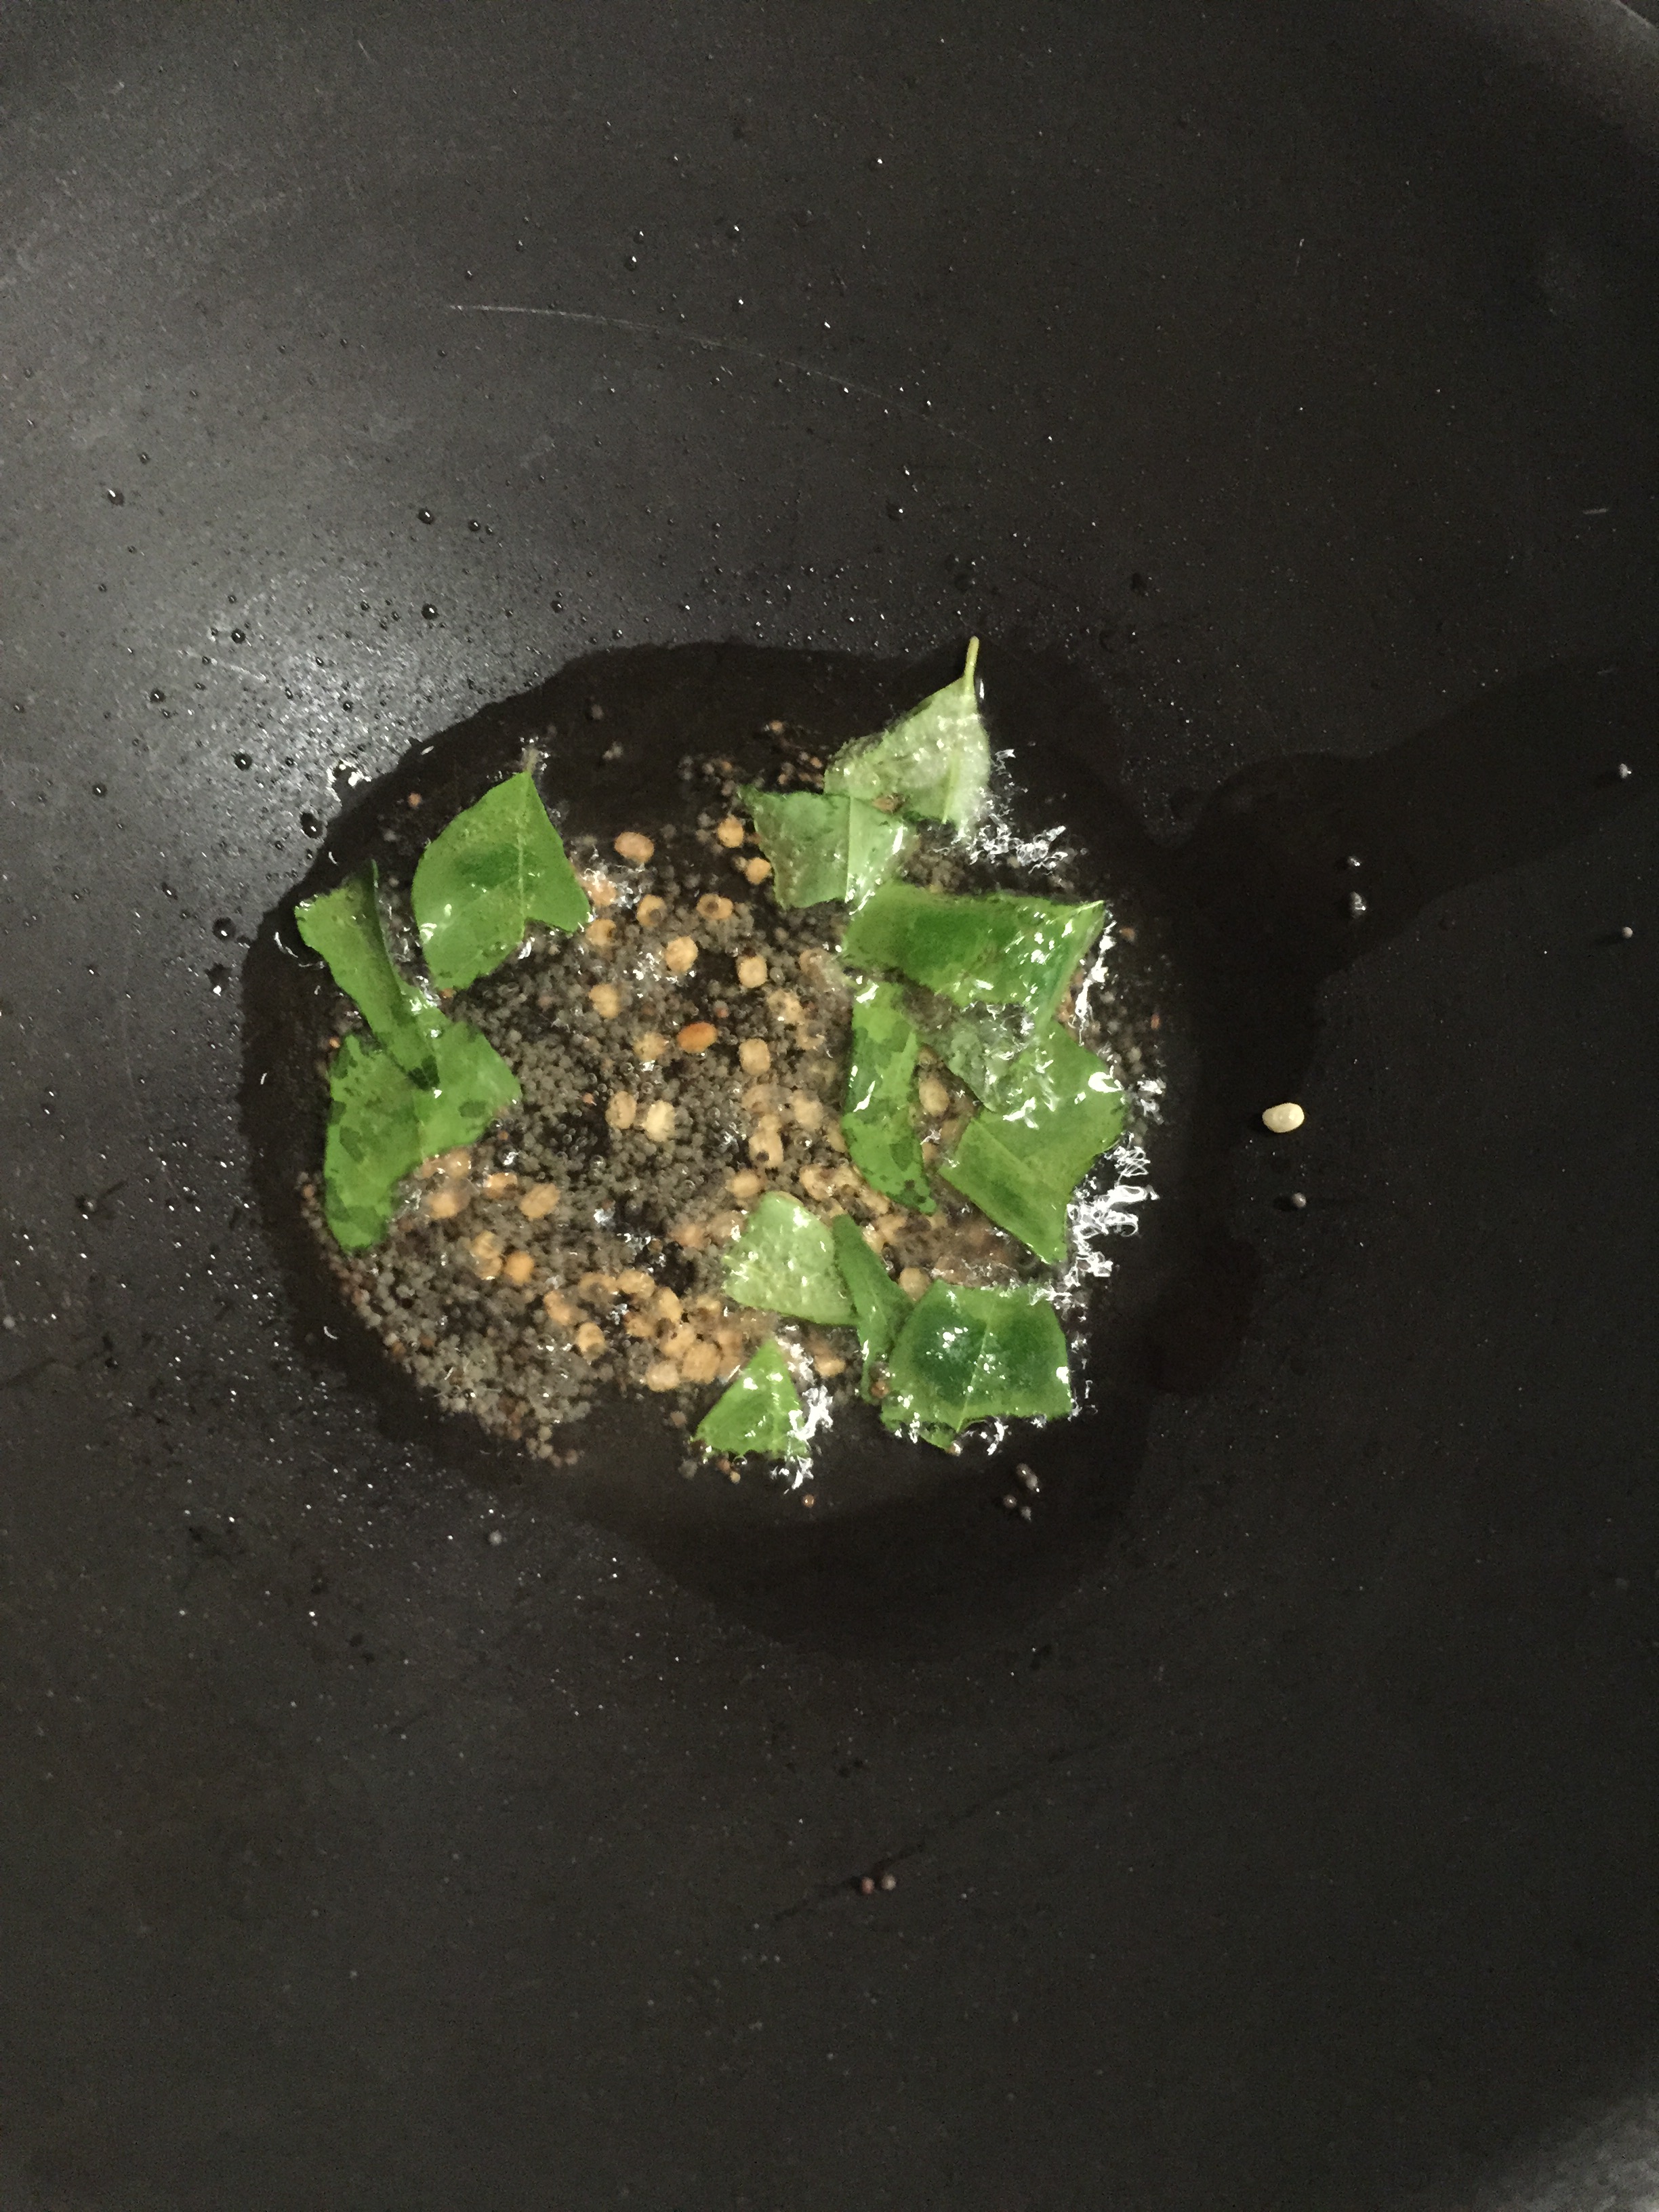
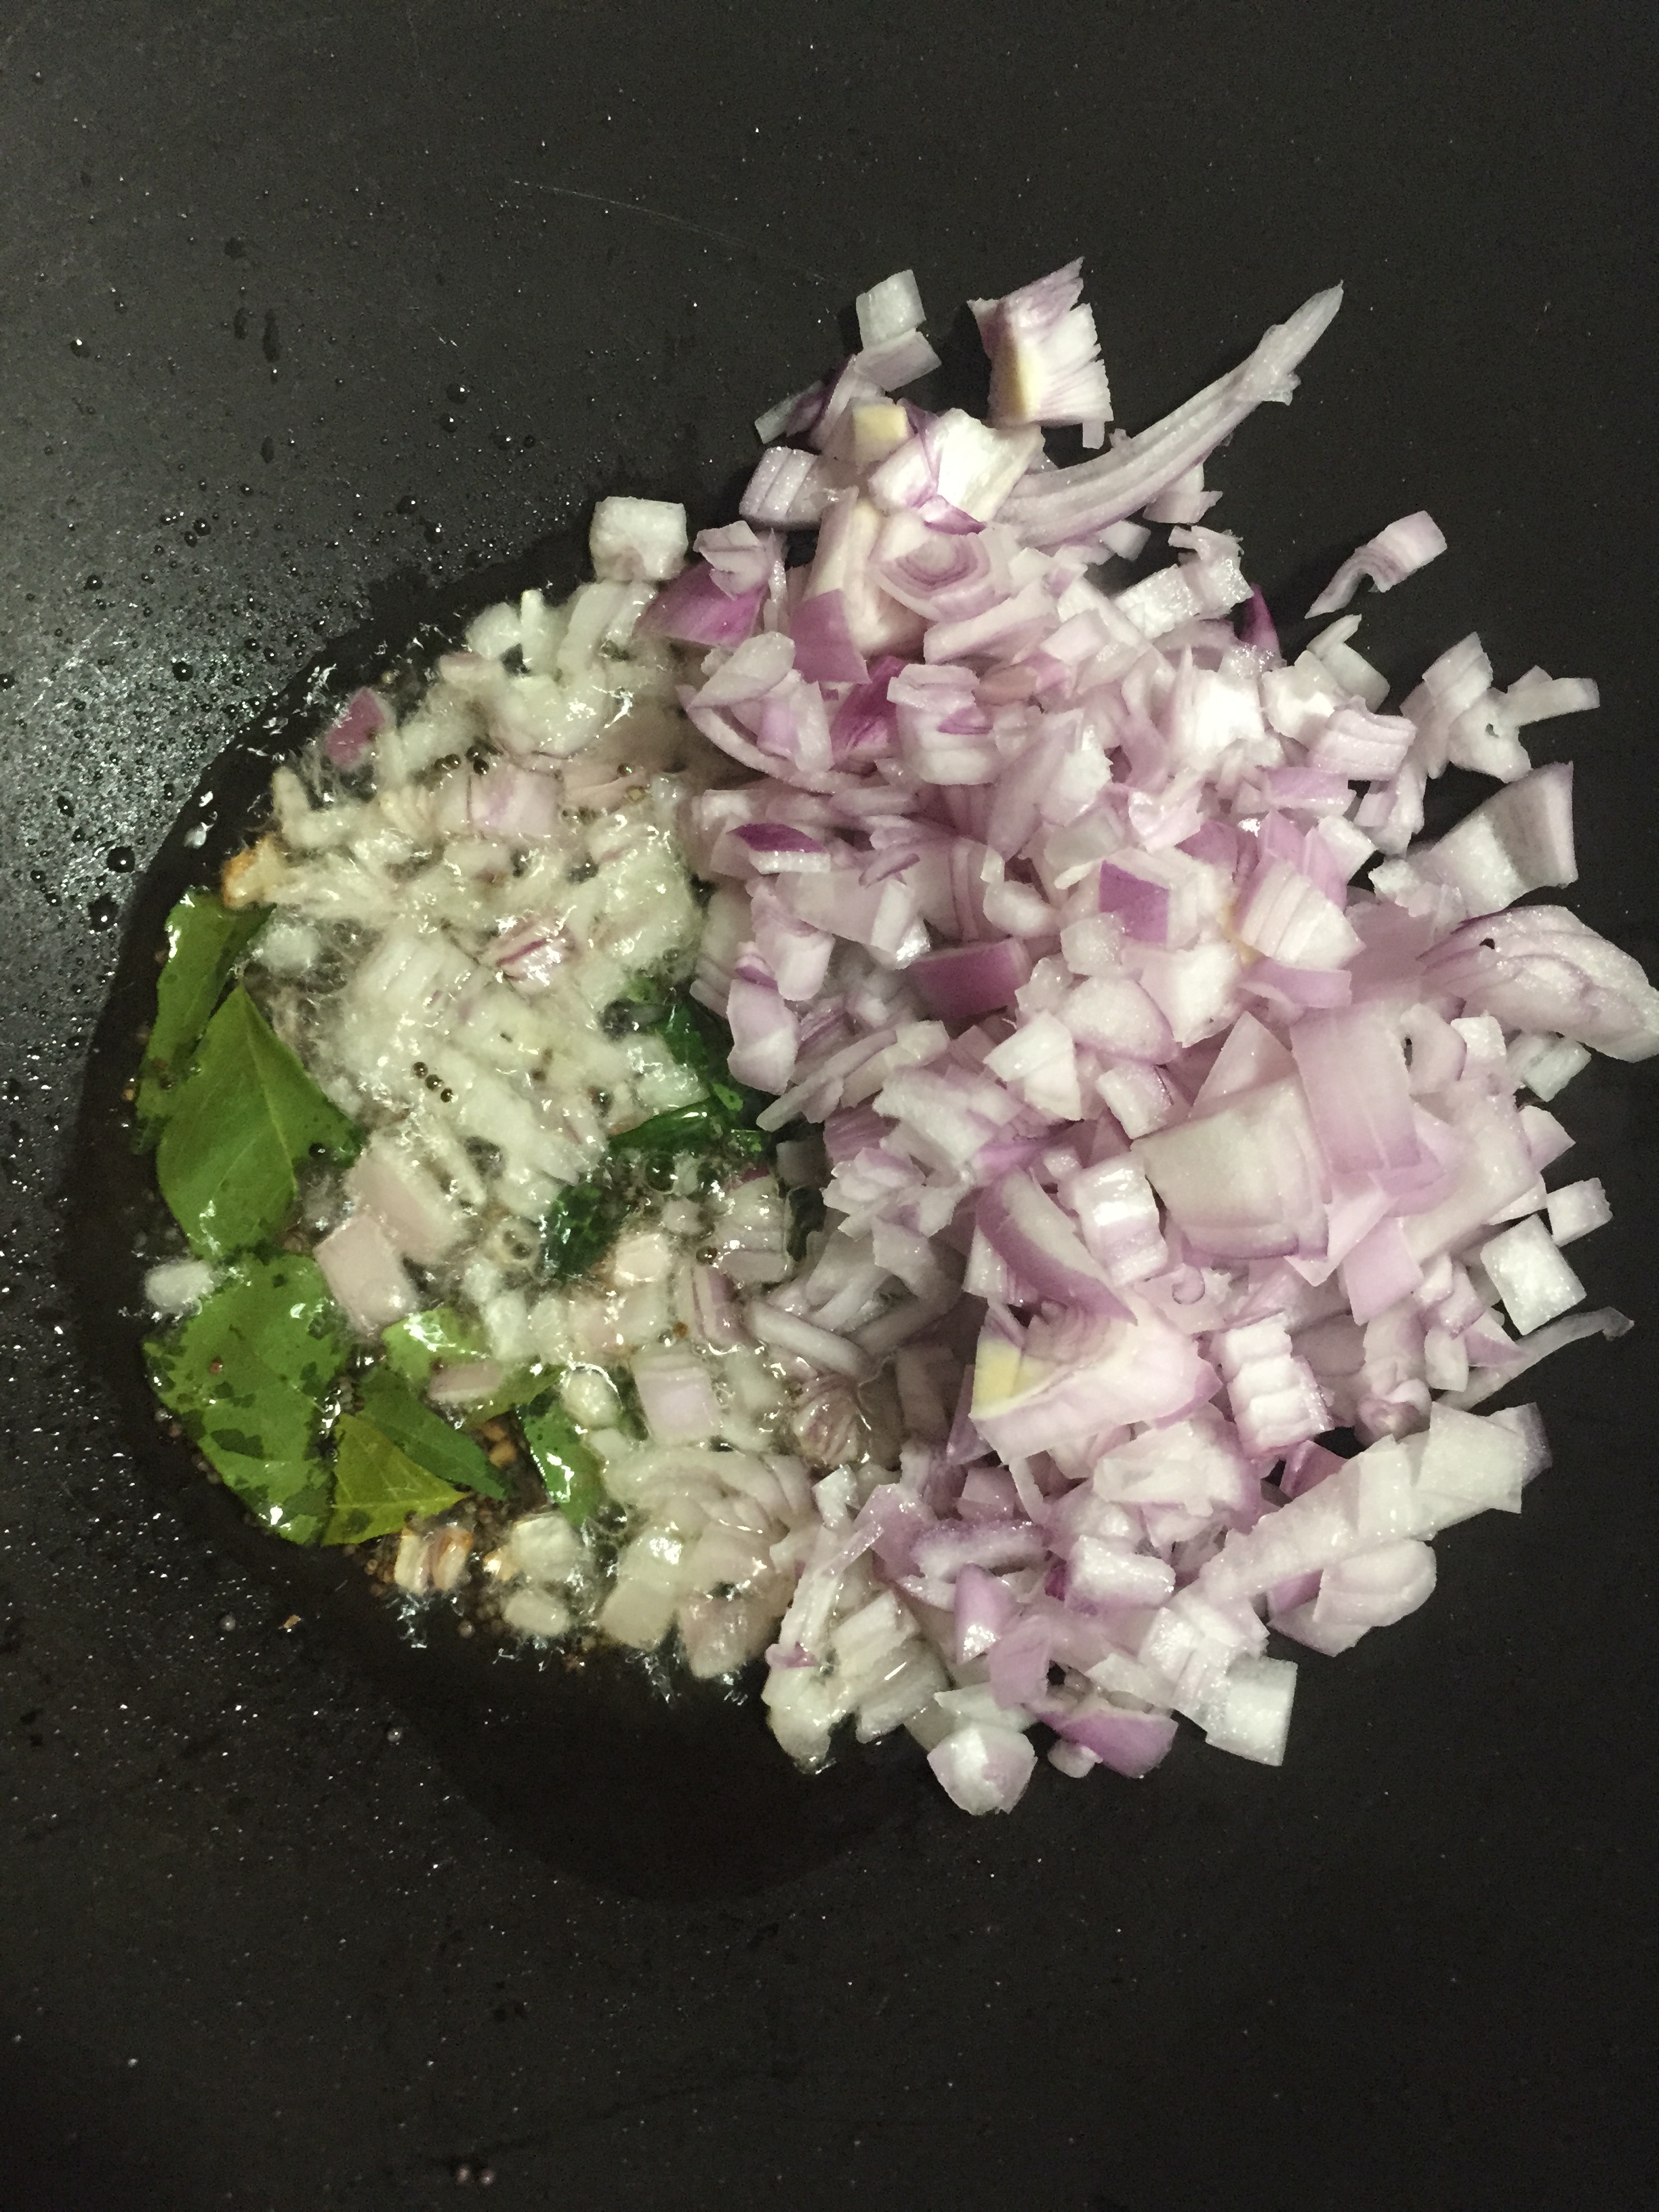
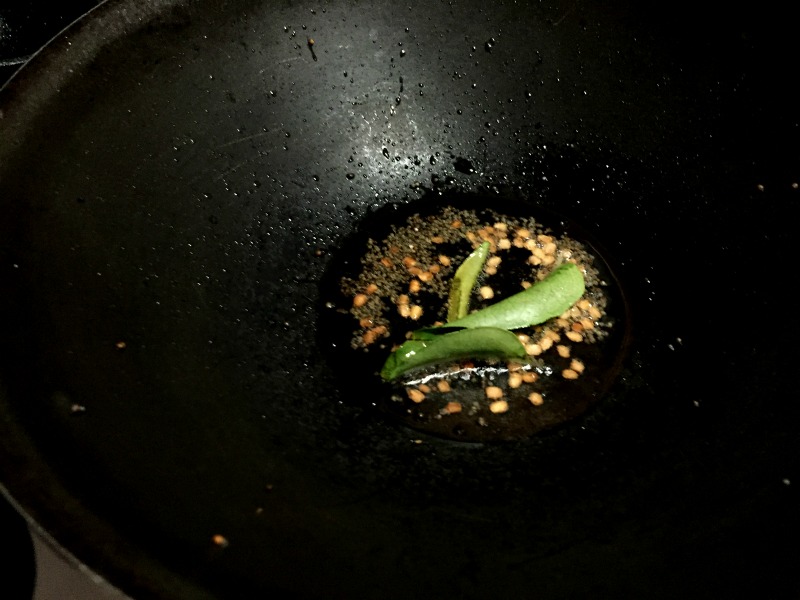
  8. Heat oil in a pan and season with mustard, urad dal and curry leaves.
  9. Add the tossed idlis to the seasoning along with a tbsp of idli podi. Covet the lid, hold two sides of the pan and carefully toss them for few seconds.
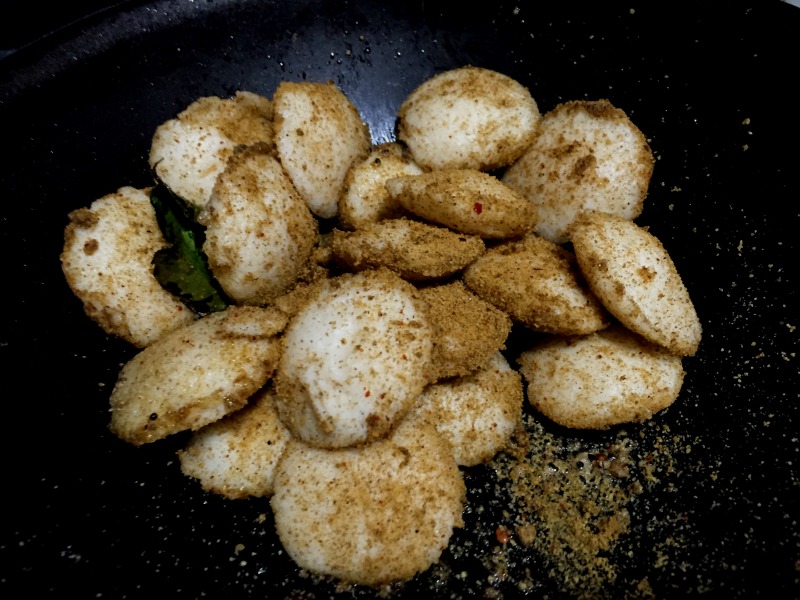
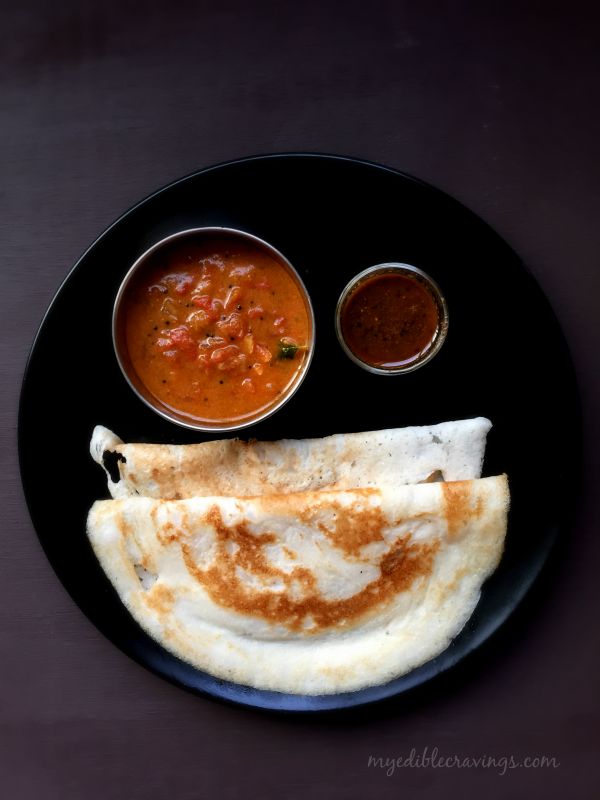
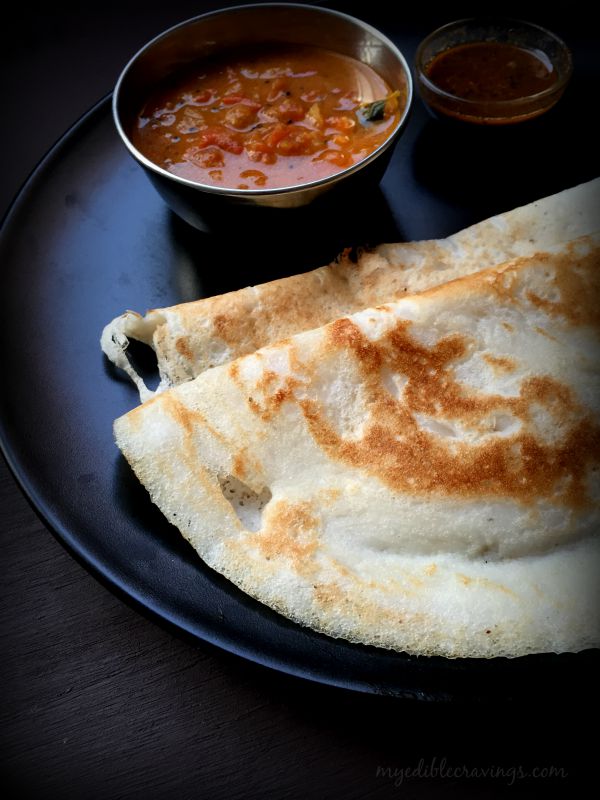
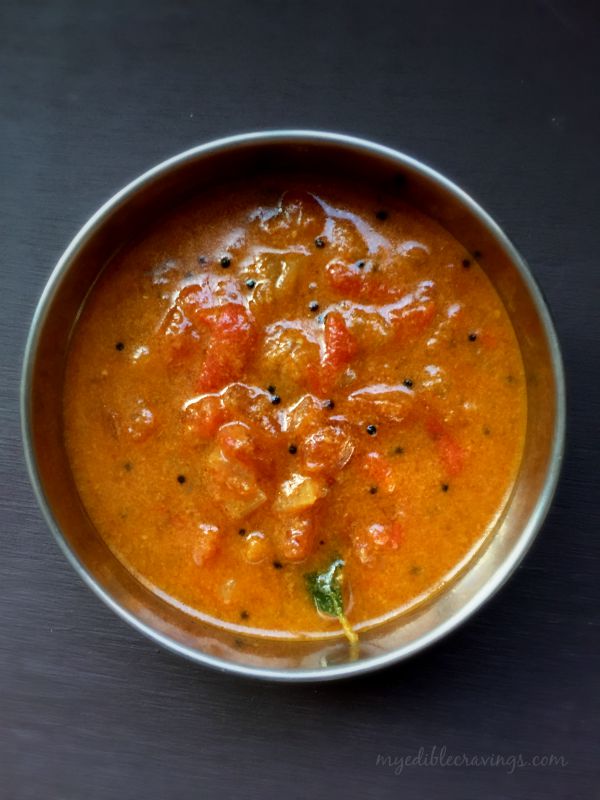
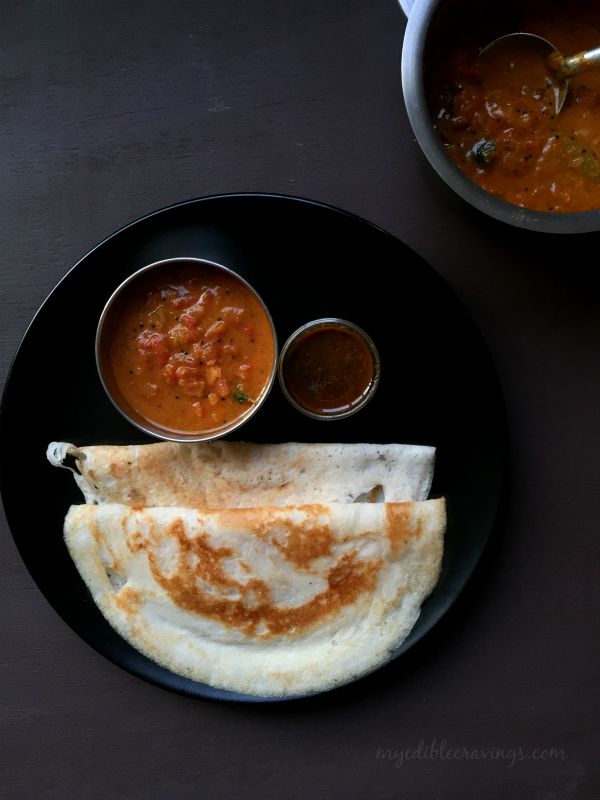
  10. Turn off the heat and serve tasty and spicy podi idli with sambar and chutney or serve as is. Enjoy! 🙂

Podi Idli

Mooli Ka Paratha

Mooli Ka ParathaParatha is a bread variety made from leavened wheat flour and is the staple food in northern parts of India. There are so many varieties of parathas like Aloo paratha, Kashmiri paratha, Paneer paratha etc. Today’s recipe is one such variety called the Mooli Ka Paratha, a stuffed paratha variety made from Mooli. Mooli is the hindi word for radish. I have heard about Mooli ka paratha before but have never tried it until recently. Thanks to my dear friend for introducing me to this dish.

Mooli Ka ParathaMooli Ka ParathaRadish or Mooli is a root vegetable and you must have seen it as an ingredient in another south Indian culinary delight called as the Sambar. Mooli ka paratha, though is a common dish prepared at homes, it is rarely seen in a restaurant menu. As with other stuffed parathas that I had mentioned above, Mooli ka paratha too can be had as is without a side dish and if you really must have something with it then Raita is the one to go for, especially cucumber raita. I have provided the recipe for that as well here 🙂Mooli Ka Paratha

Mooli Ka ParathaMooli ka Paratha is a summertime dish because of the rich water content in radish and is healthy as well. For the stuffing, you can either use the radish as is or sauté them and then use it. Either way, it tastes good. The next time you want to have paratha for lunch or dinner, do try this variety and I promise that you will not be disappointed 🙂

Mooli Ka Paratha
Recipe type: Main
Cuisine: Indian
Prep time: 
Cook time: 
Total time: 
Serves: 6 parathas
 
Ingredients
for the stuffing:
  • Radish, grated – 4 cups
  • Ajwain – ¼ tsp
  • Green chilli, finely chopped – 3 nos
  • Cilantro, finely chopped – 3 nos
  • Cumin powder – ½ tsp
  • Red chilli powder – ½ to ¾ tsp
  • Garama masala – ¼ tsp
  • Chat masala – ¼ tsp
  • Salt
for the dough
  • Wheat flour – 2 cups
  • Salt as required
  • Oil – 2 tsp
for raitha:
  • Grated persian cucumber, small – 1 no
  • Grated carrot, small – 1 no
  • Green chili, finely chopped – 1 no
  • Salt as required
  • Yogurt – ½ cup
  • Chat masala – a generous pinch
Instructions
  1. Grate the radish and transfer to a bowl. Set aside for 30 minutes and squeeze all the juice completely. Finely chop green chilli and cilantro.
  2. Add all the above ingredients to the grated radish and mix well. You can use this as a stuffing.
  3. Or saute them without squeezing the radish juice until raw smell disappears and all the water dries out and use that as a stuffing.
  4. Add oil, salt and squeezed radish juice with enough water (if needed) to the flour and make a dough. Leave it for 15 to 30 minutes.
  5. Divide the dough to equal sized balls.Heat the flat pan to make parathas.
  6. Dust a ball into the dry flour and roll them to circle. Repeat the same and make a equal sized circle.
  7. Place the stuffing in the middle of a rolled dough.
  8. Cover with the another rolled circle.
  9. Now carefully roll the paratha to desired size and repeat the same for the remaining dough.
  10. Cook the paratha on a hot tawa for couple of minutes on one side until brown spots appear.
  11. Flip the paratha, spread ghee on top of cooked side and cook for another couple of minutes until the dark spots appear on other side. Smear enough ghee if needed.
  12. Serve the hot moolika paratha with cucumber raitha and pickle. Enjoy! 🙂
To make cucumber raitha:
  1. Add little water and salt to the yogurt and mix well.
  2. Add the grated cucumber, carrot and green chilli. Mix well and sprinkle chat masala on top before serving.

Mooli Ka Paratha

Milagai Chutney

Milagai chutneyAs most of you know, Idli is one of the most popular breakfast dishes in South India, especially Tamilnadu. It is the staple breakfast food in most south Indian homes. A dish as popular as Idli should have countless accompaniments, right? Yep, these accompaniments or chutneys, as locally known, come in all varieties and made from different ingredients. Here I have posted the recipe of one such chutney called the Milagai Chutney, as learnt from my mom.

Milagai chutneyMilagai Chutney, as the name suggests, is a very simple but tasty chutney made from chillies. Milagai is the tamil word for chilli. And Milagai chutney is made from dried red chilli, also known as Vaththal in Tamil. I know, making a chutney from just dried red chilli sounds ludicrous but trust me, it tastes heavenly with hot idlis. The first time I had Milagai Chutney was in Madurai back when I was a kid. Our neighbor aunty used to make tasty Milagai Chutney and I always pestered my mom to make it exactly the same as the neighbor aunty did.

Milagai chutneyMilagai Chutney is my favorite chutney, hands down. After several attempts, I think I have perfected my mother’s recipe. The best kept secret of this recipe is the correct balance maintained between red chilli and tamarind. A slight variation might change the taste completely. Though Milagai Chutney pairs well with idli, it can also be had with Dosa, chapati etc. Try this spicy and tasty recipe at home and let me know if it is indeed the best chutney to go along with hot idlis 🙂

Milagai Chutney
Recipe type: Breakfast
Cuisine: Indian
Prep time: 
Cook time: 
Total time: 
Serves: 3
 
Ingredients
  • Shallots – 8 to 10 nos
  • Red chilli – 10 to 12 nos
  • Tamarind –1/4 lime size
  • Grated coconut – ½ tbsp
  • Salt as required
for the seasoing:
  • Gingely oil – 1 ½ tbsp
  • Mustard seeds- 1 tsp
  • Urad dal – 1 tsp
  • Curry leaves – a sprig
Instructions
  1. Grind all the above ingredients in a blender without adding water.
  2. Season with mustard, urad dal and curry leaves.
  3. Have the spicy and tasty milagai chutney with hot idlis or dosas. Enjoy! 
Notes
1. You can store this chutney in the refrigerator for 10 days.
2. You don’t have to sauté the ingredients before or after grinding them. Just add the seasoning on top.
3. This milagai chutney is super spicy and so I would recommend adding a tsp of gingely oil on top before serving.

Milagai chutney

Quinoa Tabbouleh

031Today’s recipe is another entry to my healthy eats category. We have been having Quinoa for quite some time now, probably for a year or so, and I am on the lookout for any new recipe that has Quinoa as an ingredient.

023Recently, we went to a mediterranean restaurant and I came across a new type of salad made with Quinoa. I got hooked to it and was eager to try it out myself. The name of the salad is Quinoa Tabbouleh salad and that is the recipe I have posted here.

024Quinoa Tabbouleh salad is very easy to make and very healthy as well. On days when you don’t feel like cooking or doing a take out, Quinoa Tabbouleh salad is the one to go for. Very few ingredients are needed to make this salad. Also, there is an accompaniment to the Tabbouleh salad called the Zough. It is a condiment relish made from green chili. The mild taste of Quinoa Tabbouleh and the spiciness of Zough make the perfect pair.

030Quinoa Tabbouleh salad can be had as a light dinner or for lunch. Quinoa in general is rich in calories and having it as a salad will not get you full or bloated. Try this wonderful mediterranean salad in your home and let me know your comments 🙂


Tabbouleh
Recipe type: Salad
Cuisine: Mediterranean
Prep time: 
Cook time: 
Total time: 
Serves: 2
 
Ingredients
Tabbouleh:
  • Red quinoa – 1 cup
  • Chick pea or garbonza beans or sundal – ½ cup
  • Olive oil – 3 tbsp
  • Lemon juice – 3 tbsp
  • Cucumber, finely chopped – 1 no (I used Persian Cucumber)
  • Tomato, medium, finely chopped – ½ no (2 tbsp)
  • Green onions, finely chopped – 2 tbsp
  • Carrot, finely grated – 2 tbsp (optional)
  • Cilantro, finely chopped – 2 to 3 tbsp
  • Salt as required
Zough – green chilli sauce
  • Cilantro – small bunch
  • Garlic cloves, small to medium – 3 nos
  • Lemon juice – 1 ½ tbsp
  • Olive oil – 1 ½ tbsp
  • Cayenne pepper – ½ tbsp
  • Pepper – ¼ tsp
  • Cumin powder –a generous pinch
  • Green chilli – 4 nos
  • Salt as required
Instructions
  1. Soak chick pea overnight and pressure cook for 6 whistles adding enough water and salt. Drain the excess water and set aside.
  2. Wash the quinoa thoroughly and drain them using strainer, pressure cook adding enough salt and 1½ cup water (not more than that) for 3 whistles. Or you could parboil them adding the same amount of water in a sauce pan, covered for 15 minutes. Drain the excess water if any.
  3. Finely chop all the above given ingredients and keep them ready.
  4. In a large mixing bowl, add olive oil, lemon juice and salt. Mix well.
  5. Add cucumber, tomato, carrot, green onion and cilantro. Mix well.
  6. Finally add quinoa and chick pea. Mix them well until well combined.
  7. Have it right away or Cover and leave it at least for ½ an hour in the refrigerator and serve chill for better taste.
For making zough
  1. Blend all the above given ingredients to a fine sauce without adding any water.
  2. Have zough sauce as a side for yummy quinoa tabbouleh. Enjoy! :)

028

Kollu Idli

kollu idliToday’s recipe is a new entrant to my healthy eats collections. One of the most popular breakfast dishes in south India is Idli. I would say there is no restaurant back home that does not have Idli in the menu. Normally, Idli is made from rice batter. The same batter can be used to make another popular breakfast item called the Dosa. The recipe that I have posted here is a type of Idli made from a batter prepared from Kollu (or horse gram in english) hence the recipe is called Kollu Idli. It is a healthy breakfast dish that is rich in essential nutrients.

kollu idlikollu idliKollu Idli recipe was suggested to me by my cousin. Thank you, Chitthi! I have been looking for varieties from the usual breakfast dishes that we make and it’s good that this recipe came across. It served two purposes, one is that I finally found a way to make use of one of the least used pulses in my kitchen and the second was that I had found yet another healthy dish 🙂

031Kollu Idli is very easy to make and it does not take much time to prepare the batter. You can have this idli with the chutneys that you normally have with regular idli. I would say Kollu Idli is tastier than regular idli and is very much filling too (because of the horse gram/Kollu). Try the Kollu Idli in your home and let me know your comments.

PS:- Check out my other dish made from Kollu here.


Kollu Idli
Recipe type: Breakfast
Cuisine: Indian
Prep time: 
Cook time: 
Total time: 
Serves: 20 to 25 idlis
 
Ingredients
  • Idli rice – 3 cups
  • Kollu or horse gram dal – 1 cup
  • Salt as required
Instructions
  1. Thoroughly wash the rice and dal together in running water (At least thrice).
  2. Soak them with enough water overnight or for 8 to 10 hrs.
  3. Grind them together in a grinder or blender for 20 to 25 minutes or until smooth and thick, sprinkling water in between if needed. If you are grinding for idli do not add too much water. Batter has to be thick.
  4. Add enough salt and mix well. Ferment the batter like how you ferment normal idli/dosa batter.
  5. Pour the batter on idli plates using ladle and pressure cook for 10 to 15 minutes.
  6. Enjoy healthy and tasty kollu idli with milagai chutney or any other hot and spicy chutney of your choice. 

032c

Tomato Chutney

Tomato ChutneyIt has been quite a while since I had posted a chutney recipe. Chutneys are a type of accompaniment that is specific to South Asian cuisine. It is similar to relish and mustards in western cuisines. The word chutney is derived from the Sanskrit word ‘Catni’ which means to lick (courtesy-Wikipedia). There are literally hundreds of varieties of chutneys made from a wide range of spices, vegetables and fruits. Today I have posted one such chutney variety made from tomato called the Tomato chutney or thakali chutney.

Tomato ChutneyTomato chutney is one of the most popular chutney varieties in south Indian cuisine. It is most often had for breakfast along with idli and dosa. Tomato chutney is very easy to make and uses very minimum ingredients. One interesting fact about chutneys in general is that they were originally used as a method of preserving food which was later adopted by Roman and British empires during colonization.

Tomato ChutneyTomato chutney can be stored for three to four days (using the refrigerator). Also, you can customize the chutney to suite your palate by making it spicy or mild. Try this easy yet tasty chutney recipe in your home and have it with hot idlis or ghee roast along with idli podi.

Tomato Chutney
Recipe type: Main
Cuisine: Indian
Prep time: 
Cook time: 
Total time: 
Serves: 6
 
Ingredients
To grind:
  • Grated coconut – 2 tbsp
  • Shallots – 2 nos
  • Homemade sambar powder (veettu milagai podi) – 2 tbsp
  • Cumin seeds – ¼ tsp
other ingredients:
  • Oil – 1 ½ tbsp
  • Mustard seeds – ½ tsp
  • Urad dal – ½ tsp
  • Curry leaves – 5 nos
  • Shallots, chopped – 9 nos
  • Green chilli, slit – 1 no
  • Tomatoes, finely chopped – 2 nos
  • Salt as required
Instructions
  1. Grind all the ingredients mentioned above to a fine paste and keep it aside.
  2. Heat a pan with oil and add mustard and urad dal. When they start to splutter add curry leaves.
  3. Add chopped shallots and sauté until they turn translucent.
  4. Add slit green chilli and chopped tomatoes. Add enough salt and sauté well.
  5. Finally add the ground paste when the tomatoes turn mushy.
  6. Mix well and bring it to boil.
  7. Cook until the raw smell disappears or cook for one whistle in a pressure cooker. Enjoy tomato chutney with ghee roast and idli podi. 

 Tomato Chutney

Dhoodh Shahi Murgh

Creamy ChickenI am always interested in trying out different recipes and am on the lookout for the same. That is how I found today’s recipe, an unique chicken gravy that is a sort of fusion dish (will elaborate on this shortly) I would say. It is called the Doodh Shahi Murg which means chicken cooked with milk. The main ingredients in this recipe, apart from milk are, koya and heavy cream.

creamy chickenDoodh Shahi Murgh is a rich gravy that makes you feel heavy even when had in small servings. The preparation of this dish is unique in the sense that the ingredients used are all Indian but the cooking method closely resembles continental style i.e., similar to pasta or cannelloni. In Doodh Shahi Murgh, the meat (chicken) is first cooked (shallow fried here), then a layering gravy made from milk, khoya and heavy cream is poured over the chicken and then baked. The resulting Doodh Shahi Murgh is a mouth watering, rich chicken gravy.

Chicken dhoodh shahi murghcreamy chickenDoodh Shahi Murgh is an excellent accompaniment for naan, chappathi, parotta etc. It has a slight sweetness to it because of the milk and koya. I admit that the time taken to prepare Doodh Shahi Murgh is a bit longer than most other gravies but do believe me when I say that the taste is worth all the time spent. Try this exotic, rich Doodh Shahi Murgh in your kitchen and do let me know your favorite accompaniment to it.


Chicken Dhoodh Shahi Murgh
Recipe type: Main
Cuisine: Fushion
Prep time: 
Cook time: 
Total time: 
Serves: 4
 
Ingredients
To marinate:
  • Chicken – 1 cup
  • Ginger garlic paste – 1 tbsp
  • Turmeric powder – ½ tsp
  • Lemon juice – from 1 lemon
  • Cumin powder – a generous pinch
  • Salt as required
  • Red chilli powder – 1 tsp
  • Garam masala powder – 1 tsp
  • Hung yoghurt, beaten – ½ cup
For the gravy:
  • Ghee – 1 tbsp
  • Green chilli slits – 2 nos
  • Onion, medium, finely chopped – 1 no
  • Cashew paste – 2 tbsp
  • Sweetened khoya – 1 to 1 ½ tbsp
  • Milk – 1 cup
  • Cumin powder – ½ tsp
  • Cardamom powder – a pinch
  • White pepper powder – ½ tsp
  • Black pepper powder, freshly ground – ½ tsp
  • Salt – a generous pinch
  • Fresh cream – 1 tbsp
  • Grated cheddar cheese – for garnishing
Instructions
  1. Wash the chicken pieces and drain all the excess water. Add in ginger garlic paste, turmeric powder, lemon juice and mix well.
  2. Now add cumin powder, salt and garam masala powder. And again mix well.
  3. Finally add the beaten hung yoghurt, mix well and leave it for at least 20 minutes.
  4. Heat a wide pan with oil and add green chillies. Sauté well until the outer layer turn white.
  5. Add in finely chopped onions and sauté until they turn translucent or golden brown.
  6. Meanwhile heat a flat skillet with 2 tbsp of oil and add marinated chicken one by one onto the skillet. Shallow fry the chicken pieces until one side is done.
  7. Now in a low flame add in cashew paste and mix well. Cook until the raw smell disappears stirring constantly. Cashew paste tends to stick to the bottom. So constant stirring is required.
  8. Meanwhile check if the chicken pieces are cooked on one side and flip them to cook on the other side.
  9. Add in sweetened khoya when the raw smell of cashew disappears. Mix well.
  10. Now add a cup of milk and mix well. Cook for a minute.
  11. Add cumin powder, cardamom powder, pepper powder and salt. Mix well and cook until the sauce is semi thick and well cooked. Switch off the flame.
  12. Add a tbsp of fresh cream to the sauce and mix it well.
  13. Preheat the oven to 500 degrees Fahrenheit or 320 degrees Celsius.
  14. By the time your chicken will be well cooked on both sides. Take out the chickens using tongs and place them on a oven safe flat bowl.
  15. Pour the sauce on top of the chicken pieces and make a layer.
  16. Grate the cheddar cheese on top of the sauce.
  17. Place the bowl inside the oven and leave for 10 minutes or until you see the cheese melt and turns golden brown on top. Enjoy this creamy chicken dhoodh shahi murgh with parotta or romali roti! 
Notes
To make hung yoghurt, place your strainer lined with muslin cloth or paper towel inside of a bowl. Pour enough amount of yoghurt in. place it in the refrigerator for an hour. Or just rotate the muslin cloth and gently squeeze the excess water (i.e. Whey) using your hand.

creamy chicken

Sothi

SothiThere are so many different dishes in Tamilian cuisine that they can be categorized based on the locality.  One such cuisine is that of Tirunelveli, whose dishes are very popular and known for their unique taste and recipes. Here I have given a very popular dish from Tirunelveli called as Sothi. I also learnt recently that it is a popular dish in Srilankan cuisine as well. Sothi is a coconut milk based dish that has a creamy texture (somewhat like alfredo sauce, texture only not the taste) and a mild taste.

SothiSothiWhenever I cook Sothi, my dear friend’s mom come to my mind because she is the one who taught me to cook this dish and she is from Tirunelveli (no wonder :)). She always prepares Sothi when we visit their home for holidays. Compared to many other dishes from Tirunelveli, the number of ingredients used to prepare this dish is less. Coconut milk is the main ingredient and that gives a richness and thick consistency to Sothi.

SothiSochi is a pretty heavy dish in the sense that you feel the fullness even when had in small servings. Back home, Sothi is the main accompaniment for Idiyappam (string hoppers) along with diluted coconut milk with sugar. It can also be had with rice along with any spicy curry like Crunchy cauliflower. Try this ethnic dish from Tirunelveli right in your home and let me know if you like it with Idiyappam or rice. FYI, I love to have it with both 🙂

Sothi
Prep time: 
Cook time: 
Total time: 
Serves: 5
 
Ingredients
To grind:
  • Green chilli – 1
  • Ginger - 1 “
Other ingredients:
  • Fenugreek Seeds - 1 tsp
  • Garlic - 5 cloves
  • Onion, medium, finely chopped - 1 no
  • Green chilli, finely chopped – 2 nos
  • Coconut Milk - 1 cup
  • Drumstick - 1
  • Potato - 1
  • Beans-1
  • Carrot -1
  • Moong dal - 100 grams
  • Salt as required
  • Cumin seeds - 1 tsp
  • Coriander leaves - for garnishing
  • Lemon juice- 1 spoon (optional)
Instructions
  1. Grate the coconut and pulse them adding some water. Strain the milk using strainer. This is first (thick) milk. Add some water to the extracted coconut and pulse them again for couple of seconds and strain the milk. This is second (thin) milk. Repeat this process and extract third milk as well.
  2. Pressure cook the dal for 1 whistle.
  3. Grind ginger and chilli in a blender to a fine paste and keep it aside.
  4. Chop all the vegetables and keep it ready.
  5. In a kadai add a tsp of oil and season it with fenugreek seeds.
  6. Add in onions, garlic and green chillies.
  7. When the onions turn golden brown add the second and third extracted coconut milk.
  8. Then add all the vegetables and bring them to boil. I used drumstick and carrots today. I added drumstick first as it takes lots of time to cook. After 10 minutes I added carrots.
  9. Add the cooked dal to the vegetables and again bring it to boil.
  10. Now add the ground mixture (ginger and chillies) along with salt.
  11. When the gravy becomes thick, add cumin and coriander leaves.
  12. When the mixture comes to boil for the last time add the first extracted coconut milk to it and immediately switch off the stove.
  13. You can sprinkle lemon juice after 10 minutes(optional).

Sothi

Spicy Bread Toast

Spicy Bread Toast

Bread is a staple food for most of the population in the world. It is one of those food items that you can find anywhere. Irrespective of the country, people or its culture. Also, there are hundreds of varieties to it, from normal white bread to rye, sesame, cauliflower etc. There are countless varieties of dishes that you can prepare from bread. One such variety is the Spicy Bread toast. It is a very simple and tasty dish made from a minimum number of ingredients.

Spicy Bread ToastSpicy Bread ToastSpicy bread toast is made from egg, cilantro, turmeric, pepper, green chillies and ginger garlic paste. It literally takes 15 minutes to prepare this dish, right from preparing the egg mixture to toasting the bread dipped in that mixture. Spicy bread toast is an excellent dish for kids and it’s healthy as well, with the absence of jam or spread to have it being the main reason. It is a pretty heavy (I know, it doesn’t look like it but trust me 🙂 ) dish and breakfast is the right time to have calorie rich food to get you through the day!

Spicy Bread ToastI must give a special shout out to my HB here because he is the one who prepared Spicy bread toast the first time we tried (but I was the one who found the recipe 🙂 ) and it turned out to be excellent. Try this simple and tasty dish and enjoy it for breakfast or dinner.

Spicy Bread Toast
Recipe type: Breakfast
Prep time: 
Cook time: 
Total time: 
Serves: 10 bread slices
 
Ingredients
  • Eggs – 2
  • Milk – ½ cup
  • Salt – ½ tsp or as required
  • Black pepper powder – ¼ tsp
  • Turmeric powder – ¼ tsp
  • Ginger garlic paste – ½ tsp
  • Green chilli, finely chopped – 2 nos
  • Cilantro, finely chopped – 1 tbsp
  • Breads – 10 slices
Instructions
  1. Beat all the above ingredients except bread in a medium bowl and leave it for 30 minutes.
  2. After 30 minutes, cut the edges of the bread slices and cut the breads diagonally.
  3. Heat a flat pan, dip a bread piece into the beaten egg mixture and toast them. Smear very few drops of oil around the toast. Flip them and toast the other side of the bread until golden brown.
  4. Repeat the above step for the rest of the bread pieces. Enjoy the hot and spicy bread toast along with tomato chilli sauce as a snack or breakfast or dinner. 
Notes
1.Leave the beaten egg mixture to rest for at least 20 minutes before making the toast. So that all the ingredients are well set and combined.
2.Carefully cut the sides of the bread without pressing the breads too hard at the center.
3.Dip the bread just for a second and tost them on the pan. Do not dip the bread slices too much or your toast becomes soggy.
4.Same way smear few drops of oil while toasting the bread to avoid sogginess.

Spicy Bread Toast

Pav Bhaji

Pav BhajiPav Bhaji is synonymous to Mumbai, next only to Bollywood. It is a type of street food that is sold in road side eateries in India just like gyros in New York City. Pav Bhaji is made of toasted bread roll and spicy vegetable curry usually made of potatoes, green peas and onions.

Pav BhajiAs with most street foods, the ease of making is one of the pluses here, apart from the taste. Unlike most Indian dishes, you don’t have to follow a specific sequence while adding the spices or take care when slicing the onions (there are specific ways to cut the onions depending on the dish you are making in Indian cuisine). I would call the making of Pav Bhaji an orderly messiness :), where you know what ingredients to add and when but you don’t care about the way you add them.

Pav BhajiPav Bhaji is very easy to make. You can customize the bhaji (vegetable curry) to suit your taste, like the vegetables you want to use and the spice level in the curry. Having hot Pav Bhaji with a cup of tea or coffee on a rainy evening is an experience to live for 🙂

Pav Bhaji
Recipe type: Main
Cuisine: Indian
Prep time: 
Cook time: 
Total time: 
Serves: 3
 
Ingredients
  • Unsalted butter – 3 to 4 tbsp, divided
  • Cumin seeds – ½ tsp
  • Onion, slits – 1 no , divided
  • Potato, medium – 3 nos
  • Tomato, big, slits – 1 no
  • Green peas, cooked – ¼ cup (I used frozen peas)
  • Pav bhaji masala – 1 to 1 1 ½ tsp ( I used sakthi brand )
  • Salt as required
  • Red chilli powder – ½ tsp
  • Kashmiri chilli powder – ¼ tsp (optional)
  • Coriander powder - 1 tsp
  • Cilantro, finley chopped – 3 tbsp
Instructions
  1. Add enough water in a pressure cooker just to sink the potatoes and pressure cook for 2 whistles. Allow it to cool. Peel the skin and mash them using your clean hand or with a potato masher.
  2. Heat a flat pan and add 2 tbsp of butter. Add in cumin seeds when the butter starts to melt.
  3. Add ¾th of the thin sliced onions and sauté for few seconds until they turn translucent.
  4. Add the mashed potato and mix well. Add little salt at this stage.
  5. Now add thin sliced tomato into the mixture and saute well for couple of minutes or until well blended with potatoes.
  6. Add in cooked green peas and mix well.
  7. Add in pav bhaji masala and mix well. Saute them for a minute.
  8. And finally add in the rest of the masalas. Mix well until all the masalas are well coated. At this stage you could add some more butter if needed. Sauté and cook for another 5 minutes.
  9. Switch off the flame and garnish with finely chopped cilantro.
  10. Heat a small skillet and add very little butter. When the butter starts to melt, toast the pav ( I used Pepperidge wheat bread slider) on one side until they turn slightly brown.
  11. Serve the pav along with bhaji with a thin slice of butter on top. I like to have it with some onions on the side as well. Enjoy! 
Notes
1.You do not need to finely chop the onions and tomatoes for this recipe.
2.I used kashmiri chilli powder just for the color. You can totally skip that.
3.You can just have them by filling the bhaji on the middle of the sliders with some onions. I like to have them by just taking a piece of pav/bread and scoop some bhaji with some onions.

Pav Bhaji