Hyderabad Dum Chicken Biriyani

040Happy Ramzan! And as with other special occasions and holidays, I wanted to post something new and something that relates to the special occasion. That is when I realized that I have not posted one of my favorite recipes, the Hyderabad Dum Chicken Biriyani. It is one of the most famous varieties of biriyani, not only in India but throughout the world. As the name suggests,Hyderabad Dum Biriyani originated in Hyderabad back when Nizams ruled the princely state. The ‘Dum’ in the name refers to a special type of cooking using pressure.

hyderabad dum chicken biriyanihyderabad dum chicken biriyani
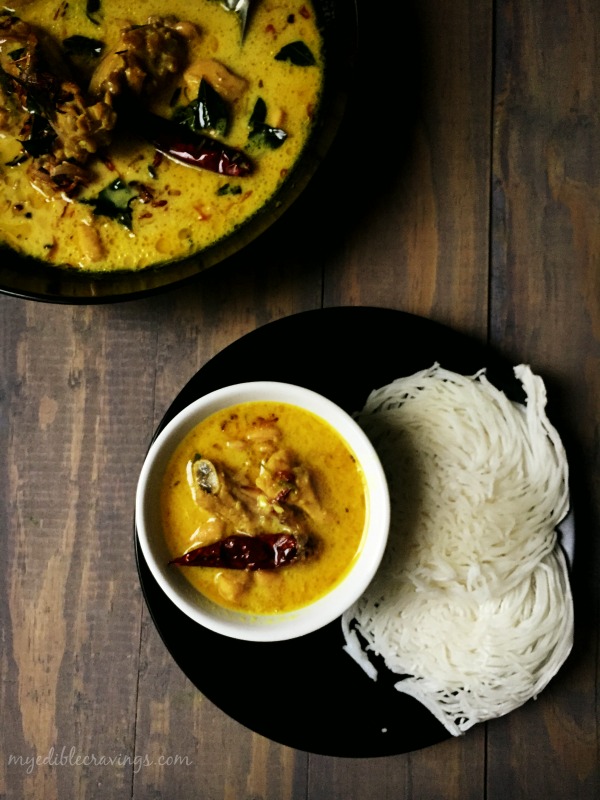
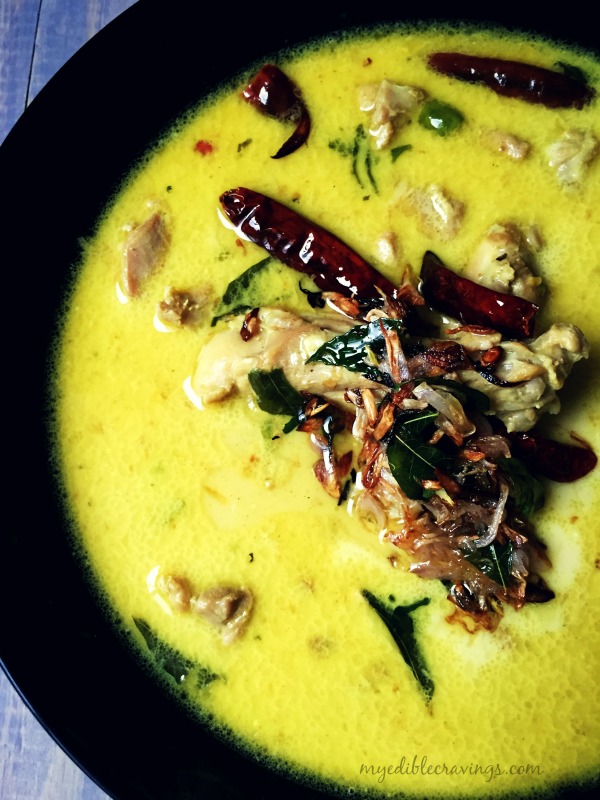
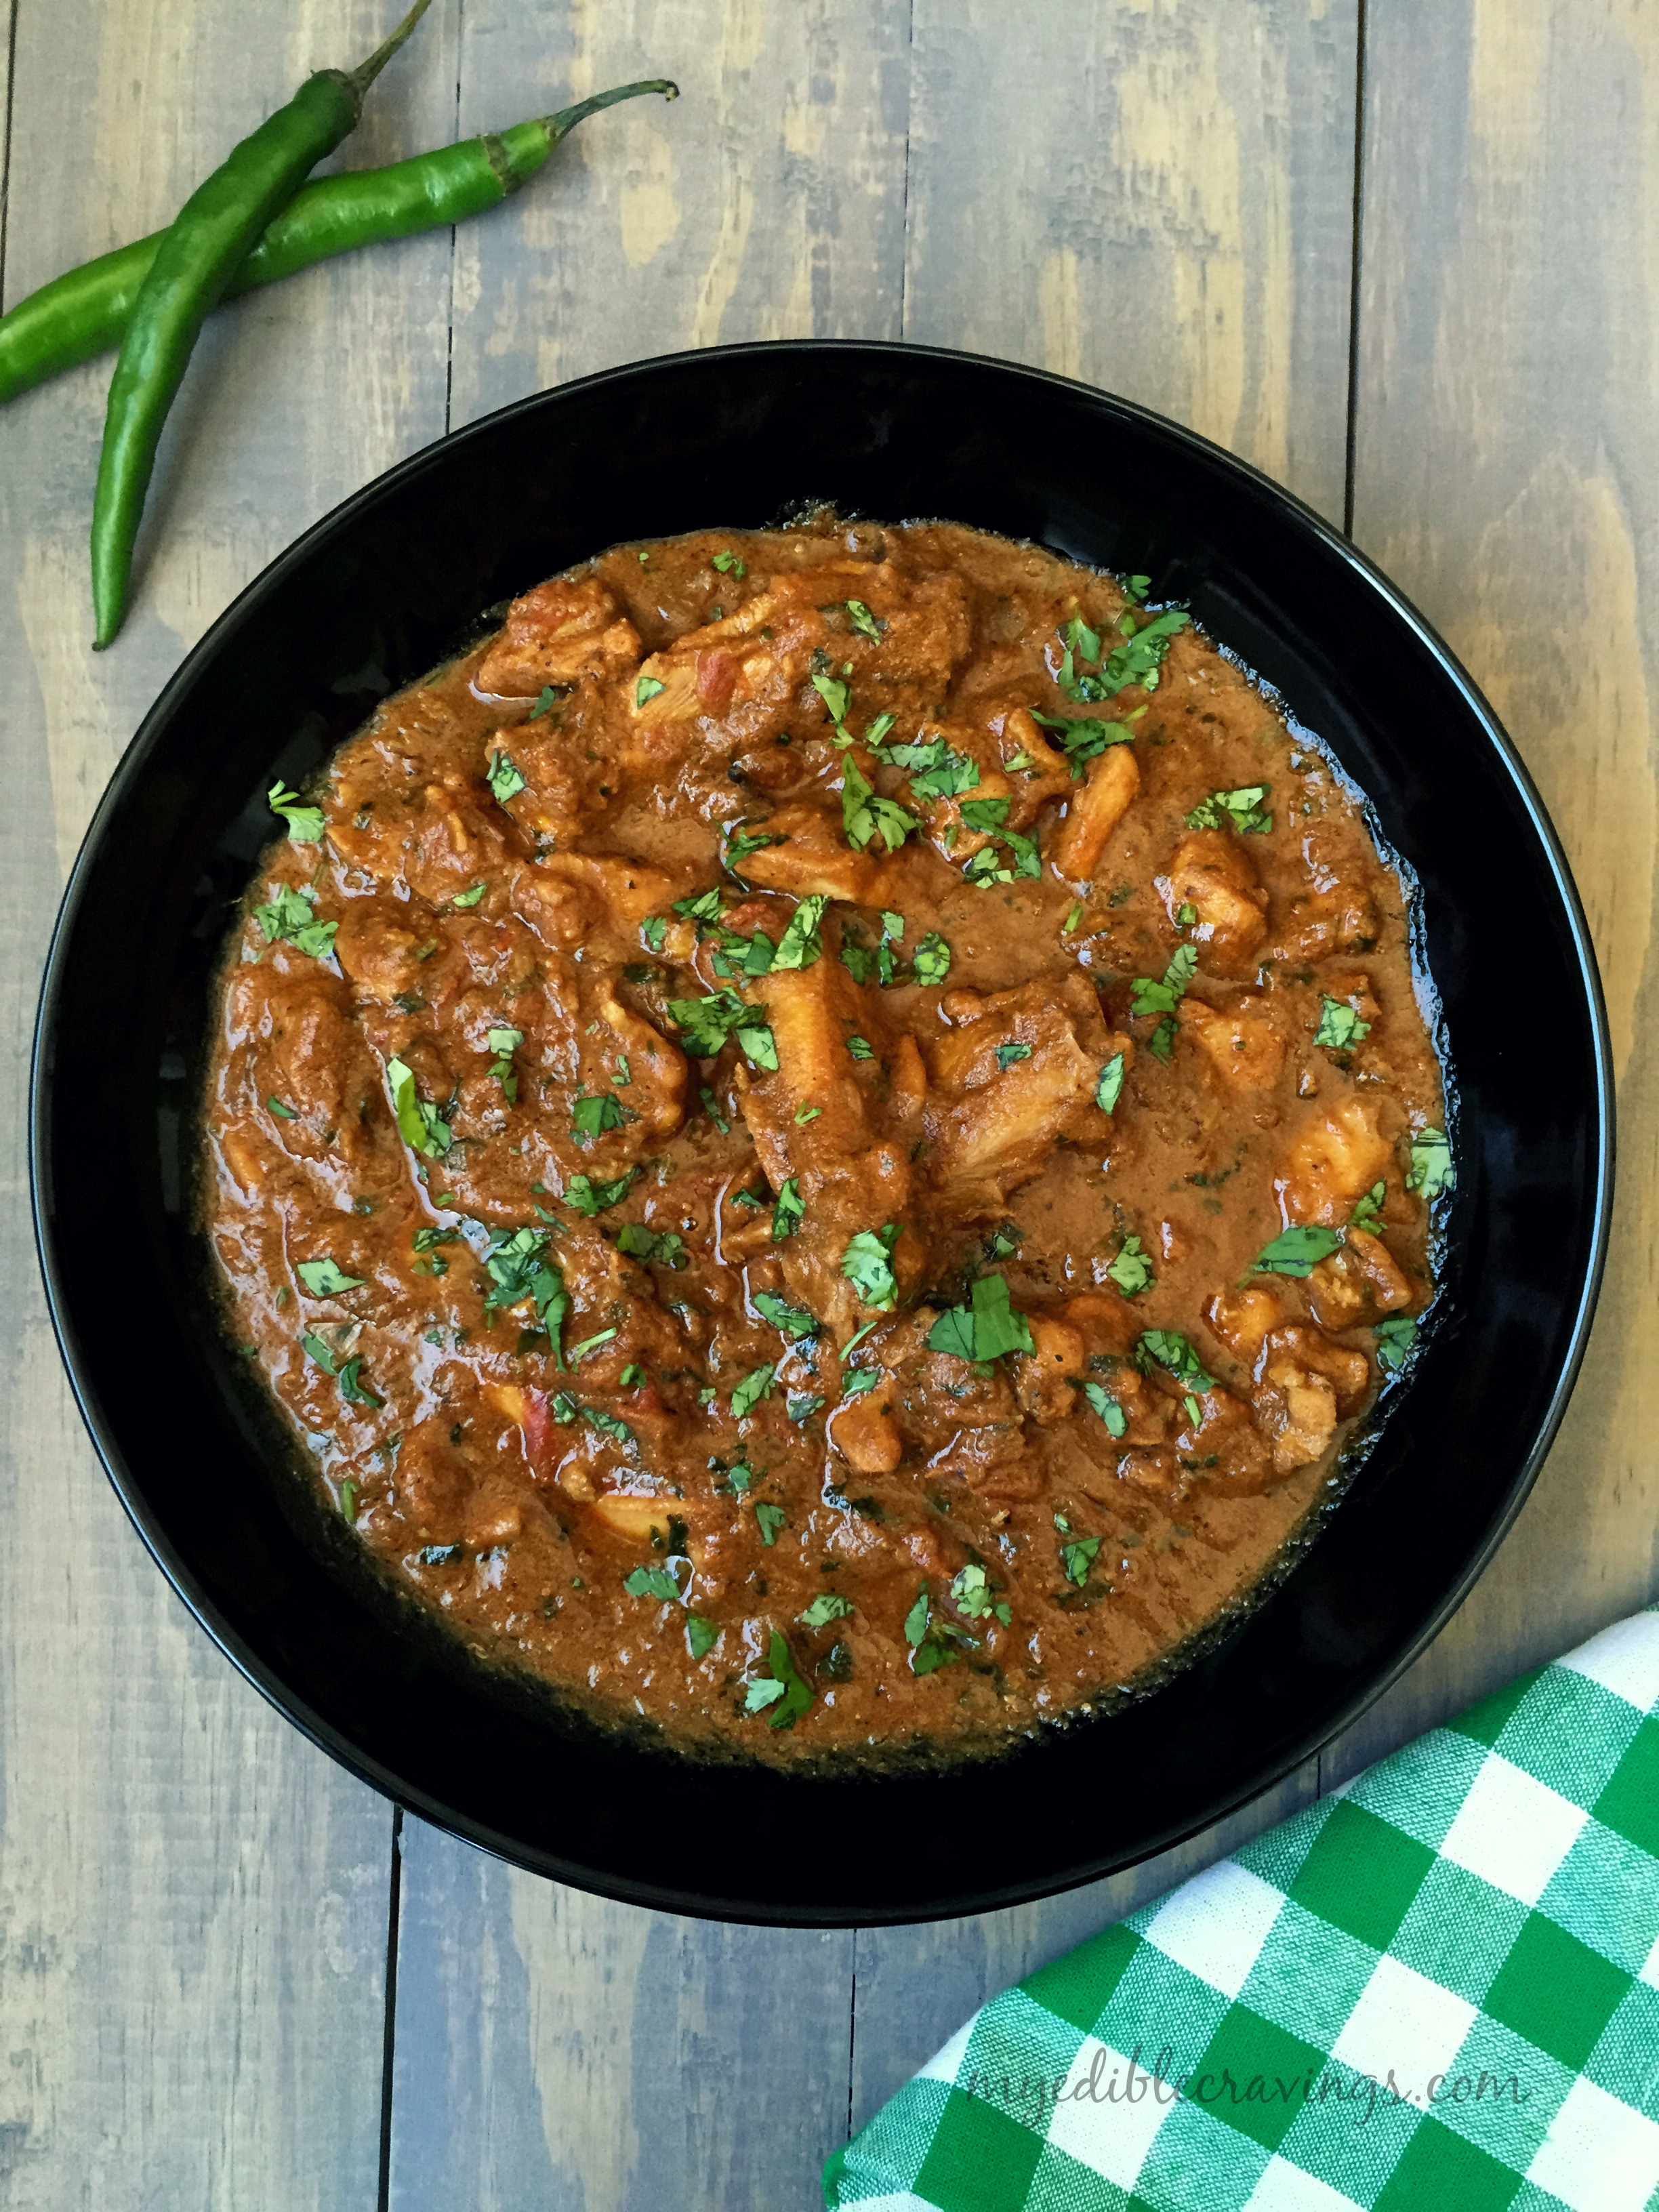
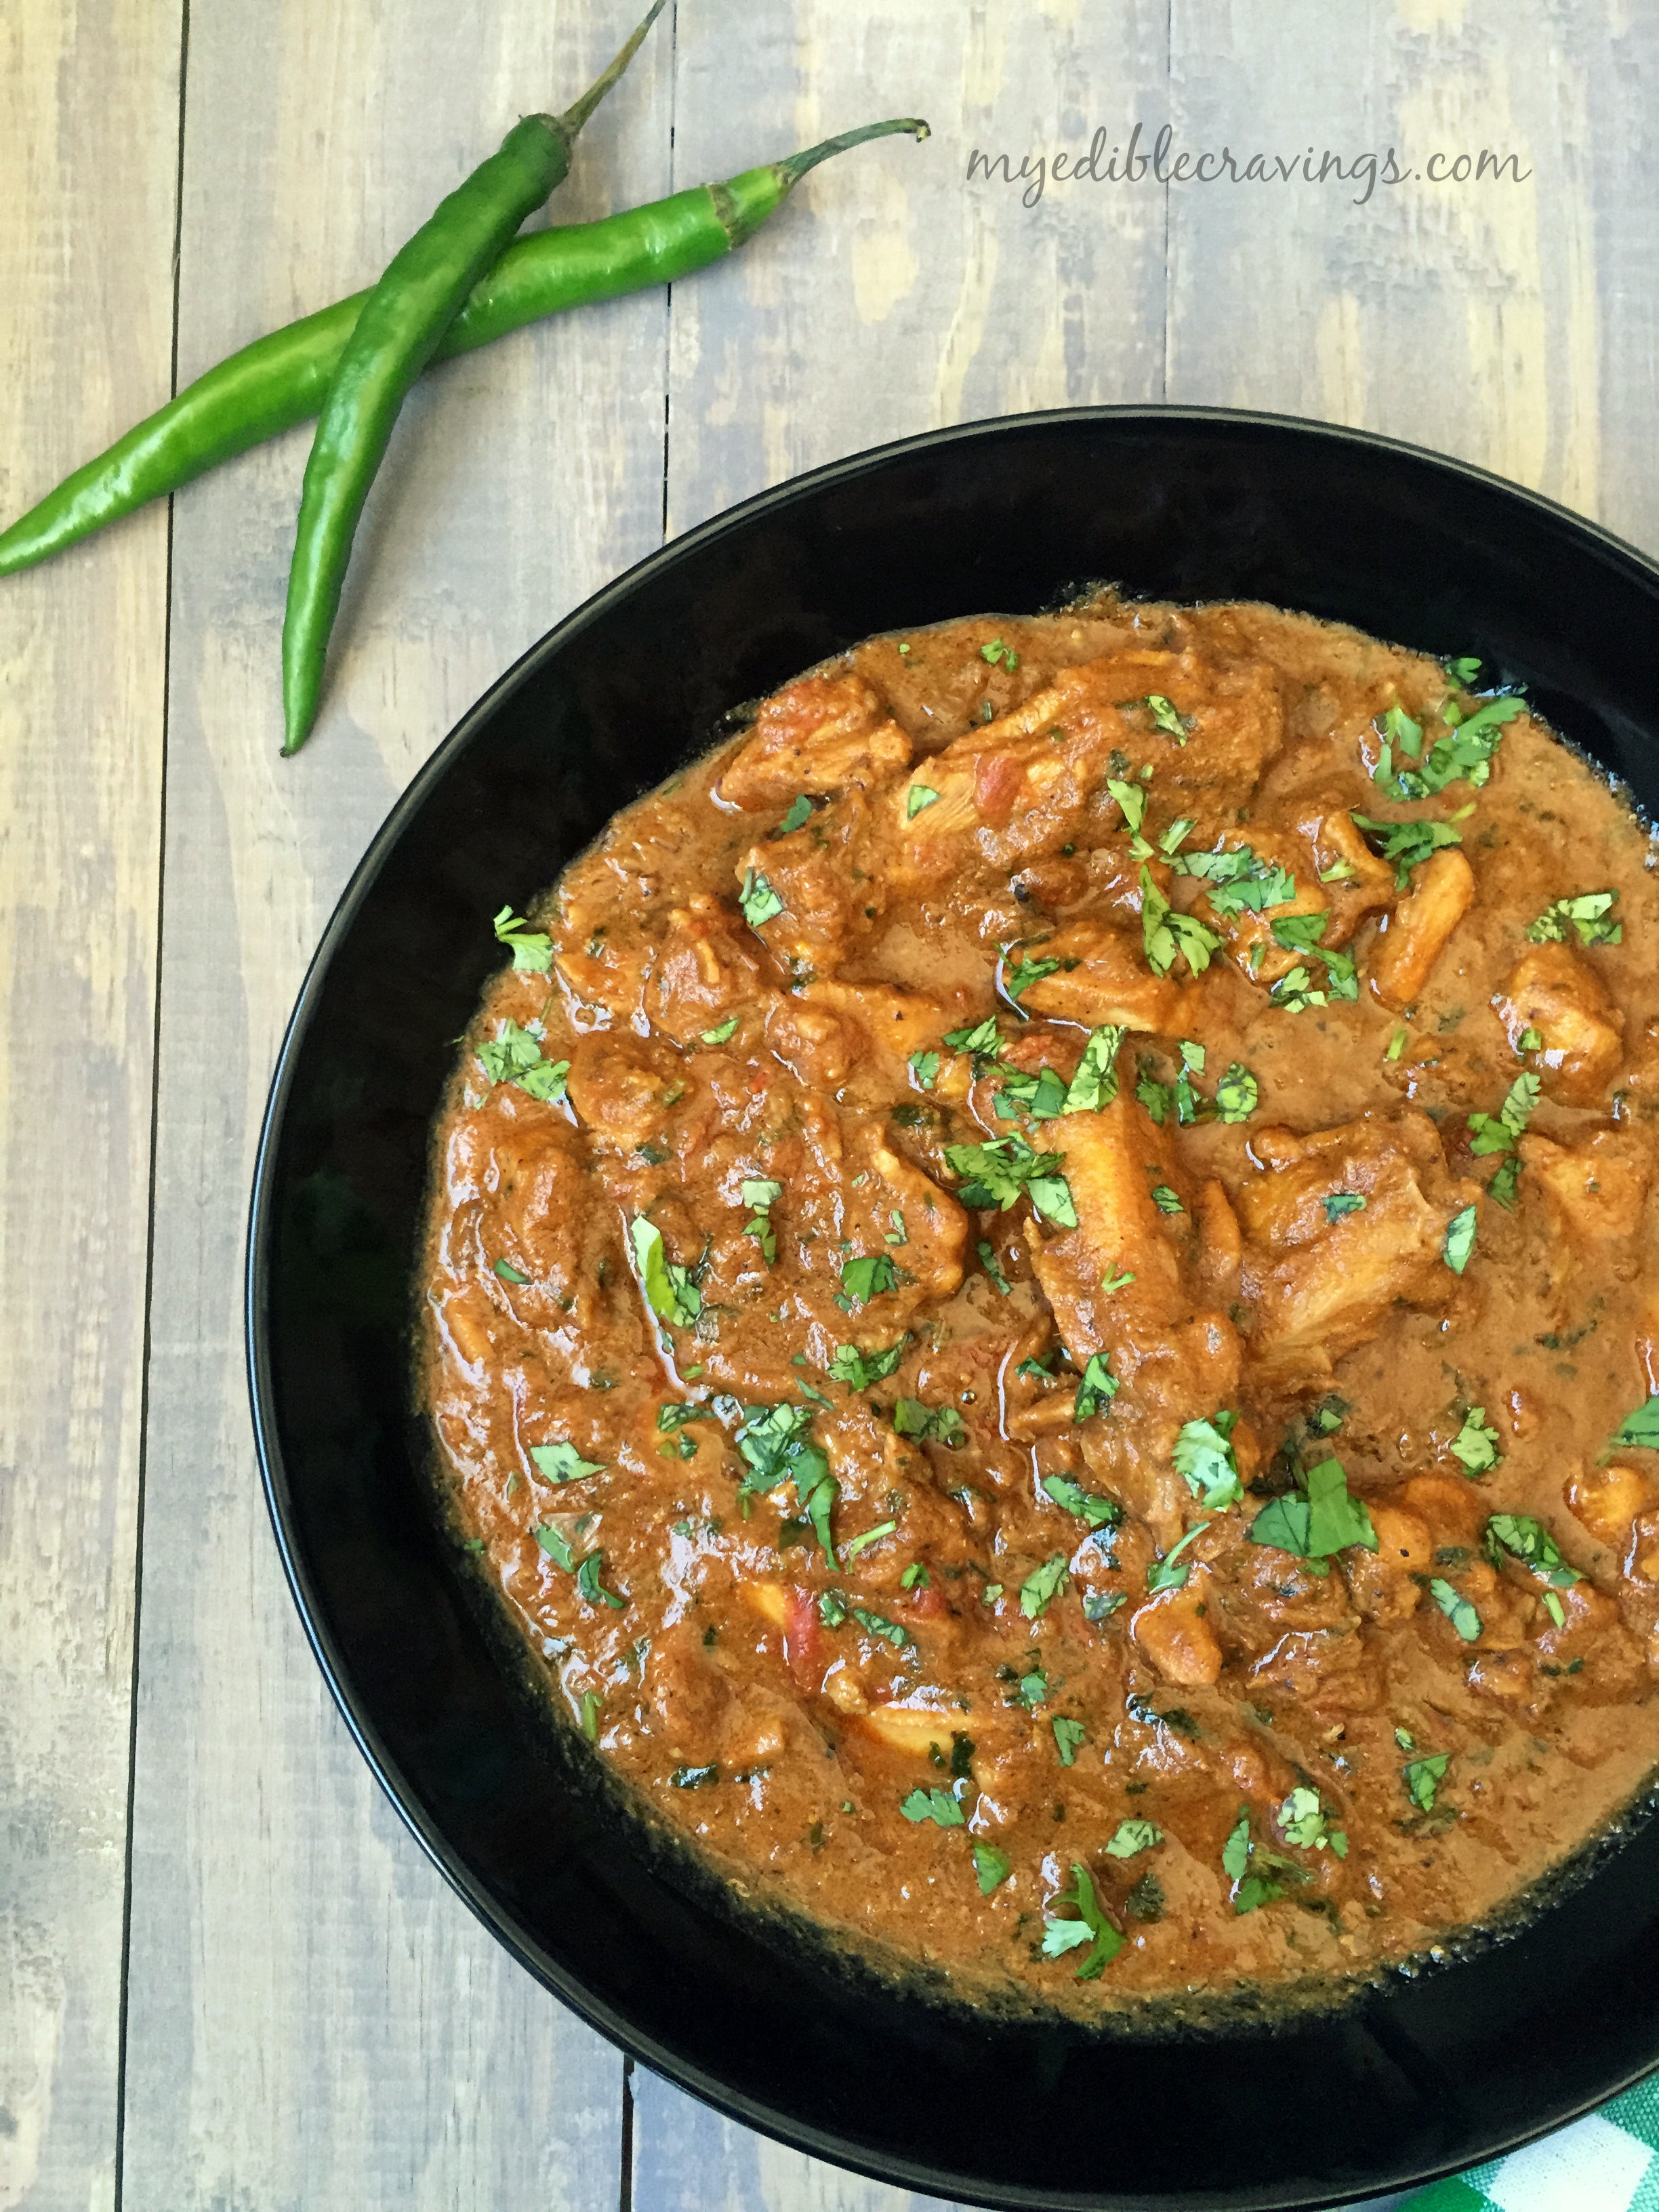
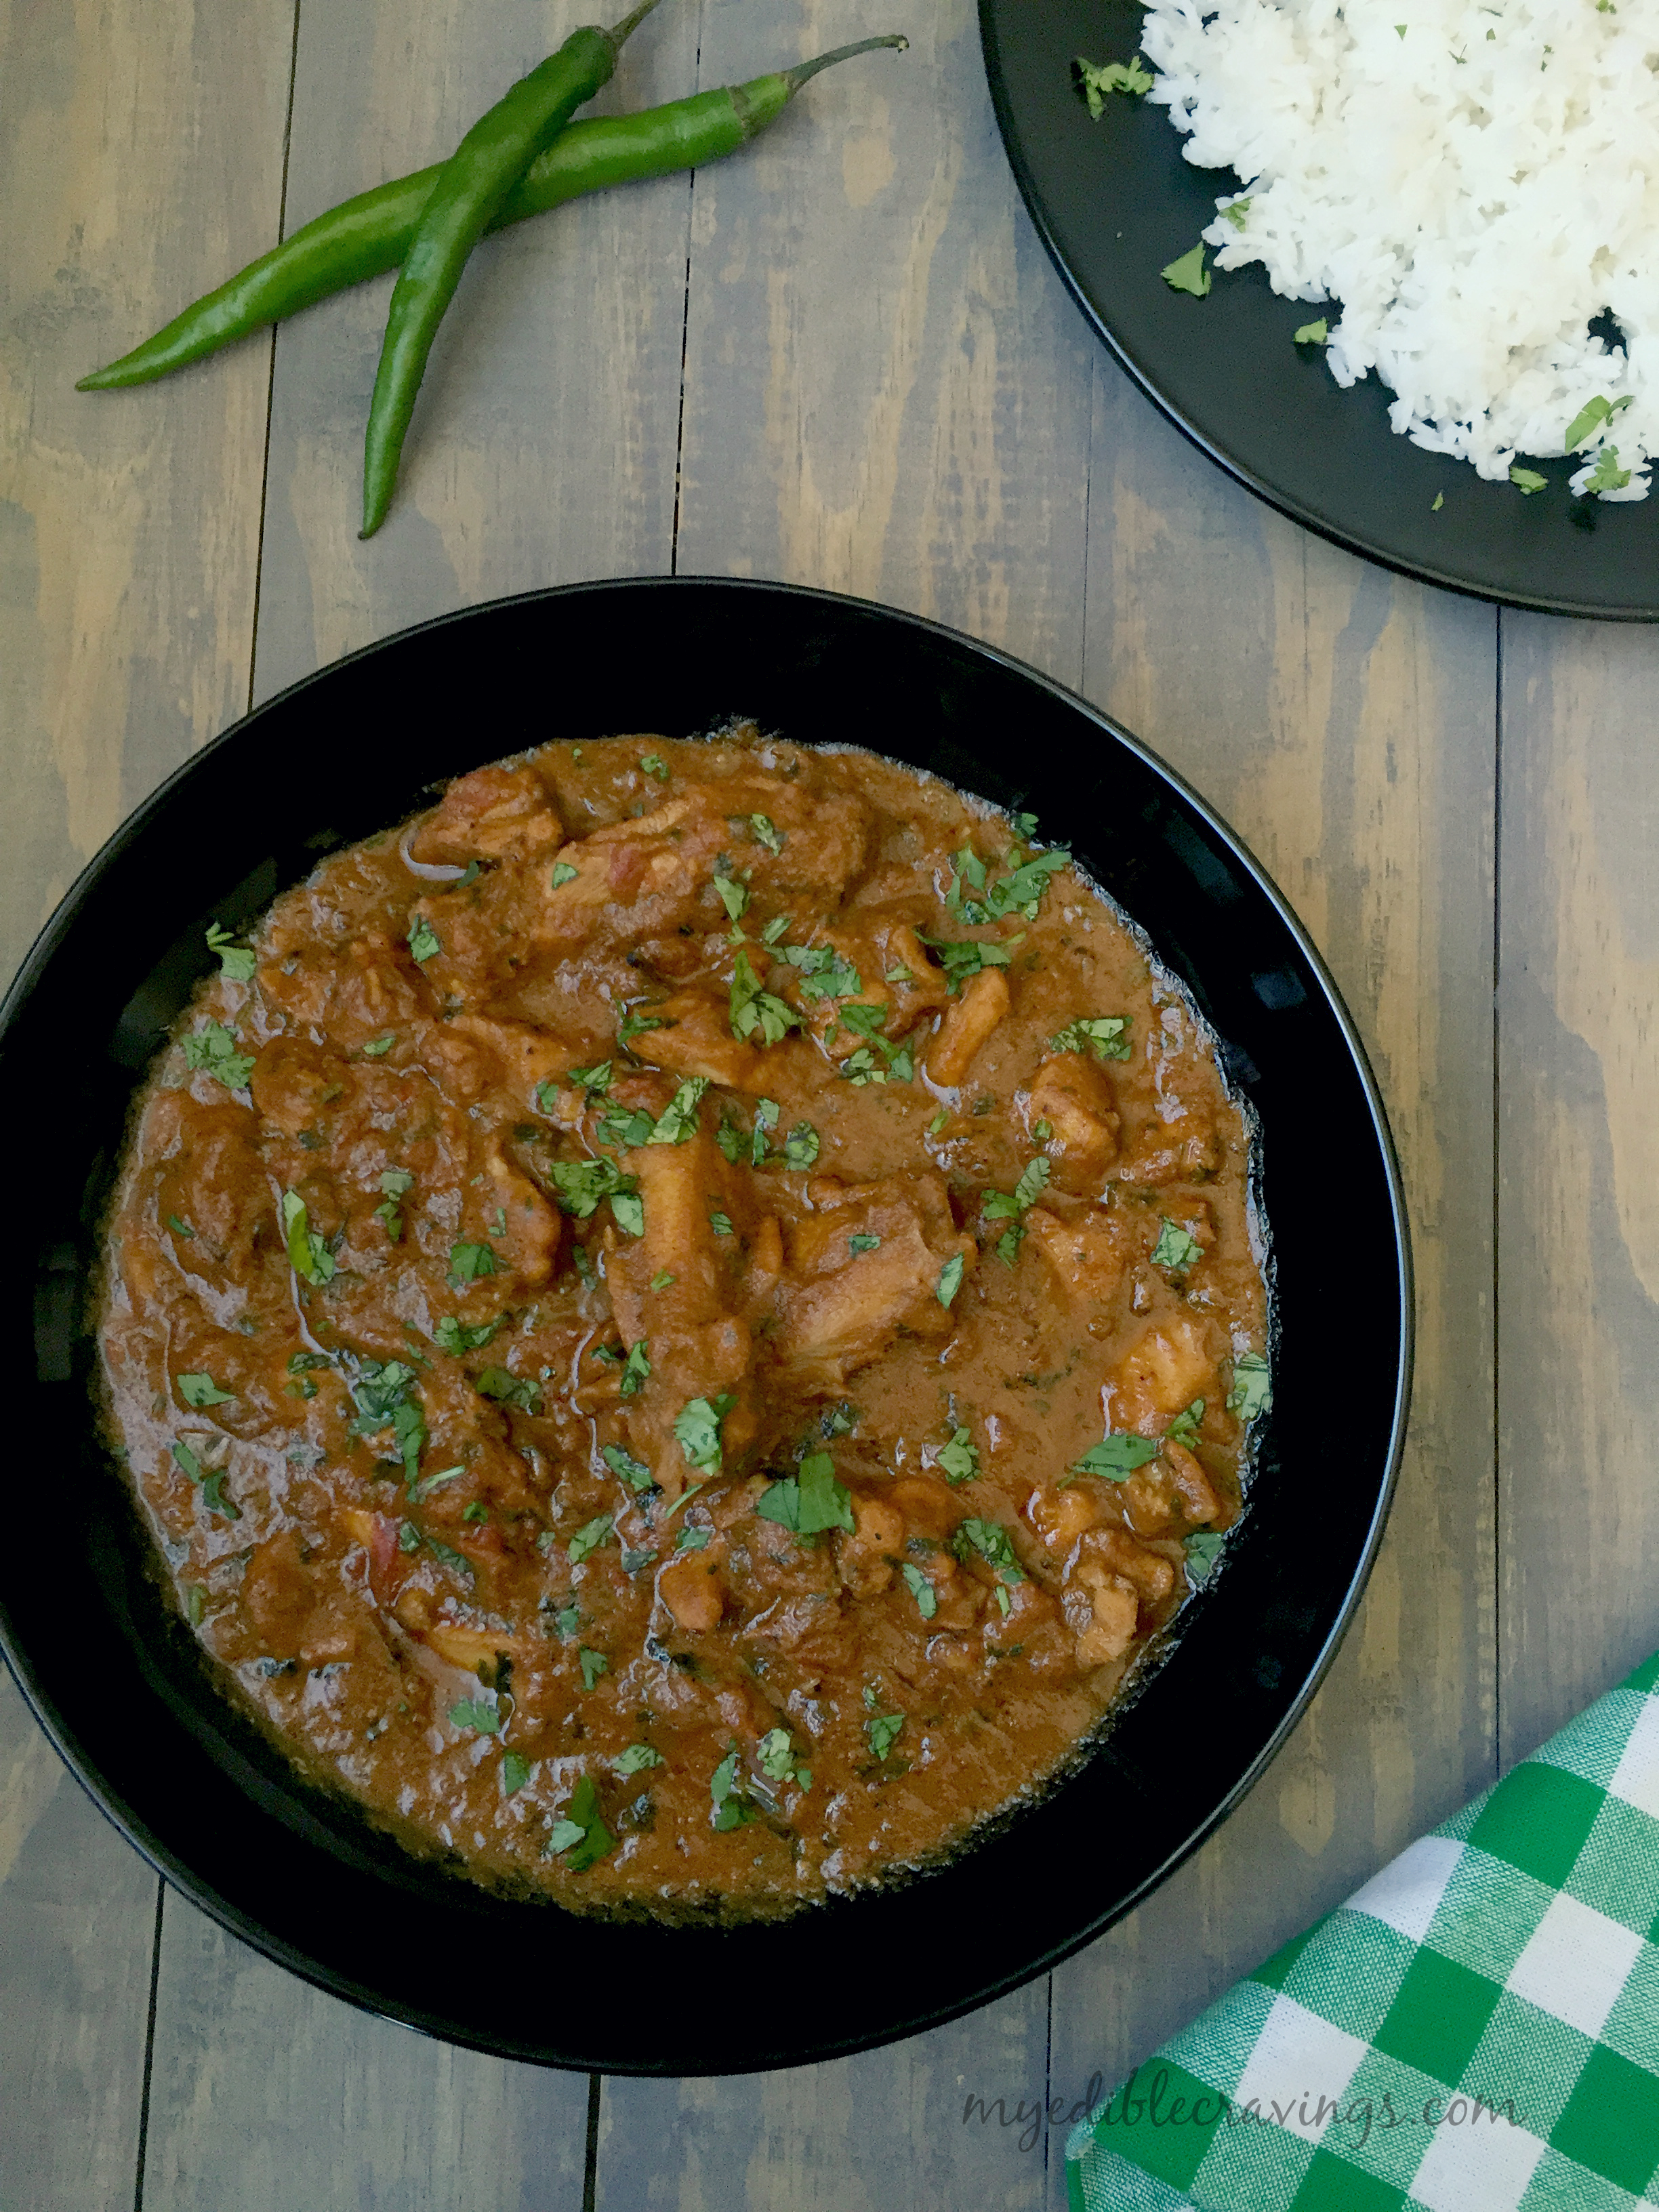
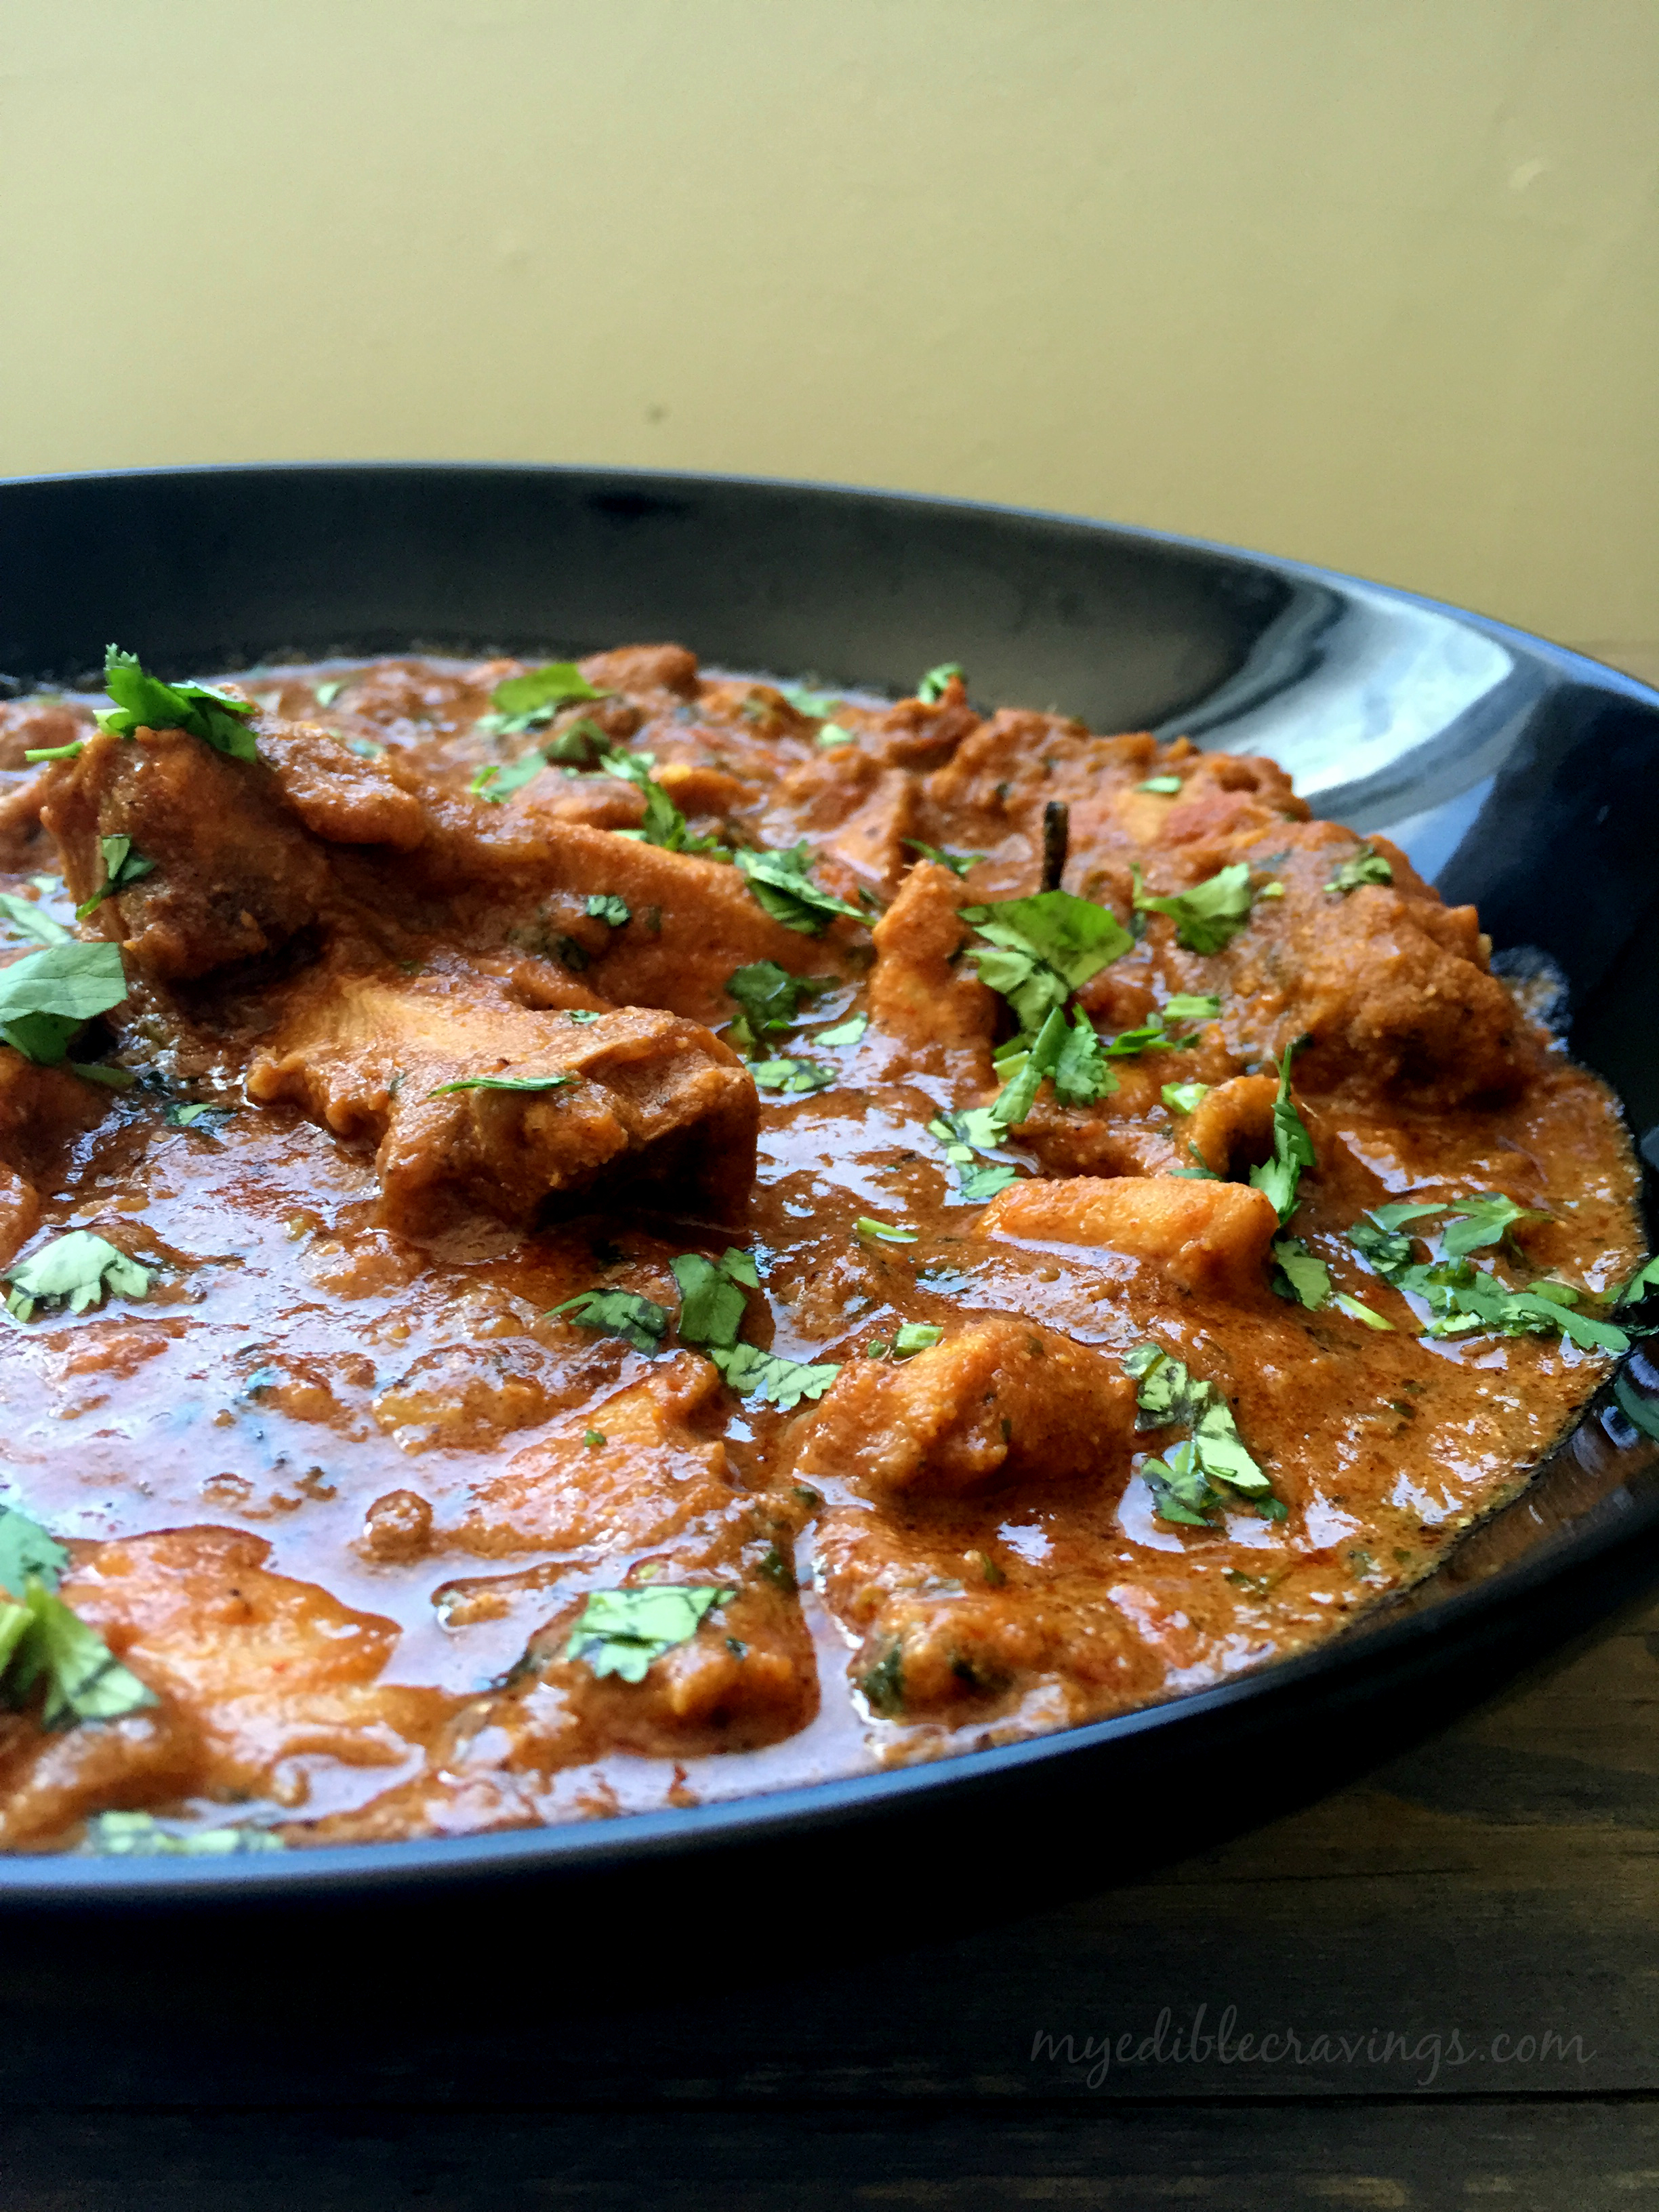
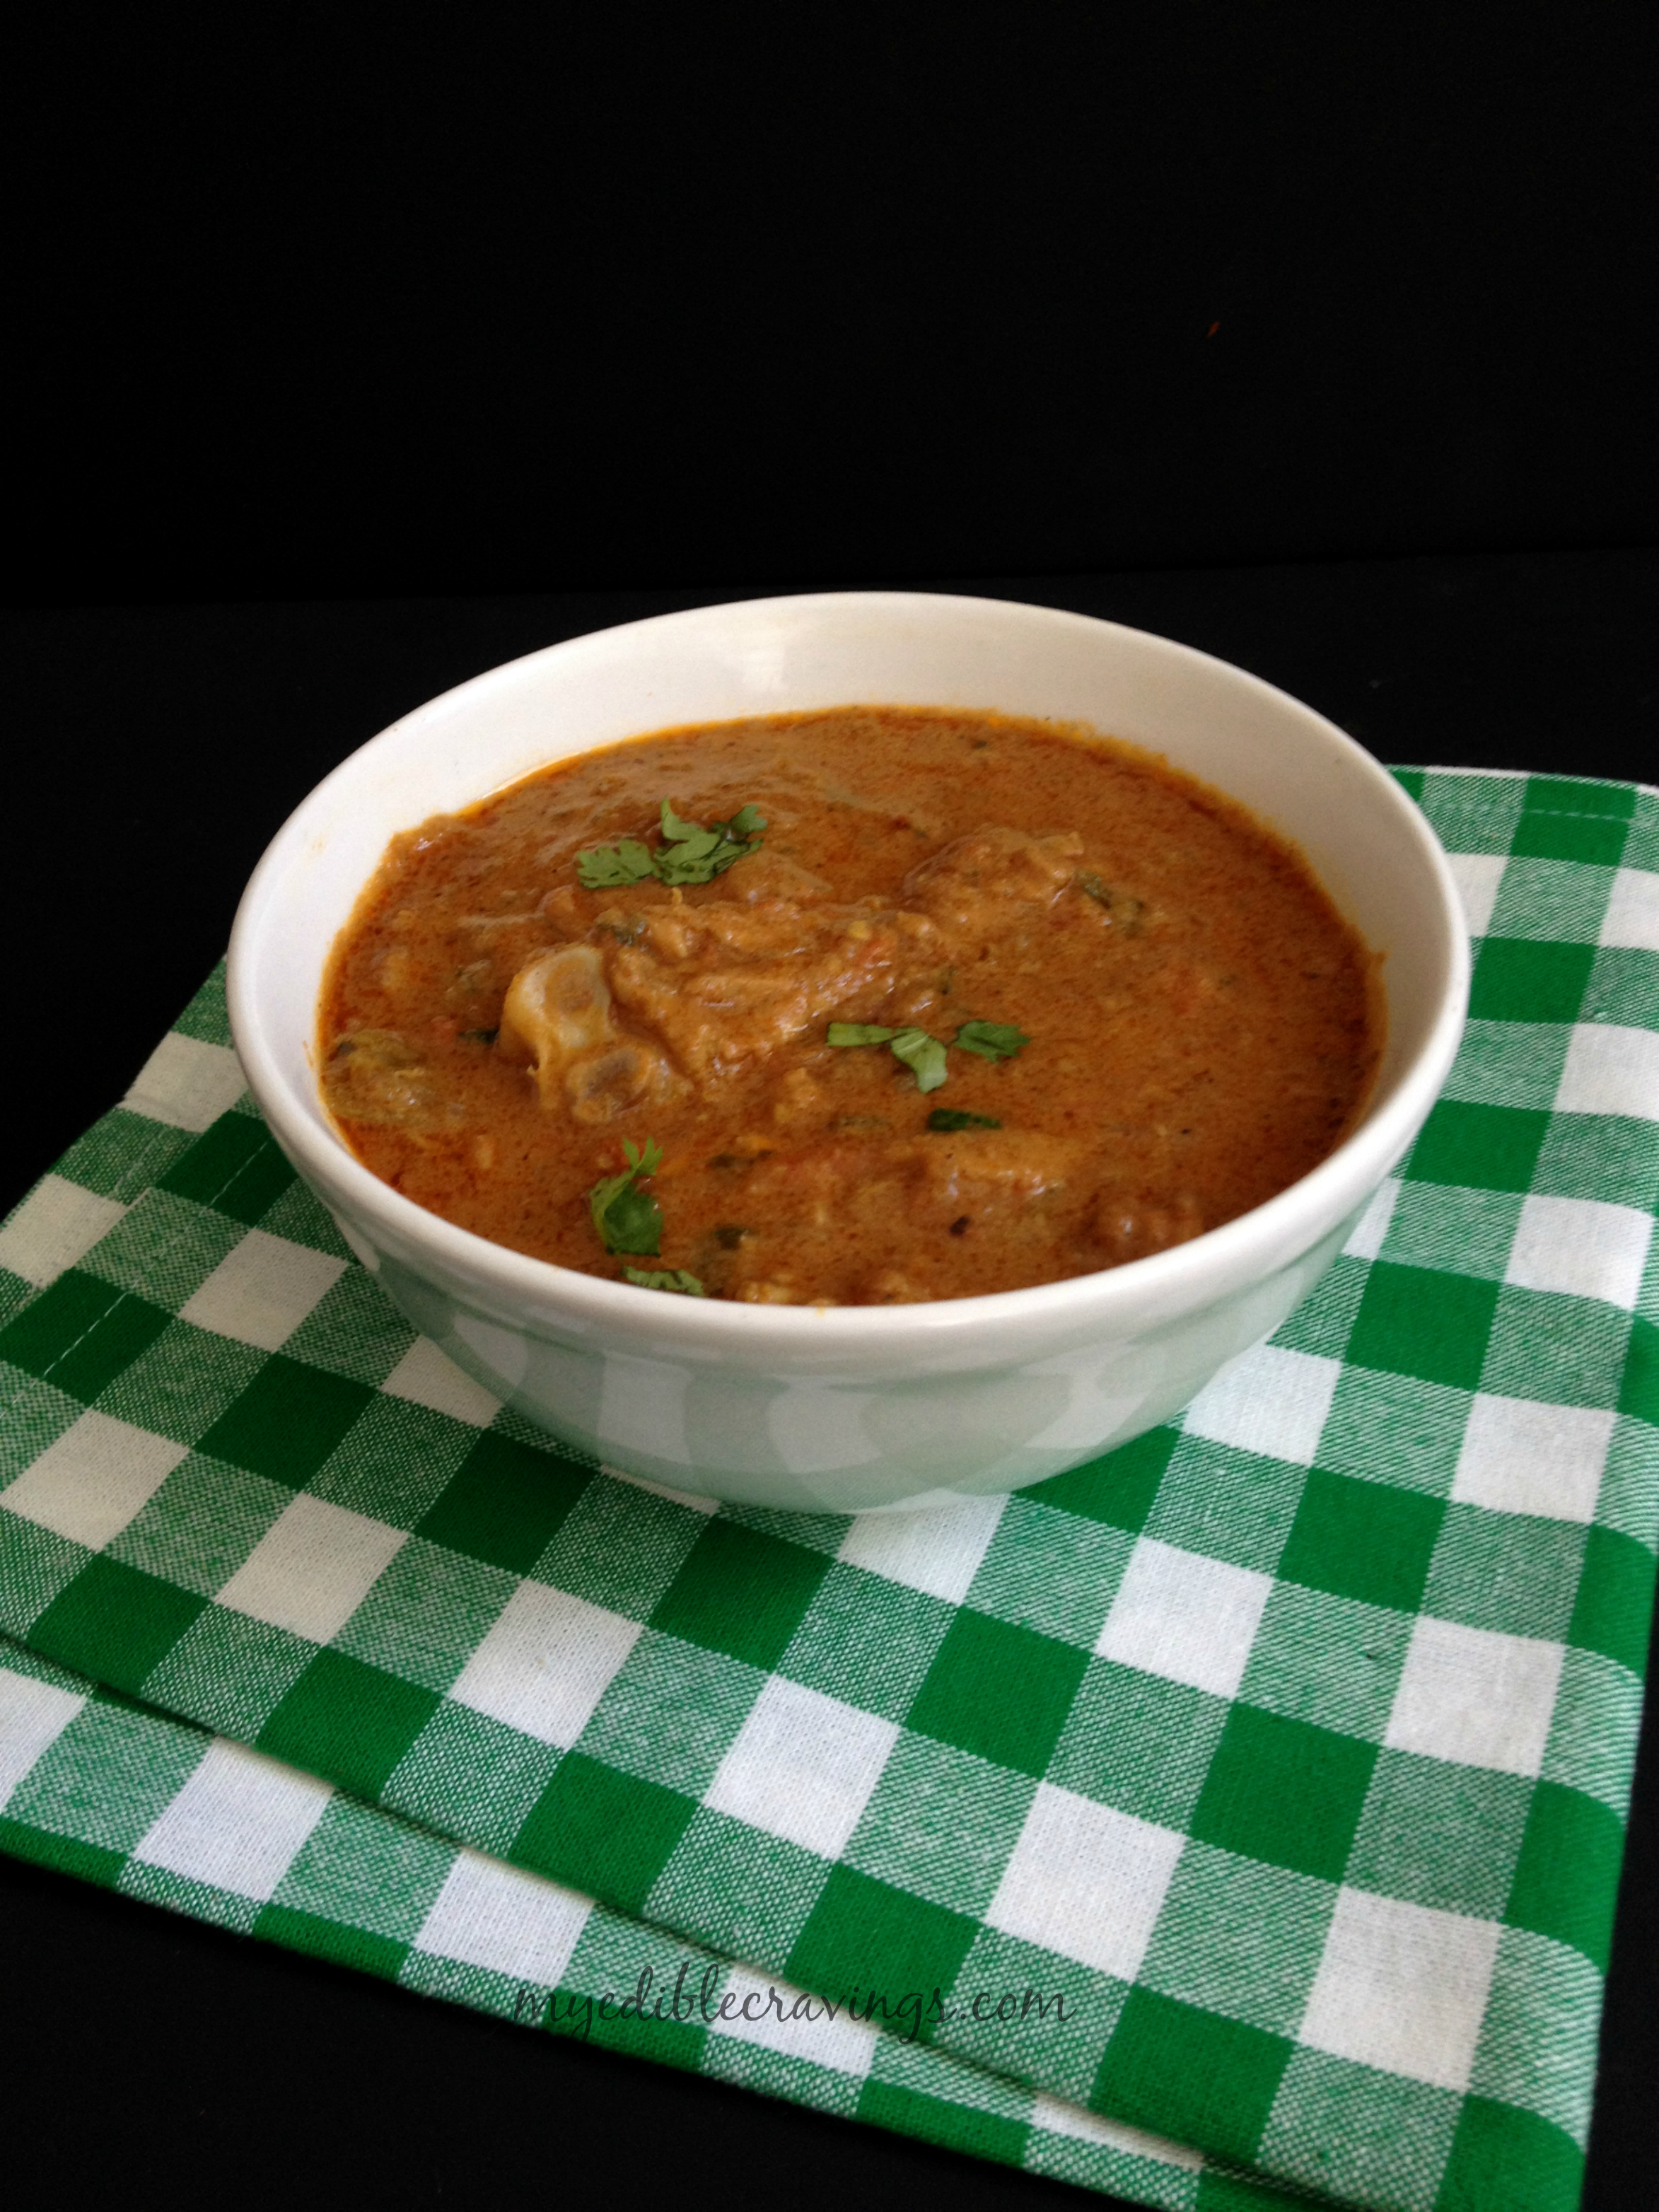
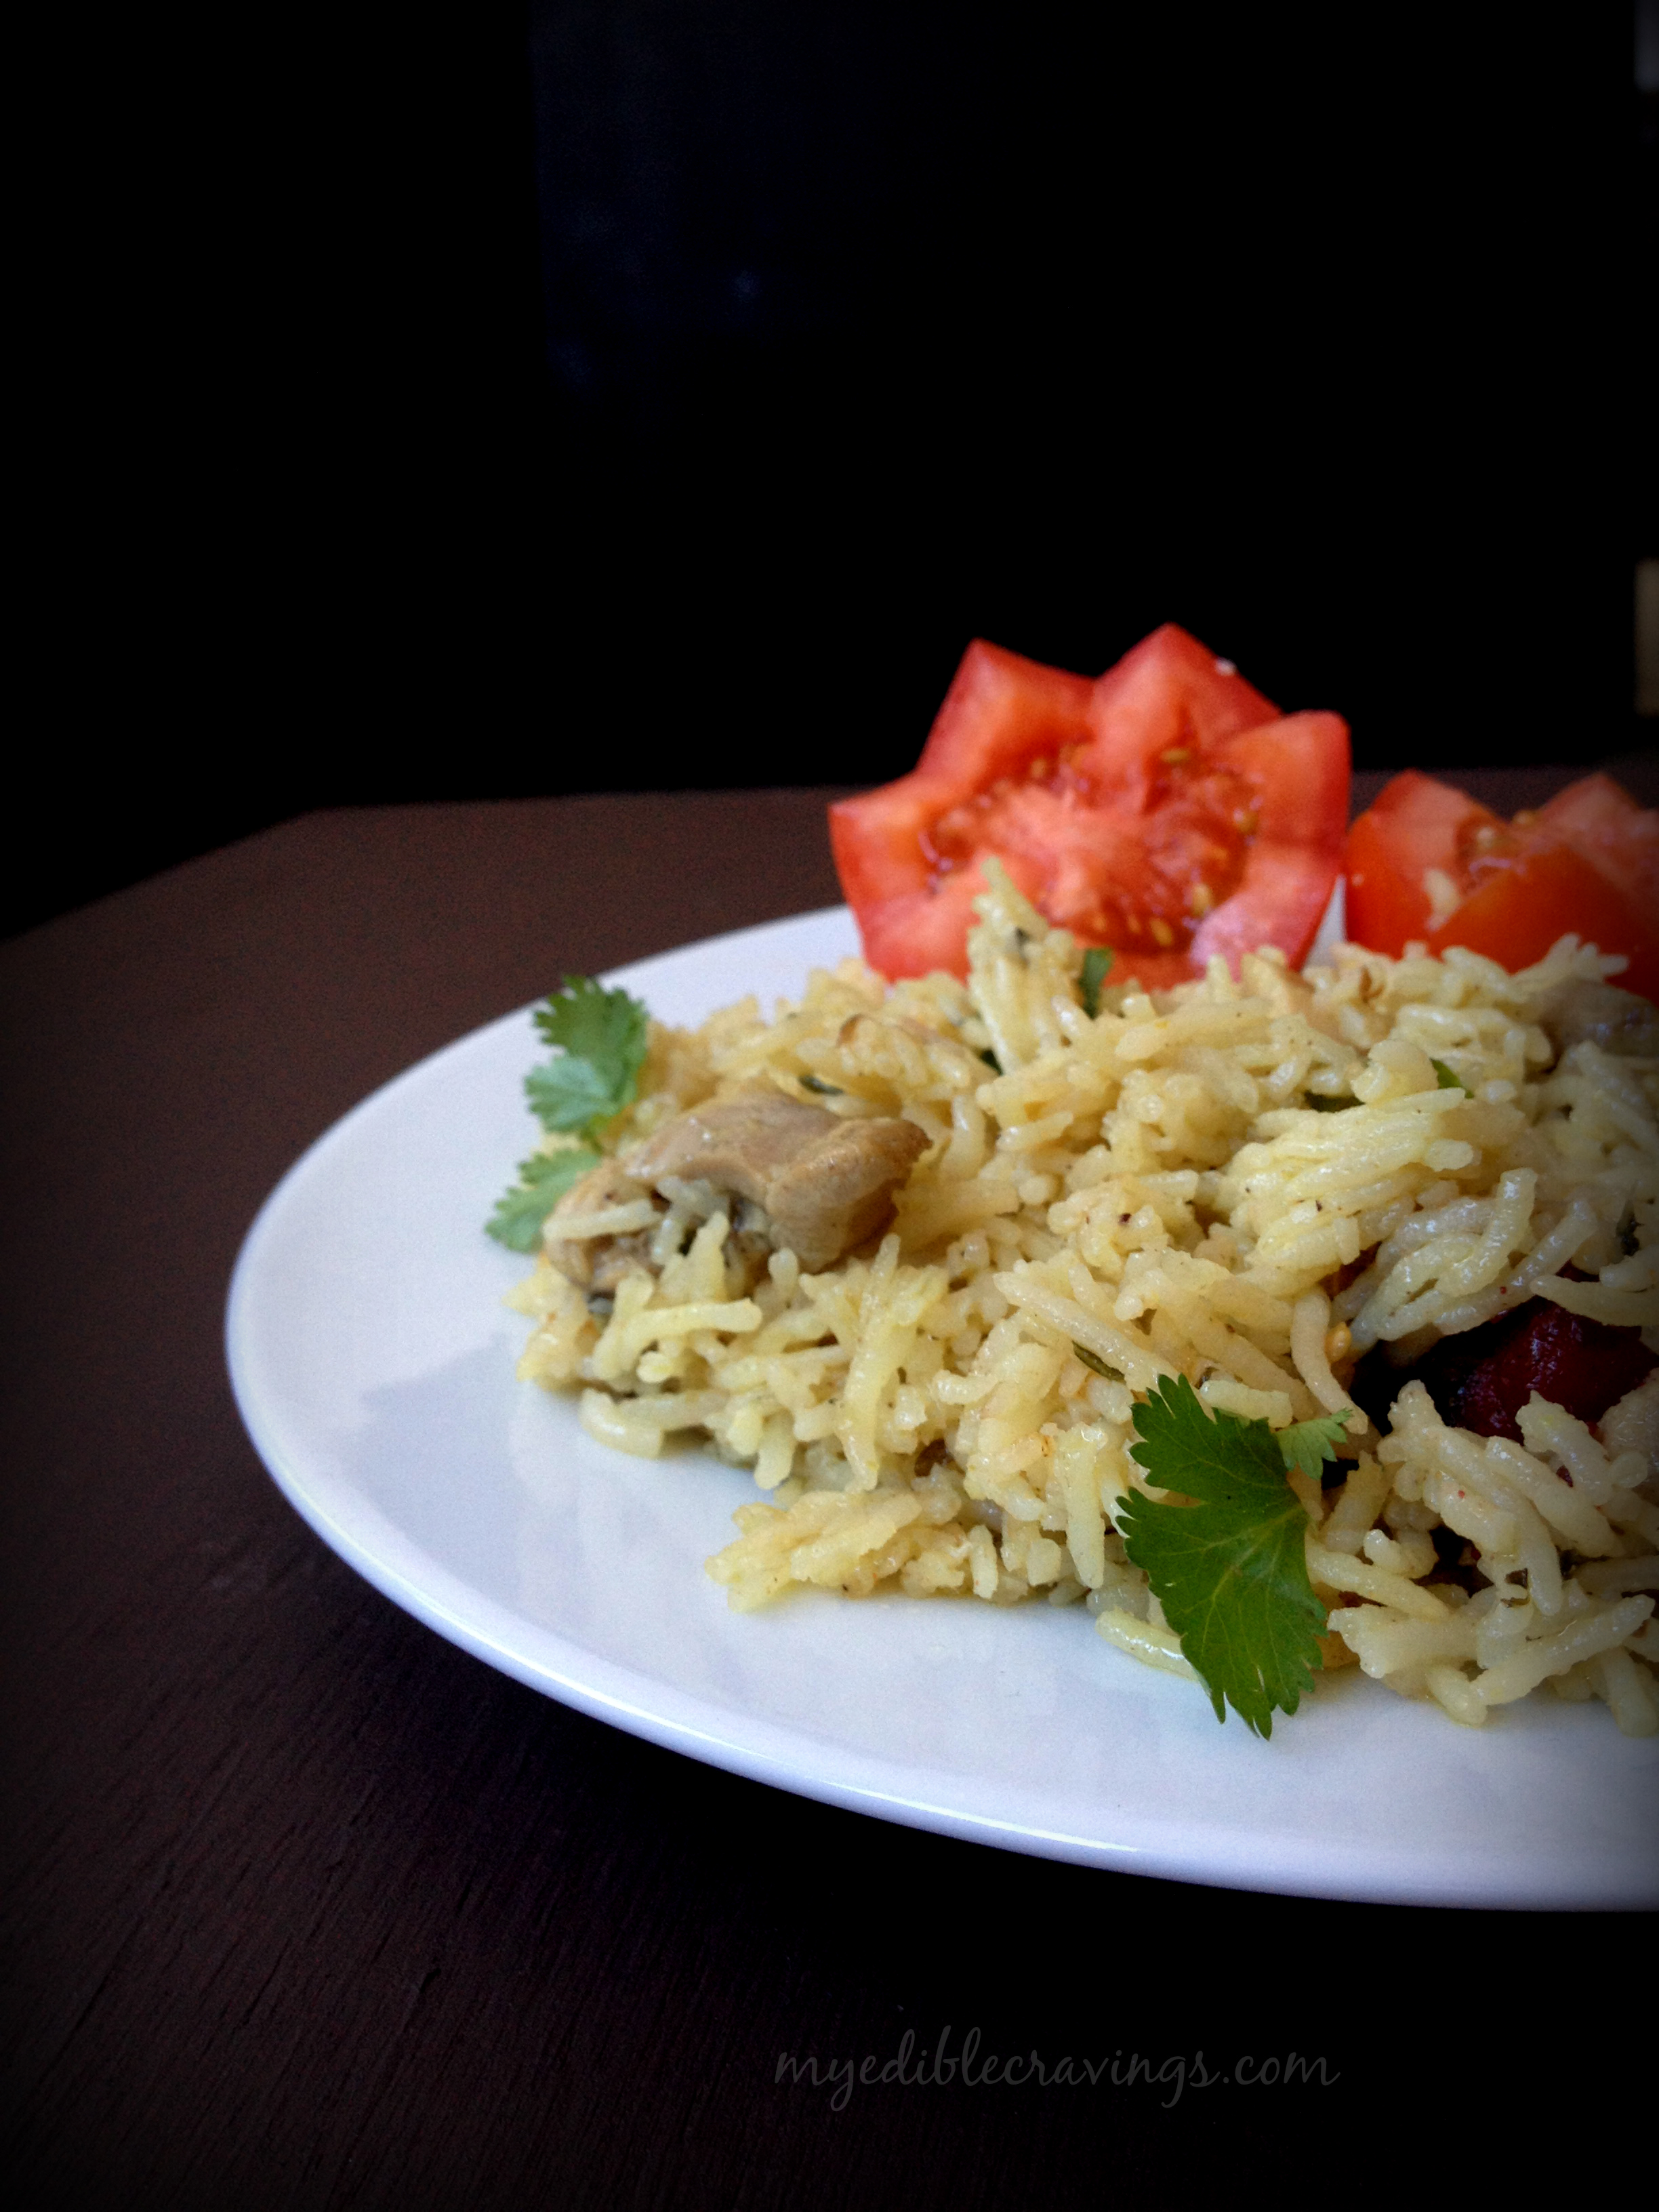
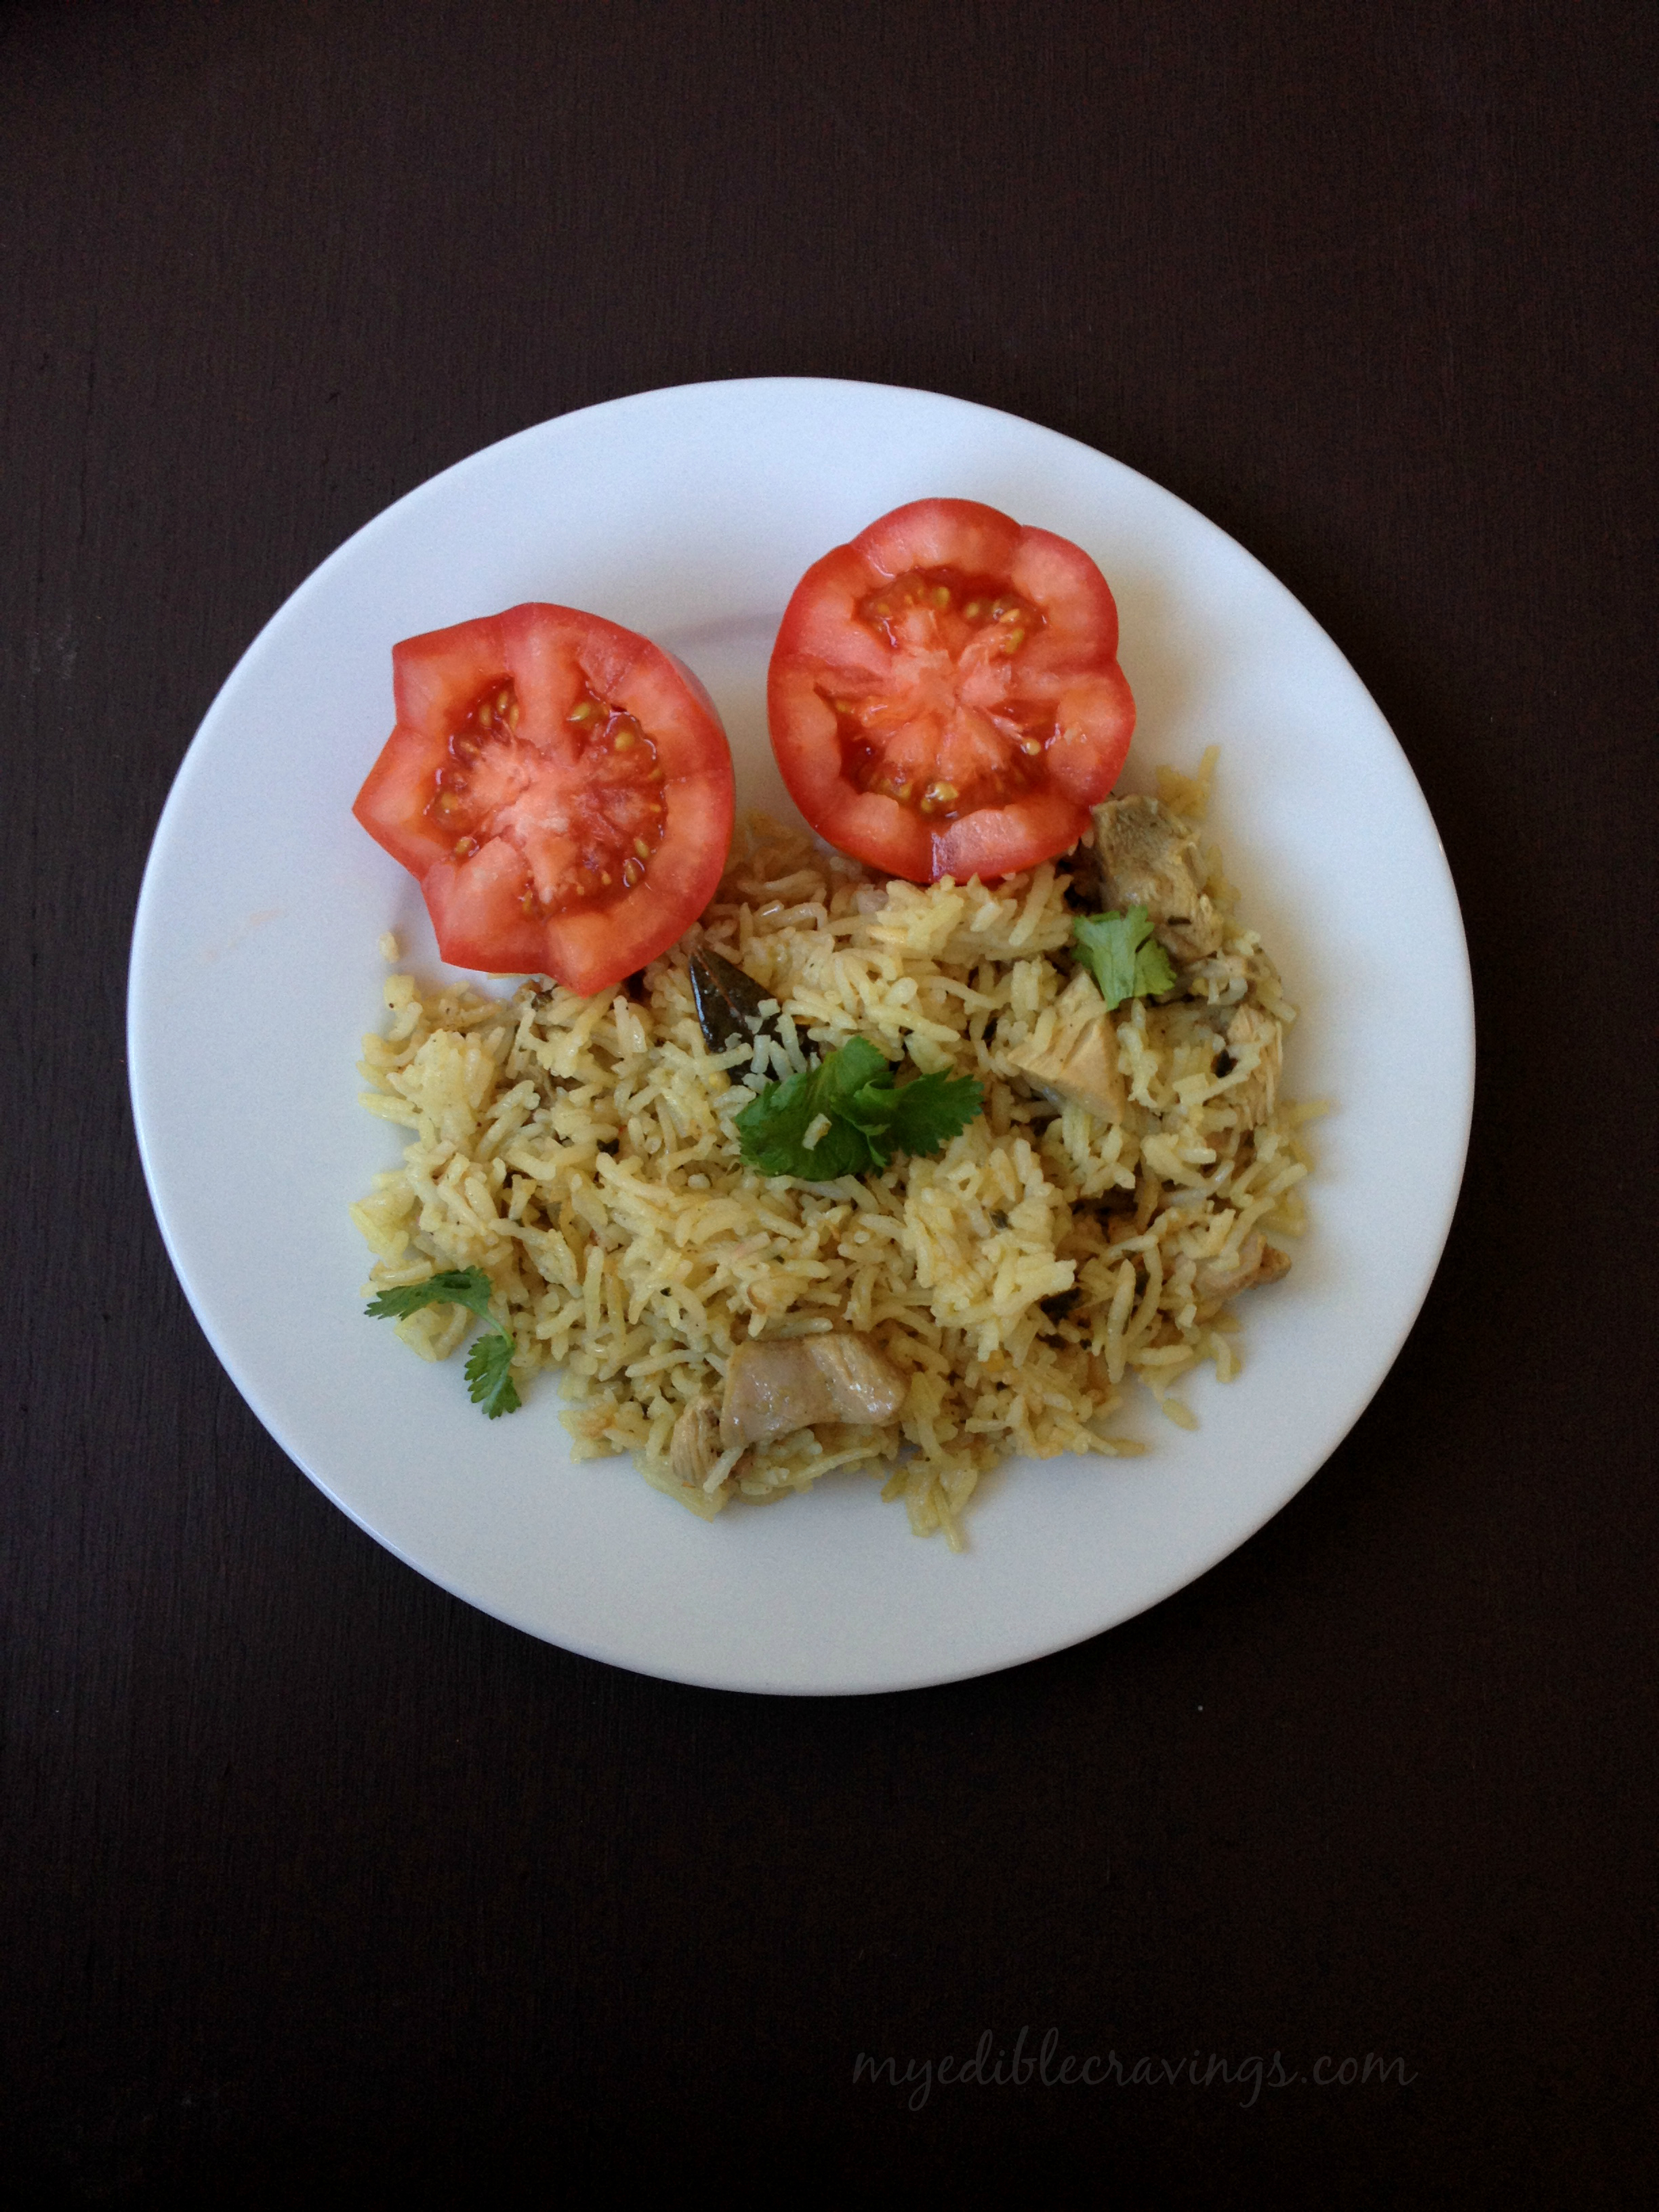
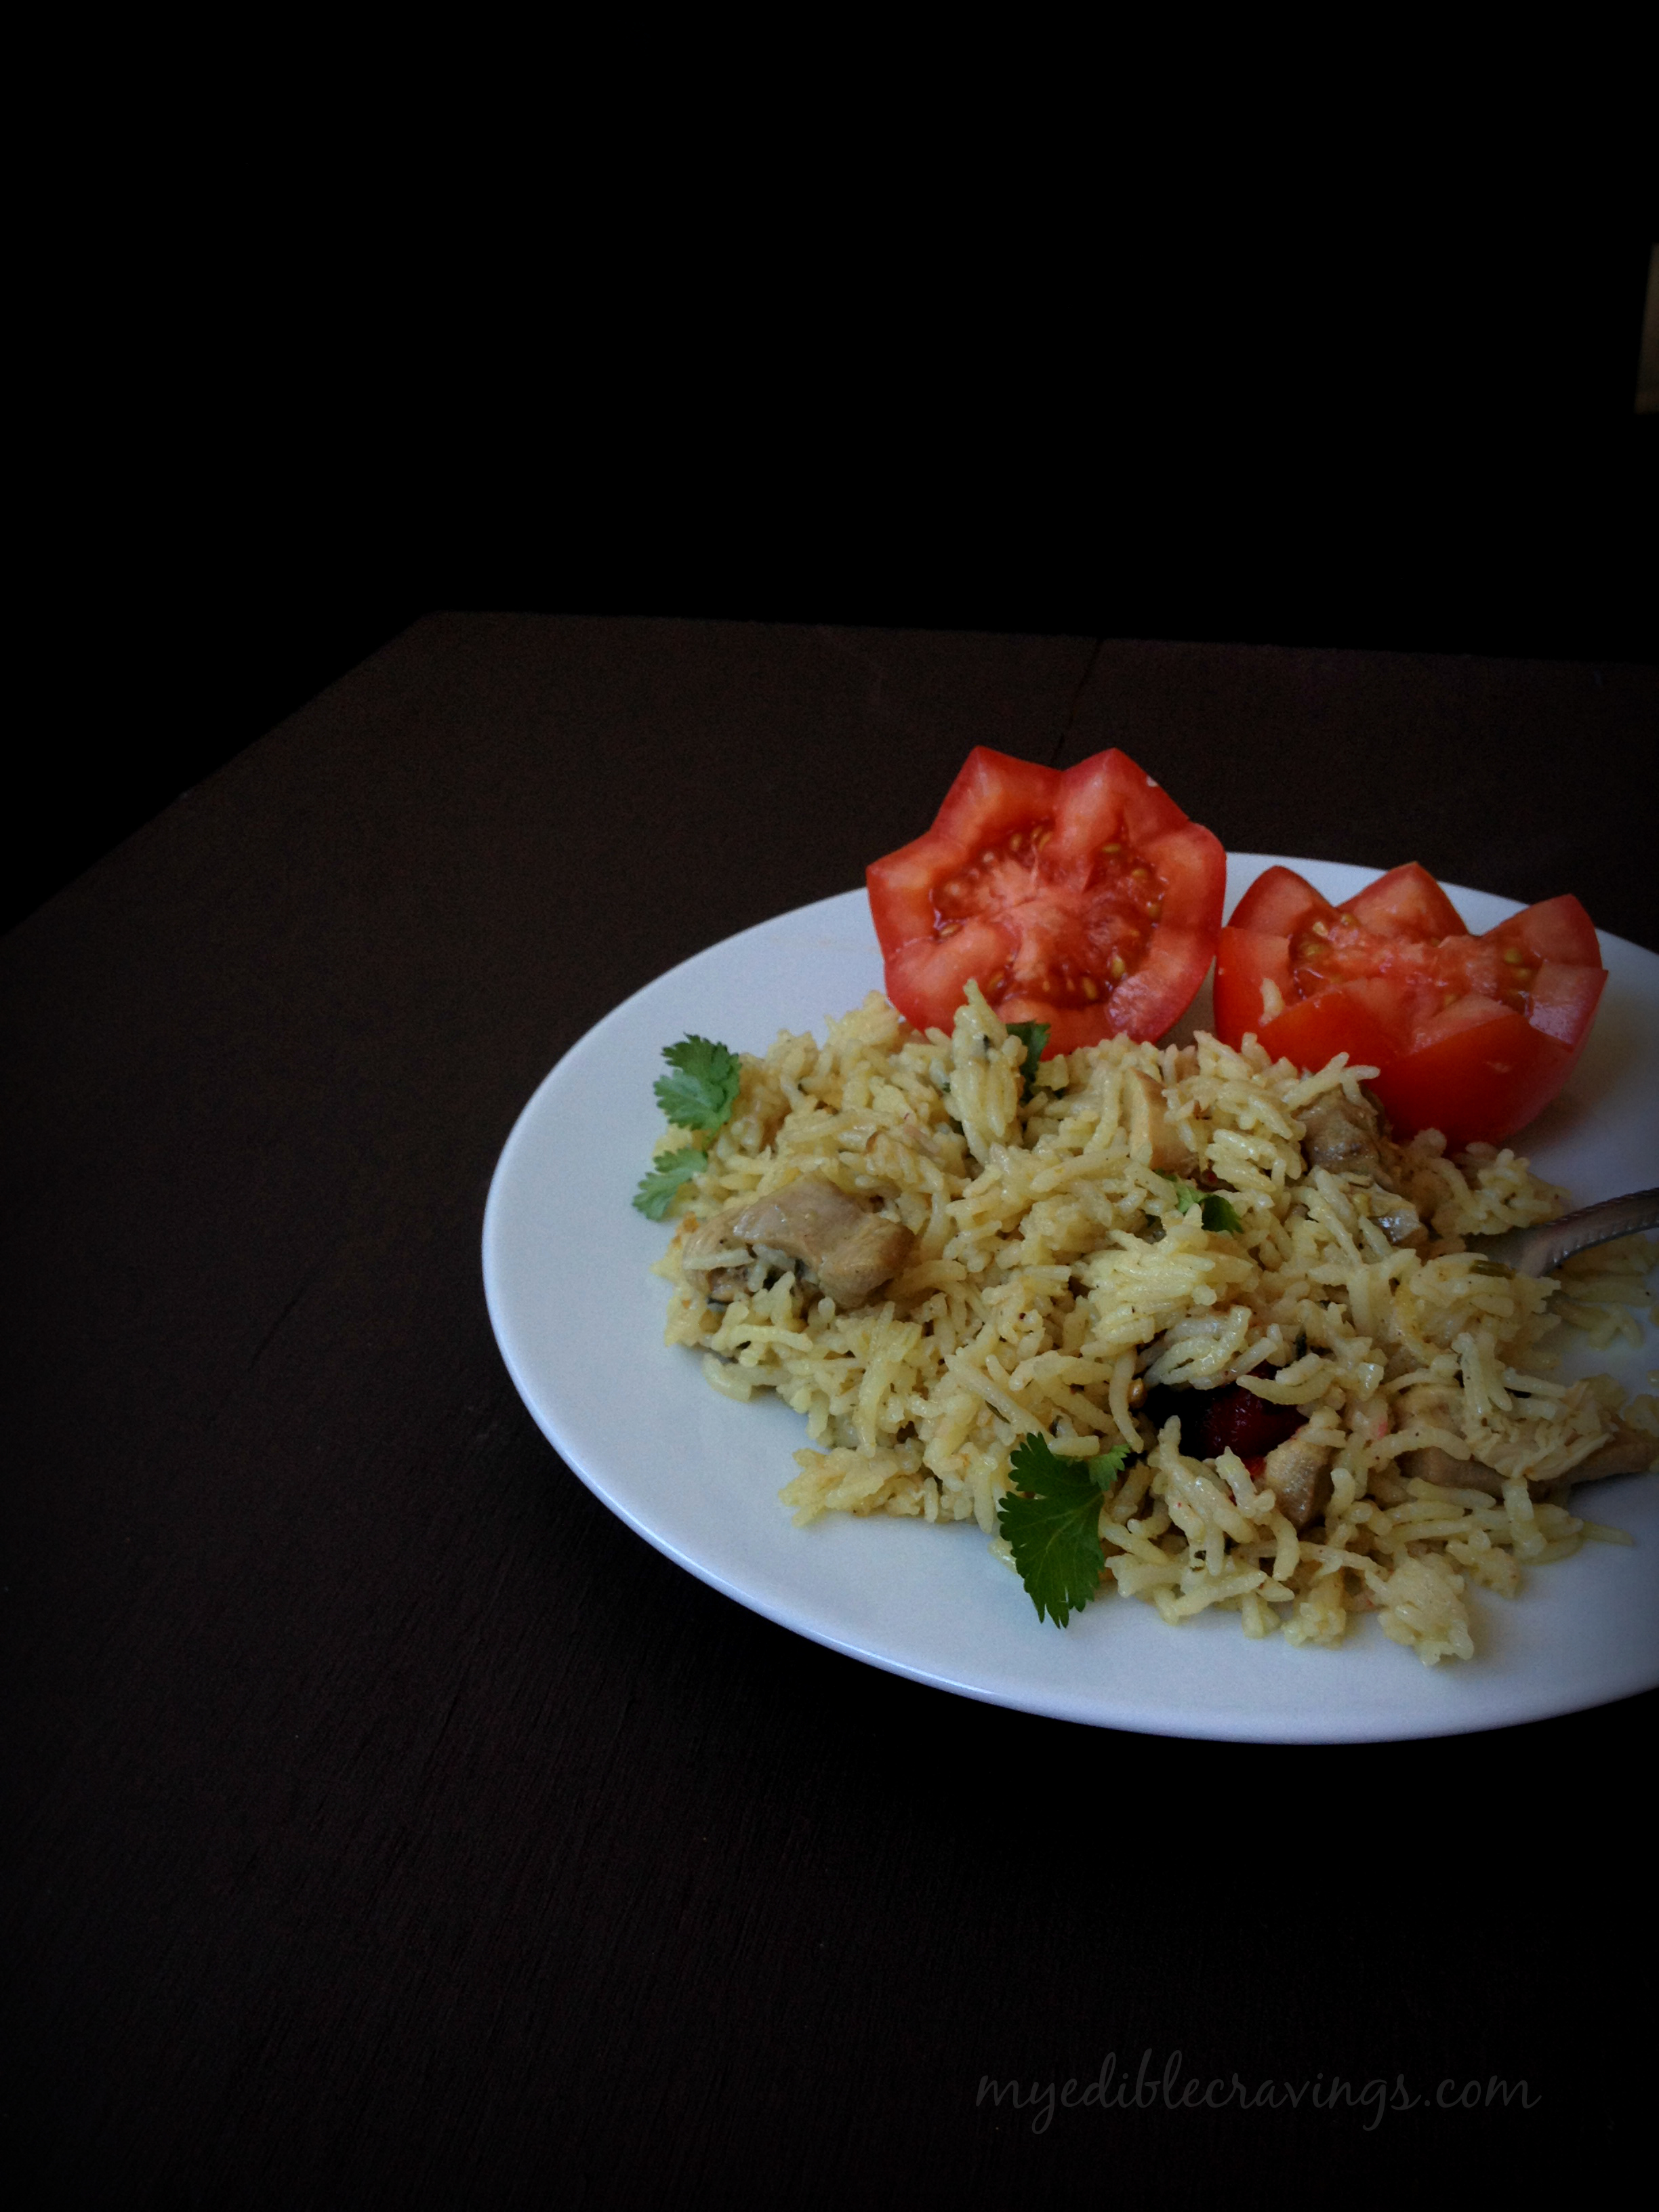
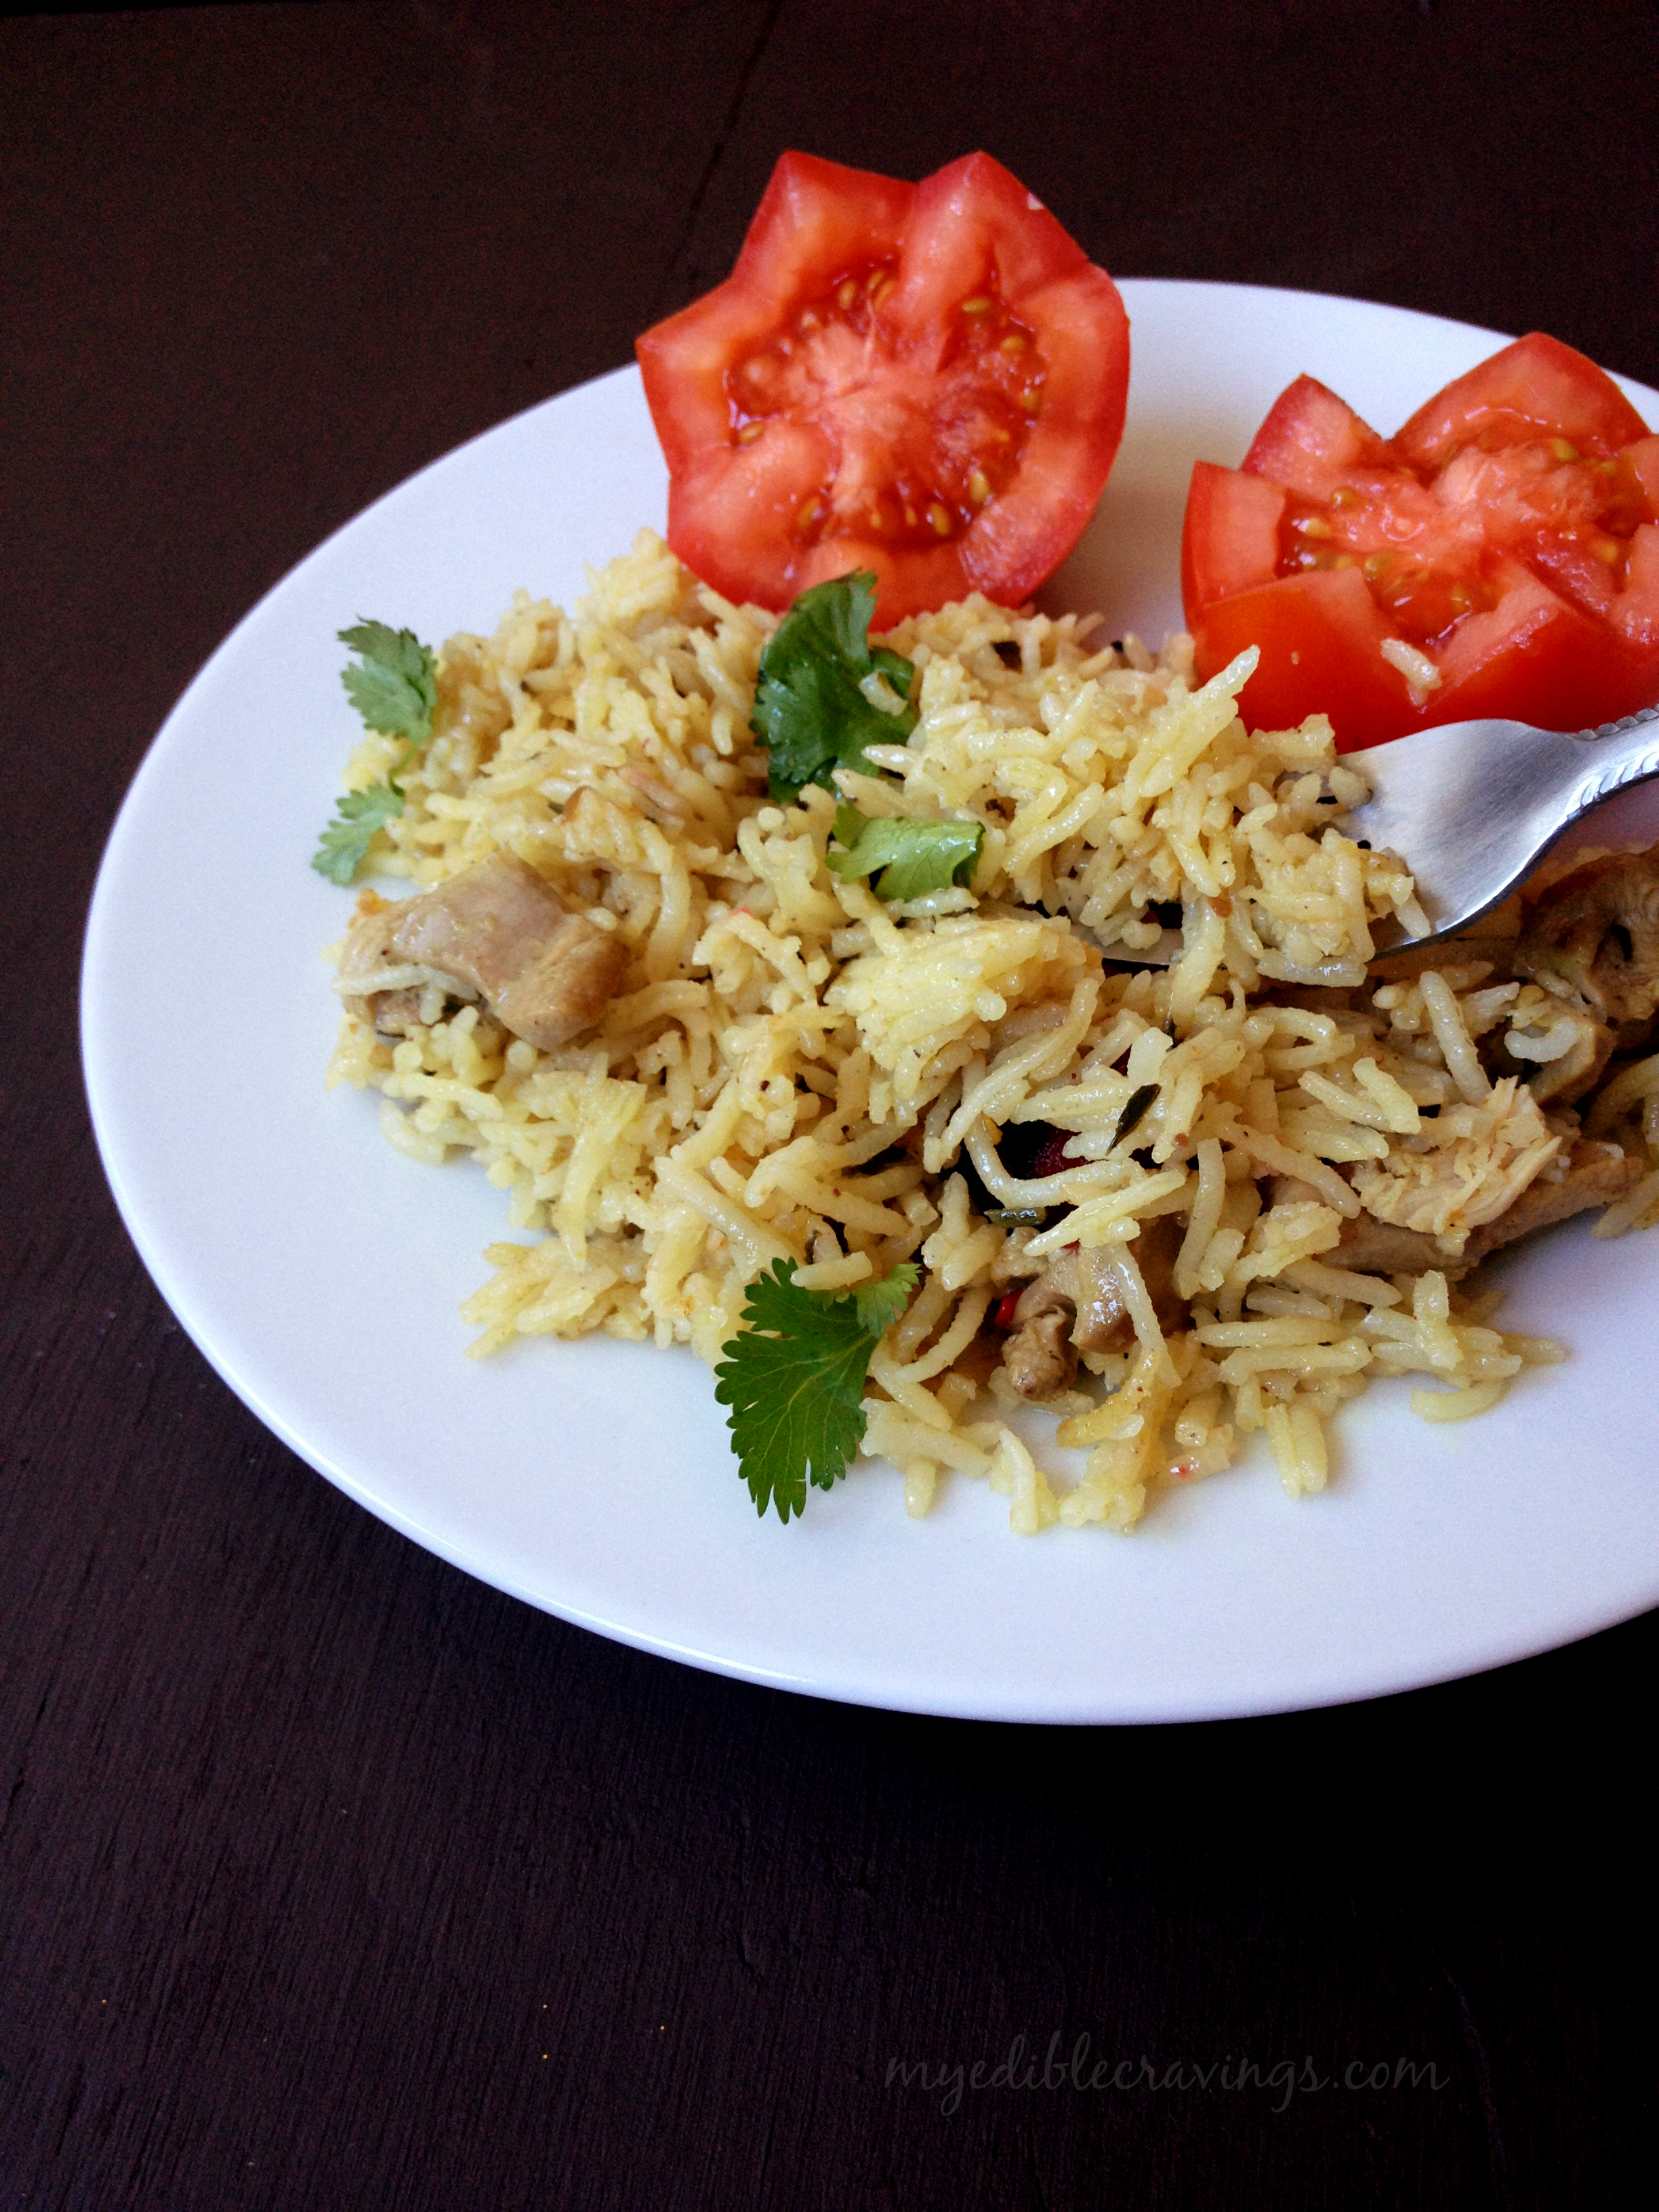
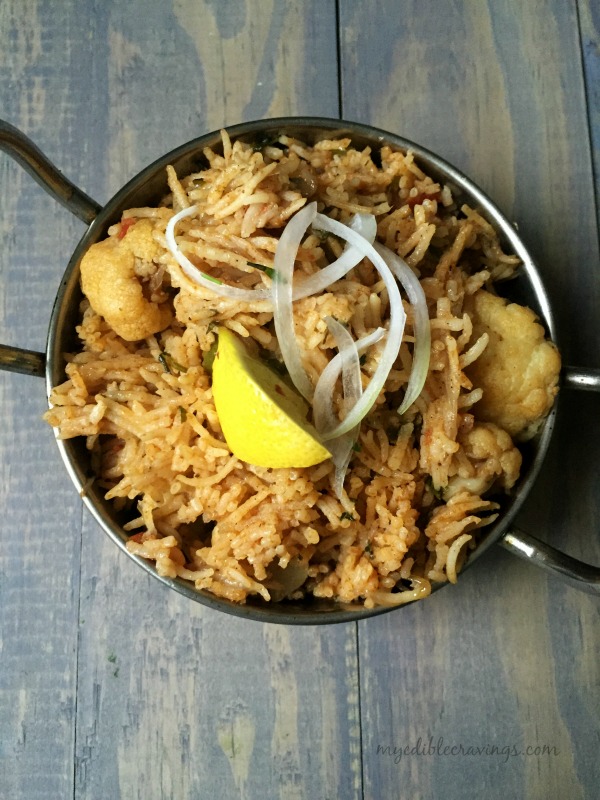
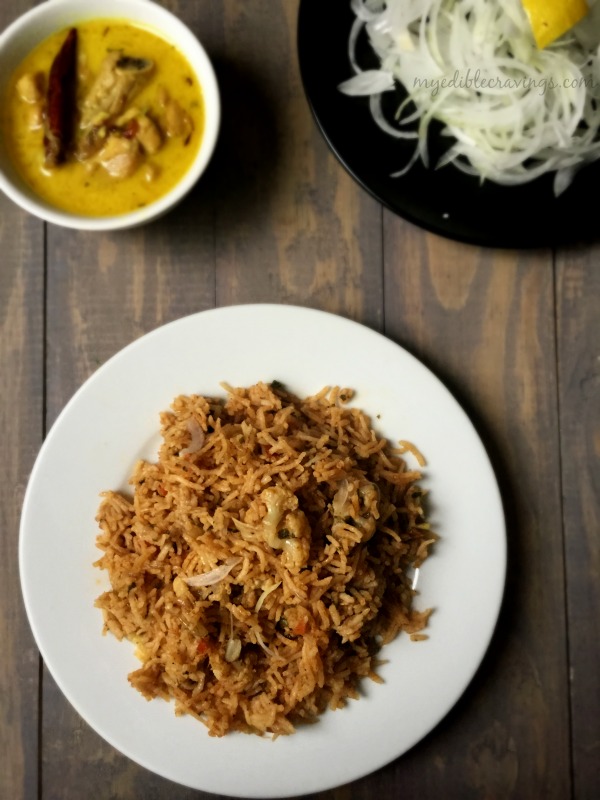
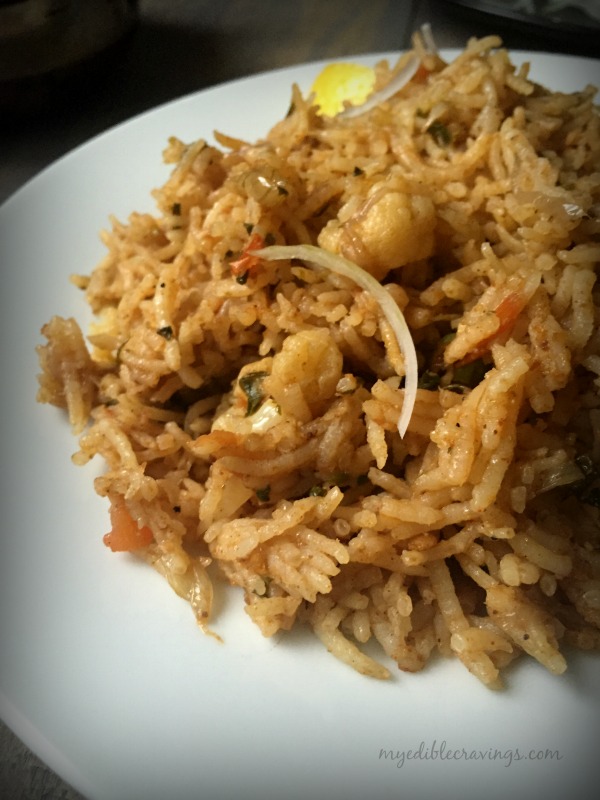
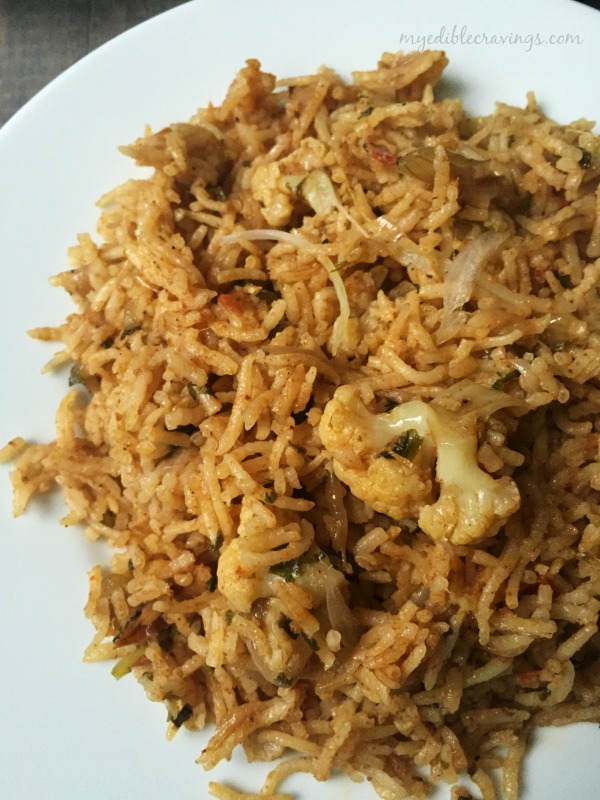
I first had Hyderabad Dum Chicken Biriyani only after coming here. Btw, this is the most popular variety of Biriyani here. In fact, I have had other type of Biriyani only once and that too in New York! Since I like it very much I don’t have much to complain about 🙂 Hyderabad Dum Chicken Biriyani differs from other varieties mainly because of the way it is cooked. We do a layering of chicken (or any other meat) and rice in alternate fashion and then ‘Dum’ cook it. The Biriyani is made using basmati rice and can be had as is or with any chicken/mutton gravy. Either way, It tastes yummy, always 🙂

hyderabad dum chicken biriyanihyderabad dum chicken biriyanihyderabad dum chicken biriyaniThough I have had Hyderabad Dum Chicken Biriyani here in the US, I really want to try it out in the place of its origin, Hyderabad. It has been one of the things to do in my India checklist for quite sometime now. Here I have posted the recipe using chicken but you can also use lamb or mutton as well. I can keep going on and on about Hyderabad Dum Biriyani but I want you to try this recipe in your home and experience the awesomeness 🙂

Hyderabad Dum Chicken Biriyani
Recipe type: Main
Cuisine: Indian
Prep time: 
Cook time: 
Total time: 
Serves: 3
 
Ingredients
For the marinade:
To make powder:
  • Cinnamon – 3 1” pieces
  • Cardamom – 5
  • Cloves – 5
  • Star anise – ½ to 1
  • Javetri – ½ to 1
  • Black pepper – 10 nos
  • Sea weed – 1 tsp
  • Bay leaf – 1 2” leaf (small one)
  • To make a Paste:
  • Ginger garlic paste – 1 ½ tsp
  • Green chillies – 5 nos (coarsely blend)
  • Other ingredients:
  • Oil – ¼ cup
  • Yogurt – 3 to 4 tsp
  • Lemon juice – from half lemon
Powders:
  • Turmeric powder – ¼ tsp (do not add too much it would change the color of the biriyani)
  • Chilli powder – 1 tsp (or according to your taste)
  • Coriander powder – 2 to 2 ½ tsp (used from the box’s plastic spoon)
  • Garam masala – ½ to 1 tsp
  • Salt – as required ( I added ¾ p.tsp)
  • Mint & coriander leaves – ½ cup
  • Fried onions, small – 1
  • Chicken – 1 to 1⅓ kg
To cook rice:
  • Good quality Basmati rice – 2 cups ( US measurement)
  • Water – sufficient amount
  • Shahi jeera – 3 pinches
  • Bay leaves, big – 2 nos
  • Oil – 1 tbsp ( I use the oil that is used to fry onions)
  • Salt – as required
For garnishing :
  • Mint & cilantro, finely chopped – ¾ cup
  • Onion, small to medium, fried – 1 no
  • Saffron - a generous pinch
  • Warm milk – ⅓ cup
  • Ghee – 2 to 3 tsps
  • Chapathi dough – to dum or aliminium foil
Instructions
Step 1:
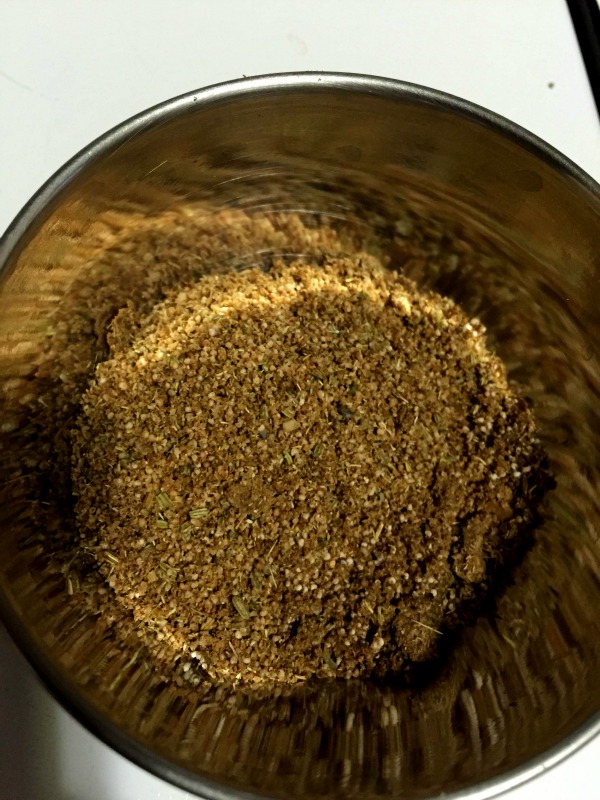
  1. First blend the things and keep it ready. Grind the spices coarsely such that sea weed is coarse and others are blend to fine powder. Add them to the mixing bowl. Blend ginger and garlic to a fine paste without adding water. keep it aside. Blend green chillies to a coarse paste.
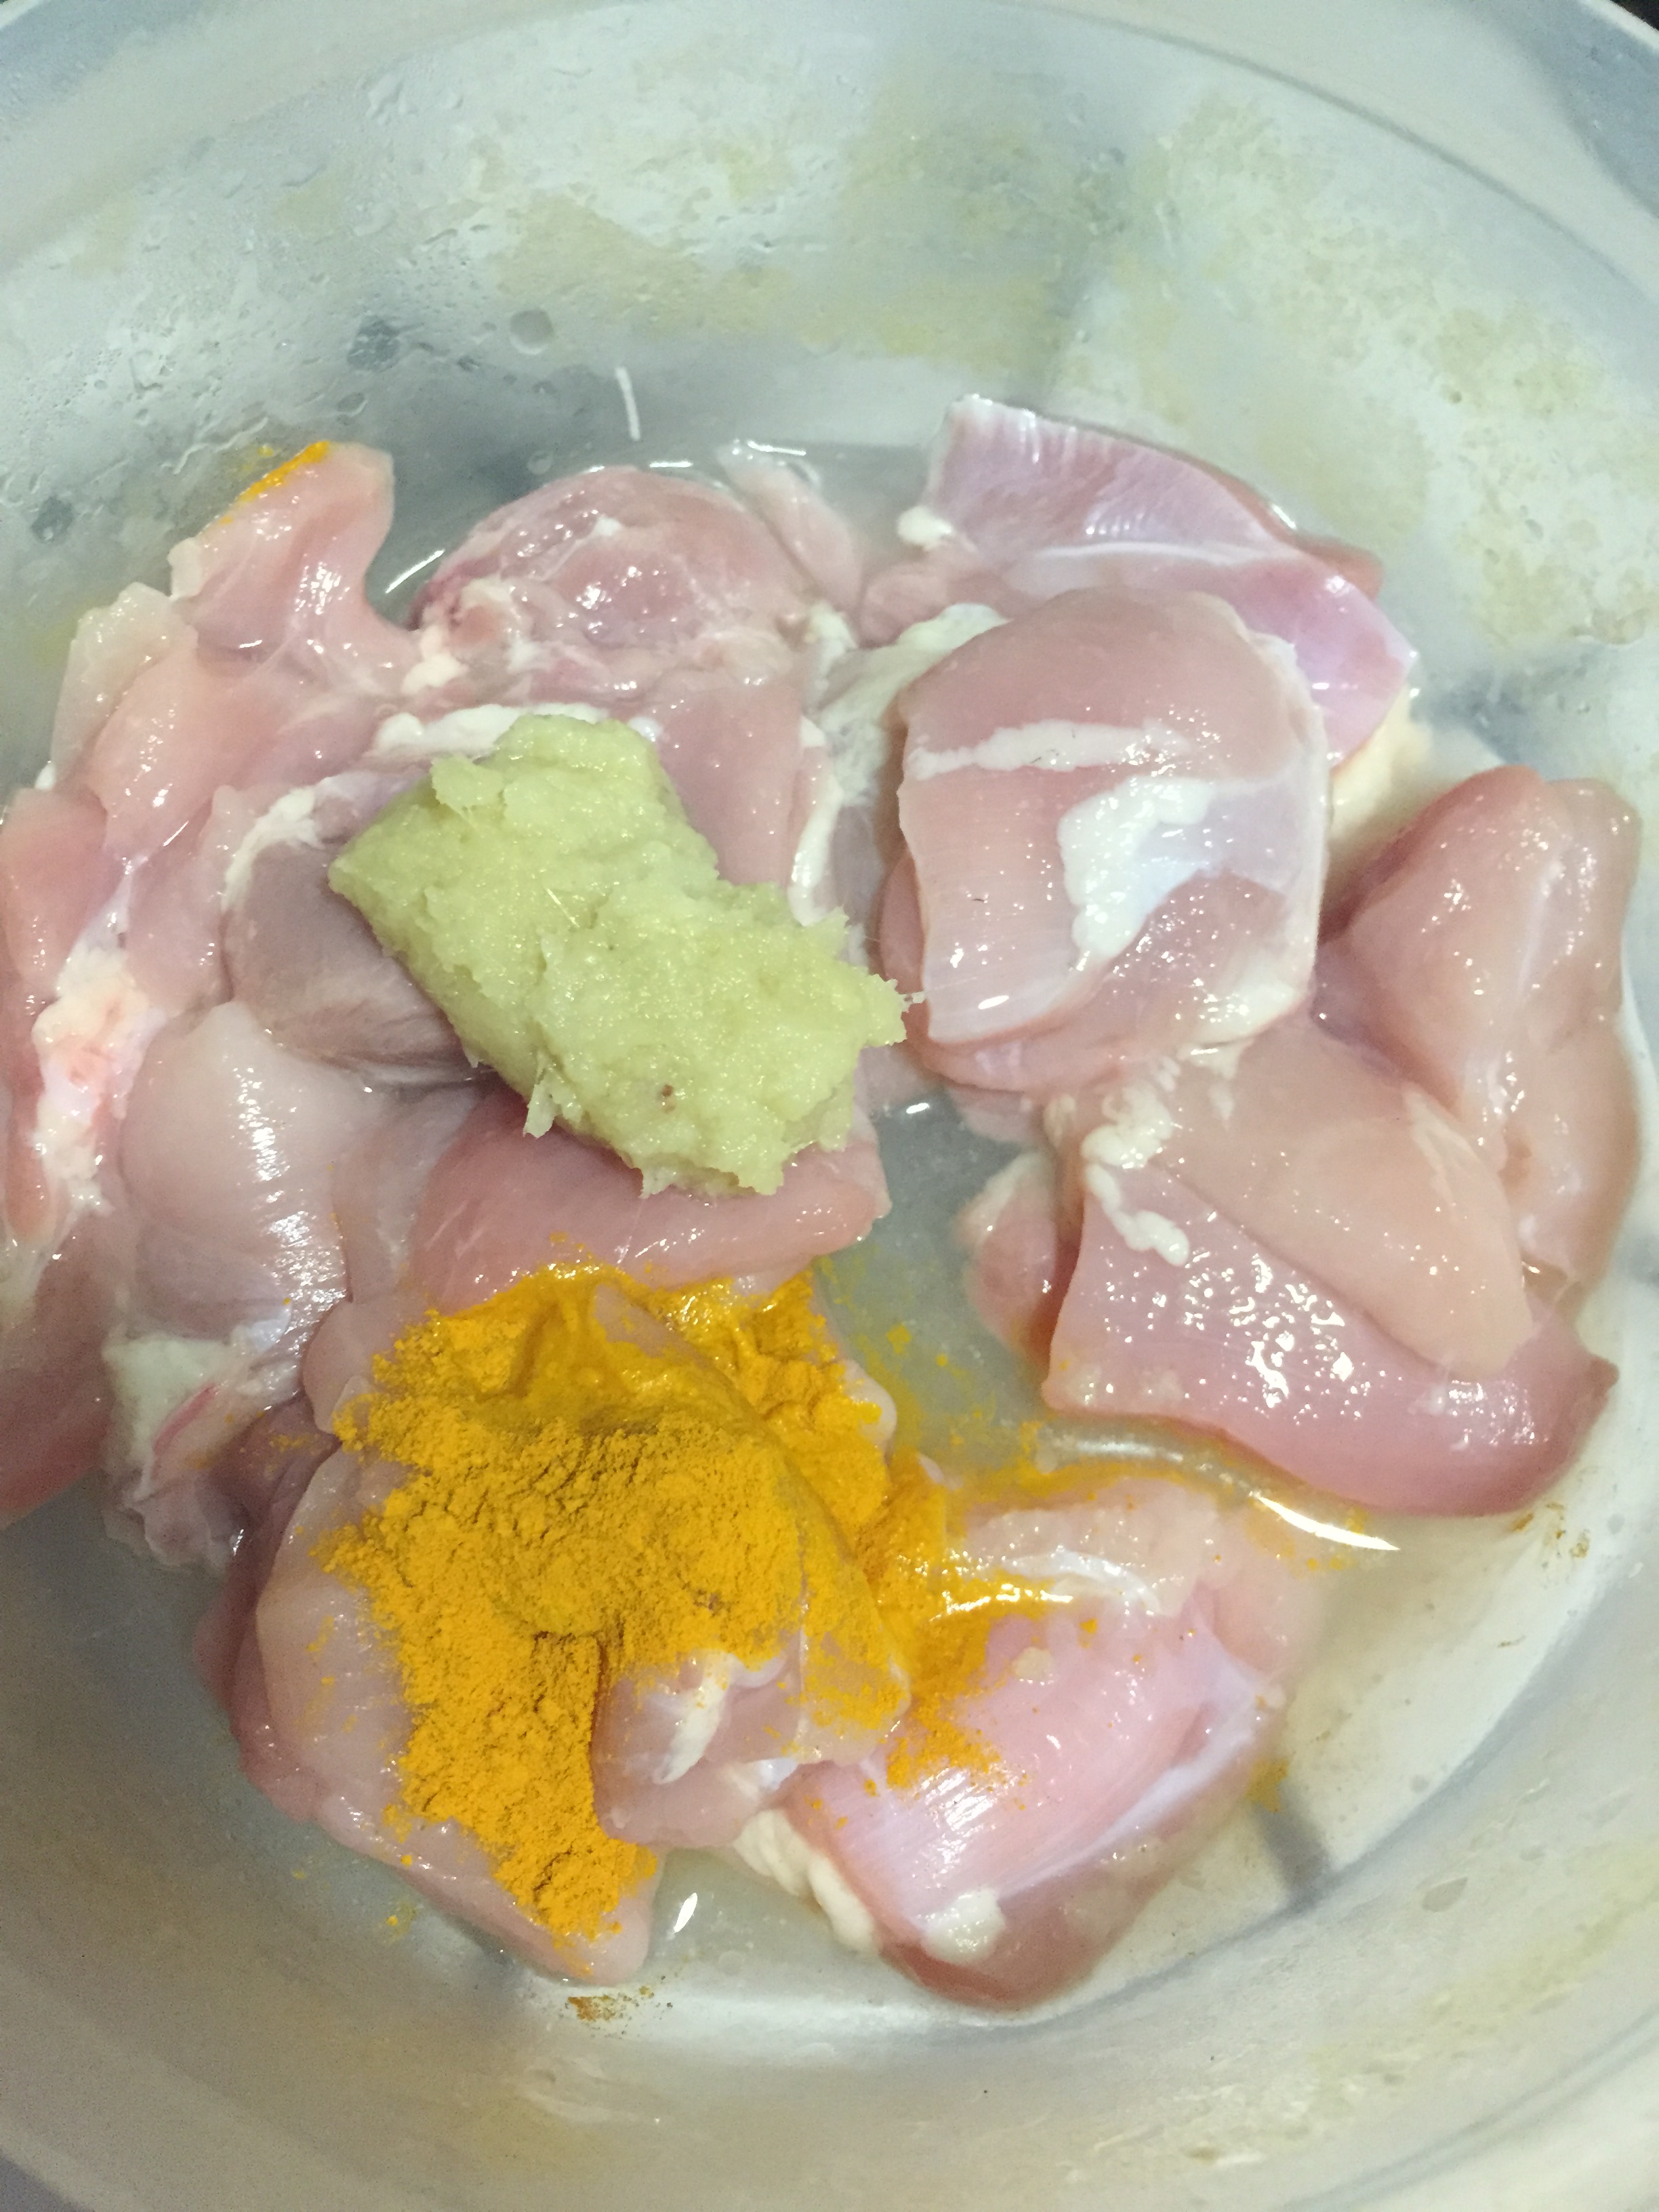
  2. Make few cross deep slits on the washed chicken pieces. The slits has to touch the bones.
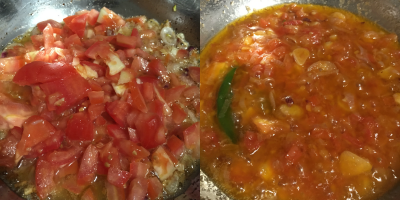
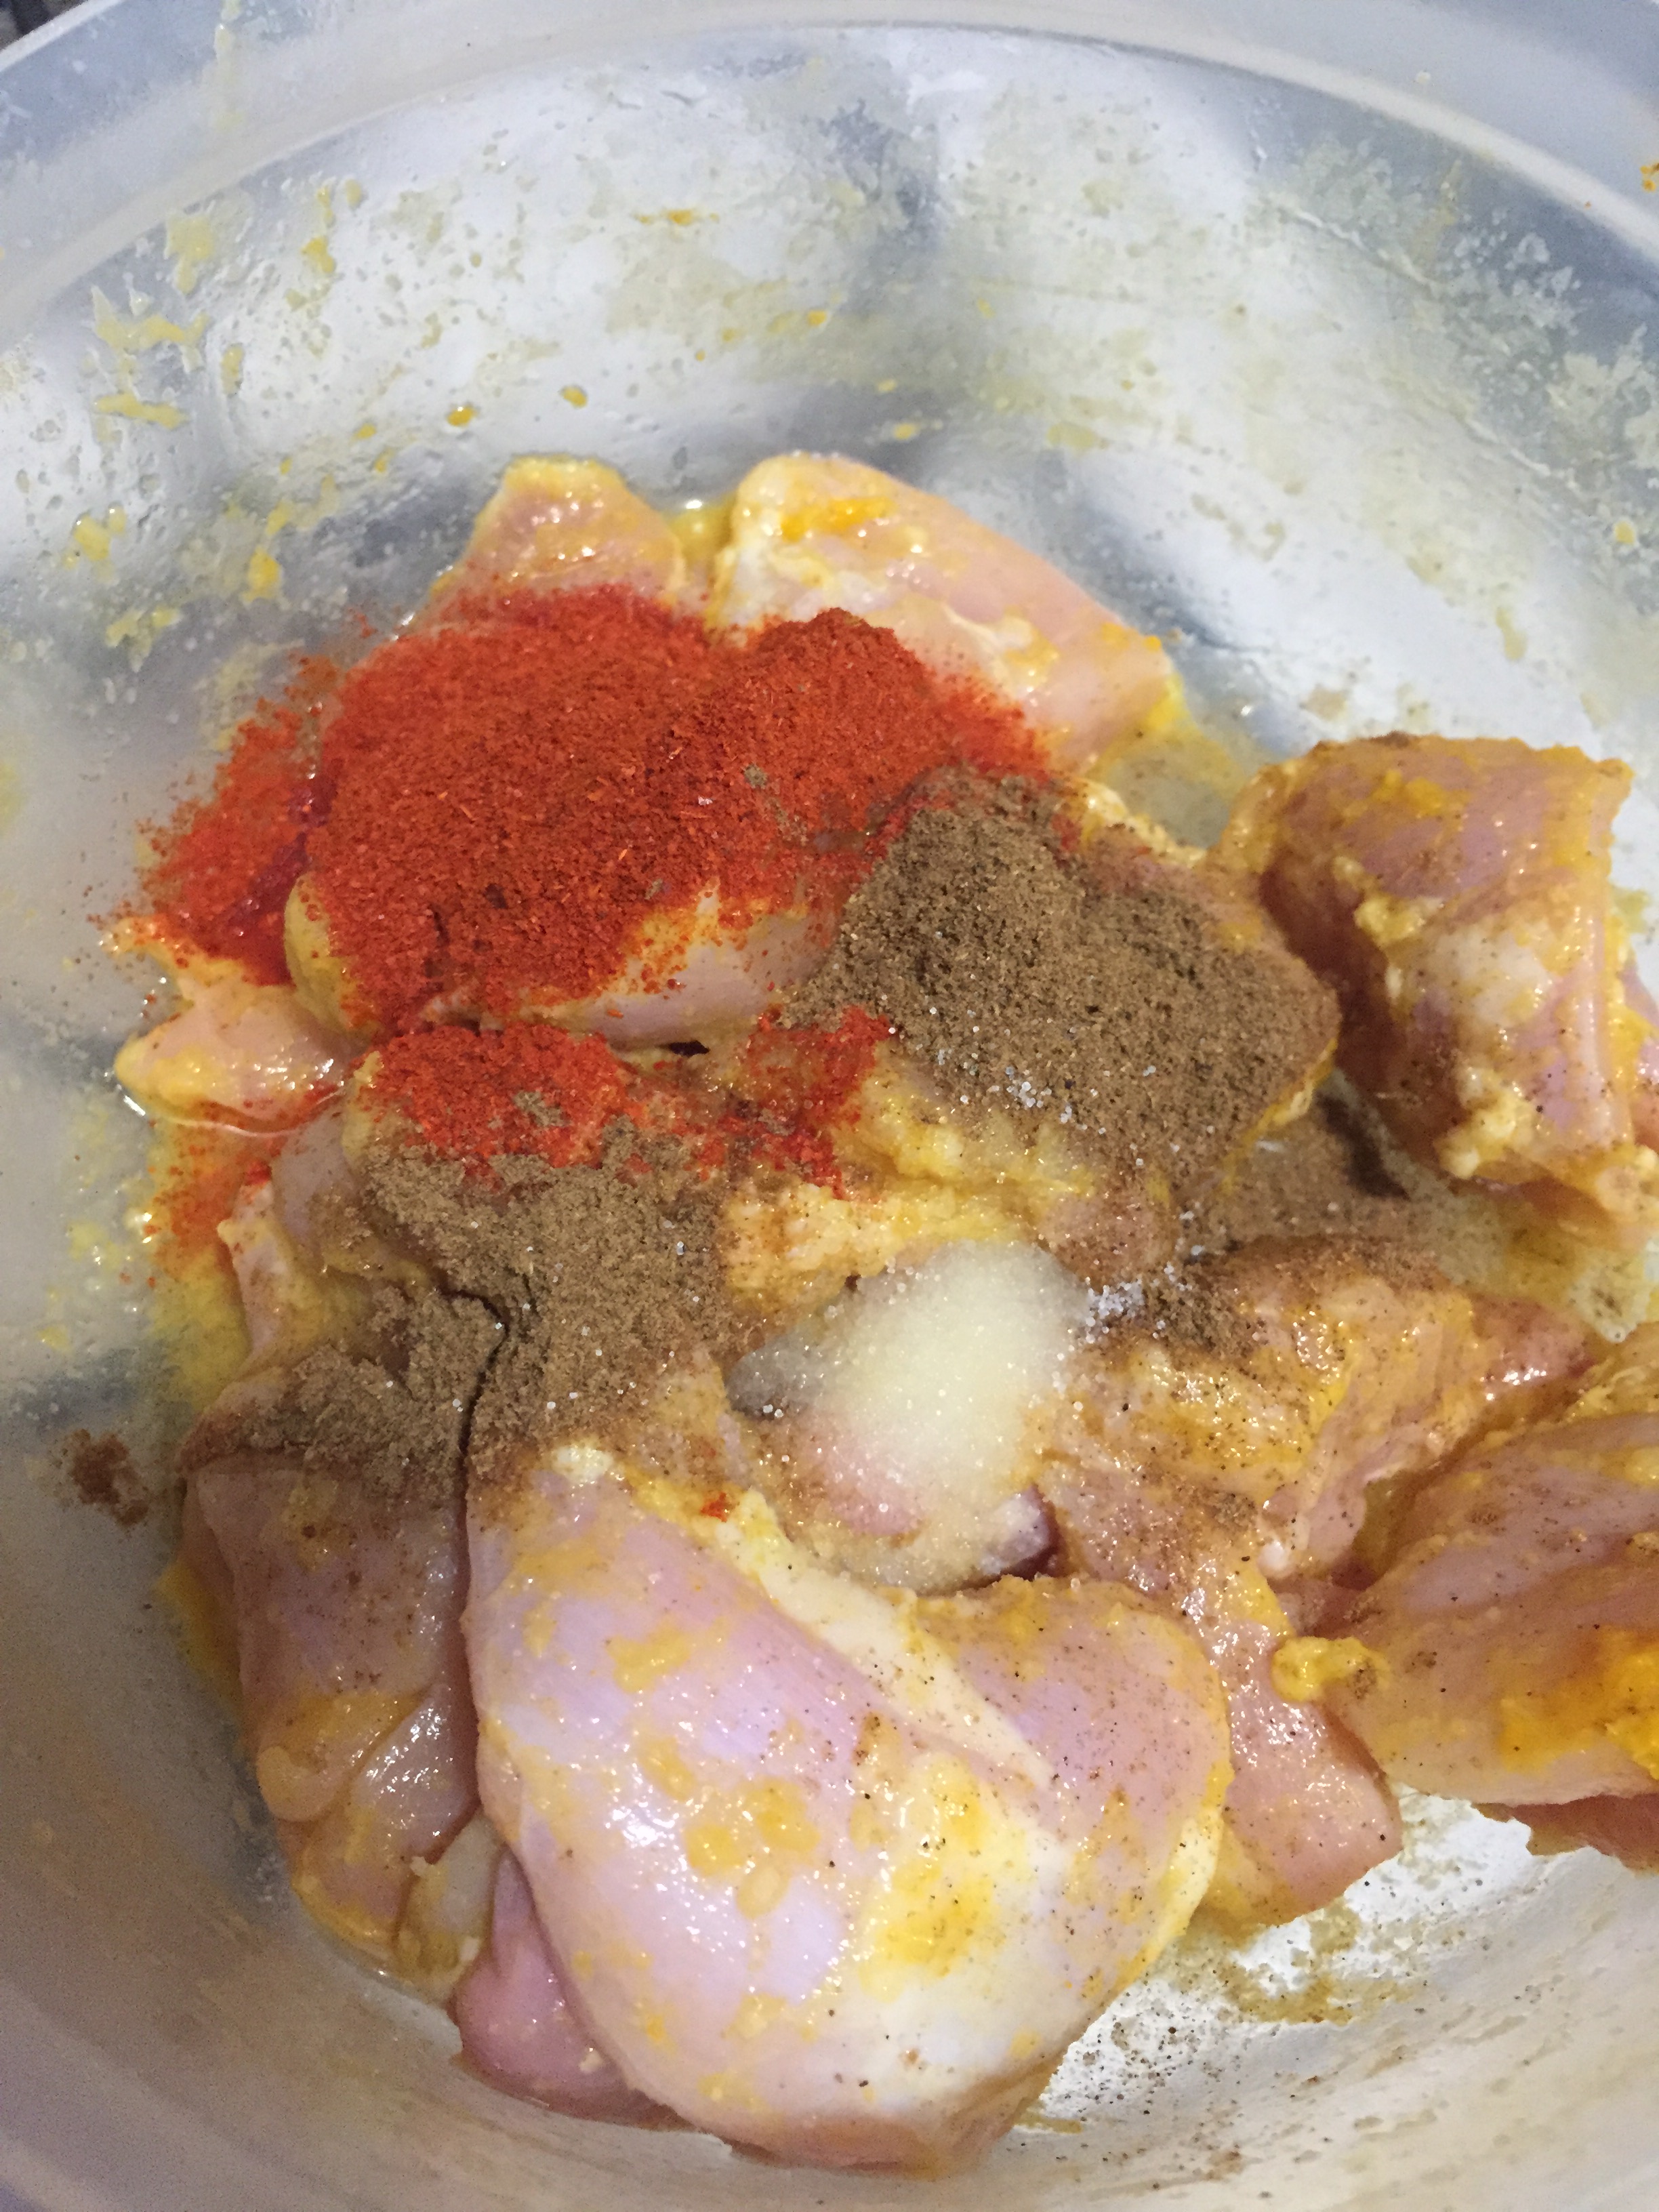
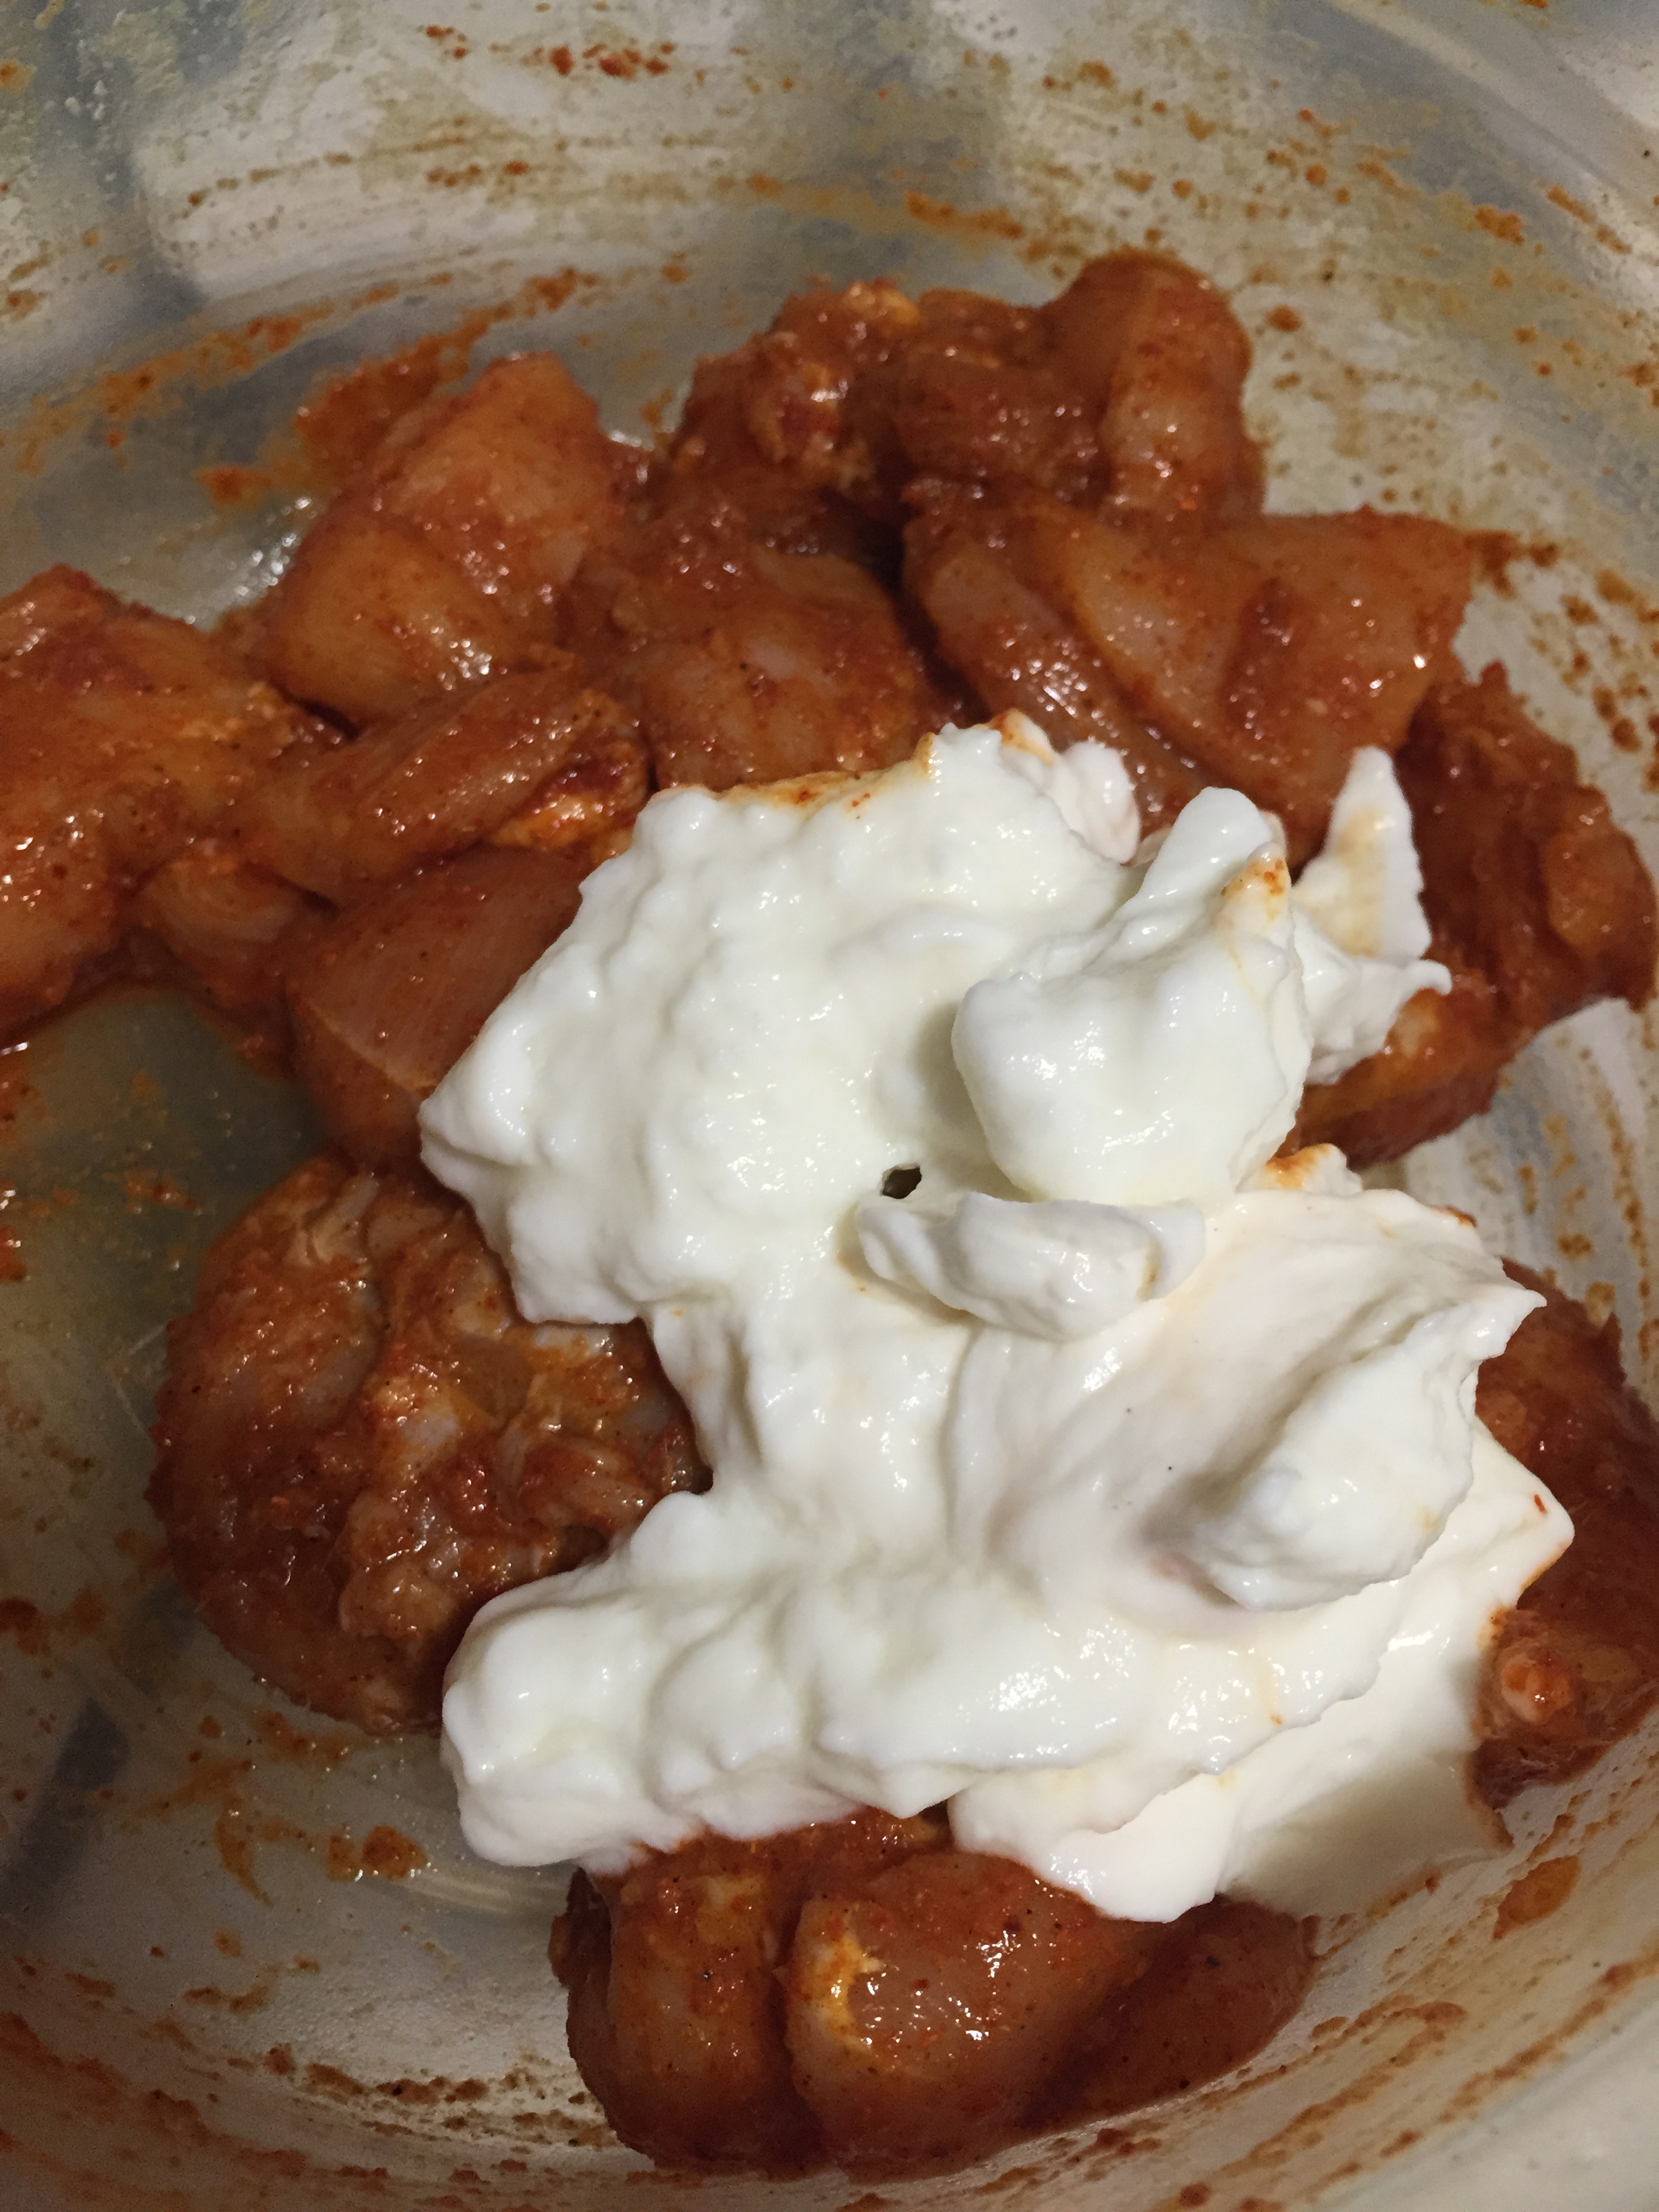
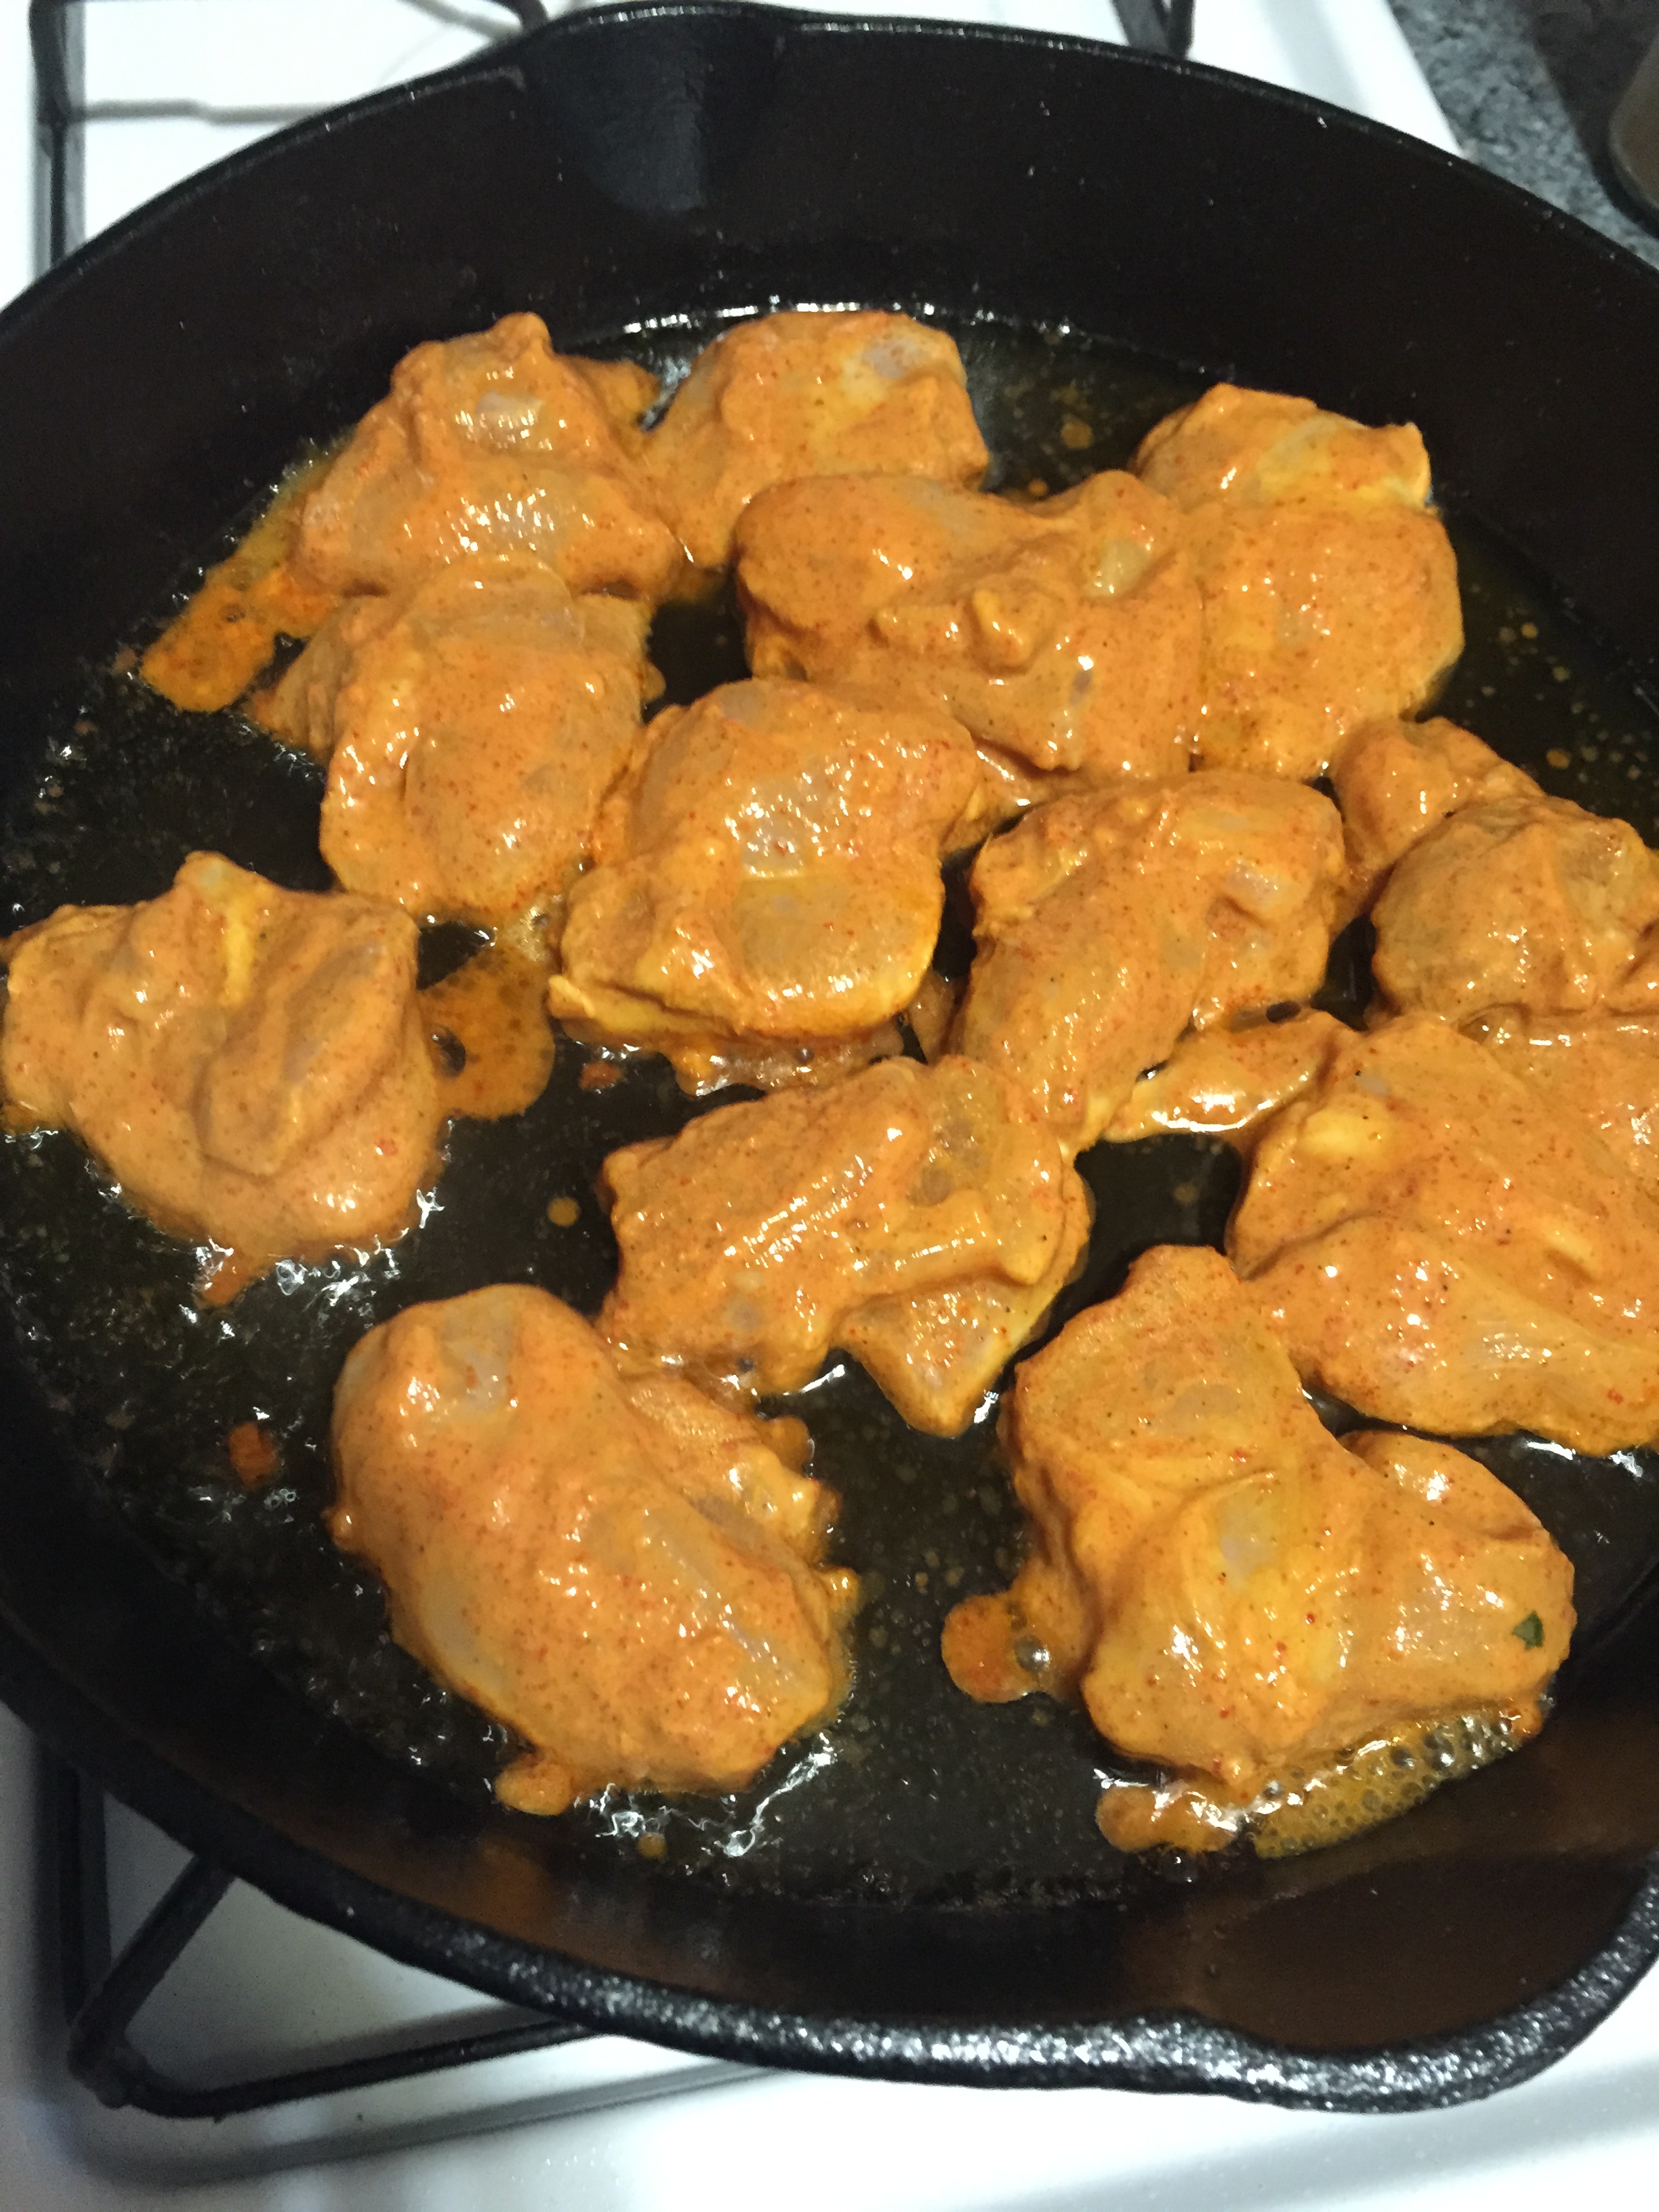
  3. Add the spice powders (turmeric, chilli, coriander, garam masala), enough salt, lemon juice, green chilli paste, ginger garlic paste, ground garam masala spices (if you haven’t add already) and yogurt to the mixing bowl. Mix well and check for salt – this is the right time to check salt for your marinade and adjust according to your taste.
  4. Add the chicken, chopped mint and cilantro and oil to the mixing bowl, mix well and refrigerate overnight.
Step 2:
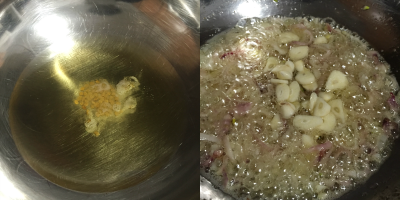
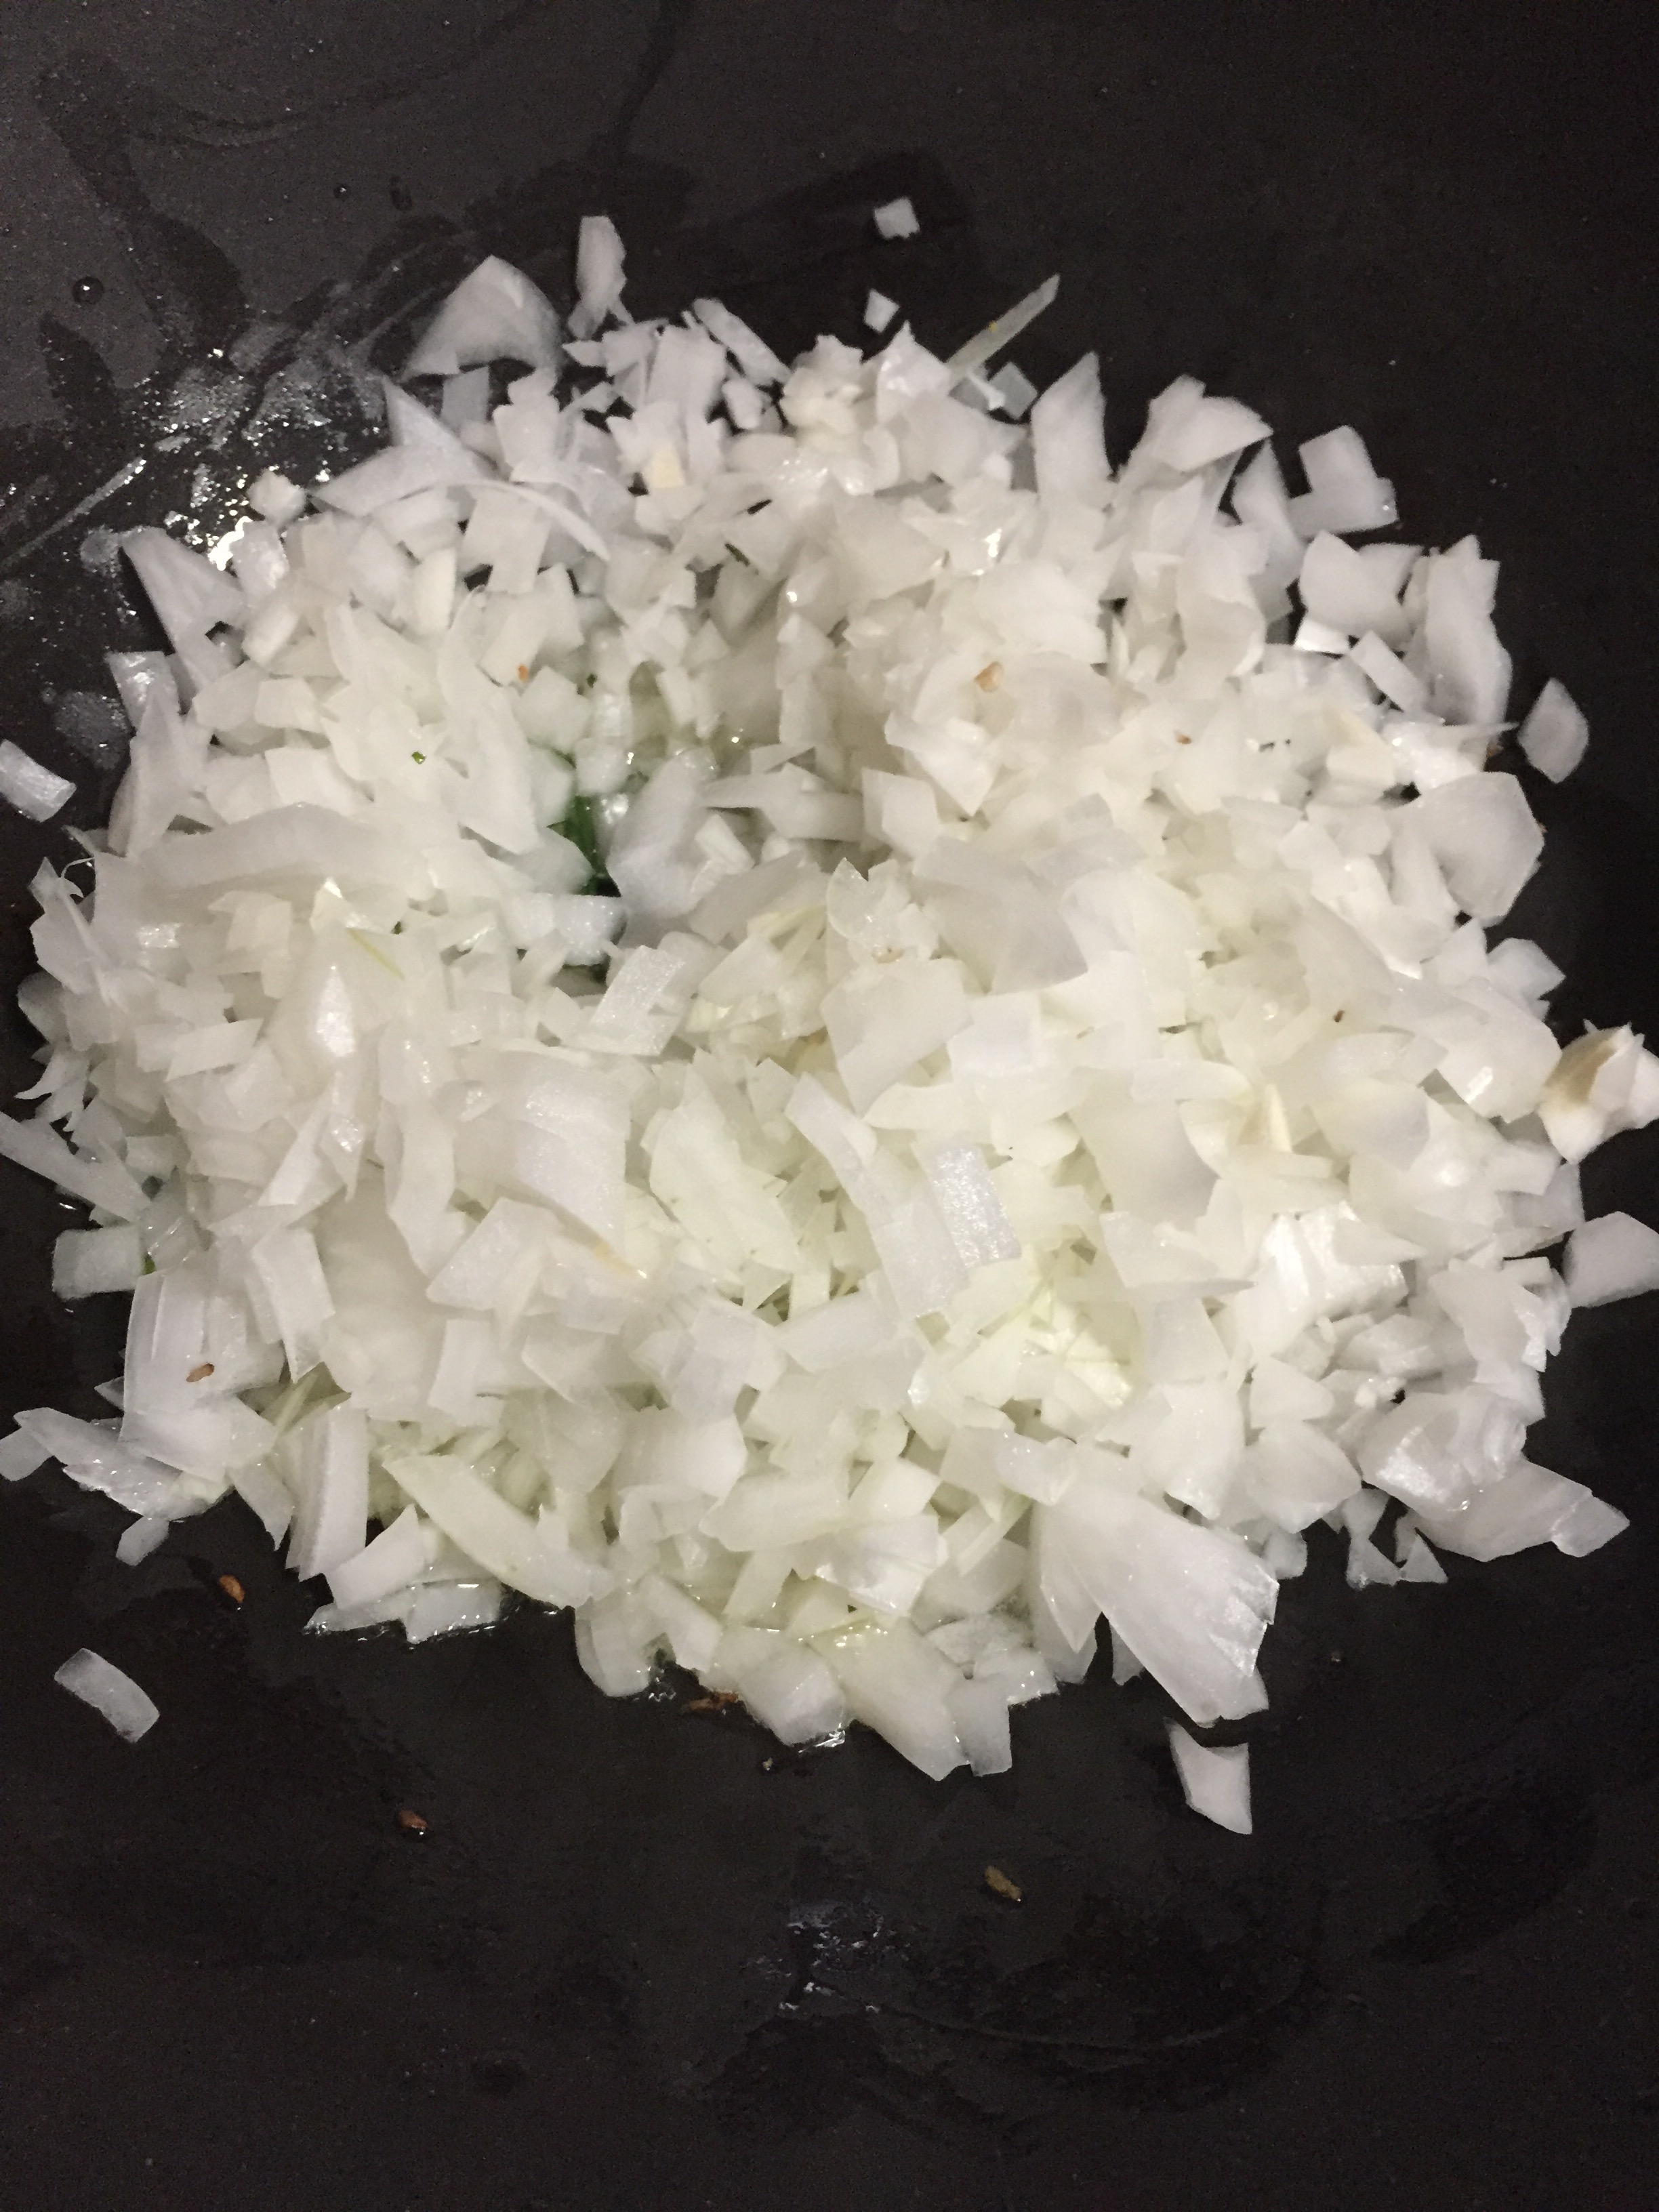
  1. Heat enough oil in a kadai and fry the onions until golden brown – I used 1 ½ small sized onion for the whole biriyani.
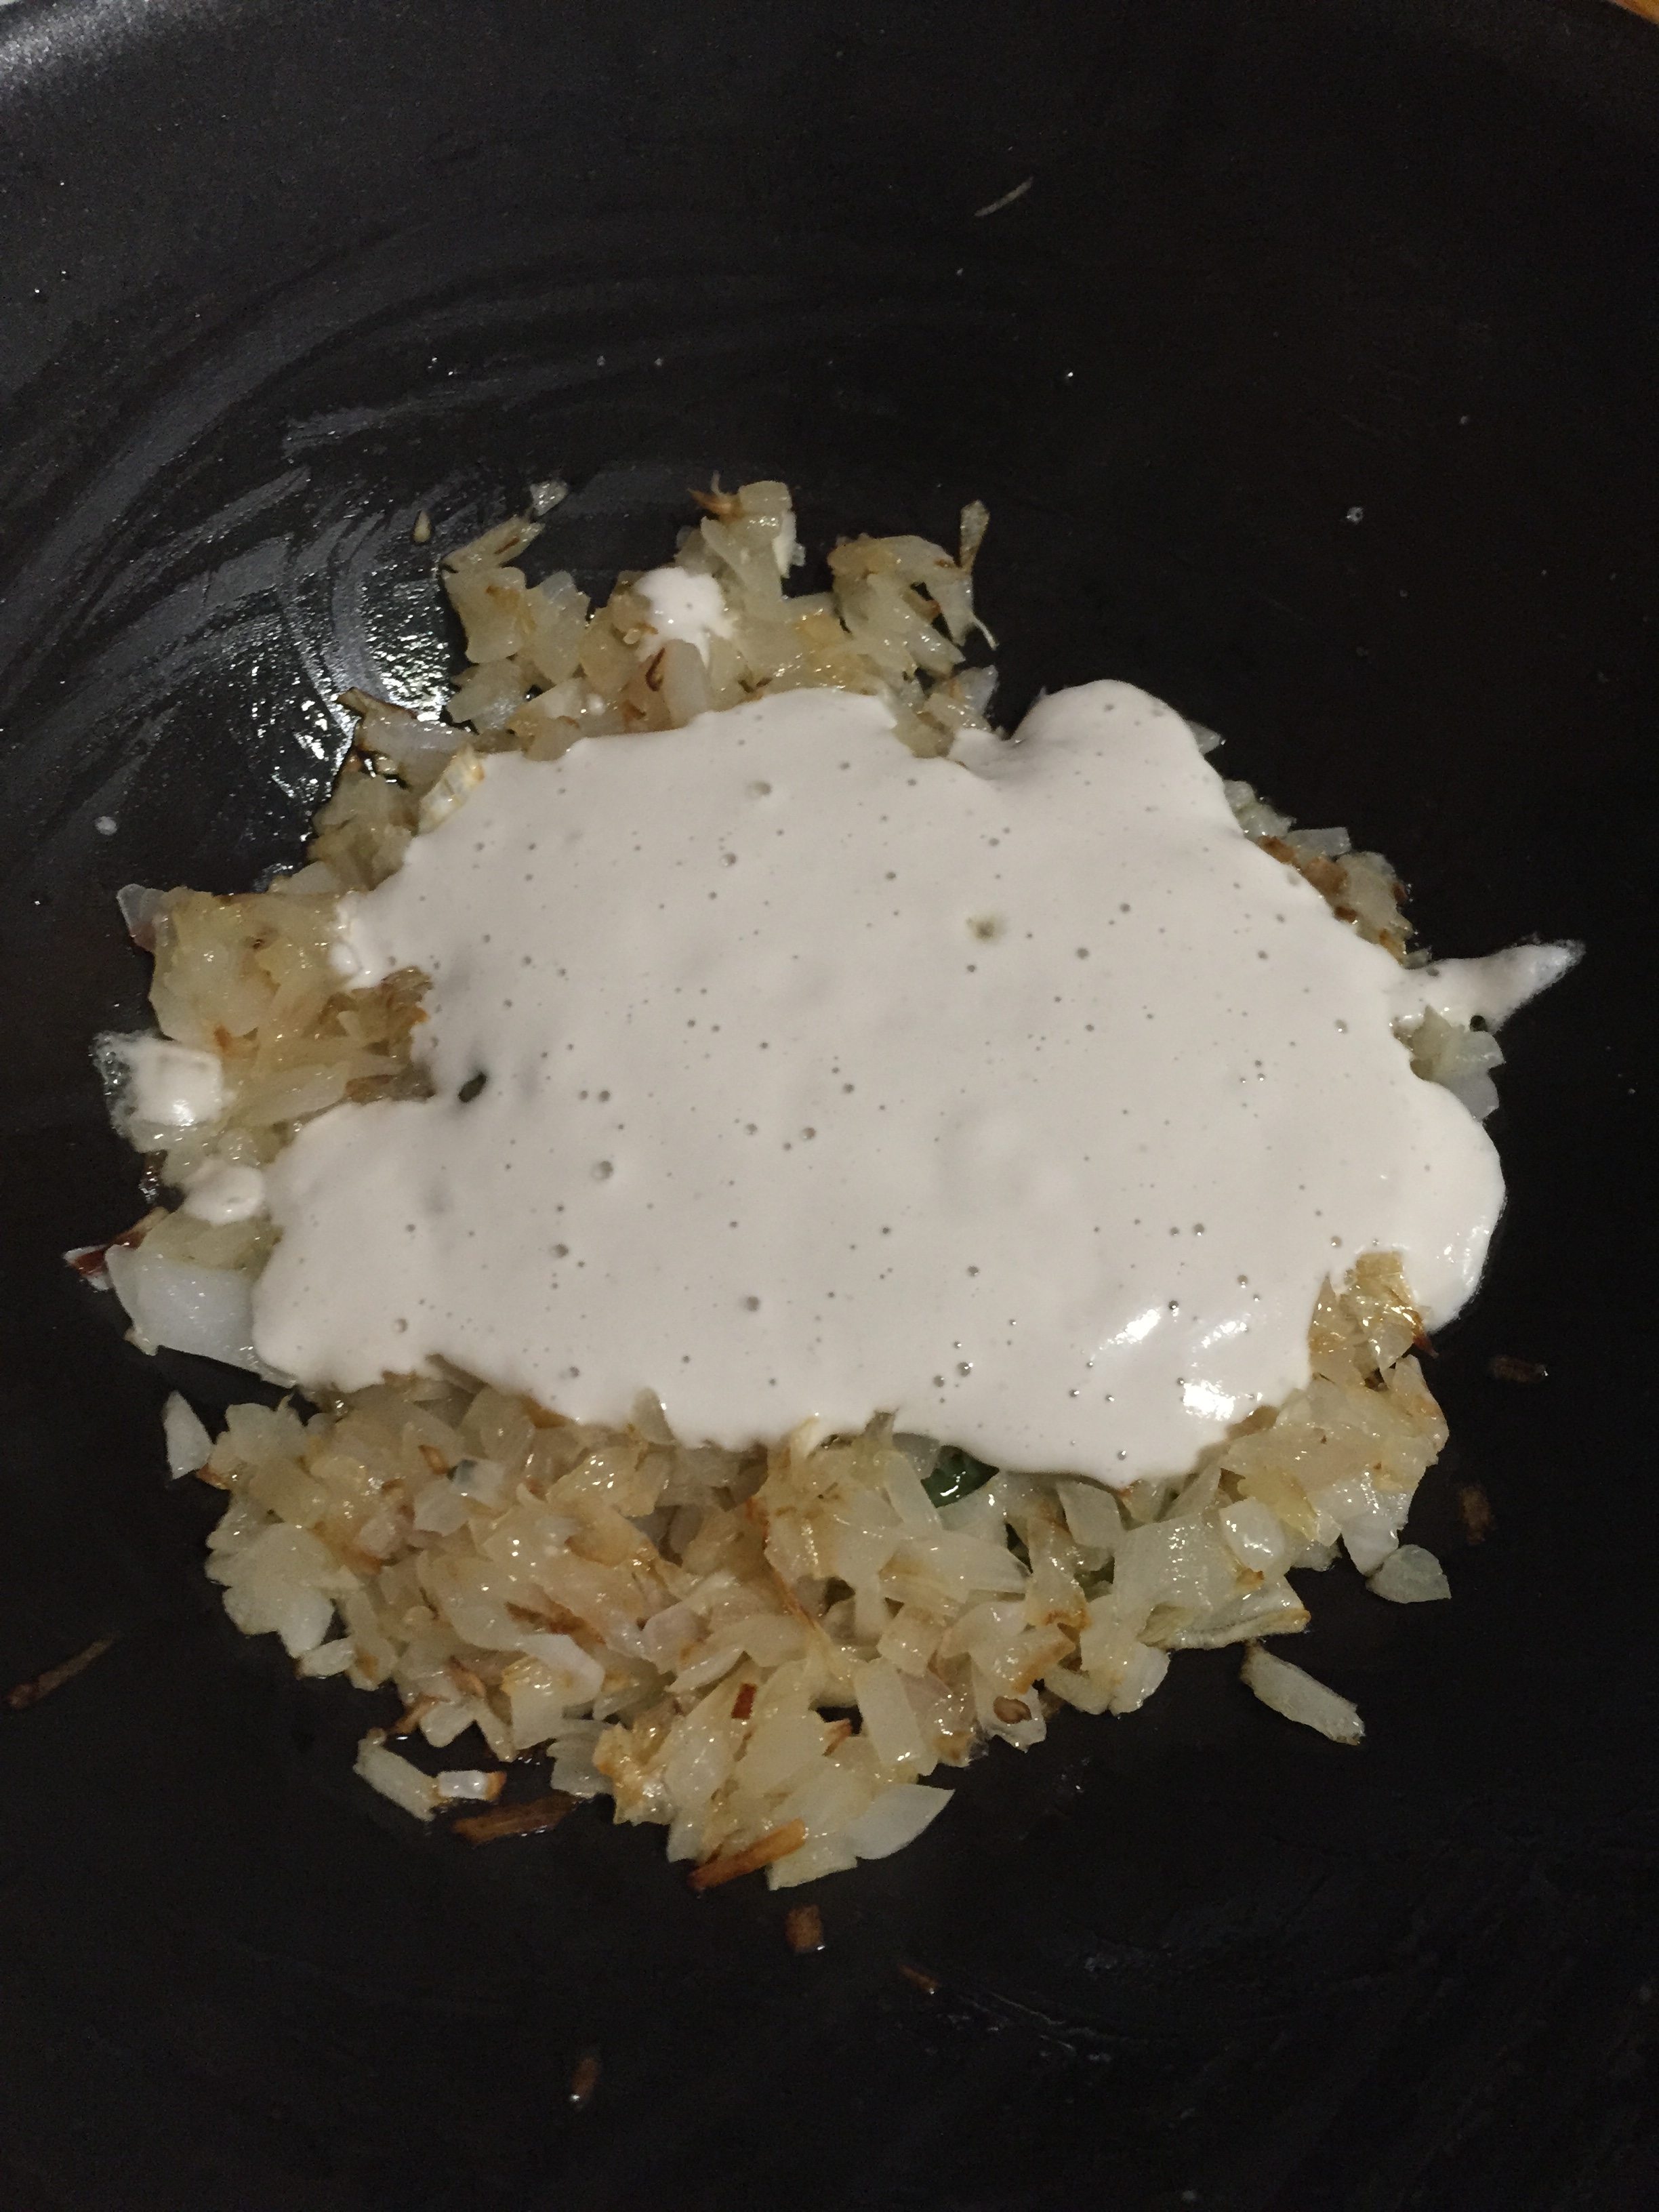
  2. Add ⅓ of the fried onions to the marinated chicken. Mix well and keep it aside.
  3. Soak saffron strands in warm milk and keep it aside.
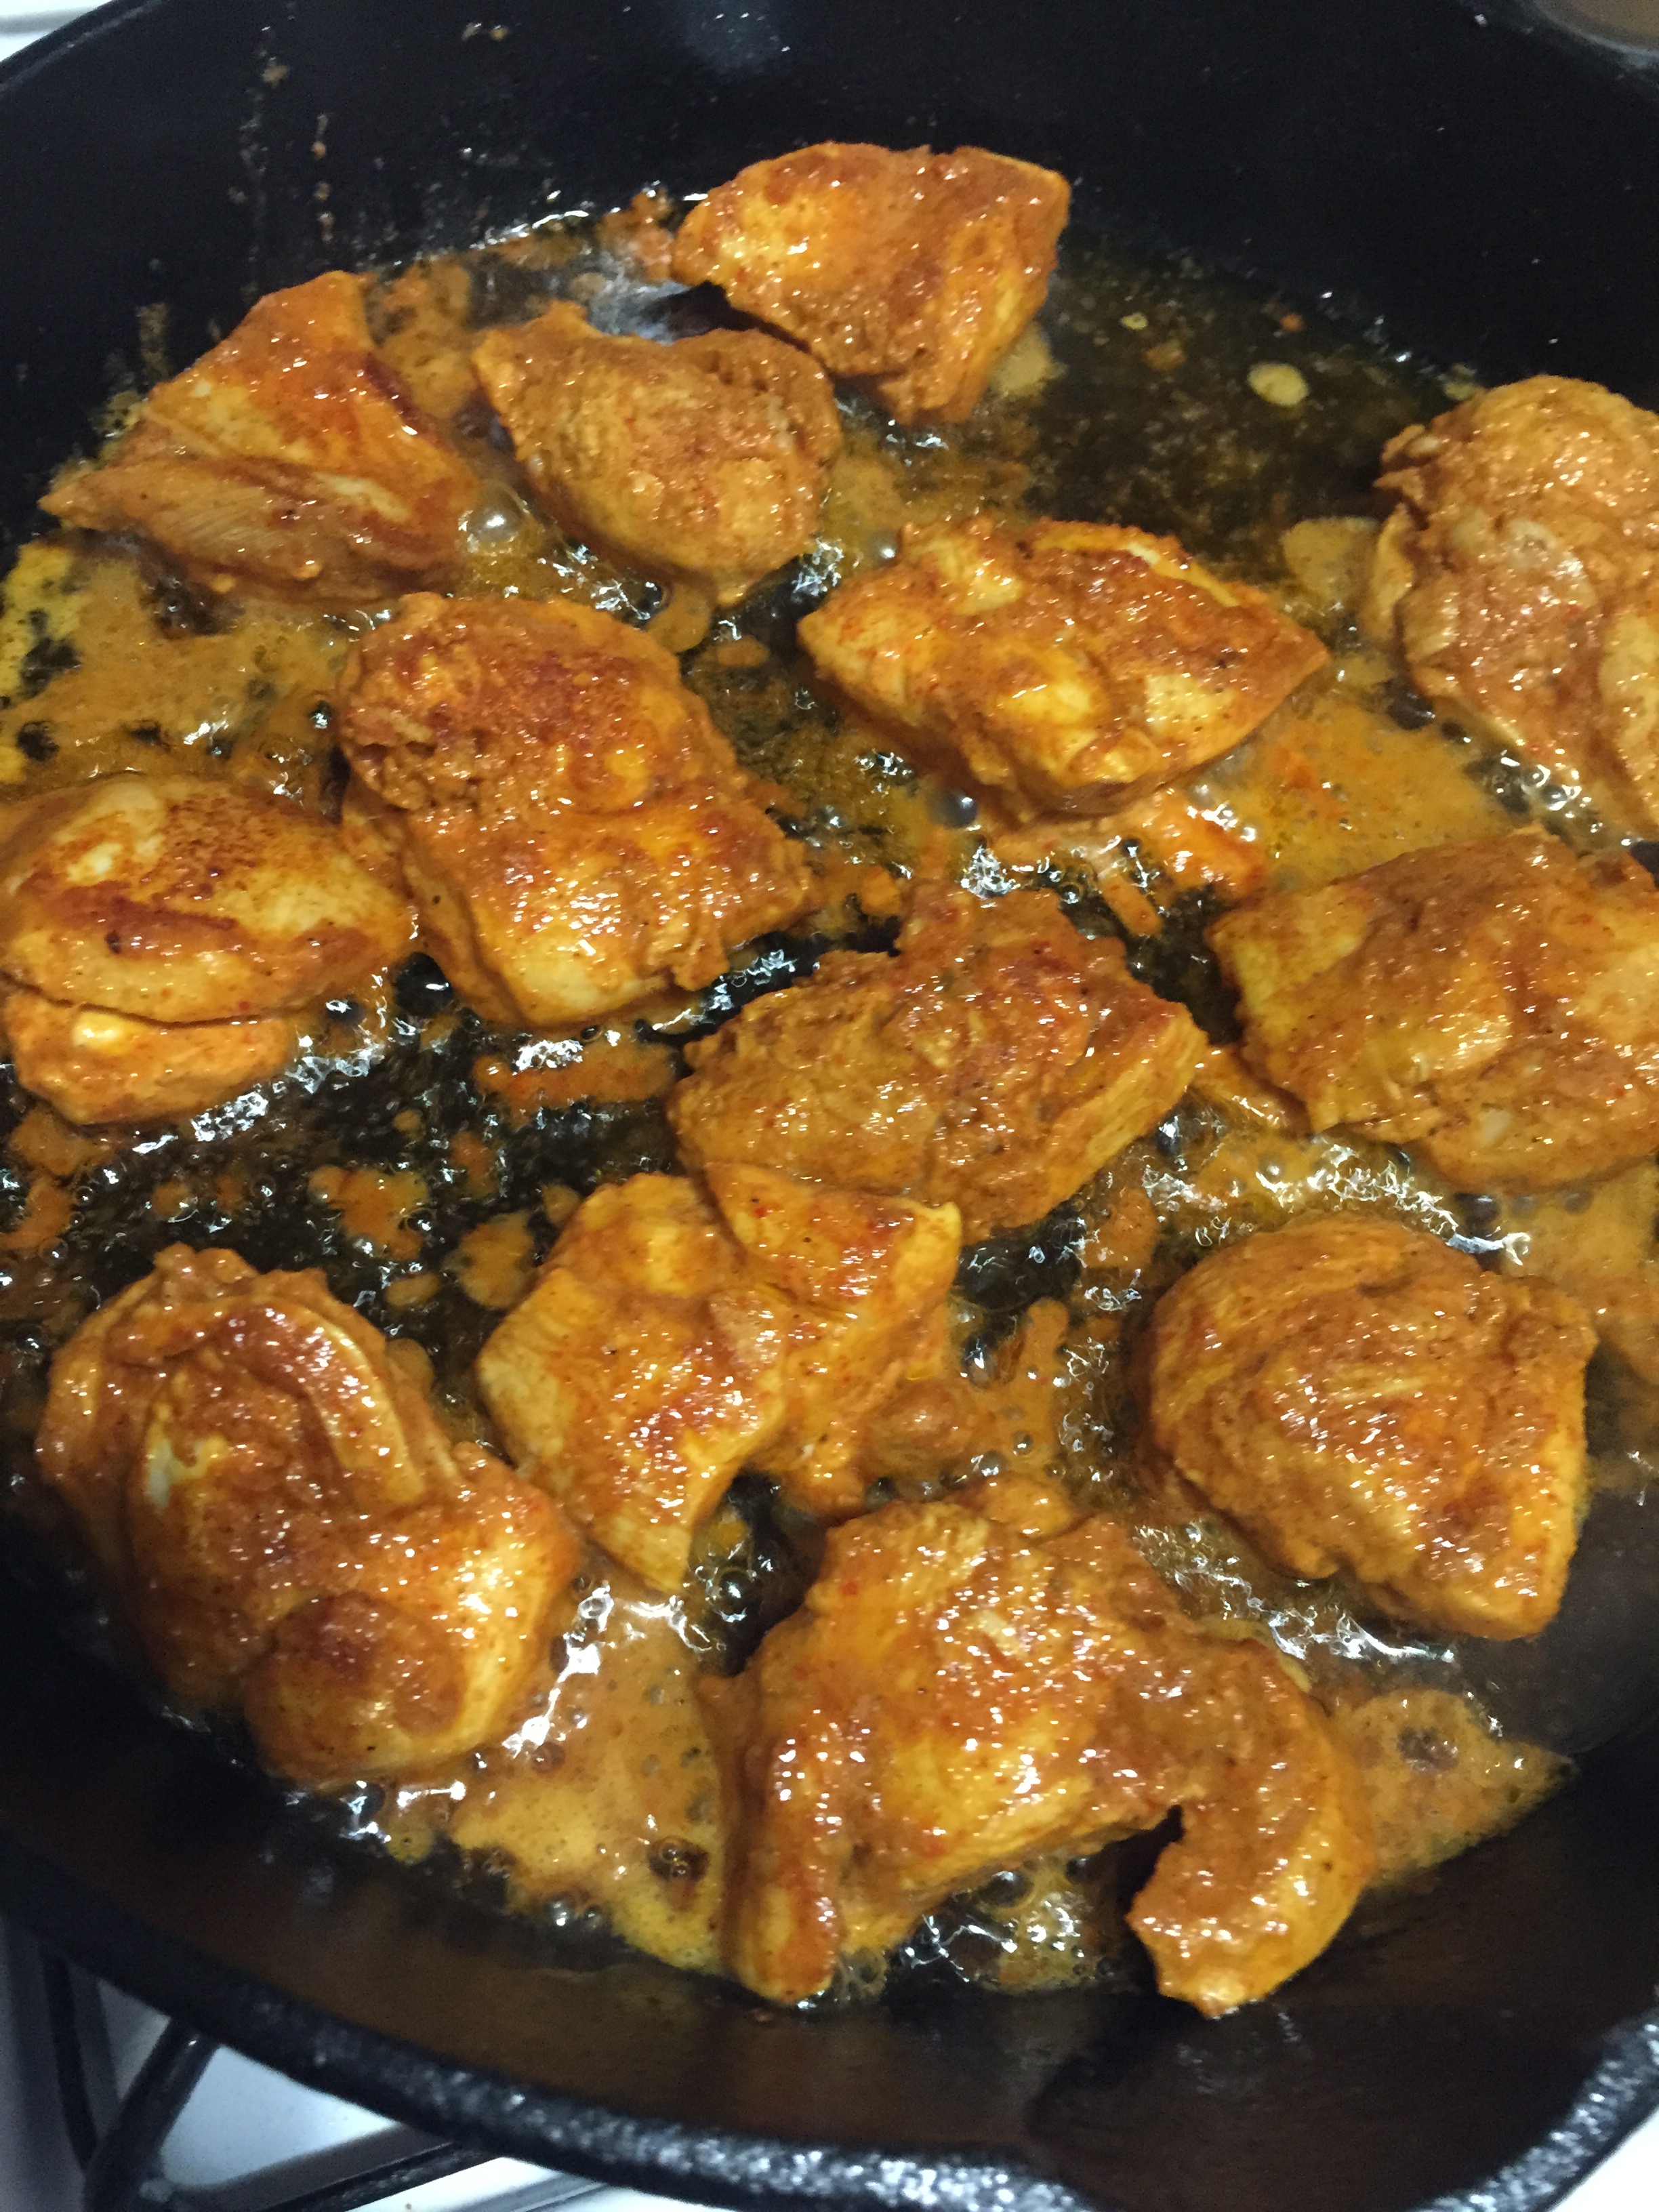
  4. Arrange all the chicken pieces in a biriyani handi or any large thick bottomed sauce pan. Arrange in such a way that all the pieces touch the base of the vessel. This is layer 1.
step 3:
  1. Soak the rice for at least 20 minutes. Boil enough water in a large deep vessel to cook the rice. When the water starts to boil add shahi jeera, bay leaves, oil (used to fry onions) and salt. Check for salt at this time. – adding salt right now is the very important step in making this dum biriyani. The water has to be little salty.
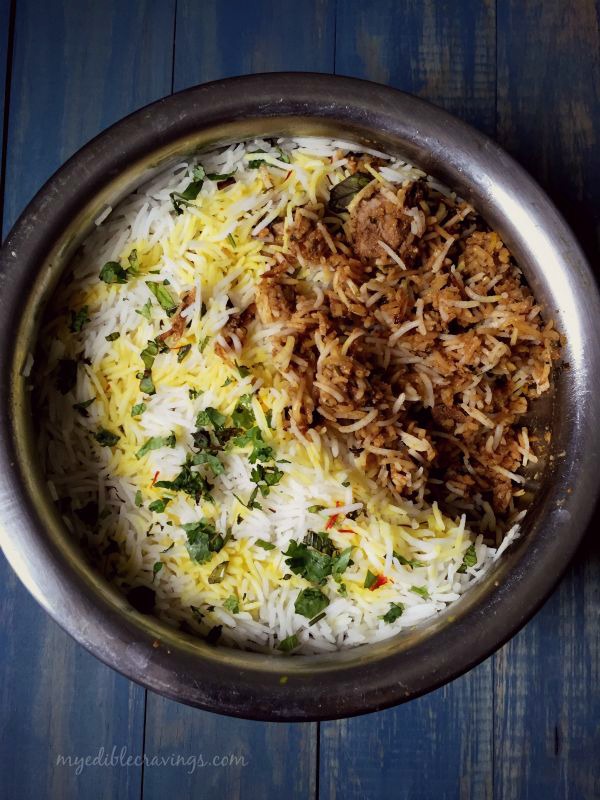
  2. Add the soaked rice to the boiling water. Cook until the rice grains starts to dance on top. That’s when you know the rice is 70% cooked. Filter half of the 70% cooked rice, drain all the excess water and layer it on top of the chicken layer. Garnish with some fried onions, chopped cilantro and mint on top. This is Layer 2.
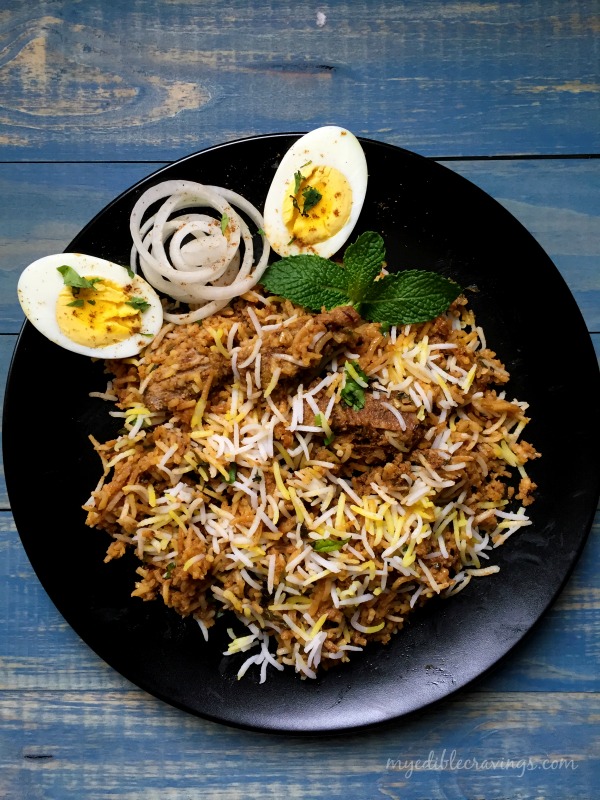
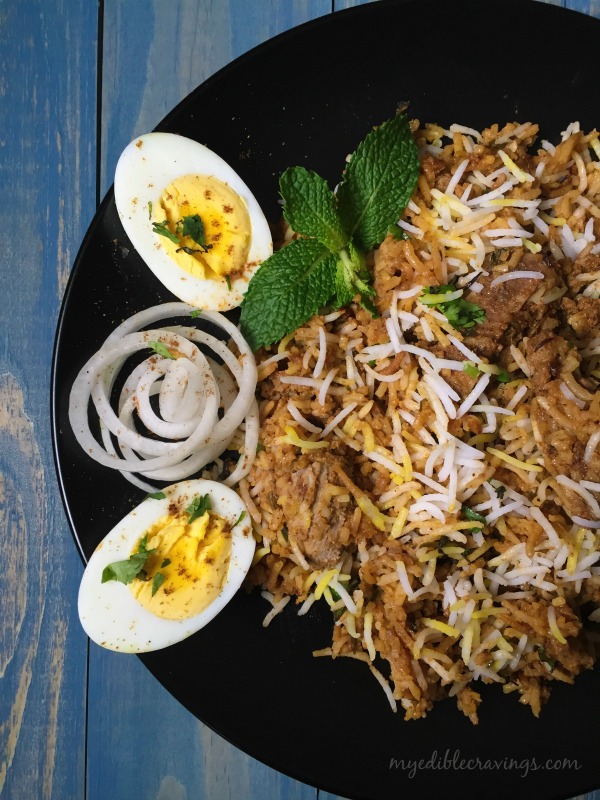
  3. When the rice is 100% cooked, strain all the excess water completely and layer them again on top of layer 2. Garnish with the remaining fried onions, mint and cilantro. Add drops of saffron milk on top to give color and nice aroma to the biriyani. Finally spread few tsps of ghee on top. This is layer 3 - Always stay close while cooking the rice by boiling method. Because rice cooks really quick in this method.
  4. Now fill the rim of the lid with chapathi dough and cover it tightly without leaving any gap or holes. Otherwise if you are using a flat plate (without handle) as a lid, cover the plate and place some weight (fill water in a large vessel or 5 ltr cooker) on top.
step 4:
  1. Place the biriyani handi or vessel on stove top and cook on high flame for 5 minutes (Meanwhile heat a dosa pan in a medium flame in a separate burner) and on low flame for 10 to 15 minutes.
  2. After overall 15 to 20 minutes of cooking on direct flame, take out the handi and place it on top of the hot dosa pan which is still on medium flame. Allow the biriyani to dum for 20 minutes.
  3. Switch off the flame and leave it for 10 minutes.
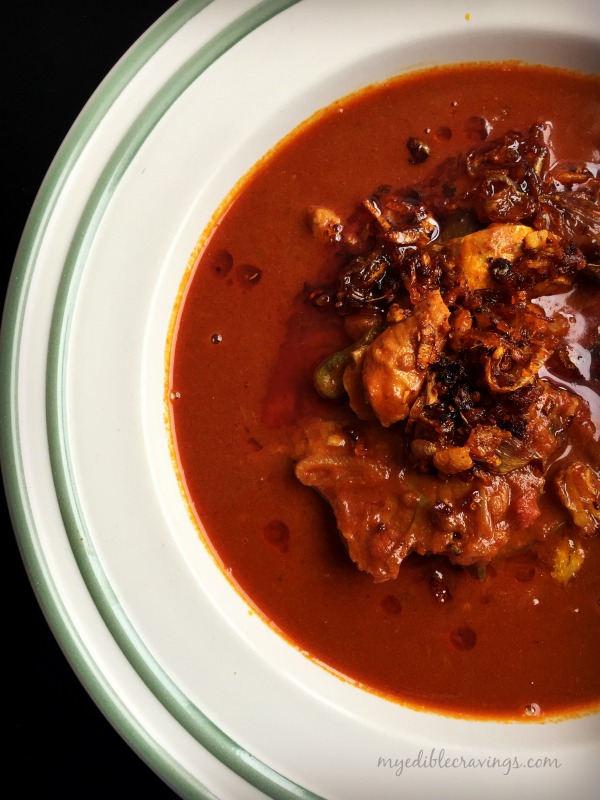
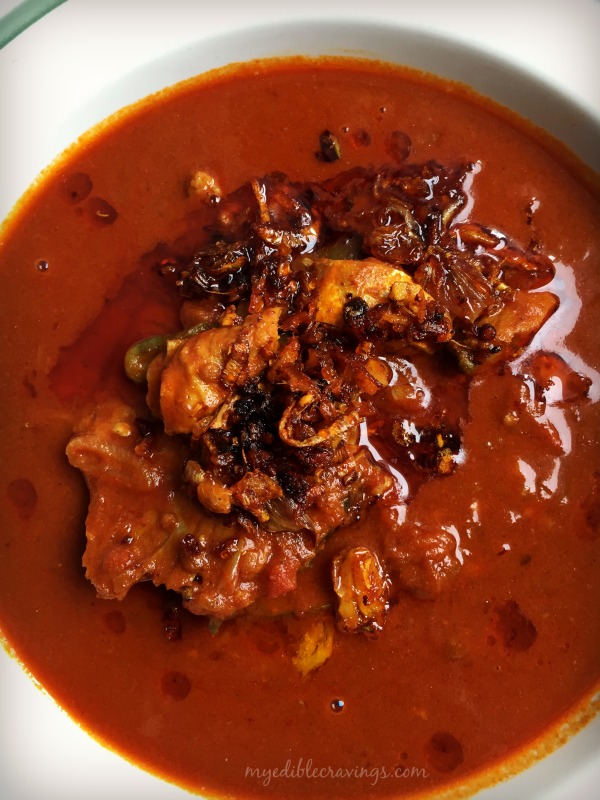
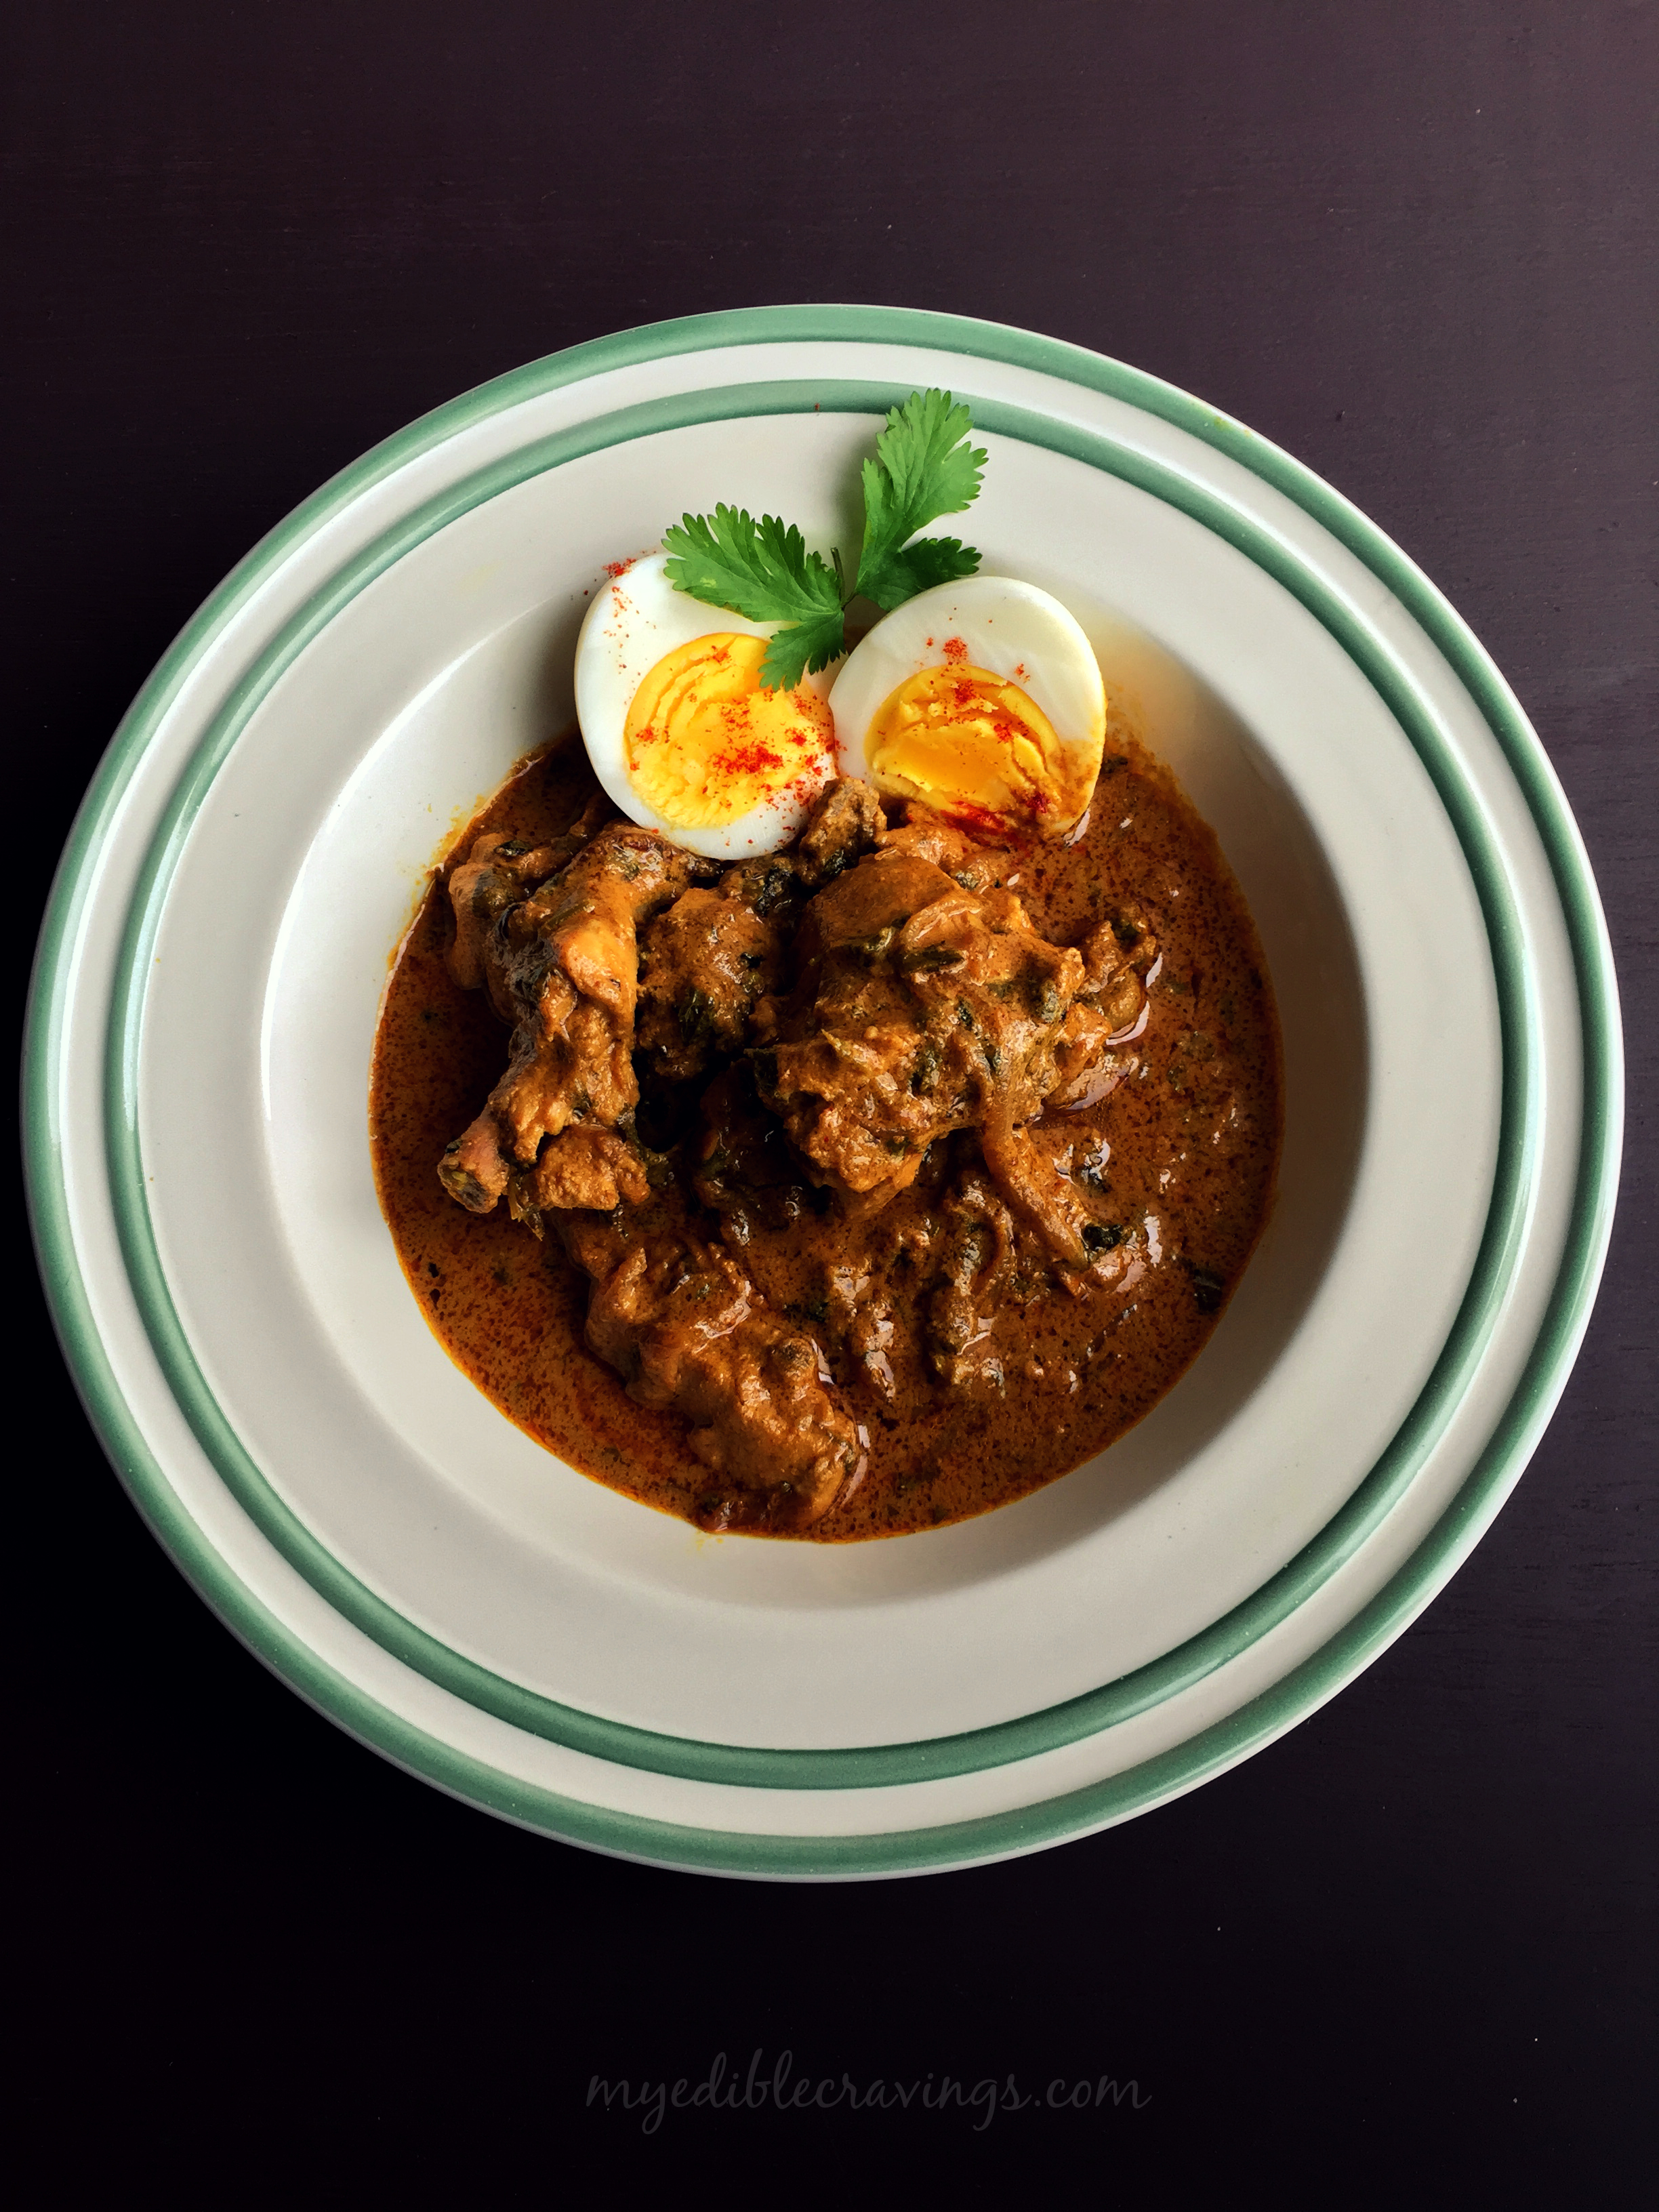
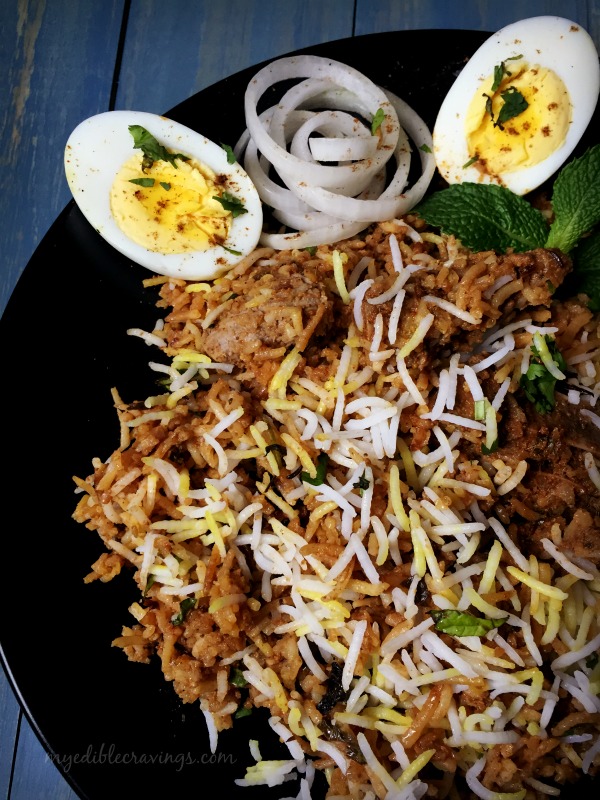
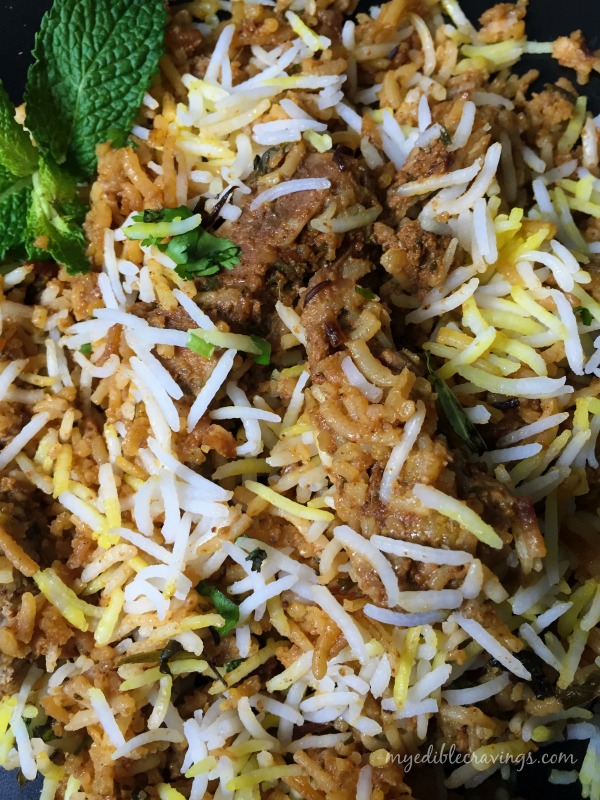
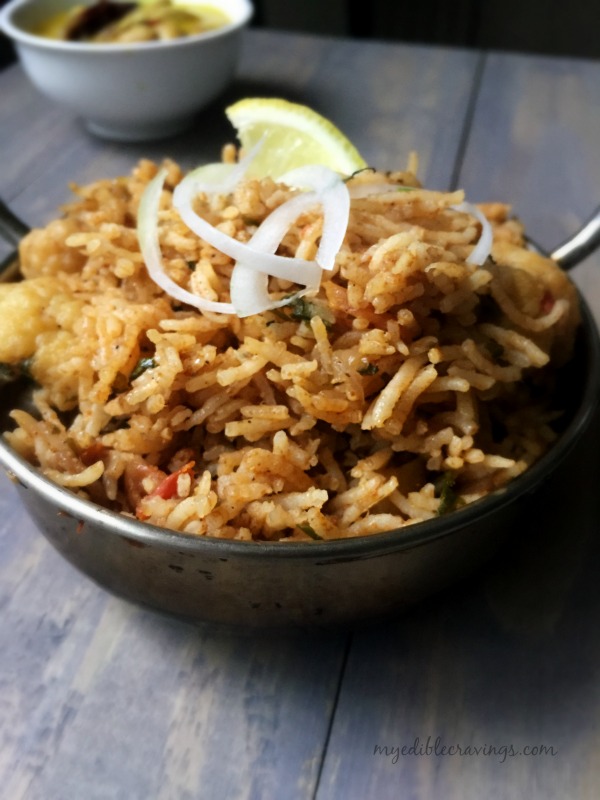
  4. Open the lid and check if the chicken is well cooked. The chicken texture has to be juicy and well done. The chicken should be completely cooked by now. Enjoy the yummy chicken dum biriyani with onion or mint raitha and salna! 
Notes
Tips:
1.Always use 1 ½ kg of chicken for 1 kg of rice. Here I used 2 cups (1/2 kg) of rice so I used 1 to 1⅓ kg (3 pounds) of chicken (ask for chicken (leg) pieces for biriyani at Indian meat shops).
2.Do not add too much of turmeric powder while marinating the chicken as it would change the color of the biriyani.
3.Always stay close while cooking the rice by boiling method. Because rice cooks very quickly in this method.
4.Do not add too much yogurt while marinating otherwise your biriyani becomes soggy.
5.Fried onion gives color for the biriyani. Always make fresh fried onions at home to get the best aroma and flavor on the biriyani. do not stir fry or shallow fry but deep fry with less oil.
6.Increase or decrease the quantity of the spices and other ingredients according to the quantity of biriyani you make. More the quantity, more the taste.
7.Cooking time differs for mutton biriyani. Tenderize the mutton for 3 hours or for at least an hour before marinating. Same cooking method. Dum it for extra 10 minutes. So that total cooking time will be 45 minutes.

hyderabad dum chicken biriyani

Egg Curry

­­­­­­­­­­­­

Egg CurryThere are times when you want to make a dish that you don’t normally give much thought about but kind of crave for it once in a while. Today I have posted one such dish that is a staple in almost all Indian homes. It is the Egg curry. Egg curry is a simple dish that consists of gravy and eggs, usually boiled. Variations are usually done with the gravy but here I have given a slight variation with the egg 🙂

IMG_1431

Egg CurryWhenever I am stuck with what to cook, Egg curry is the go-to gravy in our home. The curry in this dish is a blend of spices, each with their own unique flavor. And when all these spices come together in the gravy, it gives an appetizing aroma and a taste to match for. As I had mentioned earlier, the variation I had given with the eggs here is that instead of having them boiled, I have used them as omelets instead 🙂 The cooked omelets are rolled, cut and then dropped in the gravy, similar to how we do it for Dosa Kuzhambu.

IMG_1435Egg curry normally goes well with white rice and usually with no sides since the eggs themselves are the sides. Try this unique but very tasty Egg curry in your kitchen and if you think of an apt side dish to this gravy, please do share  🙂

Egg Curry
Recipe type: Main
Cuisine: Indian
Prep time: 
Cook time: 
Total time: 
Serves: 3
 
Ingredients
to dry roast and powder:
  • Fennel seeds – 1 tsp
  • Poppy seeds – 1 tsp
to grind:
  • Grated coconut – 2 tbsp
To temper
  • Oil – 2 tbsp
  • Mustard seeds – ½ tsp
  • Cinnamon – 1”
  • Cardamom – 3 nos
  • Cloves – 2 nos
other ingredients:
  • Shallots, chopped – 5 to 8 nos
  • Curry leaves – a sprig
  • Green chilli, slits – 2 nos
  • Tomato, finely chopped, big – 1 no
  • Sambar powder – 1 ½ tbsp
  • Mutton masala or egg masala – 1 tbsp
  • Salt as required
  • Cilantro for garnishing
to make omelet:
  • Eggs – 2 nos
  • Salt – a pinch
  • Shallots, finely chopped – 2 nos
Instructions
  1. Dry roast fennel seeds and poppy seed and allow them to cool. Make a paste of grated coconut adding little water.
  2. Heat oil in a pan and season with the above given ingredients
  3. Add shallots and sauté until they turn translucent.
  4. Meanwhile powder the dry roasted fennel and poppy seeds.
  5. Add green chilli and curry leaves. Give a quick stir
  6. Add in the fennel and poppy seed powder. Mix and stir for a few seconds.
  7. Now add in chopped tomato and sauté until they turn mushy.
  8. Add sambar power, mutton/egg curry masala and salt. Mix and cook for a minute.
  9. Add coconut paste, mix well and add enough water. Bring them to boil and cook for 5 minutes.
  10. Meanwhile beat eggs, a pinch of salt and a tbsp of finely chopped shallots.
  11. Make thin omelet (do not flip) and roll it. Cut vertically to 2 to 3 inch pieces like you do for dosa kuzhambu but little bigger.
  12. Add the omelet rolls to the gravy and cook for another couple of minutes. Switch off and garnish with cilantro. Enjoy! 

IMG_1437

Baked Fish Fry

baked fish fryToday I am posting a recipe that is a different take on one of the dishes that I had already posted before. It is one of my most favorite dishes among non vegetarian items and the version I have posted is a healthier alternative to the popular version known to many. it is the baked fish fry. I basically don’t prefer fried foods. So when I came to know of fish fry that can be baked I was stumped. Also baked fish fry can both be had as a snack as well as in a main course.

IMG_0333I first had baked fish fry at my friend’s house when we went there for dinner a few months back. I was so hooked to the dish that when we went there again, I personally requested her to prepare the dish while I was there so that I could learn the recipe 🙂 A big shout out to my dear friend 🙂 I love fish and any dish that can be made from fish. And when I learnt of a healthier alternative to frying it was a double bonanza 🙂 Baked fish fry is very easy to make. As with many of the non vegetarian dishes, especially dry varieties, marination is the key here. Beware of the consistency of the marinade. It should not be too thick or too watery. And, as passed down to me from my friend, vinegar is the key to get that tanginess in the fry. Also, make sure to get the marinade infused in the fish as much as possible.

IMG_0330I am planning to post the recipes for fish biriyani and chill fish in the near future and the baked fish fry is the main component in those dishes. Don’t forget to follow my blog for those amazing recipes. In case, you don’t have a conventional oven, you can also shallow fry the fillets instead of baking. BTW, Happy National Chocolate Cake Day. Have you all tried my chocolate cake recipe (which is by far the best dish I had baked in the last year, at least as attested by my friends :)) ?


Baked Fish Fry
Recipe type: Appetizer
Cuisine: Indian
Prep time: 
Cook time: 
Total time: 
Serves: 6 small pieces
 
Ingredients
For the marinade:
  • Ginger garlic paste - 1 tbsp
  • Red chilli powder - 2 tbsp
  • Clove powder - a pinch
  • Cinnamon powder - a pinch
  • Garlic powder - 1 tsp
  • Onion powder - 1 tsp
  • Black pepper powder - ½ tsp
  • White distilled vinegar - 1 tbsp
  • Salt as required
  • Vegetable oil - 1 tbsp
  • Corn flour - 1 ½ tbsp
  • Water - 2 to 4 tbsp
  • Tilapia fillet - 1 ¾ lb
Other ingredients:
  • Lemon – 1 no
  • Curry leaves – a sprig
Instructions
  1. Grind cinnamon and clove separately and make powders of them if you don’t have store bought at home. Make a paste of ginger and garlic and keep it ready.
  2. Mix all the above given ingredients under marinade together to a thick paste and check the seasoning. Add extra salt and spice if needed at this stage. Drizzle water at last to get the right consistency – do not add too much water otherwise the marinade won’t stick to the fish while baking.
  3. Add the fish fillets to the marinade and give a good massage for at least 20 minutes. Leave it to rest overnight or for at least half an hour.
  4. Pre-heat the oven to 350 degree Fahrenheit. Spray or brush enough olive oil on the aluminum sheet.
  5. Place the marinated fish fillets on top of the sheet and spray olive oil on them as well. Bake for 5 to 8 minutes.
  6. Flip the fish fillets and spray the other side of the fillets with olive oil and cook for another 5 to 8 minutes.
  7. Set the oven in broiler and bake for couple of minutes more to get the crispiness.
  8. Remove from the oven and enjoy with lemon wedges on the side. You could also season curry leaves and toss them on top of the fish to add extra flavor to the dish.
  9. Enjoy them as is as a snack or have them along with white rice and fish gravy ! 🙂

baked fish

Dhoodh Shahi Murgh

Creamy ChickenI am always interested in trying out different recipes and am on the lookout for the same. That is how I found today’s recipe, an unique chicken gravy that is a sort of fusion dish (will elaborate on this shortly) I would say. It is called the Doodh Shahi Murg which means chicken cooked with milk. The main ingredients in this recipe, apart from milk are, koya and heavy cream.

creamy chickenDoodh Shahi Murgh is a rich gravy that makes you feel heavy even when had in small servings. The preparation of this dish is unique in the sense that the ingredients used are all Indian but the cooking method closely resembles continental style i.e., similar to pasta or cannelloni. In Doodh Shahi Murgh, the meat (chicken) is first cooked (shallow fried here), then a layering gravy made from milk, khoya and heavy cream is poured over the chicken and then baked. The resulting Doodh Shahi Murgh is a mouth watering, rich chicken gravy.

Chicken dhoodh shahi murghcreamy chickenDoodh Shahi Murgh is an excellent accompaniment for naan, chappathi, parotta etc. It has a slight sweetness to it because of the milk and koya. I admit that the time taken to prepare Doodh Shahi Murgh is a bit longer than most other gravies but do believe me when I say that the taste is worth all the time spent. Try this exotic, rich Doodh Shahi Murgh in your kitchen and do let me know your favorite accompaniment to it.


Chicken Dhoodh Shahi Murgh
Recipe type: Main
Cuisine: Fushion
Prep time: 
Cook time: 
Total time: 
Serves: 4
 
Ingredients
To marinate:
  • Chicken – 1 cup
  • Ginger garlic paste – 1 tbsp
  • Turmeric powder – ½ tsp
  • Lemon juice – from 1 lemon
  • Cumin powder – a generous pinch
  • Salt as required
  • Red chilli powder – 1 tsp
  • Garam masala powder – 1 tsp
  • Hung yoghurt, beaten – ½ cup
For the gravy:
  • Ghee – 1 tbsp
  • Green chilli slits – 2 nos
  • Onion, medium, finely chopped – 1 no
  • Cashew paste – 2 tbsp
  • Sweetened khoya – 1 to 1 ½ tbsp
  • Milk – 1 cup
  • Cumin powder – ½ tsp
  • Cardamom powder – a pinch
  • White pepper powder – ½ tsp
  • Black pepper powder, freshly ground – ½ tsp
  • Salt – a generous pinch
  • Fresh cream – 1 tbsp
  • Grated cheddar cheese – for garnishing
Instructions
  1. Wash the chicken pieces and drain all the excess water. Add in ginger garlic paste, turmeric powder, lemon juice and mix well.
  2. Now add cumin powder, salt and garam masala powder. And again mix well.
  3. Finally add the beaten hung yoghurt, mix well and leave it for at least 20 minutes.
  4. Heat a wide pan with oil and add green chillies. Sauté well until the outer layer turn white.
  5. Add in finely chopped onions and sauté until they turn translucent or golden brown.
  6. Meanwhile heat a flat skillet with 2 tbsp of oil and add marinated chicken one by one onto the skillet. Shallow fry the chicken pieces until one side is done.
  7. Now in a low flame add in cashew paste and mix well. Cook until the raw smell disappears stirring constantly. Cashew paste tends to stick to the bottom. So constant stirring is required.
  8. Meanwhile check if the chicken pieces are cooked on one side and flip them to cook on the other side.
  9. Add in sweetened khoya when the raw smell of cashew disappears. Mix well.
  10. Now add a cup of milk and mix well. Cook for a minute.
  11. Add cumin powder, cardamom powder, pepper powder and salt. Mix well and cook until the sauce is semi thick and well cooked. Switch off the flame.
  12. Add a tbsp of fresh cream to the sauce and mix it well.
  13. Preheat the oven to 500 degrees Fahrenheit or 320 degrees Celsius.
  14. By the time your chicken will be well cooked on both sides. Take out the chickens using tongs and place them on a oven safe flat bowl.
  15. Pour the sauce on top of the chicken pieces and make a layer.
  16. Grate the cheddar cheese on top of the sauce.
  17. Place the bowl inside the oven and leave for 10 minutes or until you see the cheese melt and turns golden brown on top. Enjoy this creamy chicken dhoodh shahi murgh with parotta or romali roti! 
Notes
To make hung yoghurt, place your strainer lined with muslin cloth or paper towel inside of a bowl. Pour enough amount of yoghurt in. place it in the refrigerator for an hour. Or just rotate the muslin cloth and gently squeeze the excess water (i.e. Whey) using your hand.

creamy chicken

Vegetable Biriyani

Vegetable Biriyani

Vegetable Biriyani is the vegetarian counterpart of the more popular Biriyani, which generally refers to the variety with meat. Back home, during family functions like marriages, baby showers etc we don’t normally serve meat in the menu. But to mark the grandeur of the function we serve vegetable Biriyani as one the dishes.

Vegetable BiriyaniVegetable Biriyani is popular in my home state, Tamilnadu. Honestly, I have not seen it in any other part of India. I would say it is a healthy dish since you add vegetables (English vegetables like carrot, beans, potatoes, peas etc) in abundance. You can also add fried bread pieces and that tastes good too.

Vegetable BiriyaniVegetable BiriyaniThe recipe for Vegetable Biriyani that I have given below does not have coconut milk as one of the ingredients and it tastes just as good as the one with coconut milk added. I have slightly modified Mom’s recipe and have presented it here. Try this tasty and rich Vegetable Biriyani in your home and let me know your experience:)

Vegetable Biriyani
Recipe type: Main
Cuisine: Indian
Prep time: 
Cook time: 
Total time: 
Serves: 4
 
Ingredients
  • Ghee + olive oil - 2 tspn + 2 tbsp
  • Homemade biriyani powder + big bay leaf - 1 tsp + ½
  • Onions, small – 2 nos
  • Freshly ground ginger garlic paste - 1 ¼ tbsp (I used organic garlic from trader’s joe)
  • Big ripe tomatoes - 1 ¼ nos
  • Cauliflower, medium sized potato (cut and soaked in turmeric water) - ½ + ½
  • Green chilli, long, slits - 9 nos
  • Chopped mint and coriander leaves - ½ cup
  • Salt - 1 ¾ spoon
  • Sakthi biriyani powder - ½ tsp
  • Coriander powder – 1 ¼ tsp
  • Homemade sambar powder - ½ spoon
  • Aachi red chilli powder - ¾ tsp
  • Garam masala powder - a generous pinch
  • Water, used to soak rice - 3 cups
  • Basmati rice - 2 cups
For garnishing:
  • Chopped mint and cilantro - 1 tbsp
  • Sakthi biriyani powder - a pinch
  • Ghee - a tsp
Instructions
  1. Wash and soak basmati rice in water for 45 minutes. Drain and save the water.
  2. Chop the vegetables and soak it in turmeric water.
  3. Cut and chop onions, tomatoes, mint and cilantro.
  4. Heat a pressure cooker with ghee and oil. Add biriyani powder and bay leaf.
  5. Increase the flame to medium and add onions. Sauté until they turn translucent. add ginger garlic paste and sauté until raw smell disappears. Add tomatoes and cook for a couple of minutes. When they turn mushy add in the vegetables. Stir for a minute and add in green chillies, chopped mint and cilantro. Stir well for a couple of minutes and add all the masala powders. Mix well and add water. check for salt and bring it to boil. Add the soaked rice and allow them to boil. When the water is ¾ th observed and when you see the rice on top, garnish with mint, cilantro, sakthi biriyani powder and ghee especially on the sides. Cover the lid and dum cook in low flame for 10 minutes.
  6. After 10 minutes open the lid and check if the rice and vegetables are well cooked and all the water is observed.
  7. Serve hot with any raitha of your choice. Enjoy!!! 
Notes
1.Always use freshly ground ginger garlic paste to reach a good taste.
2.You can substitute olive oil with vegetable oil.
3.I tried using organic garlic for this recipe. You could use the regular one.

Vegetable Biriyani

Fish Fry

Fish fry

Fish fry is the most popular dish among seafood in every Indian cuisine (as long as non vegetarian items are permissible). It is a very simple dish that stays true to its name i.e., fish that has been fried in oil. As I had mentioned in my fish gravy post, fish is one of my most favorite foods and anything made with it is a no brainer for me. I have been trying to make the perfect fish fry for quite some time and the problem for me was that I could not get the right fish variety. Most recently, I got to buy king fish (the one used back home for fish fry) and to my delight the fry I made from it turned out to be almost perfect ( 🙂 I will never say any of my dishes to be perfect since I always feel that there is still room for improvement) .

Fish fryFish fryFish fry is very popular back home and you can see vendors selling them along with other delicacies in beaches and as cart foods on streets. There are so many recipes to make fish fry but the one I have posted here is really simple. All you need are chilli powder, salt and lemon juice. For health conscious people out there, you can shallow fry instead of deep frying the fish. Fish fry with fish gravy is an awesome combination. You can also have it as an appetizer or as an evening snack  🙂

Fish fryTry this simple and tasty fish fry in your kitchen and do let me know which method you prefer, deep fried or shallow fried?

Fish Fry
Recipe type: Appetizer
Cuisine: Indian
Prep time: 
Cook time: 
Total time: 
Serves: 2 fish pieces
 
Ingredients
  • Red chilli powder – 1 ½ tsp
  • Salt as required
  • Lemon juice – 1 tsp
  • Fish – 2 pieces ( I used seer/king/vanjiram fish)
  • Oil – 2 tbsp
Instructions
  1. Wash the fish thoroughly with little turmeric powder to get rid of the raw smell.
  2. Make a thick paste of red chilli powder, salt and lemon juice. Check for salt and spiciness.
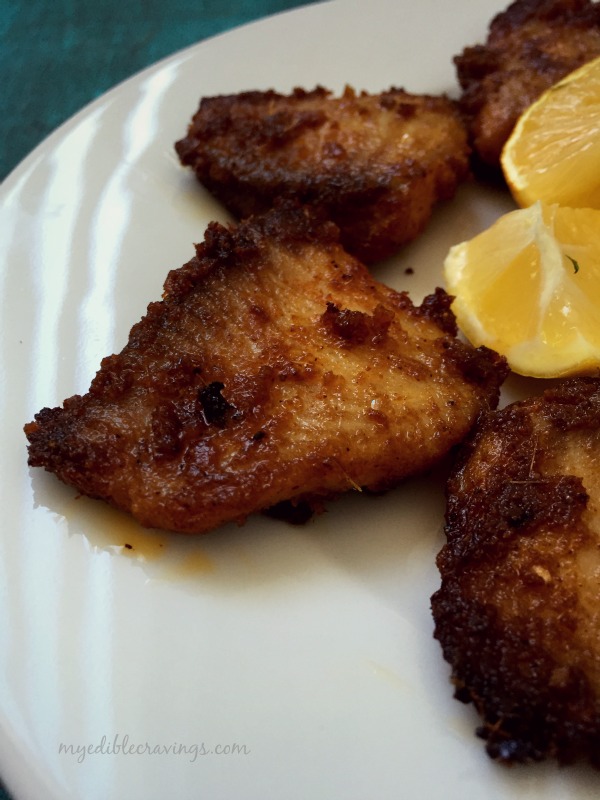
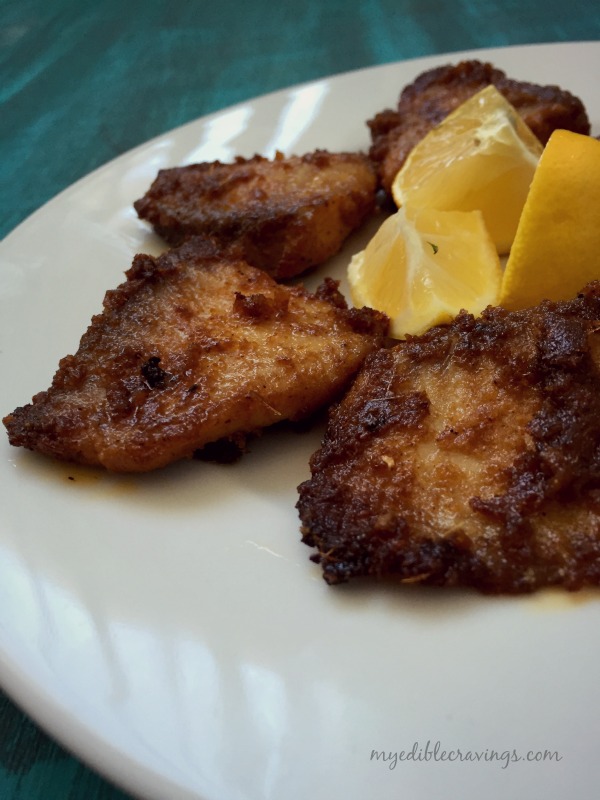
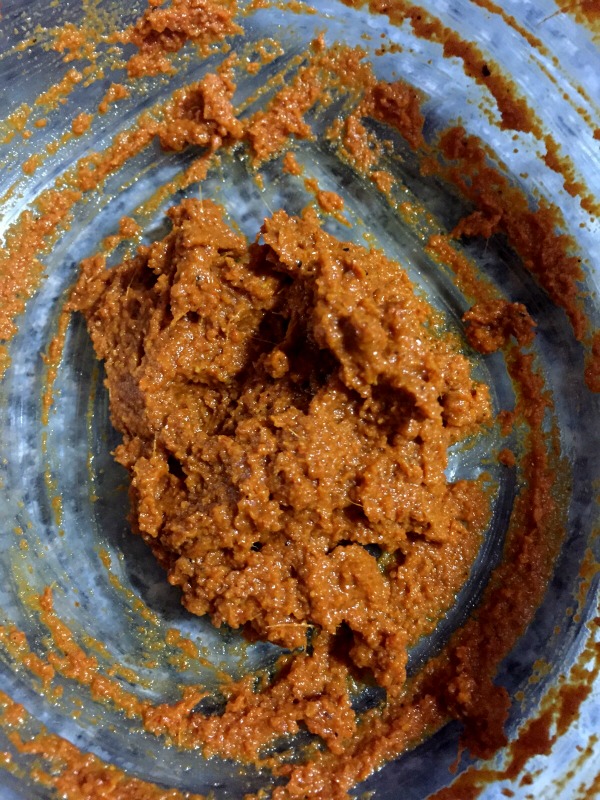
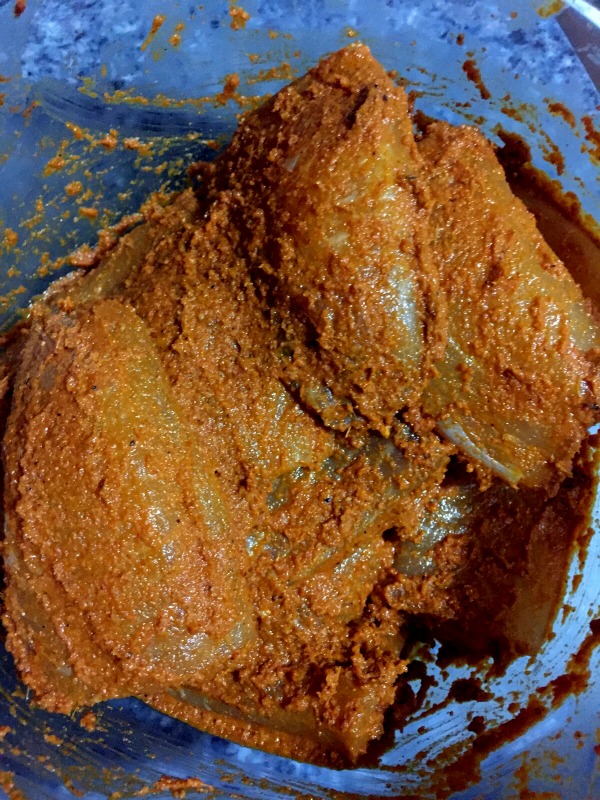
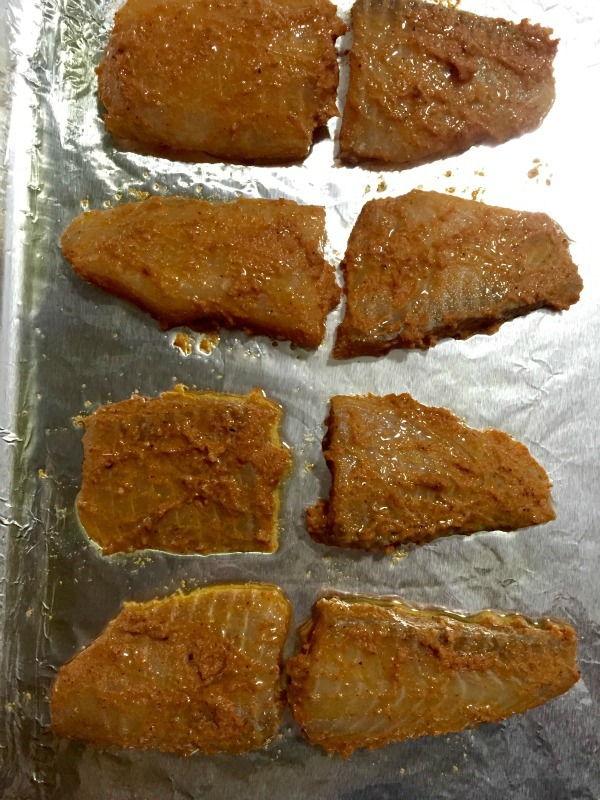
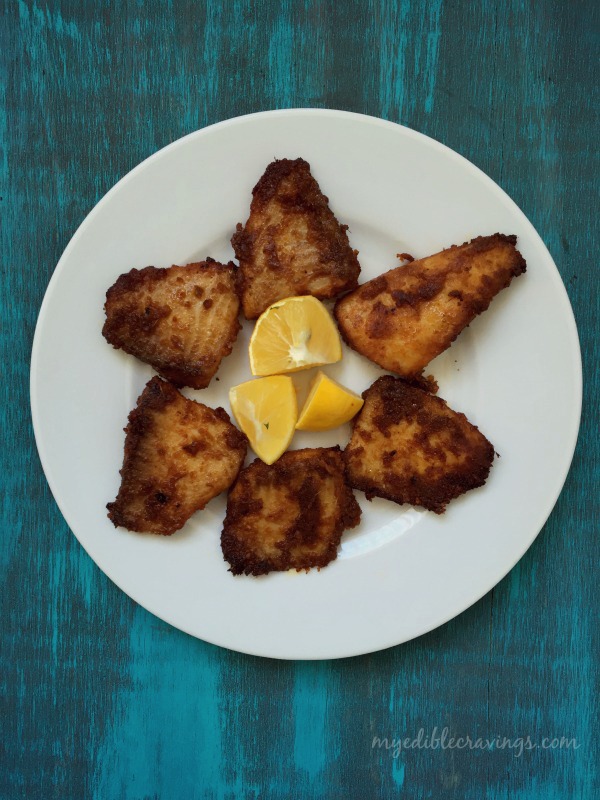
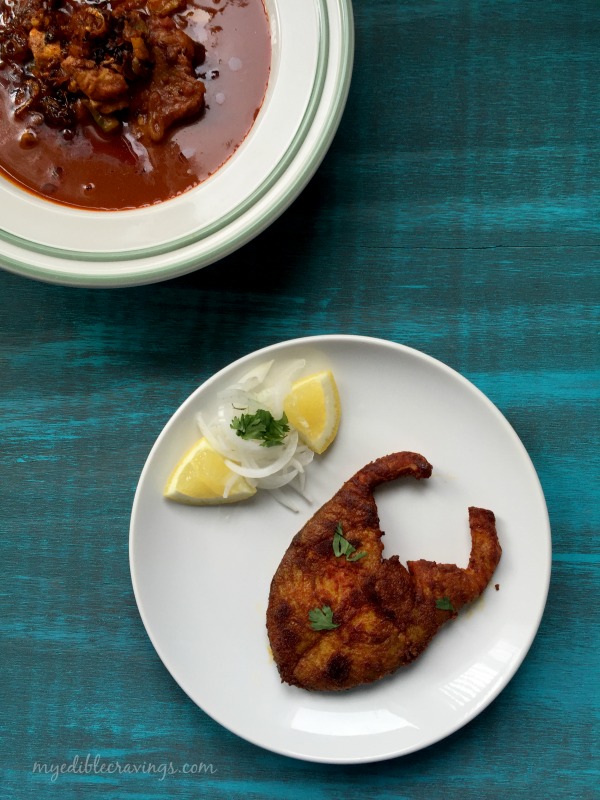
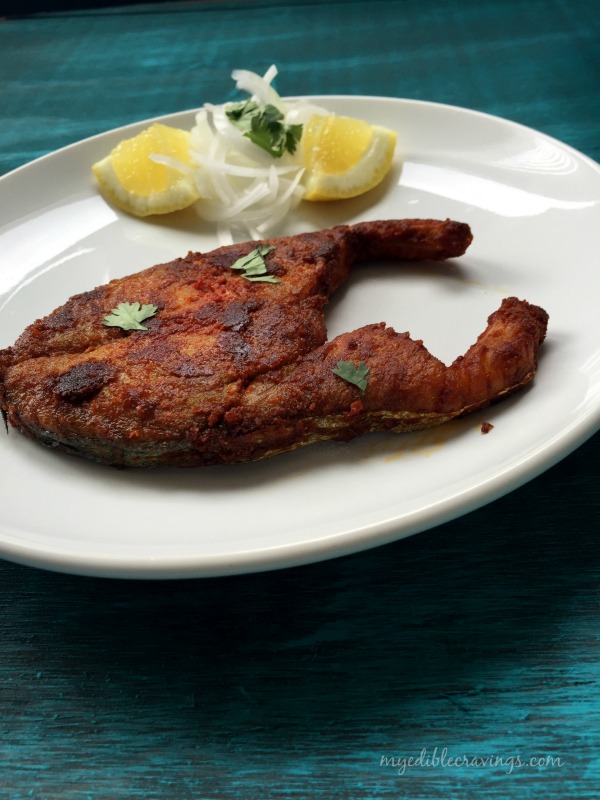
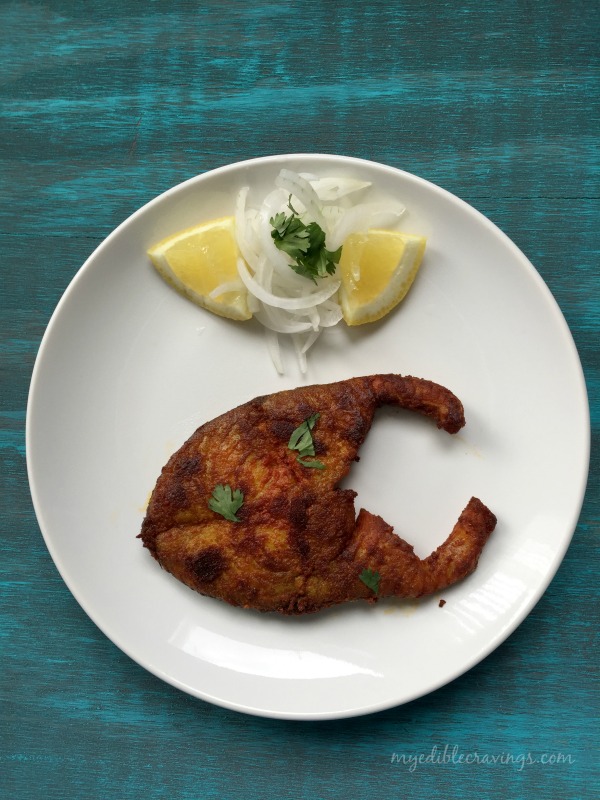
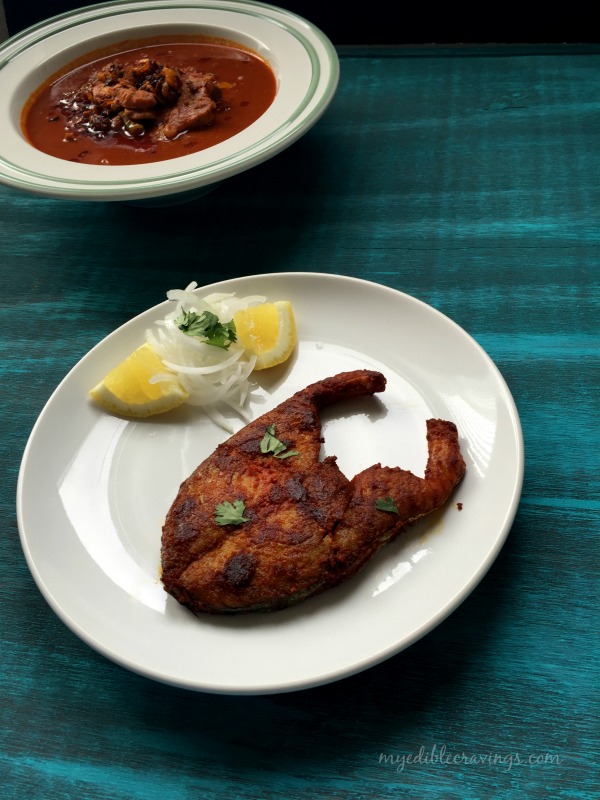
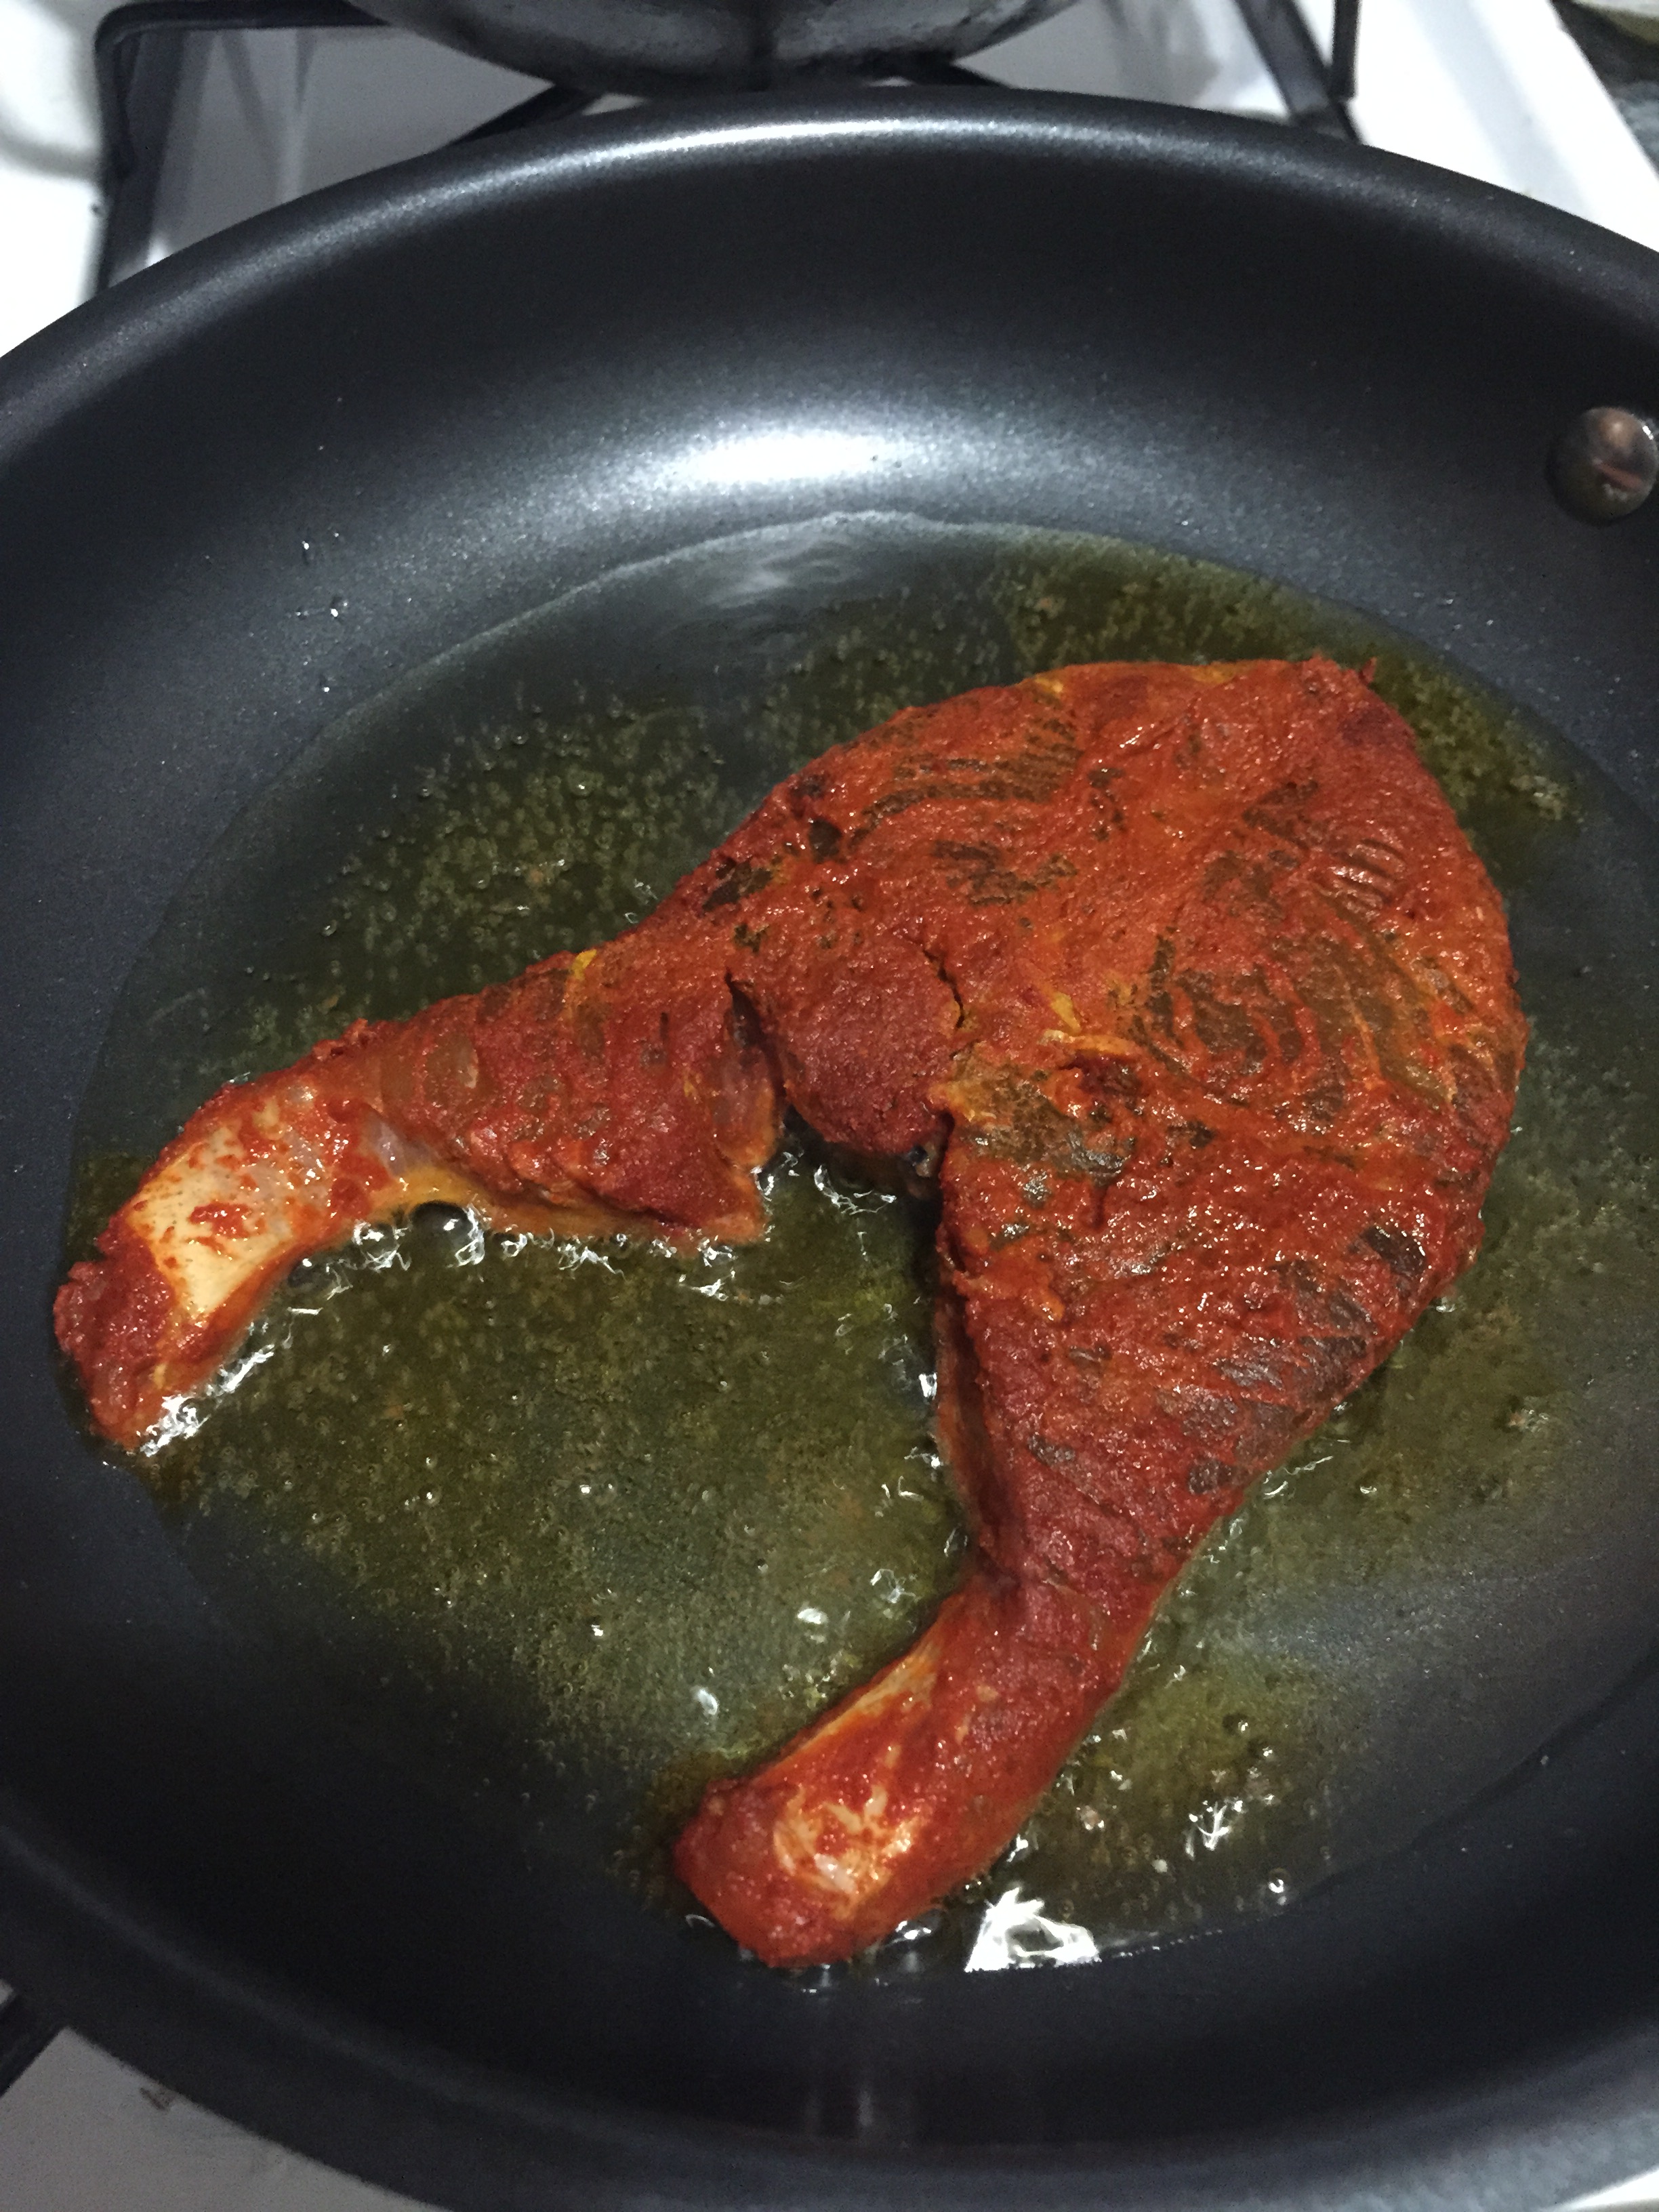
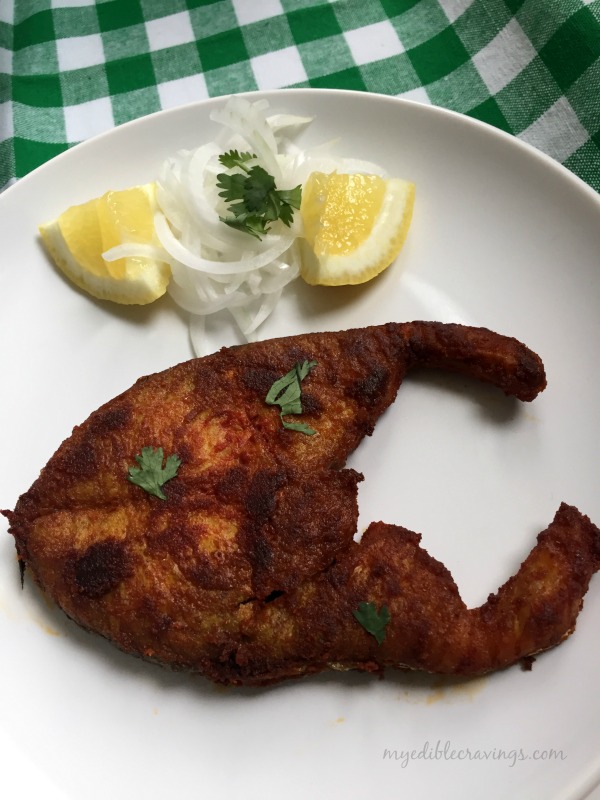
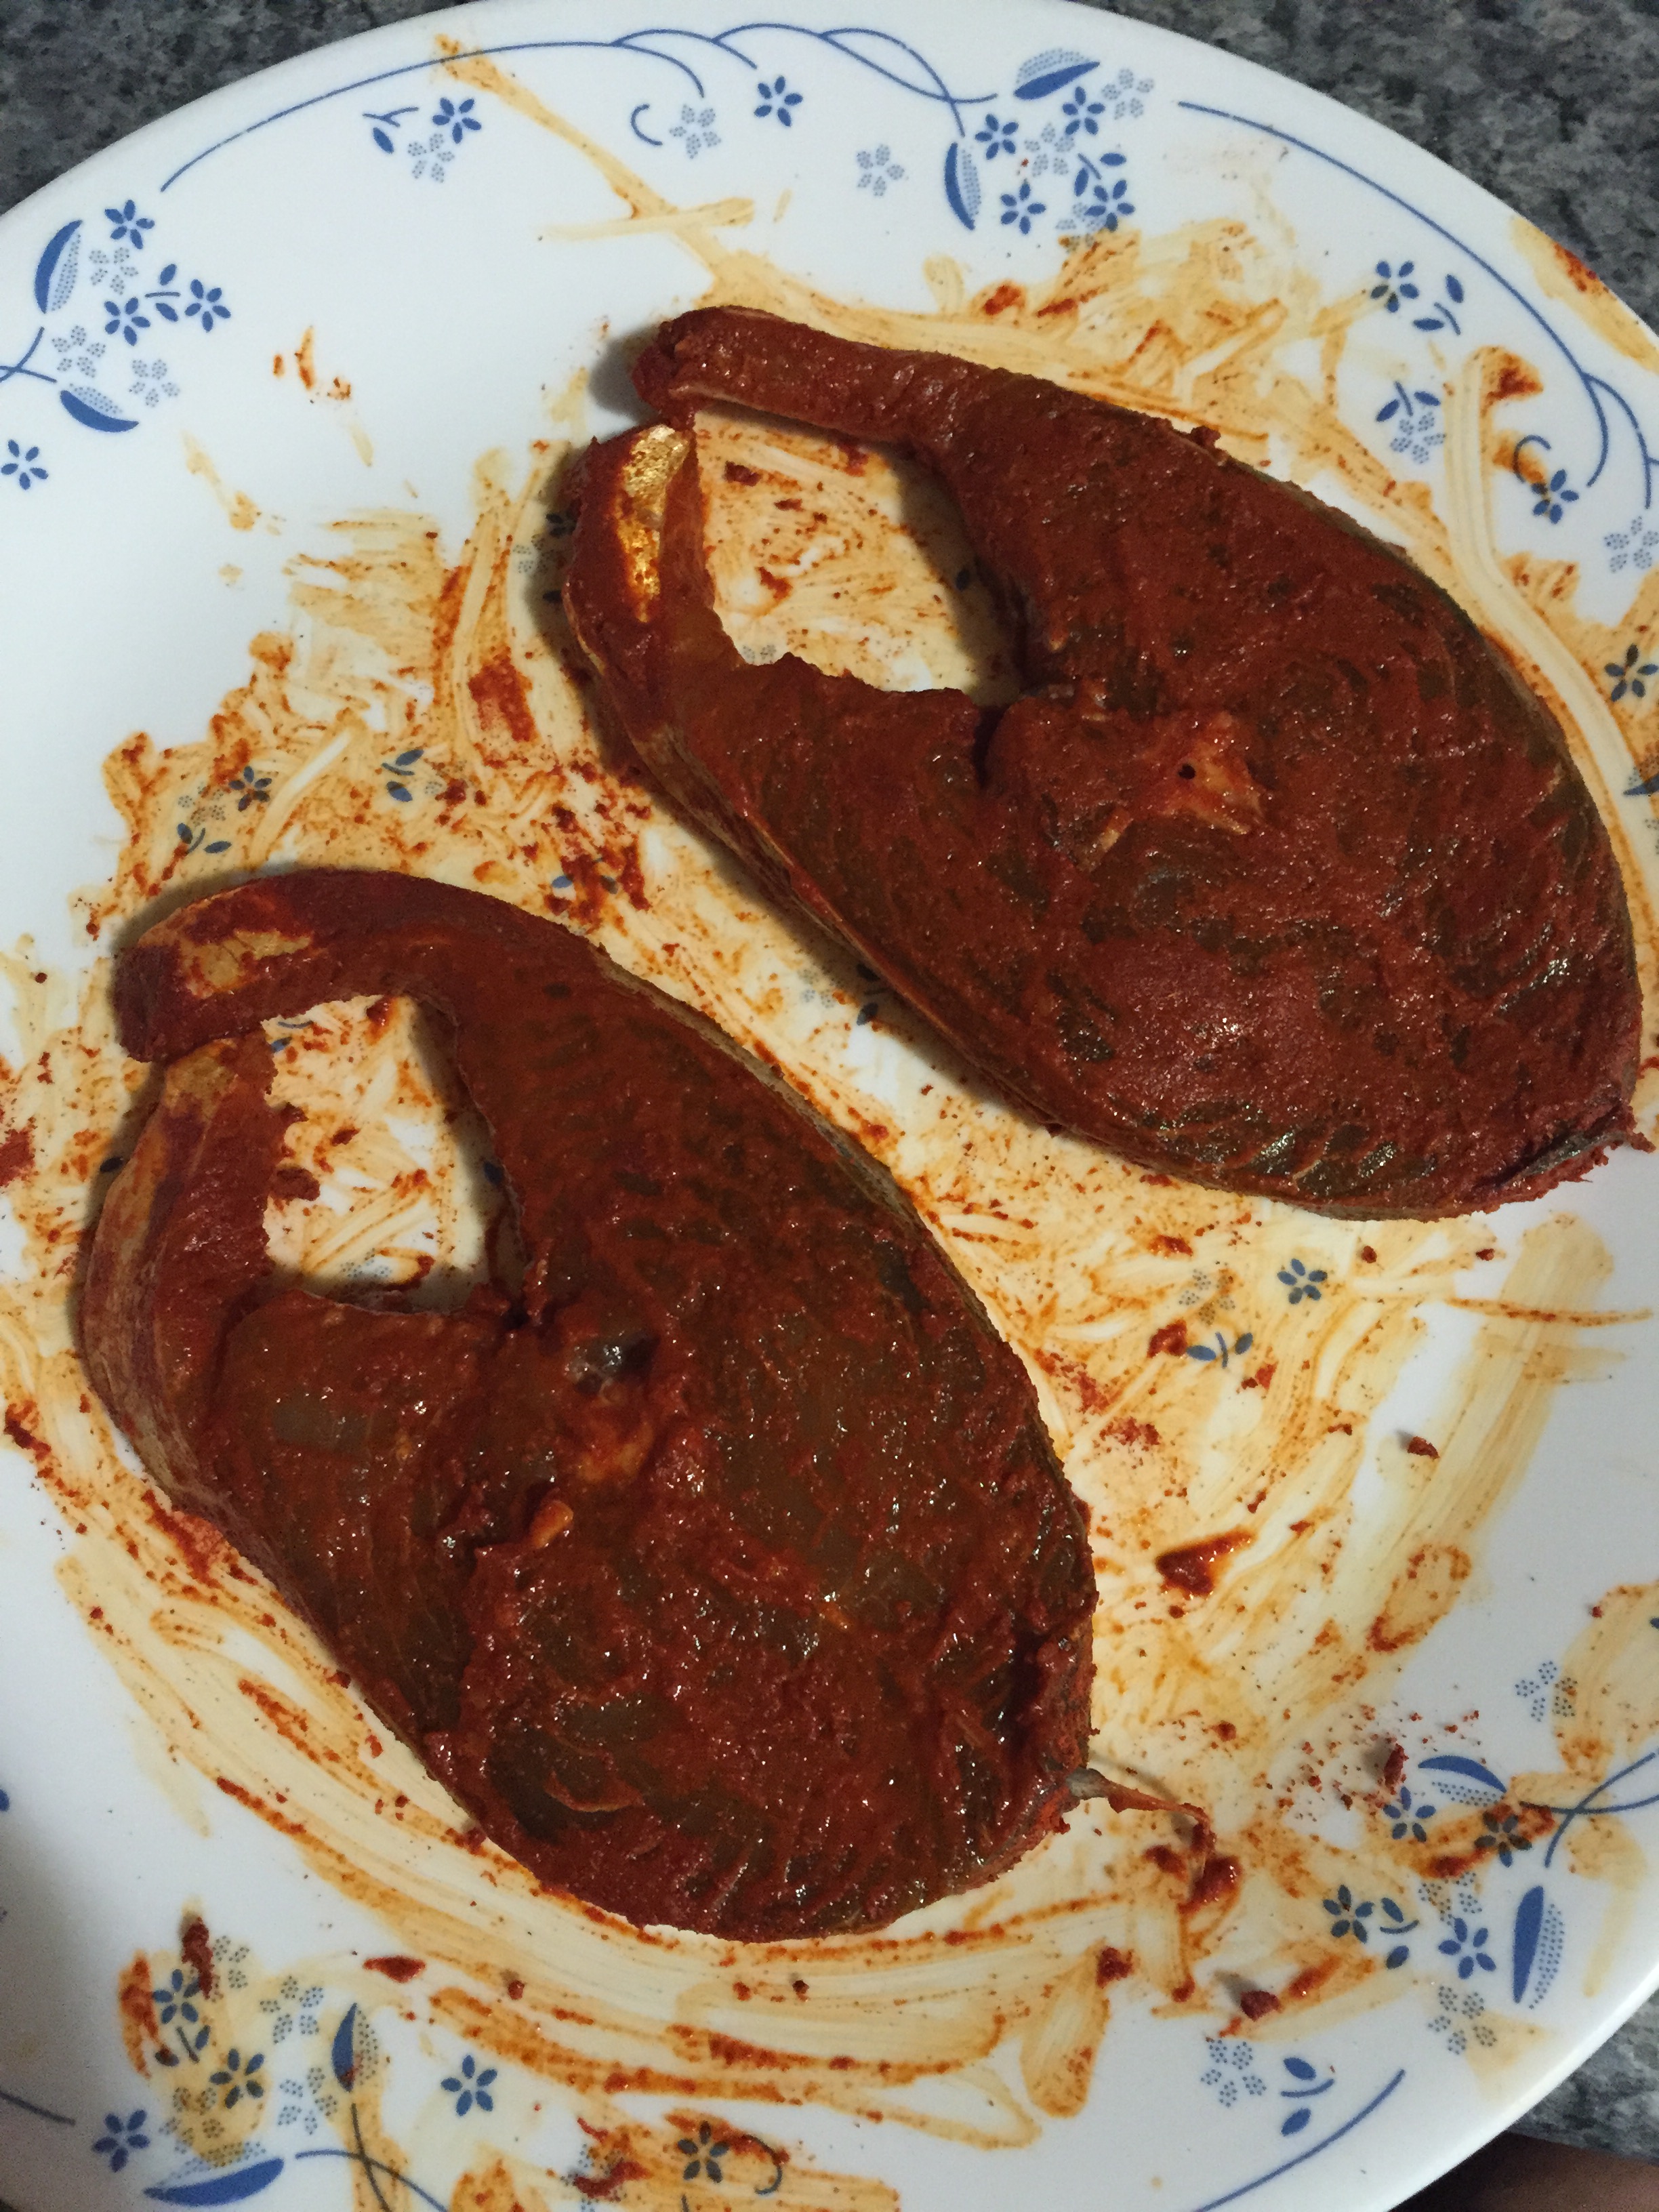
  3. Apply the paste on both the sides of the fish and leave it for at least half an hour.
  4. Heat oil in a flat pan, place the marinated fish on it and fry for a minute until one side is well fried.
  5. Flip over and cook the other side until crispy.
  6. Place it on a plate lined with tissue paper. Serve hot with spicy fish gravy and white rice or just have it as is! Enjoy! 

 Fish fry

Chicken Mappas

Chicken MappasChicken Mappas is a traditional chicken gravy from the state of Kerala, India. It is a very recent dish that I tried and very much liked it 🙂 Mappas is Kerala Christian style of cooking dishes entirely using coconut milk. So as the name suggests Chicken Mappas is chicken cooked in coconut milk 🙂
Chicken Mappas
Chicken MappasChicken Mappas is one dish that tastes totally different than how it looks. It is a watery (stew like) gravy packed with full of flavor. Also, it is one of the easiest and simplest non vegetarian dishes to make. All you need is chicken, coconut oil, turmeric, green chilli and coconut milk. As you might know Kerala cuisine is known for its generous use of coconut oil and in Chicken Mappas that comes to the fore. It serves to be a major source of the dish’s distinct flavor.
Chicken MappasChicken Mappas is an excellent combination for Idiyappam (String Hoppers). It can also be served as a soup. Since coconut milk is used, Chicken Mappas gives you that fullness quiet easily even when had in small quantities. Do try this Mappas in your kitchen and do let me know what else it would go well with other than Idiyappam 🙂

Chicken Mappas
Recipe type: Main
Cuisine: Indian
Prep time: 
Cook time: 
Total time: 
Serves: 4
 
Chicken Mappas is a very simple and traditional Kerela style chicken stew packed with full of flavors.
Ingredients
  • Coconut oil – 1 tbsp
  • Whole red chilli – 2 nos
  • Shallots, cut lengthwise – 4 nos
  • Ginger, minced, crushed – ½ tsp
  • Garlic, minced, crushed – ½ tsp
  • Green chilli, finely chopped – 2 nos
  • Curry leaves – half a sprig
  • Coriander powder – 1 tbsp
  • Turmeric powder – ¼ tsp
  • Black pepper powder, freshly ground – ½ tsp
  • Salt as required
  • Chicken – ½ kg
  • Coconut milk – ½ cup
for tempering:
  • Coconut oil – 1 tbsp
  • Mustard seeds – 1 tsp
  • Whole red chilli – 3 nos
  • Shallots, cut lengthwise – 6 nos
  • Curry leaves – half a sprig
Instructions
  1. Heat coconut oil in a flat pan and add red chillies, shallots, ginger, garlic, green chillies and curry leaves one by one. Sauté until onions turn translucent.
  2. Add coriander powder, turmeric powder, pepper powder and salt. Sauté them and add the chicken. Add ½ cup of water. Stir to mix. Cover and cook until the chicken is well cooked.
  3. Check for salt and finally add the coconut milk and cook for another couple of minutes. Switch off the flame.
  4. Heat a small pan and add coconut oil. Add the above given ingredients one by one and fry until the onions turn golden brown
  5. Add the above tempered mixture to the chicken mappas.
  6. Serve the chicken mappas with hot idiyappams. Enjoy! 

Chicken Mappas

Fish Gravy

fish gravyGenerally, I am big fan of any food items that has tamarind as one of the ingredients like puli kuzhambu (tamarind gravy), puliyogare (tamarind rice) etc. On those lines, one other dish that I like so much is the Meen kuzhambu/Fish gravy and this gravy also has tamarind as one of the ingredients. Fish gravy is one dish which literally took a lot of my effort in getting it right. Every time I try making this gravy, something or the other didn’t come together. I always suspected that the variety of fish I buy was the reason. So when I visited India recently, this was the dish I had on the top of my list to learn 😉 I tried fish gravy as soon as I returned home and voila! It turned out to be one of my best creations ever 😉

fish gravyI always liked fish since my childhood. I like its texture and taste. The meen kuzhambu that I have given here is one of my mom’s signature recipes. The main ingredients that are used here, other than tamarind, are tomato and green chilli. Fish in general absorbs too much of hotness from the ingredients that we use (chilli and homemade sambar powder). So you need to add extra chilli and/or sambar powder to the gravy. Also, the addition of sambar powder gives thickness to the gravy (you can substitute coconut milk as well here).

fish gravyOne lesson that I learnt from this successful attempt of preparing meen kuzhambu/fish gravy is that if you have the right recipe, you don’t have to worry about the fish you use. So people do try this wonderful recipe and let me know your equally wonderful experience!

Other things that I have learnt,

  • Add extra oil while making fish gravy – enhances the taste.
  • Right amount of tamarind – gives the kick to the gravy.
  • Add extra spiciness – fish absorbs more spice.
  • Fish cooks real fast, so do not stir the gravy often once the fish is added – So that you don’t break/mash the fish.
  • And finally, like biriyani and pizza, fish gravy tastes excellent when had the next day! 🙂

Fish Gravy
Recipe type: Main
Cuisine: Indian
Prep time: 
Cook time: 
Total time: 
Serves: 4
 
A traditional and authentic fish gravy recipe made using tamarind extract and spices.
Ingredients
to marinate:
  • Homemade sambar powder or kuzhambu podi – 1 tbsp
  • Salt – ½ tsp
  • King or seer fish – 1 pound (5 pieces)
other ingredients:
  • Gingelly oil – 3 to 4 tbsp
  • Fenugreek seeds – ½ tsp
  • Shallots, cut to rings – 6 nos
  • Garlic cloves, cut to rounds – 5 nos
  • Tomatoes, big, finely chopped – 1 ½ nos
  • Green chilli – 1 no
  • Salt as required
  • Tamarind - Big gooseberry size
  • Jaggery - a very small piece (a generous pinch)
  • Homemade sambar powder or kuzhambu podi– 2 tbsp
  • Red chilli powder – 1 tsp
  • Grated coconut – 1 to 2 tbsp (optional)
to crush and temper:
  • Shallots – 1 no
  • Garlic cloves - 1 no
  • Ginger – 1”
  • Oil – 1 tbsp (oil used to fry the fish)
Instructions
  1. Clean and wash the fish with a tsp of turmeric powder and marinate them with the above given ingredients. Cover and leave it for at least half an hour.
  2. Soak tamarind in a cup of water and extract the juice or blend them in a blender to a thick paste.
  3. Grind coconut and a shallot to a fine paste (this step is completely optional).
  4. Heat oil in a kadai or any wide open deep pan and add fenugreek seeds. When they start to sizzle add chopped shallots. Sauté until the onion turn translucent and then add chopped garlic and fry for a minute until it turns golden brown.
  5. Add chopped tomatoes and a slit green chilli. Cook until the tomatoes are mushy. It takes 2 to 3 minutes.
  6. Add in the tamarind extract/paste and allow them to boil. Add a pinch of jaggery at this time.
  7. Now reduce the flame and add sambar powder, red chilli powder and salt. Mix well and cook until the gravy leaves oil.
  8. When the gravy starts to boil, check for salt and spice and add the marinated fish to the gravy. Cook until the gravy leaves oil. It takes about 5 to 8 minutes – Do not stir the gravy once the fish is added. Just slightly tilt around the kadai if you wanted to.
  9. Meanwhile crush shallots, ginger and garlic in a motor and pestle.
  10. If you are making a large batch, add coconut paste to the gravy five minutes after the fish is added to the gravy.
  11. Heat a seasoning ladle and fry the crushed ingredients until light golden brown and pour them in to the fish gravy.
  12. Enjoy the tasty fish gravy with hot rice and fish fry and experience the heaven! 
Notes
1.Here I have used king fish. You can use any variety of fish of your choice. I heard red snapper tastes excellent for fish gravy. 😉
2.I usually don’t add coconut paste to the gravy if I am making for just the two of us. I recommend adding it when you are making a large batch.
3.Adding jaggery enhances the tanginess of the fish gravy
4.If you are making fish fry on the same day, season the crushed ingredients in the left over oil. My mom always does this because it adds more taste to the gravy.

fish gravy

Kovilpatti Chicken Kuzhambu

Kovilpatti chicken kuzhambuToday, I am posting a recipe given to me by my friend who hails from Kovilpatti, a southern town in my home state of Tamilnadu in India. Kovilpatti is famous for its yummy kadalamittai (a sweet variety made from peanuts), matchstick and fireworks industry. Actually, the recipe is of chicken gravy but I have named it as Kovilpatti chicken kuzhambu in honor of my dear friend.:)
kovilpatti chicken kuzhambuKovilpatti Chicken Kuzhambu is a very tasty chicken gravy and the recipe does not have coconut as one of the ingredients. One other uniqueness of this gravy is the use of castor oil and believe it or not, it enhances the flavor. And Kovilpatti Chicken Kuzhambu is my HB’s favorite chicken gravy and is one of the recipes that are often made in our home.
kovilpatti chicken kuzhambuKovilpatti Chicken Kuzhambu goes well with white rice, dosa, chappati etc. Also, I would suggest using country chicken (naatu kozhi) for the gravy, if available since that is what is used back home for any chicken recipe. It gives excellent taste to the gravy and also an authenticity to the recipe. 🙂

Kovilpatti Chicken Kuzhambu
Recipe type: Main
Cuisine: Indian
Prep time: 
Cook time: 
Total time: 
Serves: 3
 
Ingredients
To grind:
  • Ginger – 1”
  • Garlic cloves – 8 nos
  • Green chillies – 2
  • Shallots – 6
Other ingredients:
  • Gingely oil – 3 tbsp
  • Bay leaf – 1 no
  • Cinnamon stick – ½ “
  • Fennel seeds – a pinch
  • Onion, big, finely chopped – 1 no
  • Tomato, big, finely chopped – 1 no
  • Chilli powder – 1 tbsp
  • Coriander powder – 2 tbsp
  • Whole black pepper, freshly ground, powdered – 1 tbsp
  • Cumin powder -1 tsp
  • Garam masala powder – a pinch
  • Salt - as required
  • Chicken – ½ kg (750 grams)
  • Cilantro – for garnishing
  • Castor oil – 3 drops
Instructions
  1. Grind all the given ingredients under ‘to grind’ and make a fine paste.
  2. Heat oil in a thick bottomed sauce pan and add bay leaf, cinnamon and fennel seeds. When they start to sizzle add in the chopped onions and sauté until they turn translucent.
  3. Add the ground paste and sauté until the raw smell of shallots disappear.
  4. Add the chopped tomatoes and sauté until oil gets separated.
  5. Now add in all the powders (chilli, coriander, cumin, pepper, garam masala) along with salt and give a quick stir. Lower the flame and add very little water. Sauté until the raw smell disappears.
  6. Finally add in the cleaned chicken pieces, stir well until the masalas are well coated on the chicken. Add a cup of water and check for salt. Cover the lid and cook in low to medium flame for 15 minutes or until the chicken is well cooked.
  7. Add few drops of castor oil on top and cook for another couple of minutes. Switch off the flame and garnish with freshly chopped cilantro.
  8. Enjoy this excellent kovilpatti chicken kuzhambu with white rice or any Indian rotis! 
Notes
1.Adding castor oil is to enhance the taste. You could also use coconut oil instead.
2.This gravy tastes good as it is. In case if you want add richness to the gravy (or making a big batch) you can either add ½ a cup of coconut milk and cashew paste or you could just add yogurt.
3.I like my gravy to be thick so I added just a cup of water. You can adjust it according to your own taste.

Kovilpatti chicken kuhambu

You might also like

Mom’s Chicken Gravy
Chicken Kuzhambu

Dum Ka Chicken
Dum ka chciken

Anganan Biriyani

Anganan BiriyaniCoimbatore is a southern city in my home state of Tamilnadu. It is popularly known as Manchester of the south due to its textile industry. When you think of Coimbatore, the first that comes to your mind is the lilting Tamil (Kongu Tamil) accent spoken by the people there. I have had the fortune to hear that from friends at college. Thanks dears. Since mine is a food blog and I do know of a popular dish from Coimbatore, I would like to share that here. The dish is the famous Coimbatore Anganan Biriyani.Anganan BiriyaniAnganan BiriyaniAnganan Briyani is a very light biriyani in the sense that you won’t feel that usual heaviness that you have after eating biriyani. That is because of the less masala that you use in this variety. I have never had Anganan Biriyani back in India but seems that my HB had had (of course he did since it is ‘BIRIYANI’ ;)) It has been a while since I had made this variety of Biryani. I was going through my recipe collection the other day and came across it and here I am posting the recipe. The recipe below is for chicken biriyani and you can modify it other types like mutton or fish as desired.Anganan BiriyaniTry this Coimbatore specialty Anganan Biriyani at your home and experience the lightness that I talked about earlier. And yes, my HB did say that my version of Anganan biriyani tasted similar to the original! As always share your comments and experience below. Now, I am off to make Anganan Biriyani and until then, ciao 🙂

Anganan Biriyani
Prep time: 
Cook time: 
Total time: 
Serves: 3 or 4
 
Ingredients
To grind and marinate:
  • Shallots – 6 nos
  • Green chillies – 4 nos
  • Lemon juice – 1 tbsp
  • Ginger garlic paste – 1 tbsp
  • Cinnamon stick – 1”
  • Cardamom – 2 nos
  • Cloves – 3 nos
  • Mace or javetri – ½
  • Star anise – 1 no
  • Turmeric powder – ¼ tsp
  • Yogurt – 2 tbsp
Other ingredients:
  • Oil – 3 to 4 tbsp
  • Cinnamon stick – 1”
  • Cardamom – 2 nos
  • Cloves -2 nos
  • Green chillies, slits – 5 nos
  • Mint, finely chopped – 1 cup
  • Onion, big, slits – 1 no
  • Chicken – 750 grams
  • Salt as required
  • Water – 3 cups (1:1/2 ratio, for 1 cup of rice add 1½ cups of water)
  • Seeraga samba rice – 2 cups (I used basmati)
Instructions
  1. Wash and soak the rice in water for 30 minutes. Drain and save the water.
  2. Grind all the given ingredients under ‘to grind’ and make a fine paste – marinade.
  3. Make few deep slits until the bone on either side of the chicken and marinate with the above paste.
  4. Heat a pressure cooker with enough oil. Add in the whole garam masalas and allow them to sizzle. Add green chillies, mint and onions. Sauté until the onions turn translucent.
  5. Add the marinated chicken. Stir to mix and sauté for a couple of minutes.
  6. Add enough salt and water. Cook for 15 minutes until the chicken is ¾th cooked.
  7. Check for saltiness and add the rice, carefully mixing it and bring it to boil. When the water is ¾th absorbed or you see the rice on top, lower the flame and garnish with chopped cilantro and ghee.
  8. Close the lid and dum cook (without whistle) for 10 minutes and switch off the flame. After 10 minutes, serve it hot with any raitha and gravy on the side. Enjoy! 
Notes
You don’t have to soak samba rice in water before you cook. And here the water ratio is 1:2, i.e for 1 cup of rice add 2 cups of water.

 
Anganan Biriyani