Chocolate Avocado Almond Cake


Chocolate avocado almond cakeHi everybody! I know, it has been a very long time since my last post. And what is better to post than a recipe from my favorite form of cooking, baking!!! I have a greater affinity to baking and this must be the umpteenth time that I had mentioned here in my site. Baking generally involves sugar, that too lots of sugar. With that being said, wouldn’t it be awesome to bake something that is sweet but does not have processed sugar and healthy as well? I recently found one such recipe and that too of a cake! It is called the Chocolate Avocado Almond cake. Chocolate avocado almond cake
I came across the Chocolate Avocado Almond cake one afternoon when me and my HB were craving for something sweet but that doesn’t make us feel guilty after eating it 🙂 (thats one tough cookie!). Voila, I found this savior and was thoroughly satisfied afterwards. Chocolate Avocado Almond cake, as the name suggests, is made of avocado, coconut oil, coconut cream, almond flour, honey, chocolate chips and cocoa powder. It is very easy to make and is not time consuming at all.
Chocolate avocado almond cakeChocolate Avocado Almond cake is one of those rare, too good to be true, kind of recipe. It is healthy, has no added sugar (honey and chocolate chips take care of the sweetness) and is an excellent breakfast item. It can also be had as a snack (which we did when baked the first time :). For those of you wondering about the lengthy name, I came up with it, just put together the ingredients and here is your tasty, yummy Chocolate Avocado Almond cake. Try it out, you won’t be disappointed.

Chocolate avocado almond cake

Chocolate Avocado Almond Cake
Recipe type: Breakfast
Cuisine: American
Prep time: 
Cook time: 
Total time: 
Serves: 6
 
Ingredients
  • Almond flour – 2 cups
  • Raw cocoa powder – ¼ cup
  • Baking soda – 1 tsp
  • Salt – ½ tsp
  • Cashew nuts, roughly chopped - ½ cup (or any nuts of your choice)
  • Avocado, medium – 1½ Cups
  • Melted coconut oil – 3 tbsp
  • Coconut cream, room temperature – 2 ½ tbsp
  • Vanilla extract – 1 tsp
  • Eggs, room temperature - 2
  • Raw honey – 3 tbsp
  • Chocolate chips – ⅓ cup + 2 tbsp
  • Sugar – 1 tbsp (optional)
Instructions
  1. Preheat the oven to 350 degrees Fahrenheit and line the bottom and sides of the 8 inch loaf pan with parchment paper.
  2. Sieve the flour, baking soda, salt and cocoa powder in a large bowl. Add the nuts to the dry ingredients and mix well without any lumps.
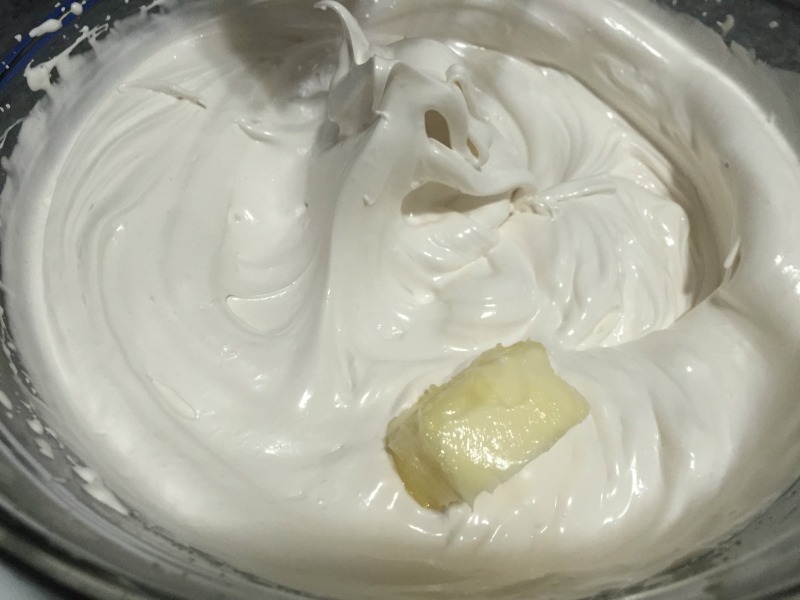
  3. Remove the pit and pulse avocadoes in a blender. Add coconut oil, coconut cream, vanilla extract, eggs, and honey and blend together to a smooth paste.
  4. Add the ground paste to the dry ingredients and gently mix using rubber spatula. Do not over mix.
  5. Add the chocolate chips and fold the mixture.
  6. Spoon batter into the loaf pan and spread it evenly using rubber spatula. (The batter will be really thick)
  7. Bake for 40 to 45 minutes until the tooth pick inserted into the center of the loaf comes out clean.
  8. Cool the bread over a wire rack for 15 minutes before serving. Enjoy!

Vanilla Cake with Swiss Meringue Blueberry Lavender Frosting

Vanilla Cake with blueberry lavender frostingHello everyone! After a few weeks, here I am with a new recipe. I might have mentioned this already but I love baking. It is a passion of mine. Trying out different varieties of cakes and whatnot is something I do when I get free time. Today I have posted below one of the recent recipes that I tried out in honor of friends all over the world. Happy Friendship Day!!! It is the recipe for Vanilla cake with Swiss Meringue blueberry lavender buttercream frosting. I know, the name itself sounds exotic and trust me, the taste do justify the name 🙂

Vanilla Cake with blueberry lavender frostingVanilla Cake with blueberry lavender frostingOne of the joys of baking is, for almost all recipes that you try out, there is a definite recipe with set measurements for ingredients. That in itself will give you the confidence to try out new items. Coming back to our Vanilla Cake with Swiss Meringue blueberry lavender buttercream frosting, the recipe is that of a wedding cake i.e., the vanilla cake baked here is most commonly baked for weddings! Meringue in itself is a type of dessert made from egg whites and sugar. And Swiss Meringue is a type of meringue. There are three types of meringues, they are French, Swiss and Italian. The swiss variety is smoother and silkier than the other two and is the popular choice for making buttercream frosting. I have used a concoction of blueberry and lavender to flavor the buttercream in this recipe.

Vanilla Cake with blueberry lavender frostingVanilla Cake with blueberry lavender frostingVanilla cake with Swiss Meringue blueberry lavender buttercream frosting is the perfect recipe for joyous occasions like birthdays and parties but you can also have it on days when you just feel like eating cake :). One thing to remember is you need a little bit of patience to try out this recipe since making the meringue takes some time. However, you will not be disappointed when you taste the soft and smooth cake once baked and frosted 🙂

Vanilla Cake with Swiss Meringue Blueberry Lavender Frosting
Recipe type: Dessert
Cuisine: American
Prep time: 
Cook time: 
Total time: 
Serves: 2 layer 6"round cake
 
Ingredients
For the cake:
  • 1 ½ cup flour
  • 1 ½ tsp baking powder
  • A generous pinch of salt
  • 3 eggs
  • 1 ½ sticks unsalted butter, room temperature
  • 1 cup granulated sugar
  • ½ cup whole milk
  • 1 tbsp vanilla extract
For the frosting:
  • 1 ½ cup blueberry
  • 1 tbsp dried lavender flowers
  • 6 egg whites
  • 1 cup + 3tbsp granulated sugar
  • 1 tbsp vanilla extract
  • A pinch of salt
  • 1 cup + 4 tbsp (2 ½ sticks) butter, room temperature
Instructions
For the cake:
  1. Preheat oven to 350 degrees Fahrenheit. Grease the two 6” round cake pans with butter (on the sides and bottom), dust the bottoms with flour and line them with parchment paper.
  2. Sieve the flour, baking powder and salt together in a medium mixing bowl.
  3. In a large mixing bowl, whisk together the egg and sugar in medium speed.
  4. Whisk in the butter until the mixture is creamy and smooth.
  5. Add in the dry ingredients to the wet ingredients and mix in medium speed until well combined- Do not mix too much.
  6. Finally add in the milk and vanilla extract and mix again.
  7. Divide the batter between cake pans
  8. Bake for 35 to 40 minutes or until the tooth pick when inserted comes out clean.
  9. Remove from oven and let cool completely.
  10. Wrap them tightly in polythene sheet and freeze them for couple of hours before frosting.
For the frosting:
  1. Place blueberry, lavender and half cup of water in a small pan and cook on medium for 5 minutes until juices have released. Let it cool.
  2. Grind them in a blender. Strain out the pulp and extract the juice. Keep it aside.
  3. On a double boiler (or a medium sized bowl suspended over the pan of simmering water) combine the egg whites, sugar, vanilla extract and salt. Heat, stirring gently until the sugar is completely dissolved- check by rubbing a bit of mixture into your fingers. It should feel smooth.
  4. Take the bowl off the heat and whip the egg whites using hand mixer until stiff peaks form. It takes around 15 to 20 minutes.
  5. Now add the butter 2 tbsp. at a time, until each tbsp. butter is well incorporated into the mixture. Once all the butter have been added, the resulting buttercream should be smooth and thick. This is called swiss meringue butter cream. If you think the frosting is runny you could add icing sugar to make it smooth and thick.
  6. Finally add in 1 ½ tbsp. of blueberry lavender concoction and gently mix together until well incorporated.
  7. Level the cake by cutting the top crust and frost them according to your taste.
Notes
1.To pasteurize the egg you could also clip on the liquid thermometer to the mixture to reach a temperature of 160 degree Fahrenheit, gently stirring continuously.
2.Butter that are added to the frosting should not be soft. It should be stable.
3.If the frosting is runny, refrigerate for 20 minutes and take out and mix in medium high speed until it becomes thick.
4. If the frosting have curdled, microwave for 10 seconds and then beat again until the frosting becomes thick.

Vanilla Cake with blueberry lavender frosting

Hara Bhara Kabab

Hara bhara kababIt has been quite some time since my last post. How you guys doing? Sorry folks, I don’t get time to post regularly like before. It is summer break here in the US and school year starting back home. Different parts of the world and different routines 🙂 Coming back to the recipe for today, I have posted a snack food for a change. It is really healthy and you would be surprised, especially children if they come to know about the ingredients. It is called as the Hara Bhara Kabab.

Hara bhara kababKabab in general refers to a variety of snack foods cooked mostly in skewers and made of meat. It originated in the Mediterranean and is widely popular all over the world. India too has its own share of kabab varieties. Since more than half the population is vegetarian and us being the innovators :), we have vegetarian kabab varieties. Hara Bhara Kabab is one such variety made using spinach and peas. I came across this recipe a while ago and have made it quite a few times since then. It is one of my favorite snacks and my HB loves it too.

Hara bhara kababThe main ingredients of Hara Bhara Kababs are, as mentioned earlier, spinach and peas. These are very easy to make and uses minimal ingredients. Hara Bhara Kababs can either be pan fried or baked in the oven. I am yet to try the latter and so the cooking method followed in this recipe is pan frying. Having hot Hara Bhara Kababs with ketchup in the evenings is one way to experience culinary nirvana :). Try it out and enjoy!

Hara Bhara Kabab
Recipe type: Snack
Cuisine: Indian
Prep time: 
Cook time: 
Total time: 
Serves: 6
 
Ingredients
  • Spinach – 2 cups
  • Potato, medium – 1
  • Green Peas, boiled – 2 tbsp
  • Green chilli – 2 nos
  • Ginger – small piece
  • Chat masala – 1 tsp
  • Amchur powder – ¾ tsp
  • Gram flour – 1 ¼ tbsp.
  • Salt as required
  • Oil – to smear around kababs
Instructions
  1. Pressure cook the potato for 2 whistles.
  2. Blanch the spinach in boiling water for a minute or two without covering and strain and wash them immediately with cold water – to retain the color. Completely drain the water and keep it aside.
  3. Grind the spinach along with green chilli, ginger and boiled green peas (I used frozen) and grind them to coarse paste without adding any water.
  4. Meanwhile drain and peel the potato.
  5. Add the peeled potatoes to the spinach puree and mash it together.
  6. Add amchur powder, chat masala, salt and gram flour. Mix well and make tikki shapes.
  7. Cook it in the flat pan drizzling very little oil. Cook for a few minutes. Flip and cook until golden brown on both sides. Enjoy the yummy hara bhara kabab with ketchup! 
Notes
1.Do not add too much gram flour. It might change the flavor.
2.Don’t overcook the potatoes.
3.Kabab has to be like cotton soft when cut. That’s the right texture.

Hara bhara kabab Hara bhara kabab

Hyderabad Dum Chicken Biriyani

040Happy Ramzan! And as with other special occasions and holidays, I wanted to post something new and something that relates to the special occasion. That is when I realized that I have not posted one of my favorite recipes, the Hyderabad Dum Chicken Biriyani. It is one of the most famous varieties of biriyani, not only in India but throughout the world. As the name suggests,Hyderabad Dum Biriyani originated in Hyderabad back when Nizams ruled the princely state. The ‘Dum’ in the name refers to a special type of cooking using pressure.

hyderabad dum chicken biriyanihyderabad dum chicken biriyaniI first had Hyderabad Dum Chicken Biriyani only after coming here. Btw, this is the most popular variety of Biriyani here. In fact, I have had other type of Biriyani only once and that too in New York! Since I like it very much I don’t have much to complain about 🙂 Hyderabad Dum Chicken Biriyani differs from other varieties mainly because of the way it is cooked. We do a layering of chicken (or any other meat) and rice in alternate fashion and then ‘Dum’ cook it. The Biriyani is made using basmati rice and can be had as is or with any chicken/mutton gravy. Either way, It tastes yummy, always 🙂

hyderabad dum chicken biriyanihyderabad dum chicken biriyanihyderabad dum chicken biriyaniThough I have had Hyderabad Dum Chicken Biriyani here in the US, I really want to try it out in the place of its origin, Hyderabad. It has been one of the things to do in my India checklist for quite sometime now. Here I have posted the recipe using chicken but you can also use lamb or mutton as well. I can keep going on and on about Hyderabad Dum Biriyani but I want you to try this recipe in your home and experience the awesomeness 🙂

Hyderabad Dum Chicken Biriyani
Recipe type: Main
Cuisine: Indian
Prep time: 
Cook time: 
Total time: 
Serves: 3
 
Ingredients
For the marinade:
To make powder:
  • Cinnamon – 3 1” pieces
  • Cardamom – 5
  • Cloves – 5
  • Star anise – ½ to 1
  • Javetri – ½ to 1
  • Black pepper – 10 nos
  • Sea weed – 1 tsp
  • Bay leaf – 1 2” leaf (small one)
  • To make a Paste:
  • Ginger garlic paste – 1 ½ tsp
  • Green chillies – 5 nos (coarsely blend)
  • Other ingredients:
  • Oil – ¼ cup
  • Yogurt – 3 to 4 tsp
  • Lemon juice – from half lemon
Powders:
  • Turmeric powder – ¼ tsp (do not add too much it would change the color of the biriyani)
  • Chilli powder – 1 tsp (or according to your taste)
  • Coriander powder – 2 to 2 ½ tsp (used from the box’s plastic spoon)
  • Garam masala – ½ to 1 tsp
  • Salt – as required ( I added ¾ p.tsp)
  • Mint & coriander leaves – ½ cup
  • Fried onions, small – 1
  • Chicken – 1 to 1⅓ kg
To cook rice:
  • Good quality Basmati rice – 2 cups ( US measurement)
  • Water – sufficient amount
  • Shahi jeera – 3 pinches
  • Bay leaves, big – 2 nos
  • Oil – 1 tbsp ( I use the oil that is used to fry onions)
  • Salt – as required
For garnishing :
  • Mint & cilantro, finely chopped – ¾ cup
  • Onion, small to medium, fried – 1 no
  • Saffron - a generous pinch
  • Warm milk – ⅓ cup
  • Ghee – 2 to 3 tsps
  • Chapathi dough – to dum or aliminium foil
Instructions
Step 1:
  1. First blend the things and keep it ready. Grind the spices coarsely such that sea weed is coarse and others are blend to fine powder. Add them to the mixing bowl. Blend ginger and garlic to a fine paste without adding water. keep it aside. Blend green chillies to a coarse paste.
  2. Make few cross deep slits on the washed chicken pieces. The slits has to touch the bones.
  3. Add the spice powders (turmeric, chilli, coriander, garam masala), enough salt, lemon juice, green chilli paste, ginger garlic paste, ground garam masala spices (if you haven’t add already) and yogurt to the mixing bowl. Mix well and check for salt – this is the right time to check salt for your marinade and adjust according to your taste.
  4. Add the chicken, chopped mint and cilantro and oil to the mixing bowl, mix well and refrigerate overnight.
Step 2:
  1. Heat enough oil in a kadai and fry the onions until golden brown – I used 1 ½ small sized onion for the whole biriyani.
  2. Add ⅓ of the fried onions to the marinated chicken. Mix well and keep it aside.
  3. Soak saffron strands in warm milk and keep it aside.
  4. Arrange all the chicken pieces in a biriyani handi or any large thick bottomed sauce pan. Arrange in such a way that all the pieces touch the base of the vessel. This is layer 1.
step 3:
  1. Soak the rice for at least 20 minutes. Boil enough water in a large deep vessel to cook the rice. When the water starts to boil add shahi jeera, bay leaves, oil (used to fry onions) and salt. Check for salt at this time. – adding salt right now is the very important step in making this dum biriyani. The water has to be little salty.
  2. Add the soaked rice to the boiling water. Cook until the rice grains starts to dance on top. That’s when you know the rice is 70% cooked. Filter half of the 70% cooked rice, drain all the excess water and layer it on top of the chicken layer. Garnish with some fried onions, chopped cilantro and mint on top. This is Layer 2.
  3. When the rice is 100% cooked, strain all the excess water completely and layer them again on top of layer 2. Garnish with the remaining fried onions, mint and cilantro. Add drops of saffron milk on top to give color and nice aroma to the biriyani. Finally spread few tsps of ghee on top. This is layer 3 - Always stay close while cooking the rice by boiling method. Because rice cooks really quick in this method.
  4. Now fill the rim of the lid with chapathi dough and cover it tightly without leaving any gap or holes. Otherwise if you are using a flat plate (without handle) as a lid, cover the plate and place some weight (fill water in a large vessel or 5 ltr cooker) on top.
step 4:
  1. Place the biriyani handi or vessel on stove top and cook on high flame for 5 minutes (Meanwhile heat a dosa pan in a medium flame in a separate burner) and on low flame for 10 to 15 minutes.
  2. After overall 15 to 20 minutes of cooking on direct flame, take out the handi and place it on top of the hot dosa pan which is still on medium flame. Allow the biriyani to dum for 20 minutes.
  3. Switch off the flame and leave it for 10 minutes.
  4. Open the lid and check if the chicken is well cooked. The chicken texture has to be juicy and well done. The chicken should be completely cooked by now. Enjoy the yummy chicken dum biriyani with onion or mint raitha and salna! 
Notes
Tips:
1.Always use 1 ½ kg of chicken for 1 kg of rice. Here I used 2 cups (1/2 kg) of rice so I used 1 to 1⅓ kg (3 pounds) of chicken (ask for chicken (leg) pieces for biriyani at Indian meat shops).
2.Do not add too much of turmeric powder while marinating the chicken as it would change the color of the biriyani.
3.Always stay close while cooking the rice by boiling method. Because rice cooks very quickly in this method.
4.Do not add too much yogurt while marinating otherwise your biriyani becomes soggy.
5.Fried onion gives color for the biriyani. Always make fresh fried onions at home to get the best aroma and flavor on the biriyani. do not stir fry or shallow fry but deep fry with less oil.
6.Increase or decrease the quantity of the spices and other ingredients according to the quantity of biriyani you make. More the quantity, more the taste.
7.Cooking time differs for mutton biriyani. Tenderize the mutton for 3 hours or for at least an hour before marinating. Same cooking method. Dum it for extra 10 minutes. So that total cooking time will be 45 minutes.

hyderabad dum chicken biriyani

Bread Halwa

bread halwaHappy Fathers day!!! For every son and daughter out there, Dad is their hero and role model and I am no different. I love my dad. As always, like any other special days, I wanted to make something sweet that personifies my dad. I also wanted it to be something that I haven’t made so far. So after some deliberation and searching, I made Bread Halwa. I have had bread halwa before, my mom’s (yummy!) and from this restaurant (Ananda’s) near (Rajapalayam) my home town in India which is famous for its Bread halwa.

bread halwabread halwaHalwa is a popular Indian sweet which literally means sweetness. There are so many varieties of Halwa, like, Wheat halwa (the original), muscut halwa, semolina halwa, carrot halwa, bread halwa, beetroot halwa, Asoka halwa etc. Halwa is the only sweet that I love to have hot (but not the bread halwa, though :)) Back home, there is this town in my state called Tirunelveli which is famous for its halwa (especially from one particular shop called Iruttukadai). Also, there is another restaurant (Nanban Mess) in Kuttralam, a popular tourist town in Tamilnadu famous for its waterfalls, that makes one of the most delicious halwa out there. Having a bath at the waterfalls and then breakfast and halwa at that restaurant is a ritual which we never forget to follow while there. I simply love it 🙂

bread halwaGenerally, I don’t like fried food or any dish that involves frying. That was one of the main reasons why I did not try making bread halwa for a long time. All the recipes that I came across involved frying the bread. But when I came across a recipe that did not involve frying I tried it at once and the result was extremely tasty :D. The Bread Halwa recipe I have posted here is extremely easy to make and it takes no time at all, infact you can make it in less than 15 minutes tops. Care should be taken while cooking as you don’t want to overcook the halwa else it will get harder because of the bread used. Try out this Bread Halwa and you won’t be disappointed, I guarantee!

Bread Halwa
Recipe type: Dessert
Cuisine: Indian
Prep time: 
Cook time: 
Total time: 
Serves: 4
 
Ingredients
  • White Bread slices – 6 (I used pepperidge sandwich bread)
  • Ghee – ¼ cup
  • Milk – 1 cup
  • Sugar – 1 cup
  • Rose water – ¼ tsp
  • Pistachios, chopped – for garnishing
Instructions
  1. Boil milk and allow it to cool.
  2. Cut the soft crust on all four sides of the bread.
  3. Roughly chop the bread slices and soak them in milk. Mash the bread with clean hand without any lumps.
  4. Heat a thick nonstick pan and add ⅛ cup ghee and add the mashed bread.
  5. Cook in medium flame and stir constantly for few minutes until it doesn’t stick on the sides.
  6. Add sugar in low to medium flame and mix well. Add the remaining ghee at this stage. Stir constantly until the halwa consistency. It only takes a couple of minutes.
  7. Switch off the flame and serve hot or cold garnishing with pistachios. Enjoy! 🙂
Notes
1.Always make this bread halwa in low to medium flame.
2.This dish will be cooked real quick. So do not overcook otherwise you won’t get the desired consistency.
3.I used US measurements for this recipe.

bread halwa

Jaangri

IMG_0987cHappy Mother’s Day to all  Moms and Moms-would be :)! It is a very special day in honor of the most caring and sweetest person in our life, Mom. As with any other special day/festival, I made one of my favorite sweets for this Mother’s day, Jaangri. Jaangri is a version of another popular Indian sweet called the Jalebi. Jalebi is crispier, smaller and sweeter than Jaangri. Jaangri is also called as Amriti, Emarti, Oriti and Jhangri. Jaangri is a sweet made from urad dal batter, deep fried and then soaked in a sugar syrup. The closest pastry that resembles Jaangri is the funnel cake here.

IMG_0996cThe first thing you notice about Jaangri is its shape. That comes from the unique way the batter is poured in oil for frying. It has a geometric pattern that somewhat resembles a flower with a circle in the middle. The texture is crunchy on the outside and soft on the inside. This is because of the frying in oil and the subsequent soak up in sugar syrup. I had always wanted to prepare Jaangri, especially after coming here to the US since it is extremely difficult to buy it here and I am not a fan of Jalebi 🙂 I had tried it once before and this time was my next attempt and I am happy that it turned out very well 🙂

IMG_0994cIMG_0992cMaking Jaangri is simple but a bit time consuming process. Everything comes down to the batter and your skill in pouring it in the oil to get that unique flower pattern while frying. But trust me, it is worth all the trouble. Having a crunchy, soft Jaangri well soaked in the sugar syrup is a culinary delight that can only be experienced. And I would love for you all to experience this sweetness with your sweet ones at home 🙂

Jaangri
Prep time: 
Cook time: 
Total time: 
Serves: 30 Jaangris
 
Ingredients
  • Whole urad dal – ¾ cup
  • Rice flour – 1 tsp
  • Corn flour – ¼ tsp
  • Sugar – 2 cups
  • Rose essence – ¼ tsp
  • Orange food color – a pinch or two
  • Oil to fry the Jaangri
Instructions
  1. Wash and soak urad dal with enough water for 2 hours. Drain the water completely and set aside.
  2. Grind the urad dal in grinder, sprinkling little water now and then – do not add too much water. The batter has to be thick in order to get good jangri shape. It took me like ¾ cup of water. Add or reduce according to your measurement. I ground the urad dal for 35 minutes to get a smooth batter.
  3. Meanwhile add 2 cups of sugar in a pan and add enough water to cover the sugar. I added ¾ cup water. Set aside until the sugar is completely dissolved.
  4. While grinding the batter I also prepared the piping bag. I used wilton piping bag with #10 tip.
  5. You could also use traditional jaangri making cloth or thick ziplock and make a hole.
  6. Make the sugar syrup when the sugar is completely dissolved. Do not stir the sugar syrup otherwise it forms crystals. Just heat the syrup and bring it to boil.
  7. Now reduce the flame and add essence and food color. Boil for another couple of minutes until single string consistency.
  8. Transfer the batter into a mixing bowl.
  9. Add rice flour,corn flour and food color (mixed with little water) to the batter and beat or fluff them well using your hand. (Like how you do for idli batter). The batter should be airy and thick.
  10. Add some of the batter to the piping bag.
  11. Heat a FLAT pan with enough oil in a medium flame. Do not add too much oil. Fill 1” of the pan with oil. Oil should not be too hot.
  12. You will know the oil is ready when you start to notice small bubbles rising from the bottom of the pan.
  13. Pipe the jaangri batter, pour it in oil and cook until one side is cooked. Carefully turn the jangri and cook the other side.
  14. Using skewers take out the fried jaangris.
  15. Dip them in the sugar syrup for couple of minutes and transfer to the plate. Serve hot. Enjoy! 🙂

IMG_0988c

Podi Idli

Podi IdliHere is yet another variant of one of the most popular south indian dish, Idli. However, the recipe I have posted here is simple yet tasty. It is made from Milagai Podi or Idli Podi or just Podi, a popular condiment usually had with idli and dosa, called Podi Idli. Podi literally means coarse powder in Tamil. In India, it is popular in Tamilnadu and Andhra Pradesh where it is also called as gun powder because of the spiciness 🙂 Idli podi is somewhat similar to mustard back here, I mean not the texture but the selectiveness in their usage. When you have Podi, you don’t have to worry about any other chutney or side dish for Idli and Dosa; having just them tastes awesome.

podi idliPodi IdliI love my grandma’s idli podi recipe the most and then my Mom’s. The Podi I have used in the Podi Idli recipe here is my Mom’s. There are so many varieties of Podi like Milagai Podi, Ellu Podi (made from sesame seeds), Paruppu podi etc and the interesting part is each of these serve as an accompaniment to a particular main dish 🙂 I have used both black and white sesame seeds to prepare the Idli Podi. Make sure to grind it to a coarse texture since the coarse particles brings out the flavor and adds crunchiness much more than the fine grained powder.

Podi IdliPodi IdliI always prefer having Idli Podi with whatever chutney I make 🙂 This has been my preference since childhood and I used to get an earful from my Mom for that (and still do sometimes) :). Podi Idli is a filling dish and is very easy to make. All you need is an awesome Idli podi and soft idlis. My MIB is a big fan of this recipe 🙂 I have not added onions and green chillis to the recipe since it might then taste similar to another variety of Idli called the Idli Upma (I will post the recipe soon). Podi Idli can be had for breakfast, dinner or just as an appetizer. Try this easy dish in your home and let me know when you would prefer to have it? 🙂

Podi Idli
Recipe type: Main
Cuisine: Indian
Prep time: 
Cook time: 
Total time: 
Serves: 20 mini idlis
 
Ingredients
To make idli podi
  • Whole urad dal - 1 cup
  • Red chilli - 10 to 12 nos
  • Sesame seed - ½ cup
  • Garlic cloves, big - 2 nos + 1 medium
  • Curry leaves - half a sprig
  • Salt - 1 tsp
To make podi idli
  • Idli batter -
  • Oil - ½ to 1 tsp
  • Mustard seeds - ½ tsp
  • Urad dal - ½ tsp
  • Curry leaves - ½ a sprig
  • Idli podi - 2 tbsp
Instructions
  1. Heat a pan in a medium flame and dry roast urad dal until aroma spreads for couple of minutes. Transfer to a plate and let it cool.
  2. Next dry roast red chilli and garlic seperately until they turn crisp and transfer to the plate.
  3. In the same pan dry roast sesame seeds until it splutters for about a minute. Transfer to a separate plate and let it cool.
  4. Turn off the heat and dry roast curry leaves until they turn crispy.
  5. Pulse urad dal, curry leaves and red chilli twice. Add sesame seed, garlic and salt and blend for few seconds to a coarse powder.
  6. Now pour idli batter in mini idli plates and steam cook for 15 minutes.
  7. scoop out all the idlis and immediately (when the idlis are still hot) add a tbsp of idli podi and roughly toss them.
  8. Heat oil in a pan and season with mustard, urad dal and curry leaves.
  9. Add the tossed idlis to the seasoning along with a tbsp of idli podi. Covet the lid, hold two sides of the pan and carefully toss them for few seconds.
  10. Turn off the heat and serve tasty and spicy podi idli with sambar and chutney or serve as is. Enjoy! 🙂

Podi Idli

Oats Payasam

Oats PayasamHappy Tamil New Year, everyone! Missing home :(. It is a tradition all over the world to make special dishes on special occasions like festivals, celebrations etc and Tamilians are no exception to that. Though it is not a big occasion like Deepavali or Pongal, Tamil New Year is still celebrated widely back home. You get to watch lots of programmes in cable television, you get a Government holiday and get to eat scrumptious food:) Now lets concentrate a little bit more on that last word, after all this is a food blog and I am foodie (hope you are too :)) I make it a habit of preparing something new, usually a sweet dessert on all special occasions and holidays. And I try not to make the same dish for two different occasions. This year, I tried a new type of Payasam or Kheer made from oats called the Oats Payasam and am sharing the recipe for it here.

Oats PayasamOats PayasamOats, as you all might know is a popular breakfast food which is rich in nutrients. Most often, you might have had it in the form of porridge (both sweet and savory). We too got in to this breakfast routine of having oats and ended up with buying different varieties of them like steel cut, rolled etc. For Tamil new year, I decided to make use of the oats, come on, how much can you have it as breakfast only :). I came across this Oats Payasam recipe and decided that it is going to be my special dish this year. Oats Payasam is a very simple dish but extremely tasty. It is made using steel cut oats, jaggery, ghee and nuts like cashews, pistachios and almonds.

Oats PayasamOats PayasamThis is my first time making the Oats Payasam and I am very happy with the outcome. It is very tasty and I find it similar to Aravana Payasam in taste, especially that crunchiness, served as prasadham in Sabarimala Temple back home. Try this sweet Payasam in honor of an even sweeter language, Tamil, on this special day and enjoy it with your loved ones 🙂

Also check out my Paal Payasam recipe here

Oats Payasam
Recipe type: Dessert
Cuisine: Indian
Cook time: 
Total time: 
Serves: 4
 
Ingredients
  • Steel cut oats – ½ cup
  • Water – 1 ½ cup
  • Milk – 3 cups ( I used 2% milk)
  • Jaggery – ½ to ¾th cup
  • Cashews – 7 nos
  • Pistachios and Almonds, roughly chopped, seperated – 1 tsp
  • Cardamom powder, freshly ground – 4 nos
Instructions
  1. Heat 1 and ½ cups water in a pan and add oats. (1:3 ratio – for 1 cup of oats 3 cups water)
  2. Cook in a medium flame until the water dries out completely for 10 minutes and transfer to a bowl.
  3. Meanwhile boil milk in another vessel.
  4. Once the milk is boiled, simmer and add ½ tsp roughly crushed almonds, pistachios and few cashews. Simmer it for couple of minutes stirring occasionally.
  5. Now add in the cooked oats and mix well. Simmer it for another couple of minutes.
  6. Meanwhile, add jaggery with very little water (1 tbsp) in the same pan used to cook oats.
  7. Add cardamom powder to oats.
  8. Cook jaggery until it dissolves completely and forms a syrup.
  9. Switch of the flame and add jaggery syrup to the oats mixture. Mix well until the jaggery syrup is well incorporated to the oats payasam.
  10. Fry cashews with ¼ tsp ghee and add them to the oats payasam. Sprinkle the remaining chopped nuts on top and serve hot or cold according to your taste. Enjoy! 🙂

Oats Payasam

Perfectly boil eggs

perfectly boil eggs

Hi everyone. I have started a new section called How To’s in my blog. There I will share some basic tips/ideas on some common tasks that you would encounter while cooking. I hope this new initiative will help those who are new to cooking and also to others.

It is always tricky to boil eggs. I know it’s a very simple task but to get a perfectly boiled egg is akin to finding an oasis in the middle of a desert! I recently came across a novel way of perfectly boiling eggs using an oven. I tried and it did work! And so here is the first post in my How To’s on how to perfectly boil eggs.

First preheat the oven to 325 degrees Fahrenheit. Place the eggs on a muffin tray.

perfectly boil eggs

Place them in the oven and bake for 30 minutes.

perfectly boil eggs

Fill a bowl with ice cubes just five minutes before taking out the eggs.

perfectly boil eggs

Add running cold tap water to the bowl and keep it ready.

perfectly boil eggs

After 30 minutes take out the muffin tray and shock the eggs by immediately placing them in the ice filled bowl.

perfectly boil eggs

Take them out, break and peel the shells and tadaaaaa. 🙂

perfectly boil eggs Cut them and have them as you desire.

perfectly boil eggs

Here I have added little salt and pepper.

perfectly boil eggs

Or as a salad by adding them with chopped avocados drizzled with lemon juice, salt and pepper for the perfect breakfast.

perfectly boil eggs

For those who don’t have a conventional oven, you fill the sauce pan with water and add the eggs. Boil them for 15 minutes. Take them out and leave it for 5 minutes. Then shock them and peel the shell. I will add the step by instructions soon. 🙂

perfectly boil eggs

Mooli Ka Paratha

Mooli Ka ParathaParatha is a bread variety made from leavened wheat flour and is the staple food in northern parts of India. There are so many varieties of parathas like Aloo paratha, Kashmiri paratha, Paneer paratha etc. Today’s recipe is one such variety called the Mooli Ka Paratha, a stuffed paratha variety made from Mooli. Mooli is the hindi word for radish. I have heard about Mooli ka paratha before but have never tried it until recently. Thanks to my dear friend for introducing me to this dish.

Mooli Ka ParathaMooli Ka ParathaRadish or Mooli is a root vegetable and you must have seen it as an ingredient in another south Indian culinary delight called as the Sambar. Mooli ka paratha, though is a common dish prepared at homes, it is rarely seen in a restaurant menu. As with other stuffed parathas that I had mentioned above, Mooli ka paratha too can be had as is without a side dish and if you really must have something with it then Raita is the one to go for, especially cucumber raita. I have provided the recipe for that as well here 🙂Mooli Ka Paratha

Mooli Ka ParathaMooli ka Paratha is a summertime dish because of the rich water content in radish and is healthy as well. For the stuffing, you can either use the radish as is or sauté them and then use it. Either way, it tastes good. The next time you want to have paratha for lunch or dinner, do try this variety and I promise that you will not be disappointed 🙂

Mooli Ka Paratha
Recipe type: Main
Cuisine: Indian
Prep time: 
Cook time: 
Total time: 
Serves: 6 parathas
 
Ingredients
for the stuffing:
  • Radish, grated – 4 cups
  • Ajwain – ¼ tsp
  • Green chilli, finely chopped – 3 nos
  • Cilantro, finely chopped – 3 nos
  • Cumin powder – ½ tsp
  • Red chilli powder – ½ to ¾ tsp
  • Garama masala – ¼ tsp
  • Chat masala – ¼ tsp
  • Salt
for the dough
  • Wheat flour – 2 cups
  • Salt as required
  • Oil – 2 tsp
for raitha:
  • Grated persian cucumber, small – 1 no
  • Grated carrot, small – 1 no
  • Green chili, finely chopped – 1 no
  • Salt as required
  • Yogurt – ½ cup
  • Chat masala – a generous pinch
Instructions
  1. Grate the radish and transfer to a bowl. Set aside for 30 minutes and squeeze all the juice completely. Finely chop green chilli and cilantro.
  2. Add all the above ingredients to the grated radish and mix well. You can use this as a stuffing.
  3. Or saute them without squeezing the radish juice until raw smell disappears and all the water dries out and use that as a stuffing.
  4. Add oil, salt and squeezed radish juice with enough water (if needed) to the flour and make a dough. Leave it for 15 to 30 minutes.
  5. Divide the dough to equal sized balls.Heat the flat pan to make parathas.
  6. Dust a ball into the dry flour and roll them to circle. Repeat the same and make a equal sized circle.
  7. Place the stuffing in the middle of a rolled dough.
  8. Cover with the another rolled circle.
  9. Now carefully roll the paratha to desired size and repeat the same for the remaining dough.
  10. Cook the paratha on a hot tawa for couple of minutes on one side until brown spots appear.
  11. Flip the paratha, spread ghee on top of cooked side and cook for another couple of minutes until the dark spots appear on other side. Smear enough ghee if needed.
  12. Serve the hot moolika paratha with cucumber raitha and pickle. Enjoy! 🙂
To make cucumber raitha:
  1. Add little water and salt to the yogurt and mix well.
  2. Add the grated cucumber, carrot and green chilli. Mix well and sprinkle chat masala on top before serving.

Mooli Ka Paratha