Chicken Tikka Masala

Chicken Tikka Masala
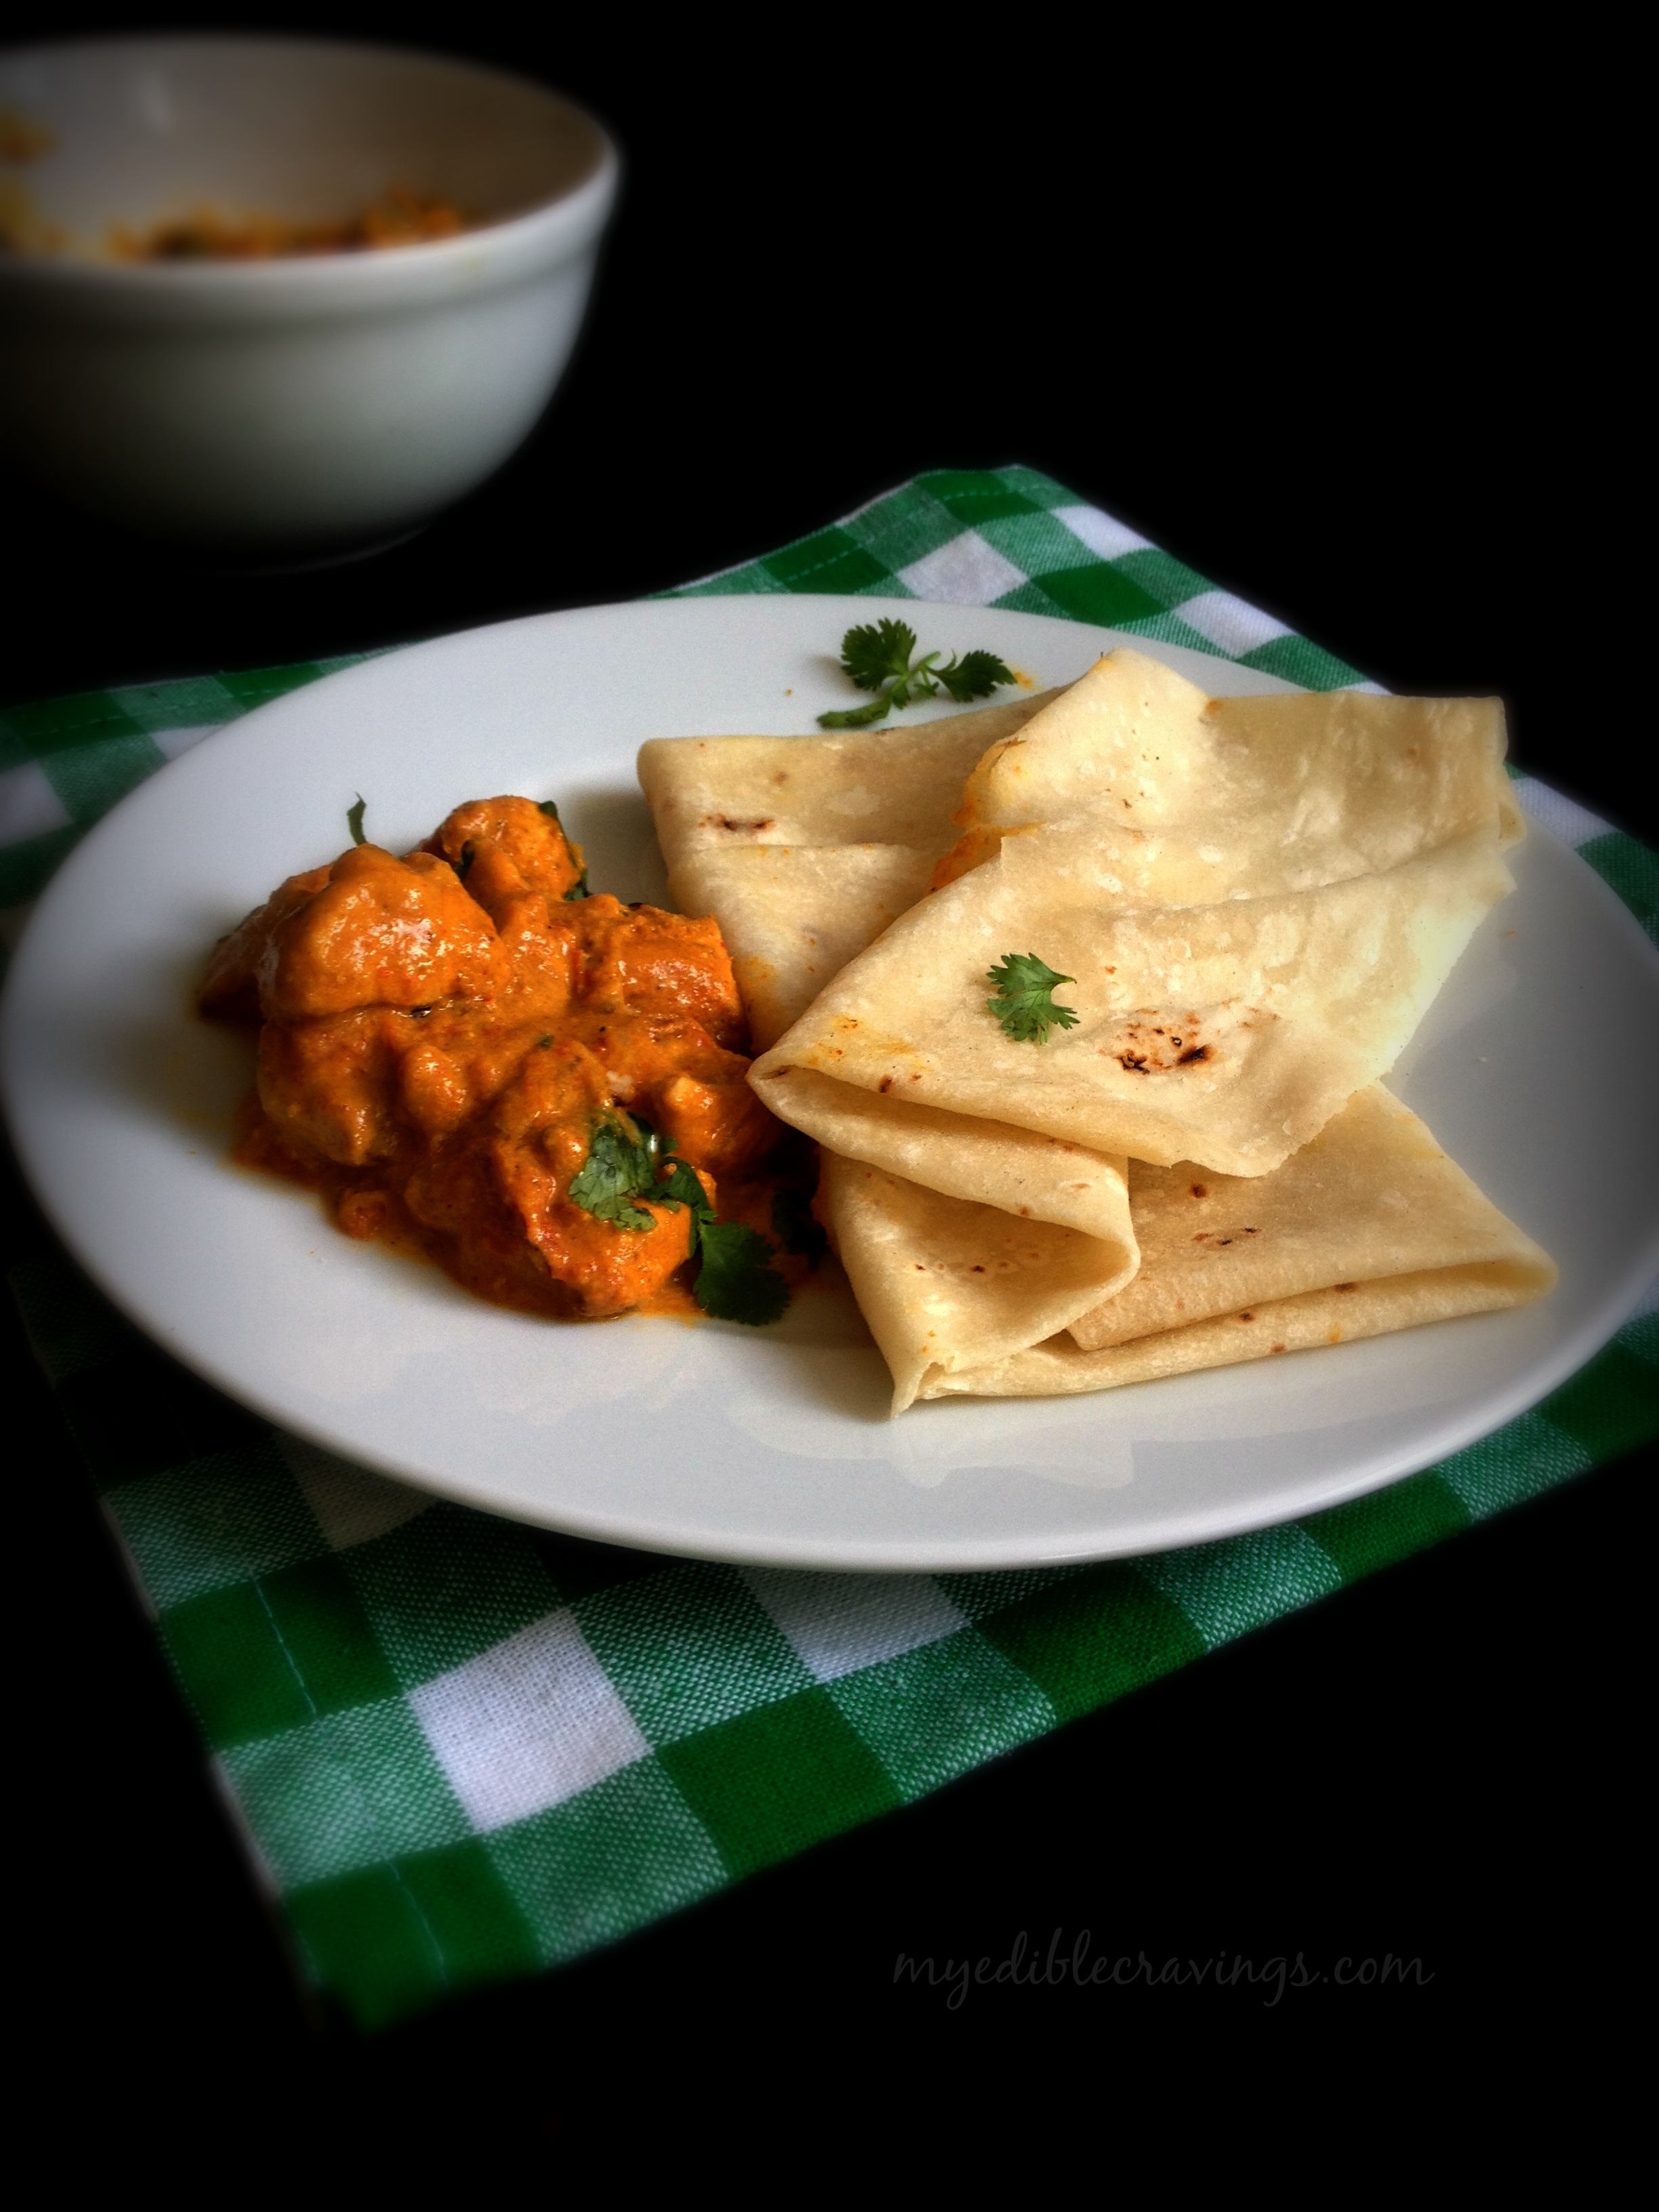
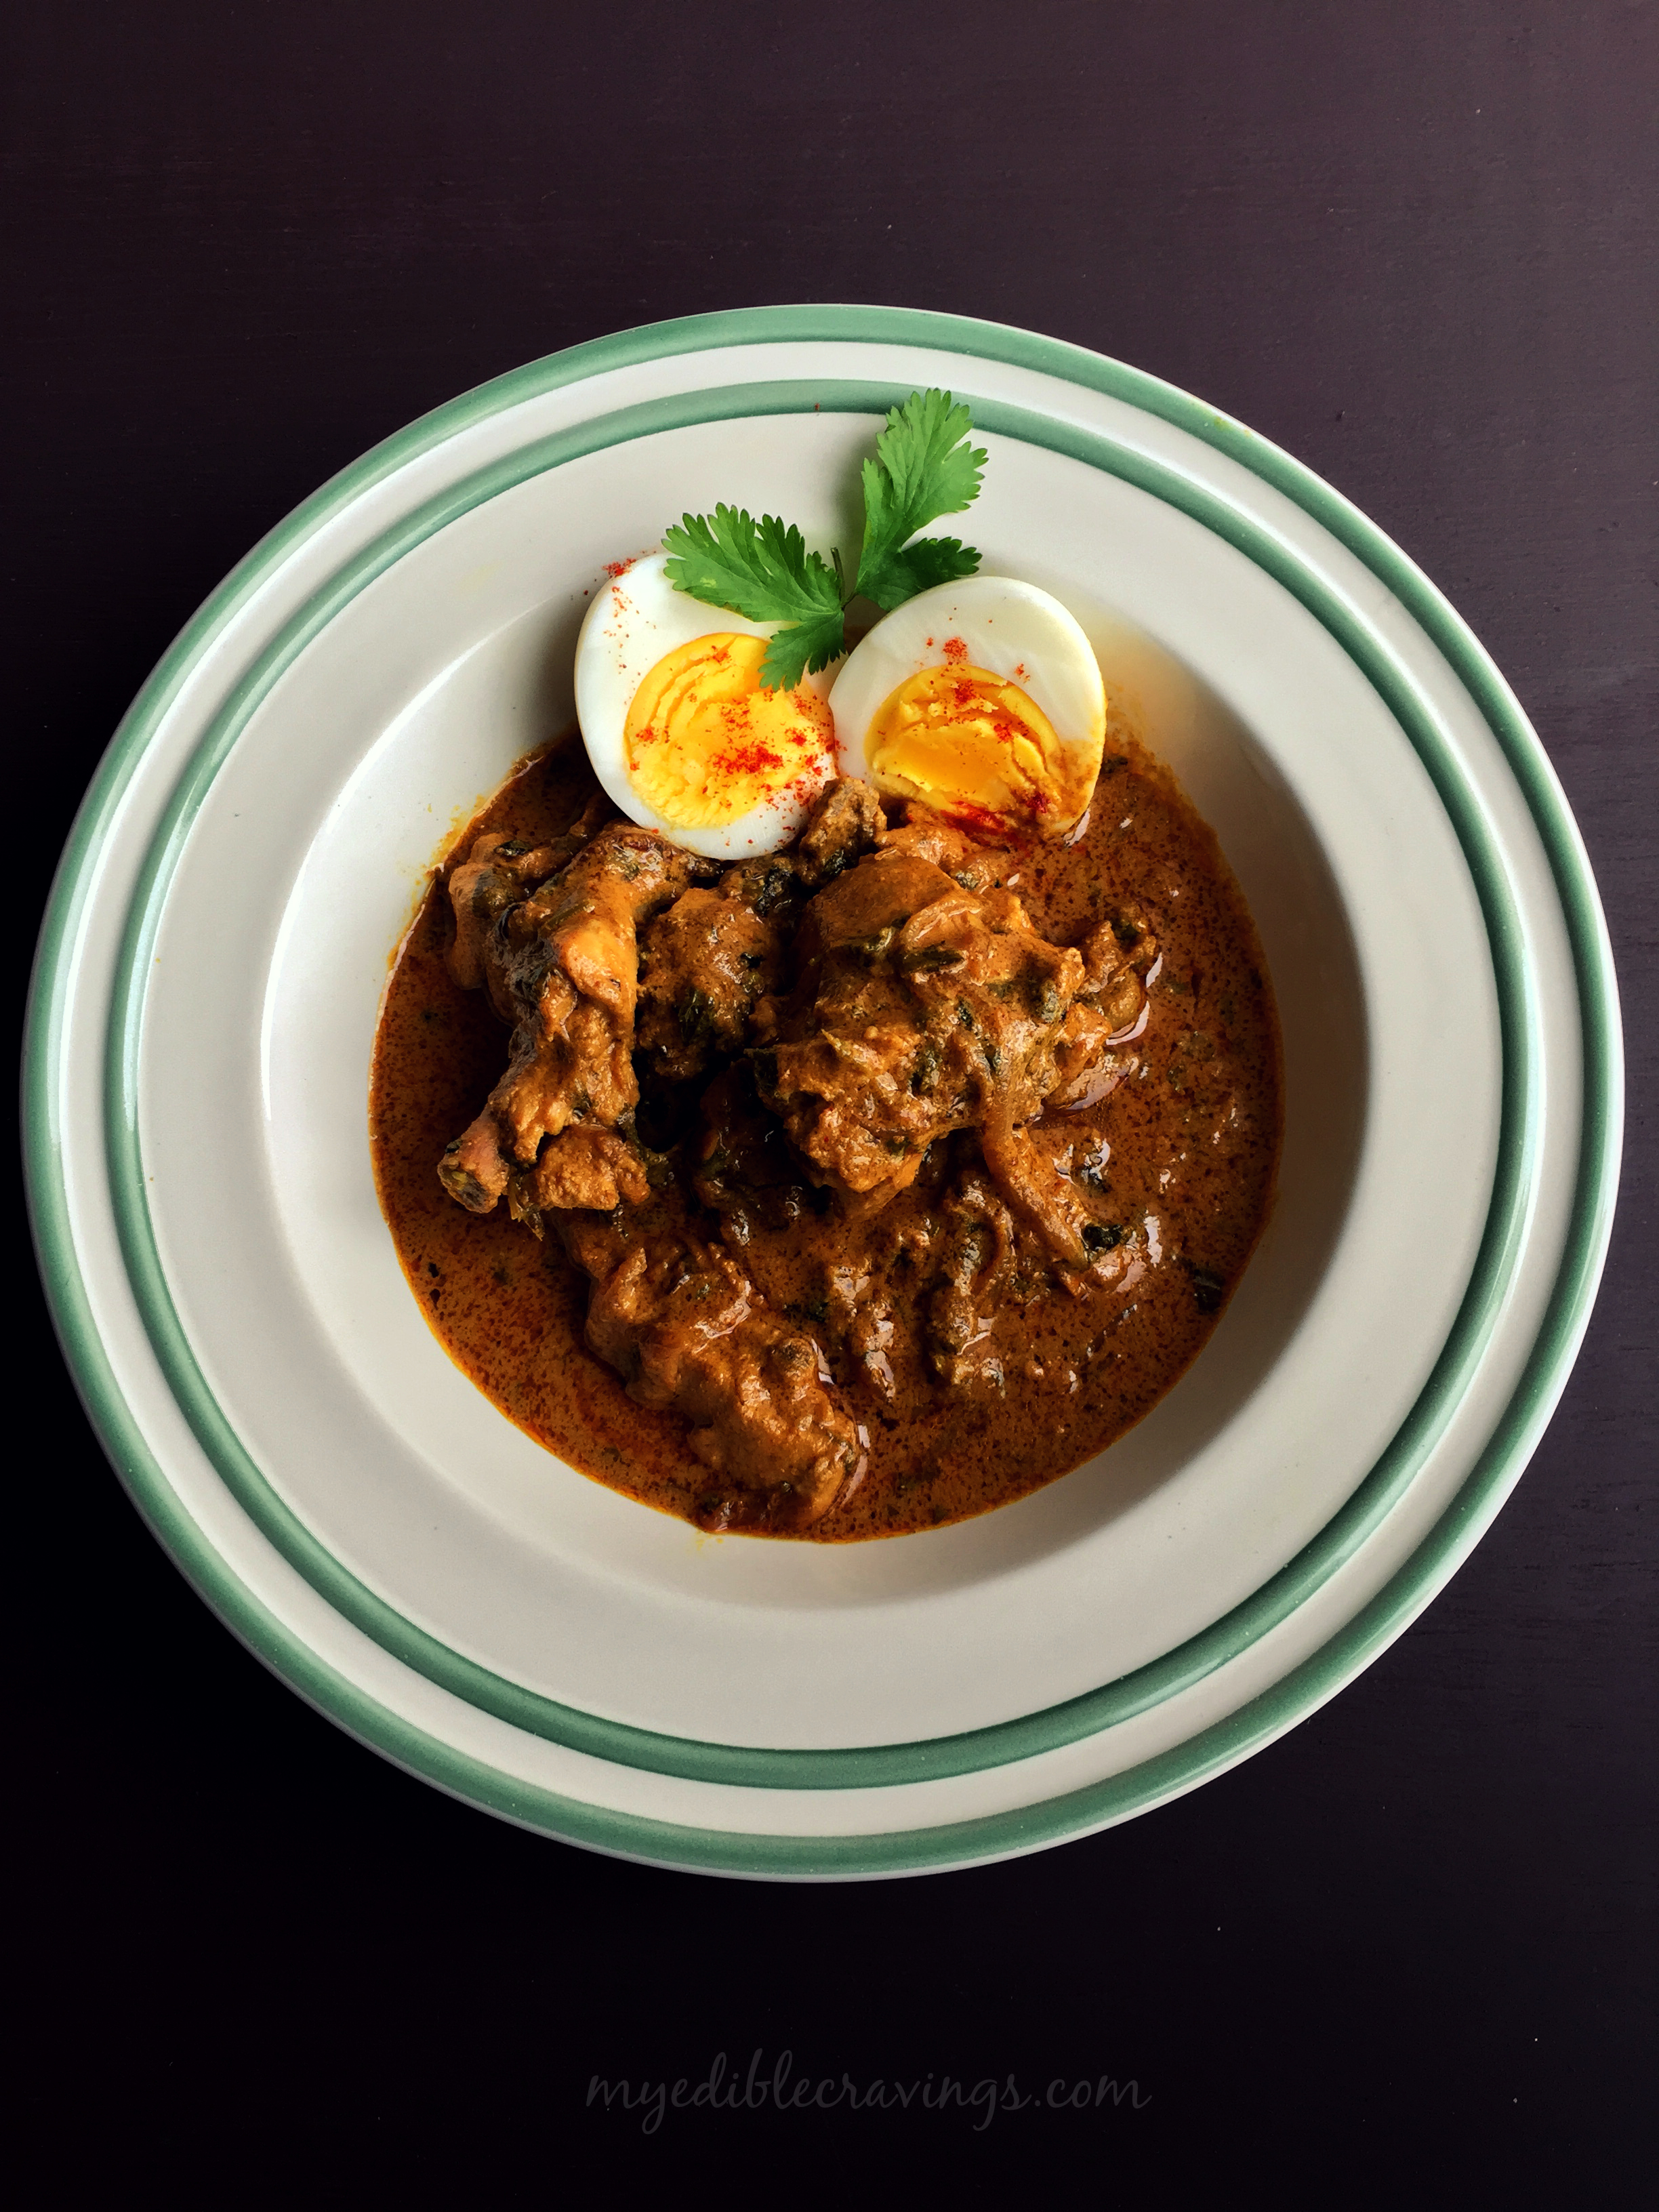
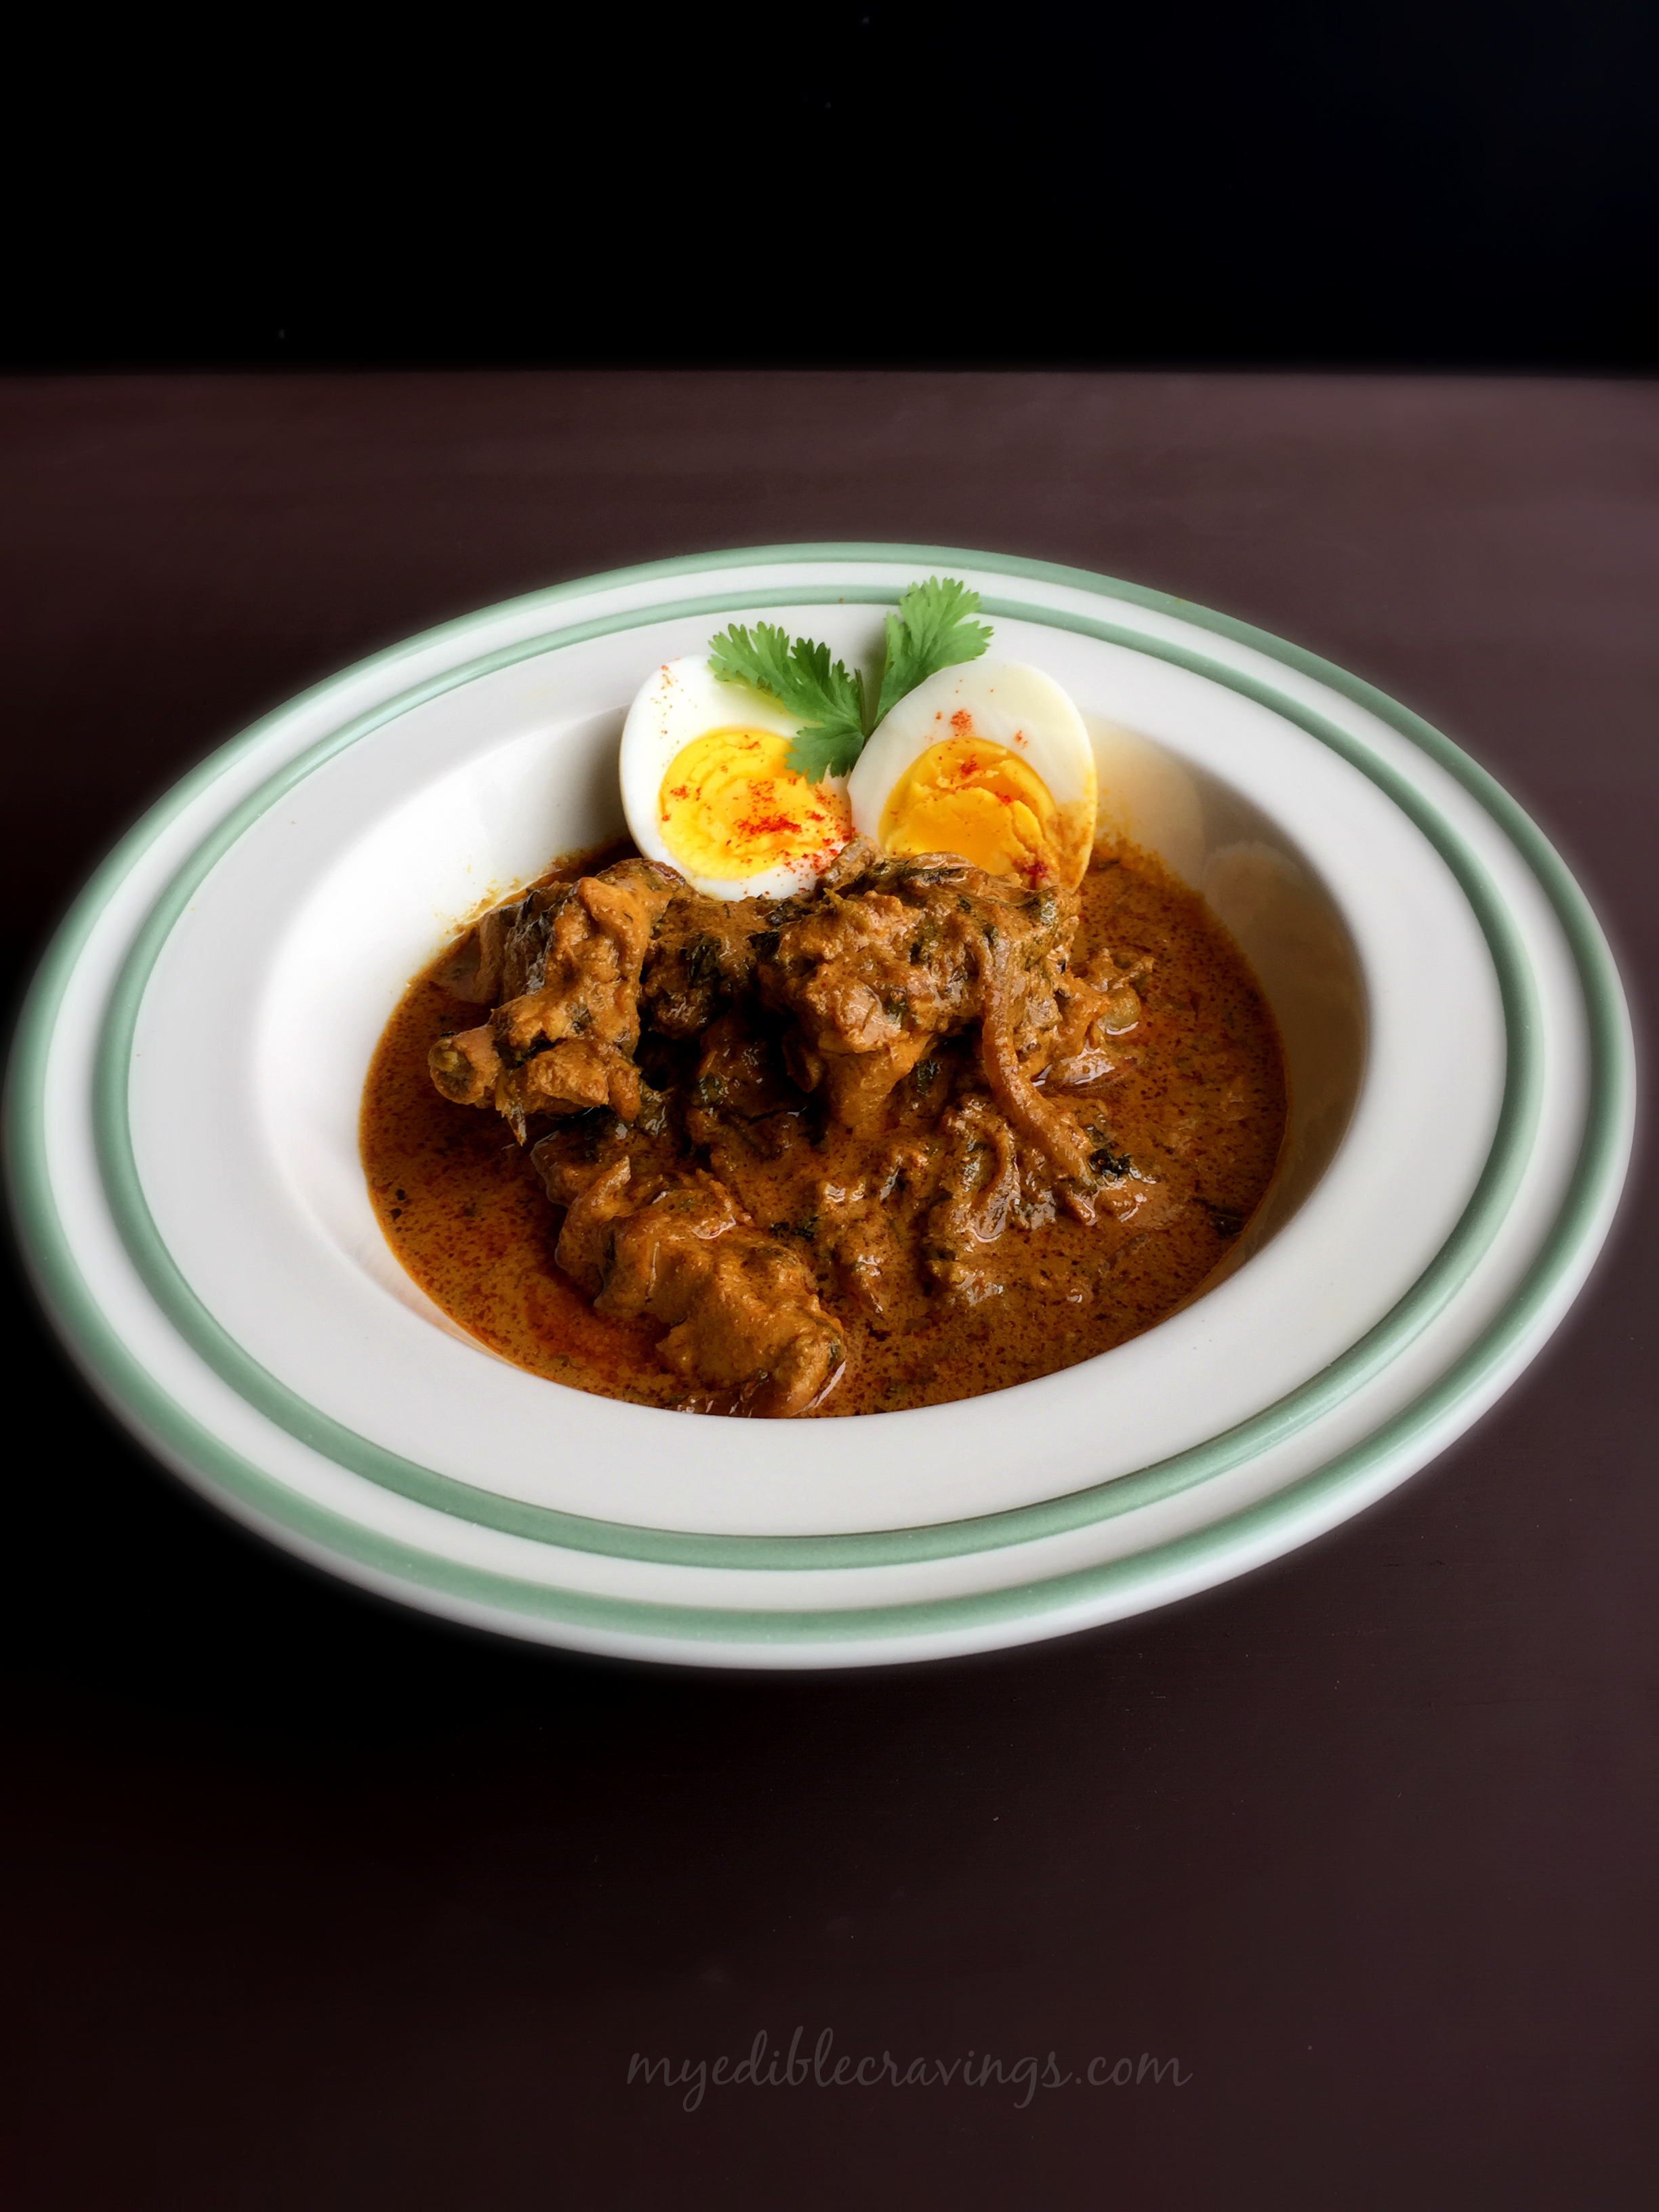
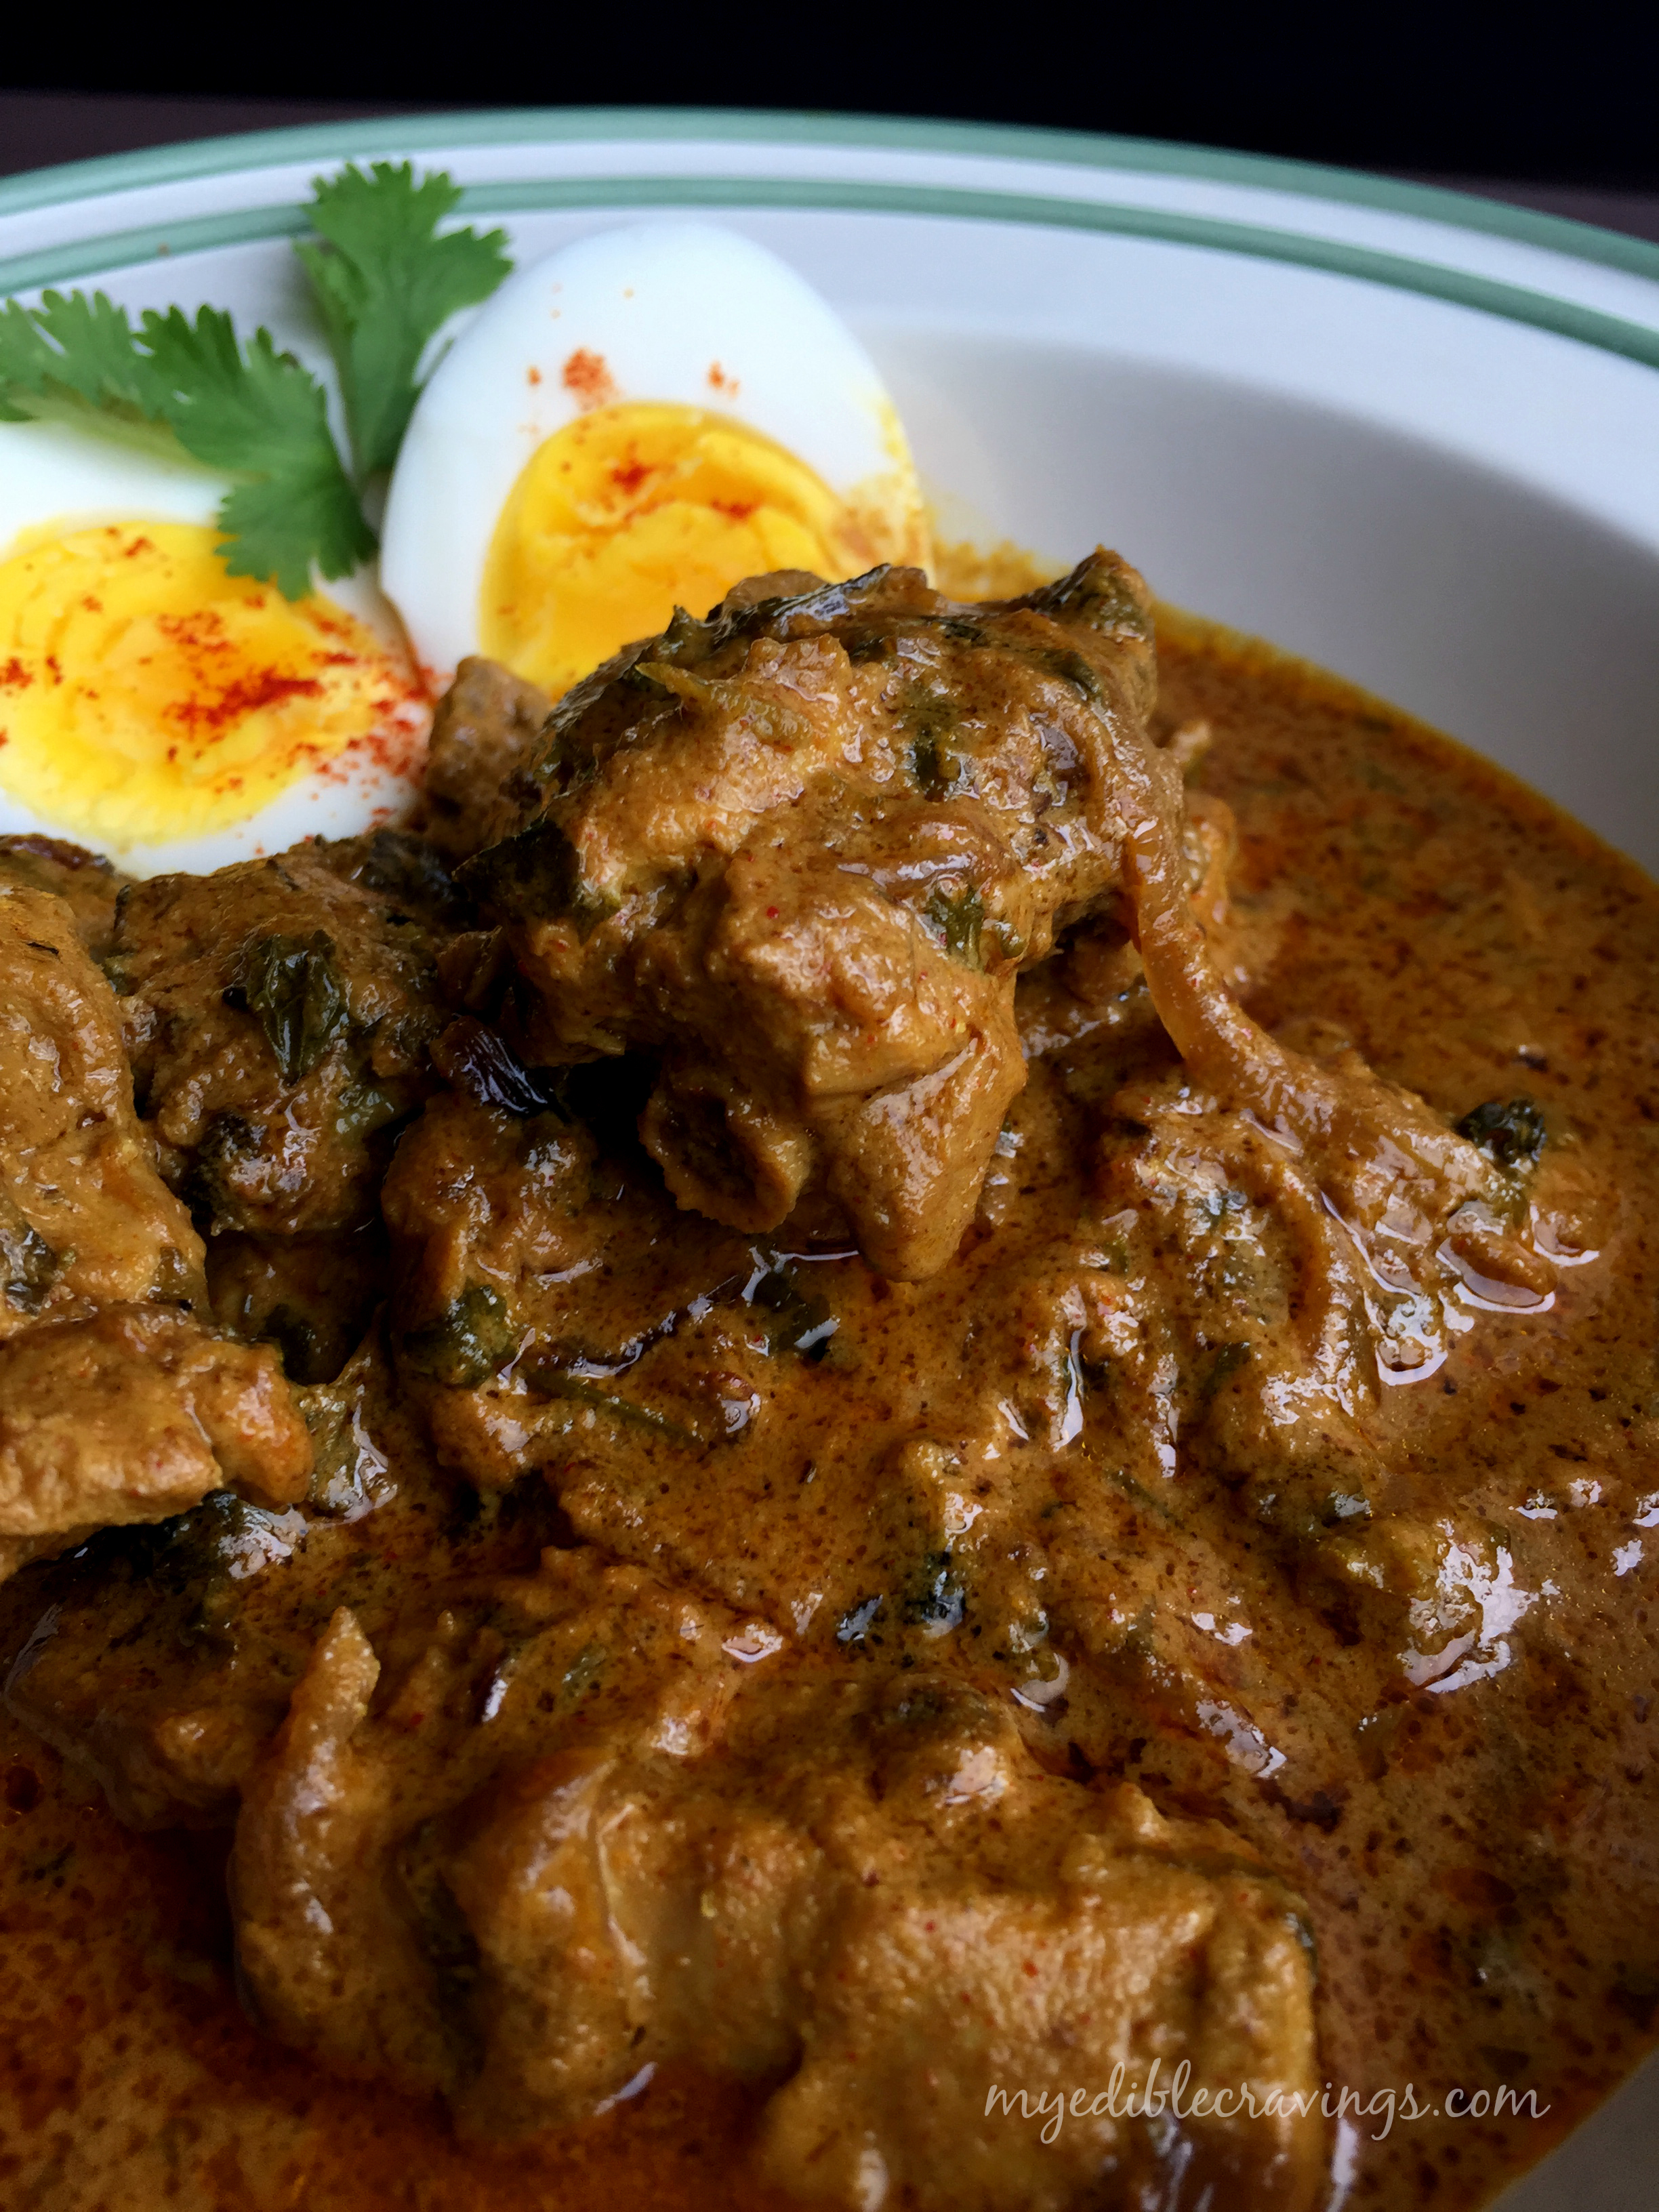
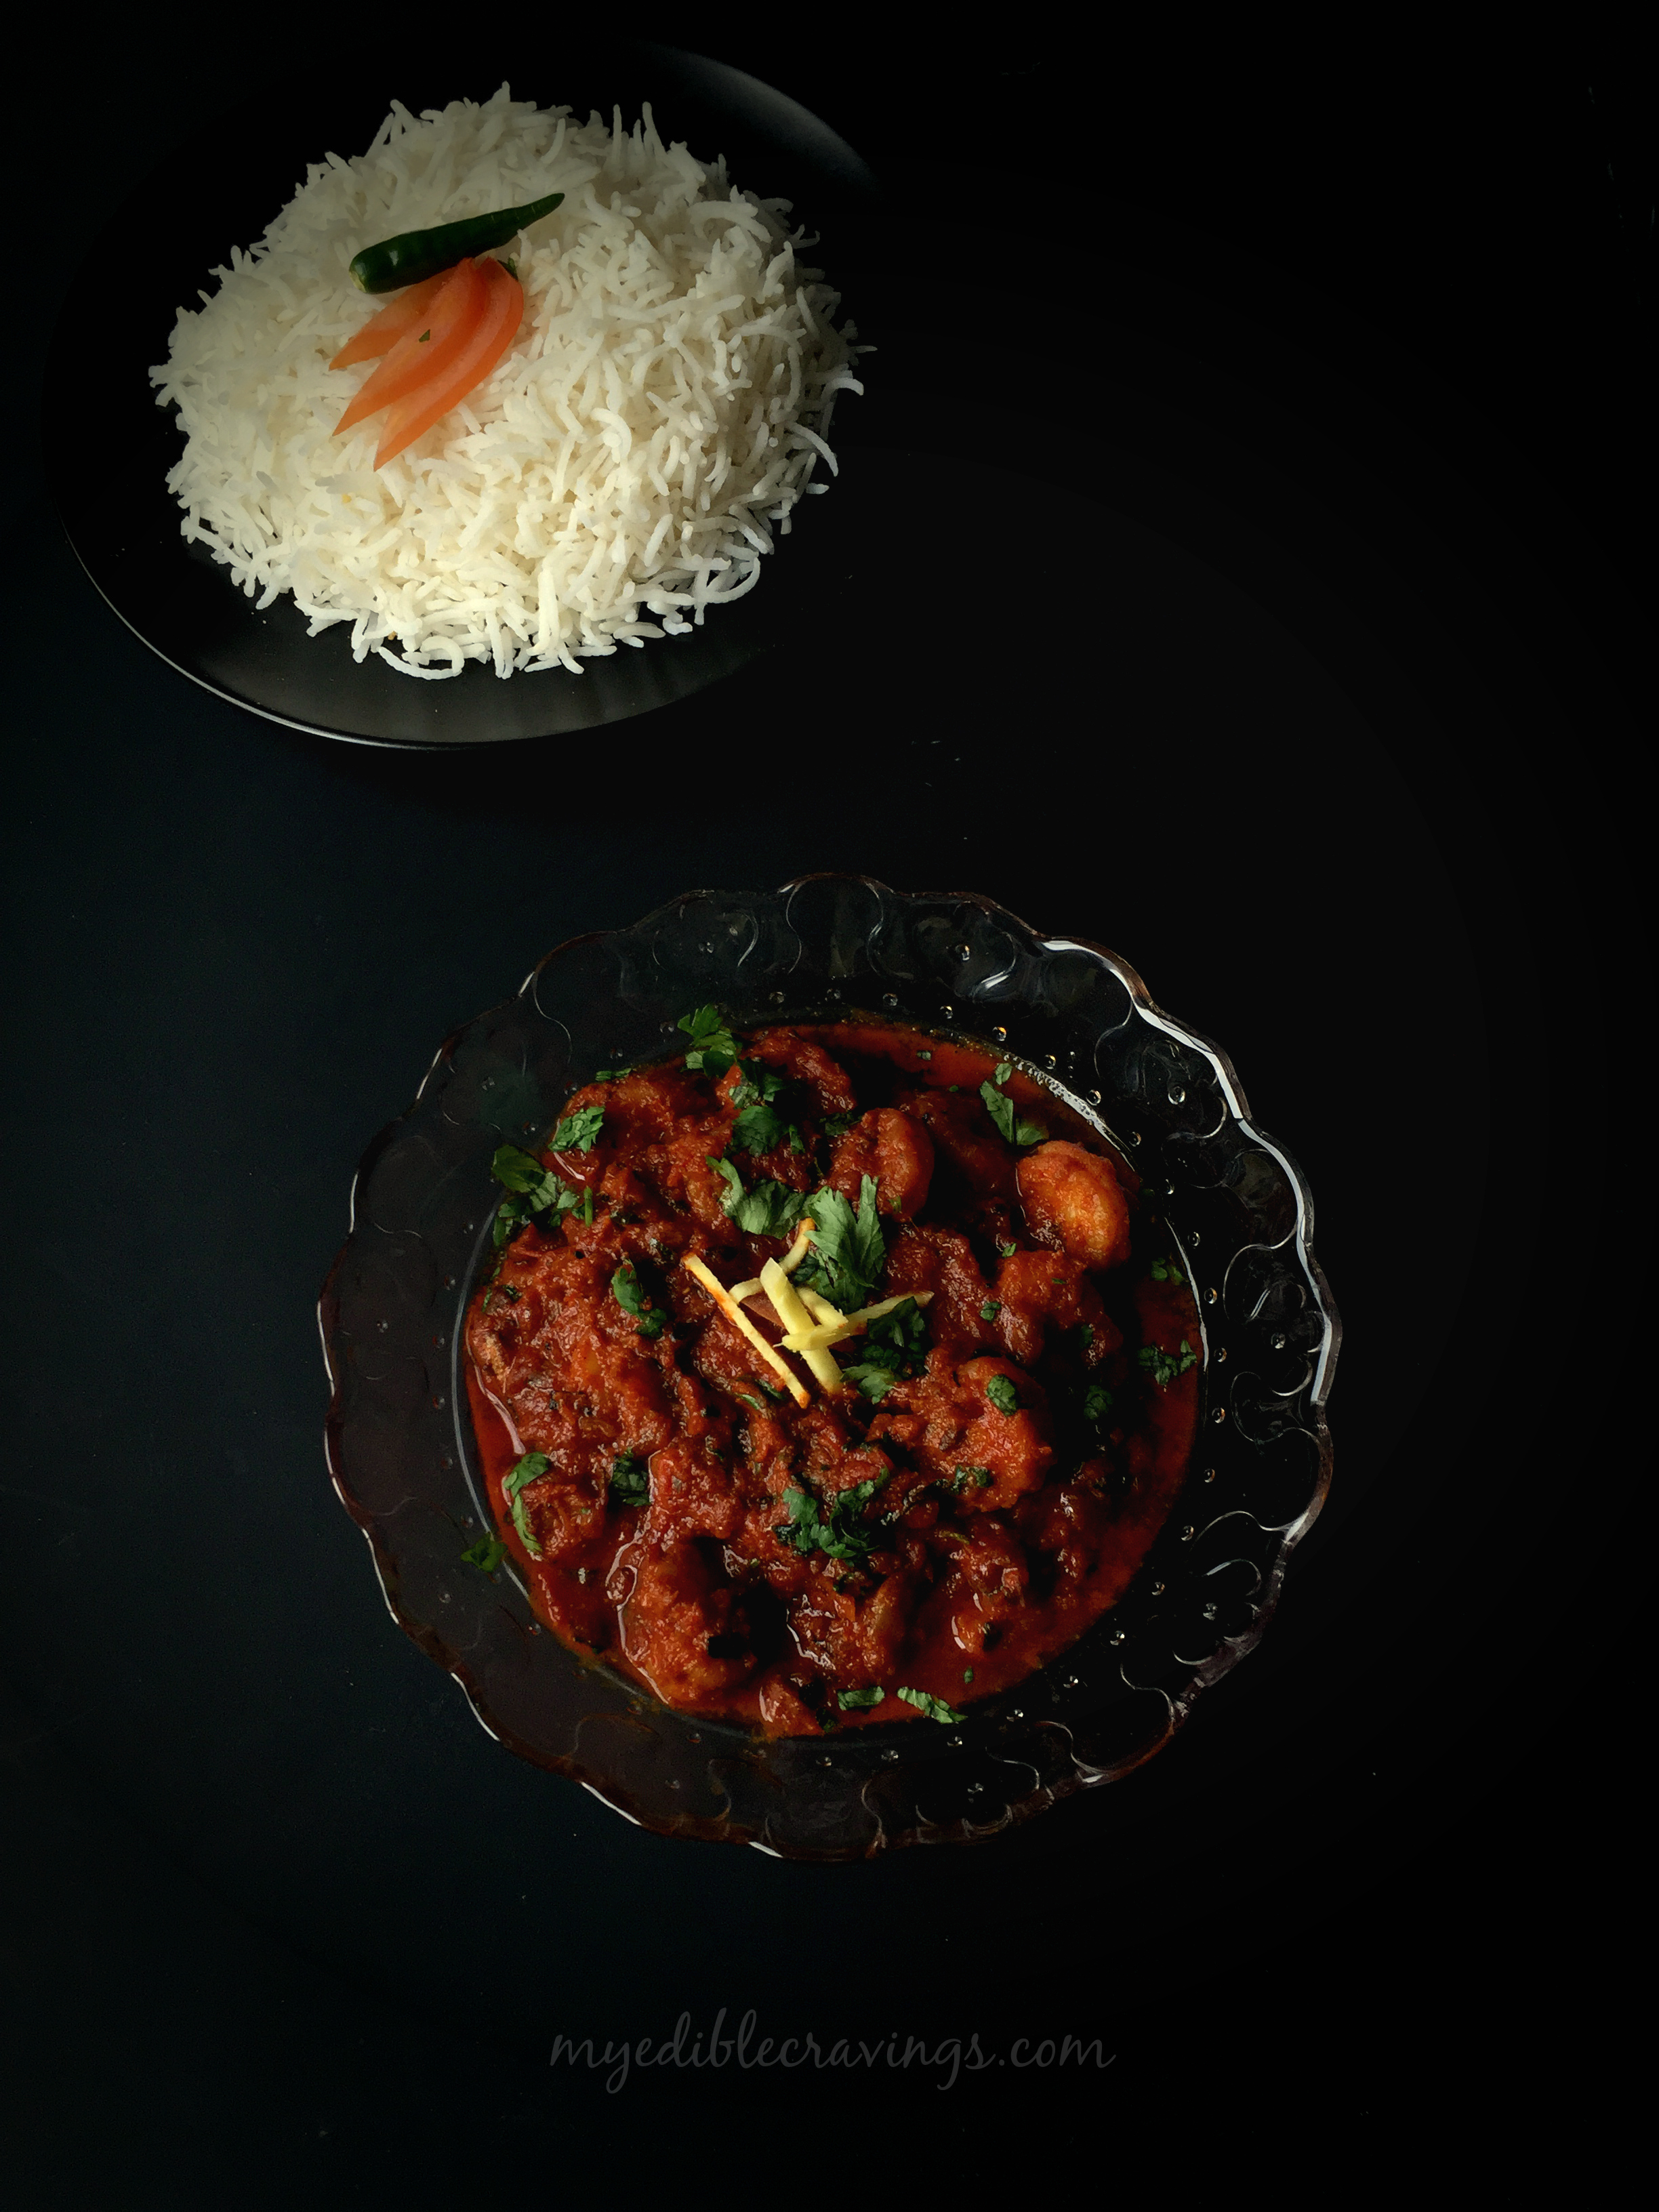
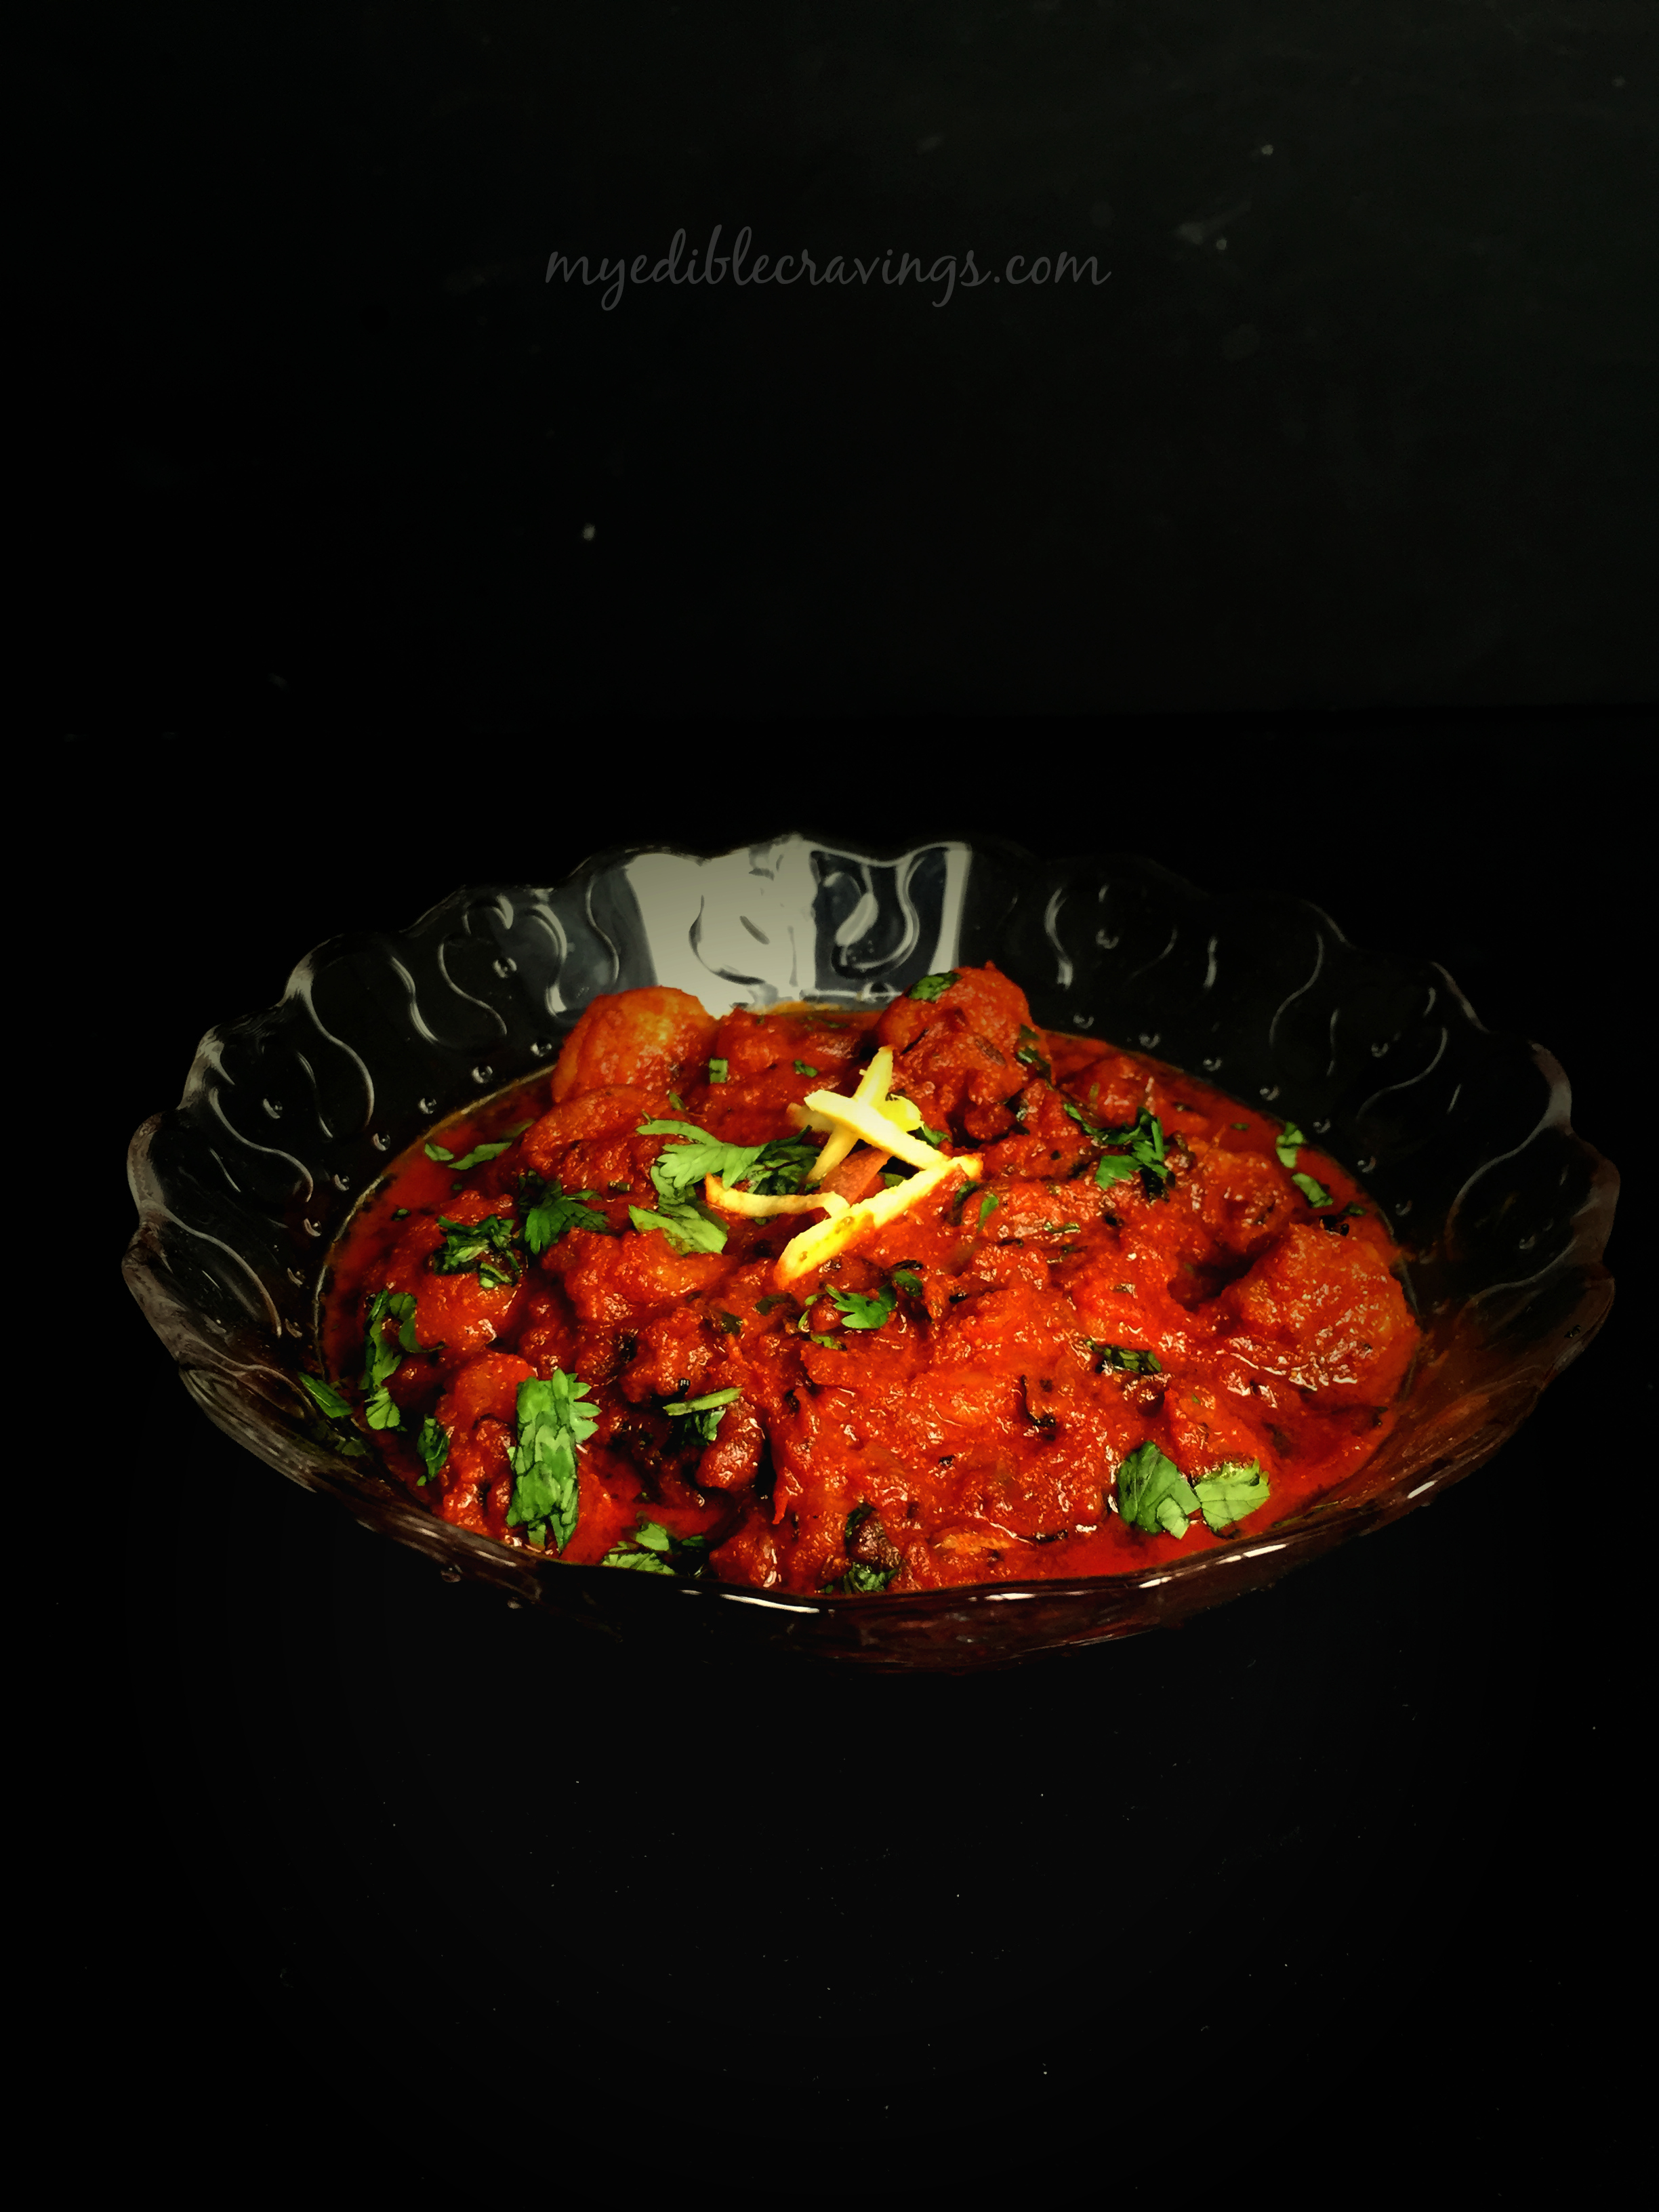
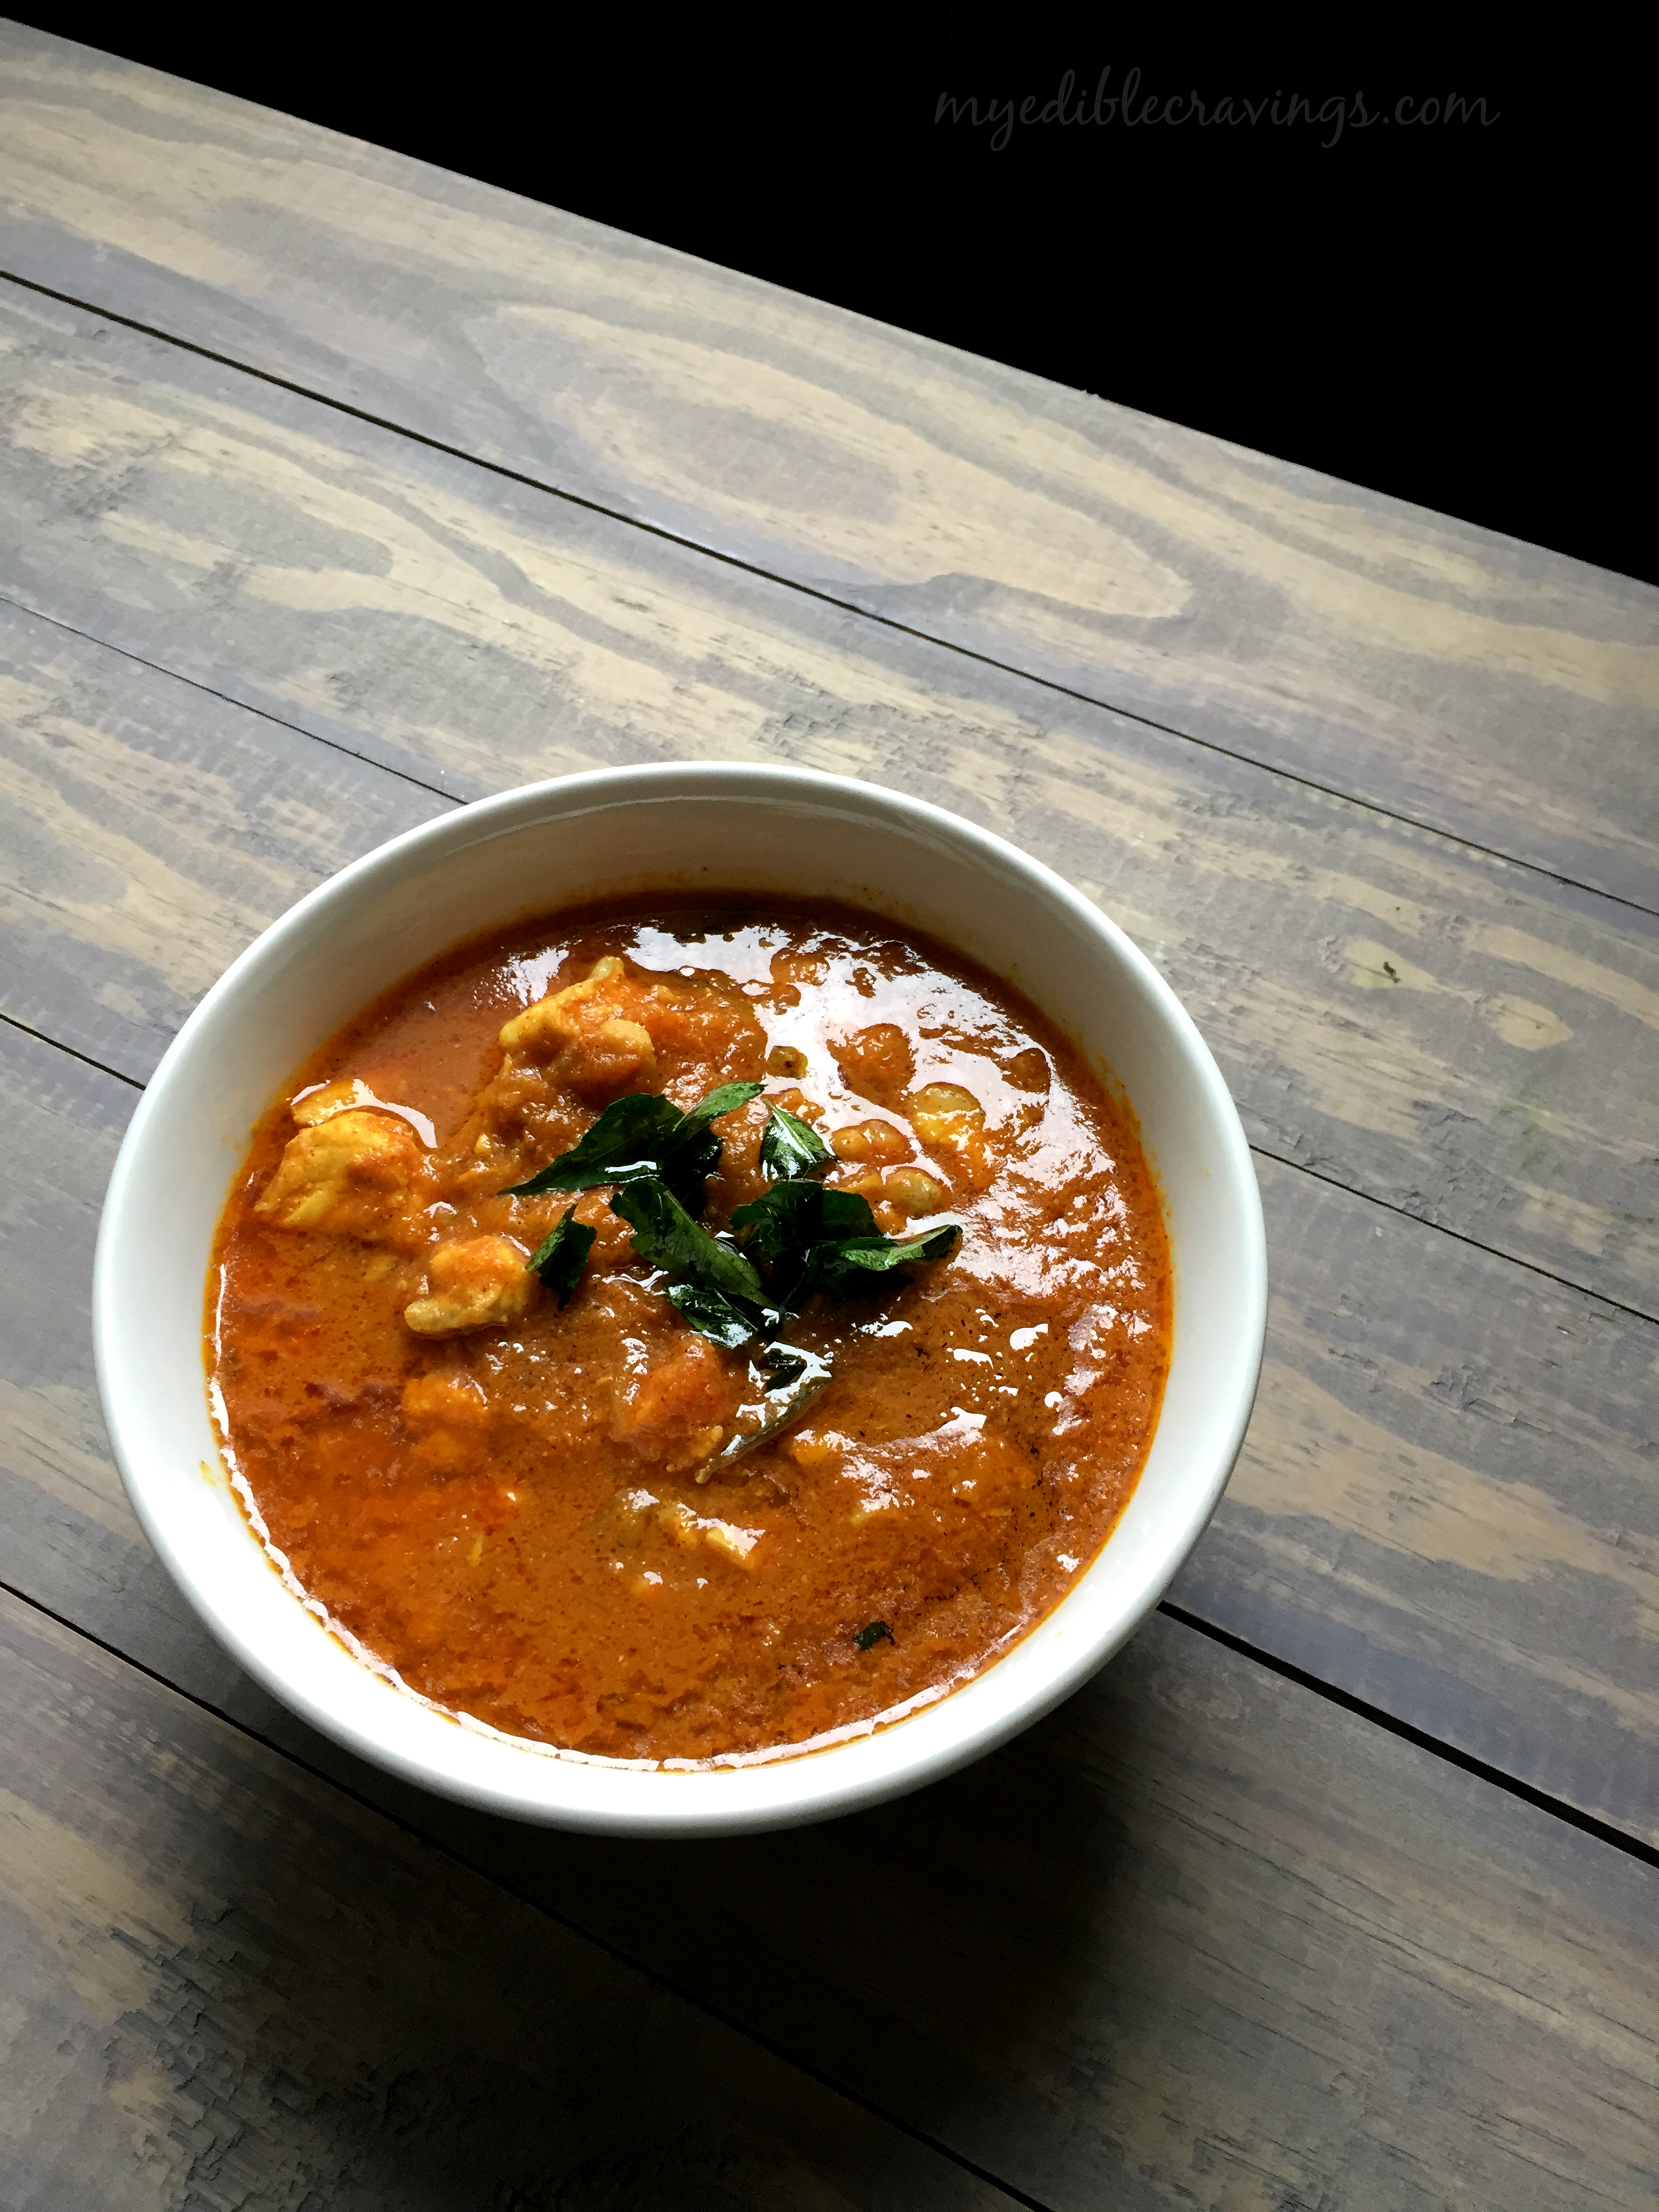
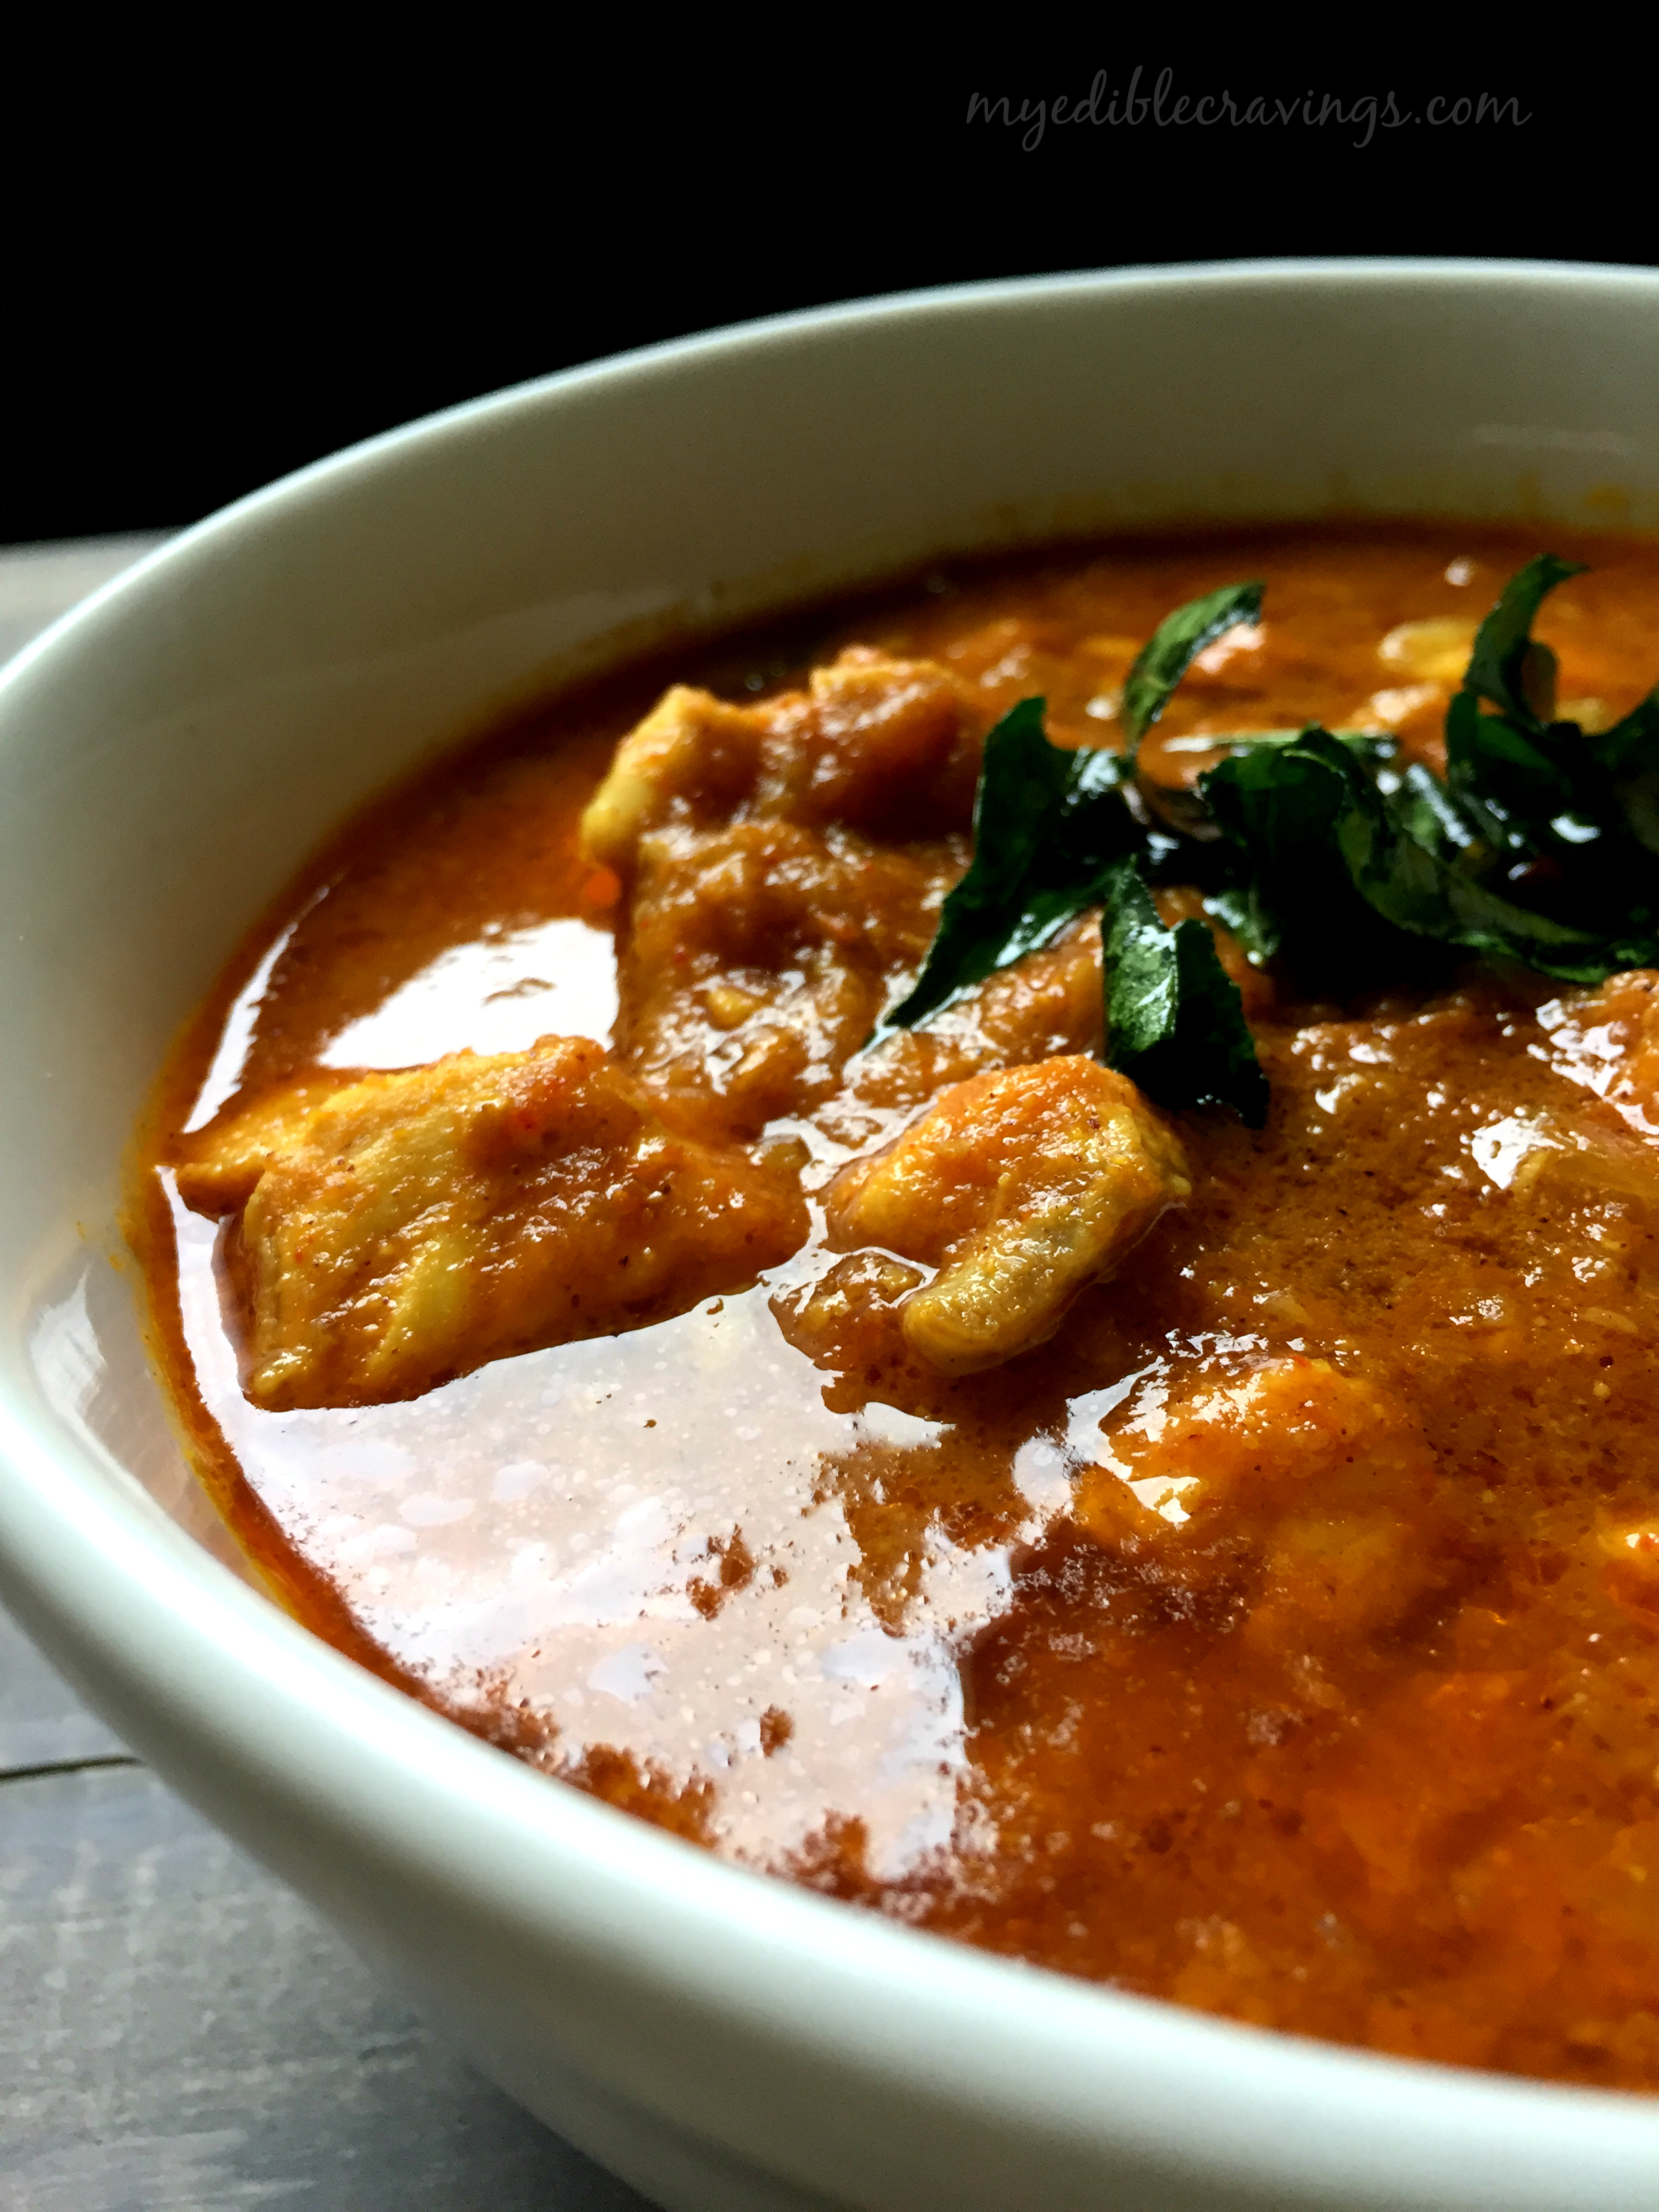
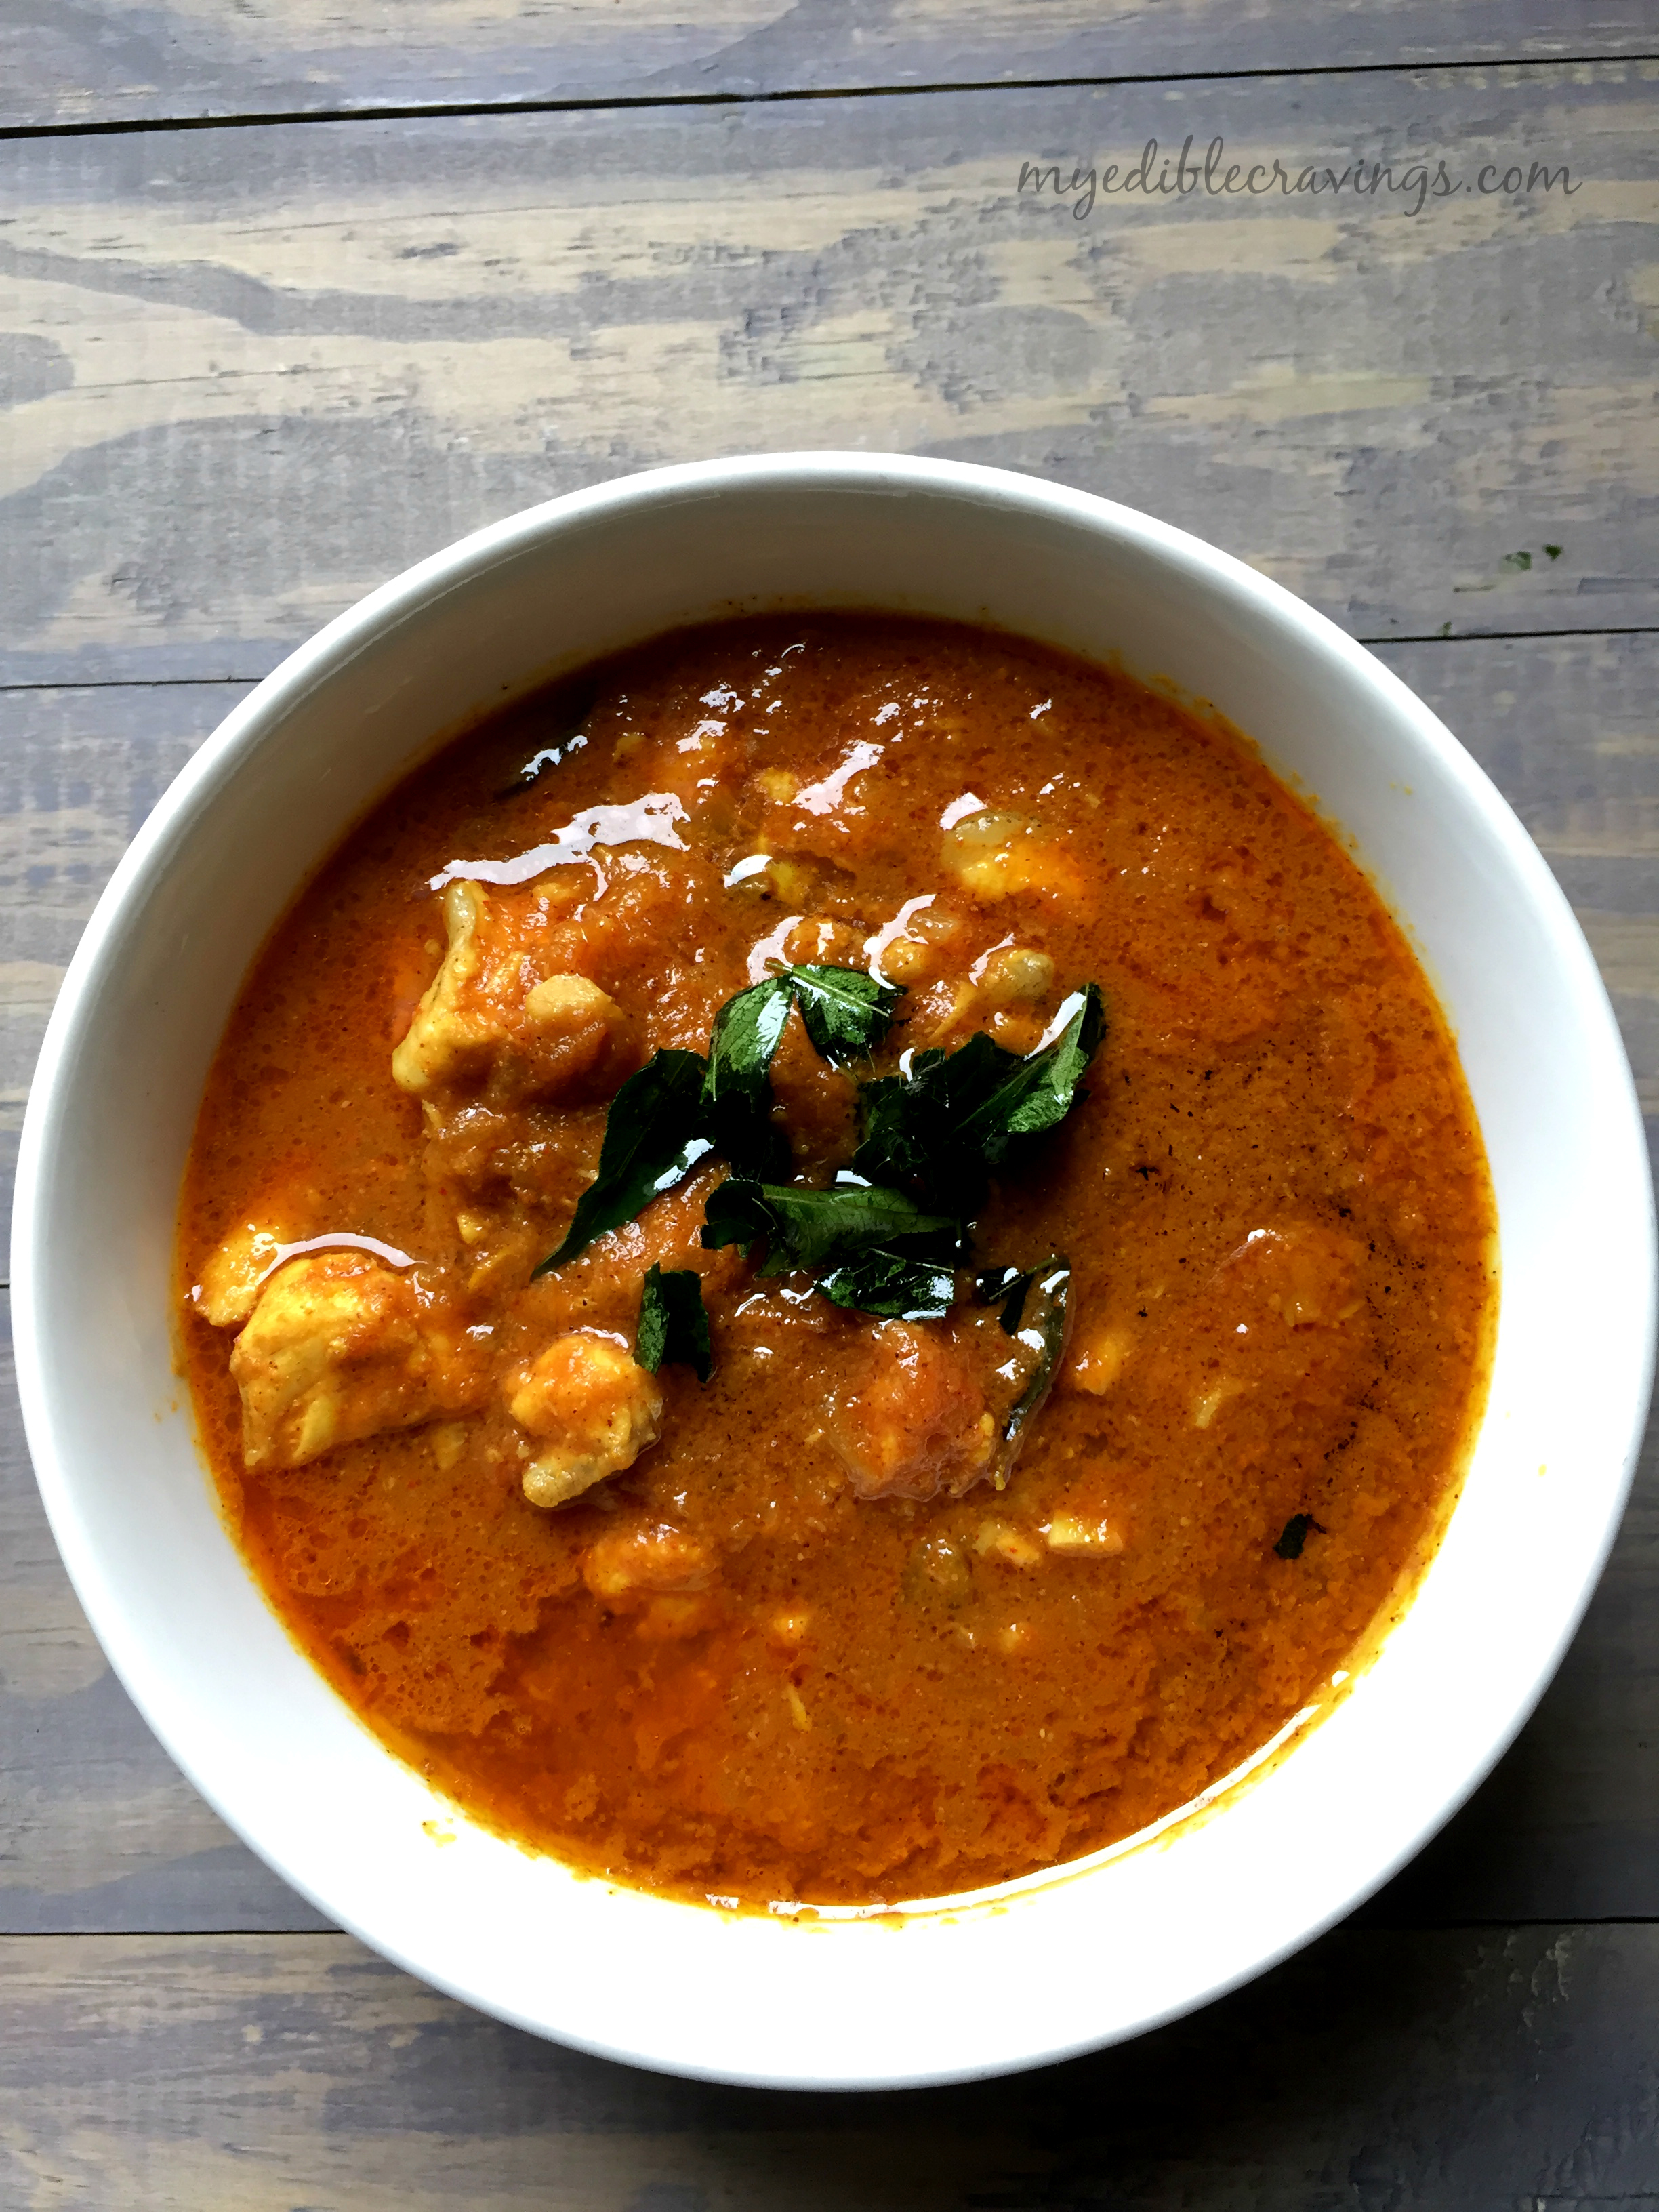
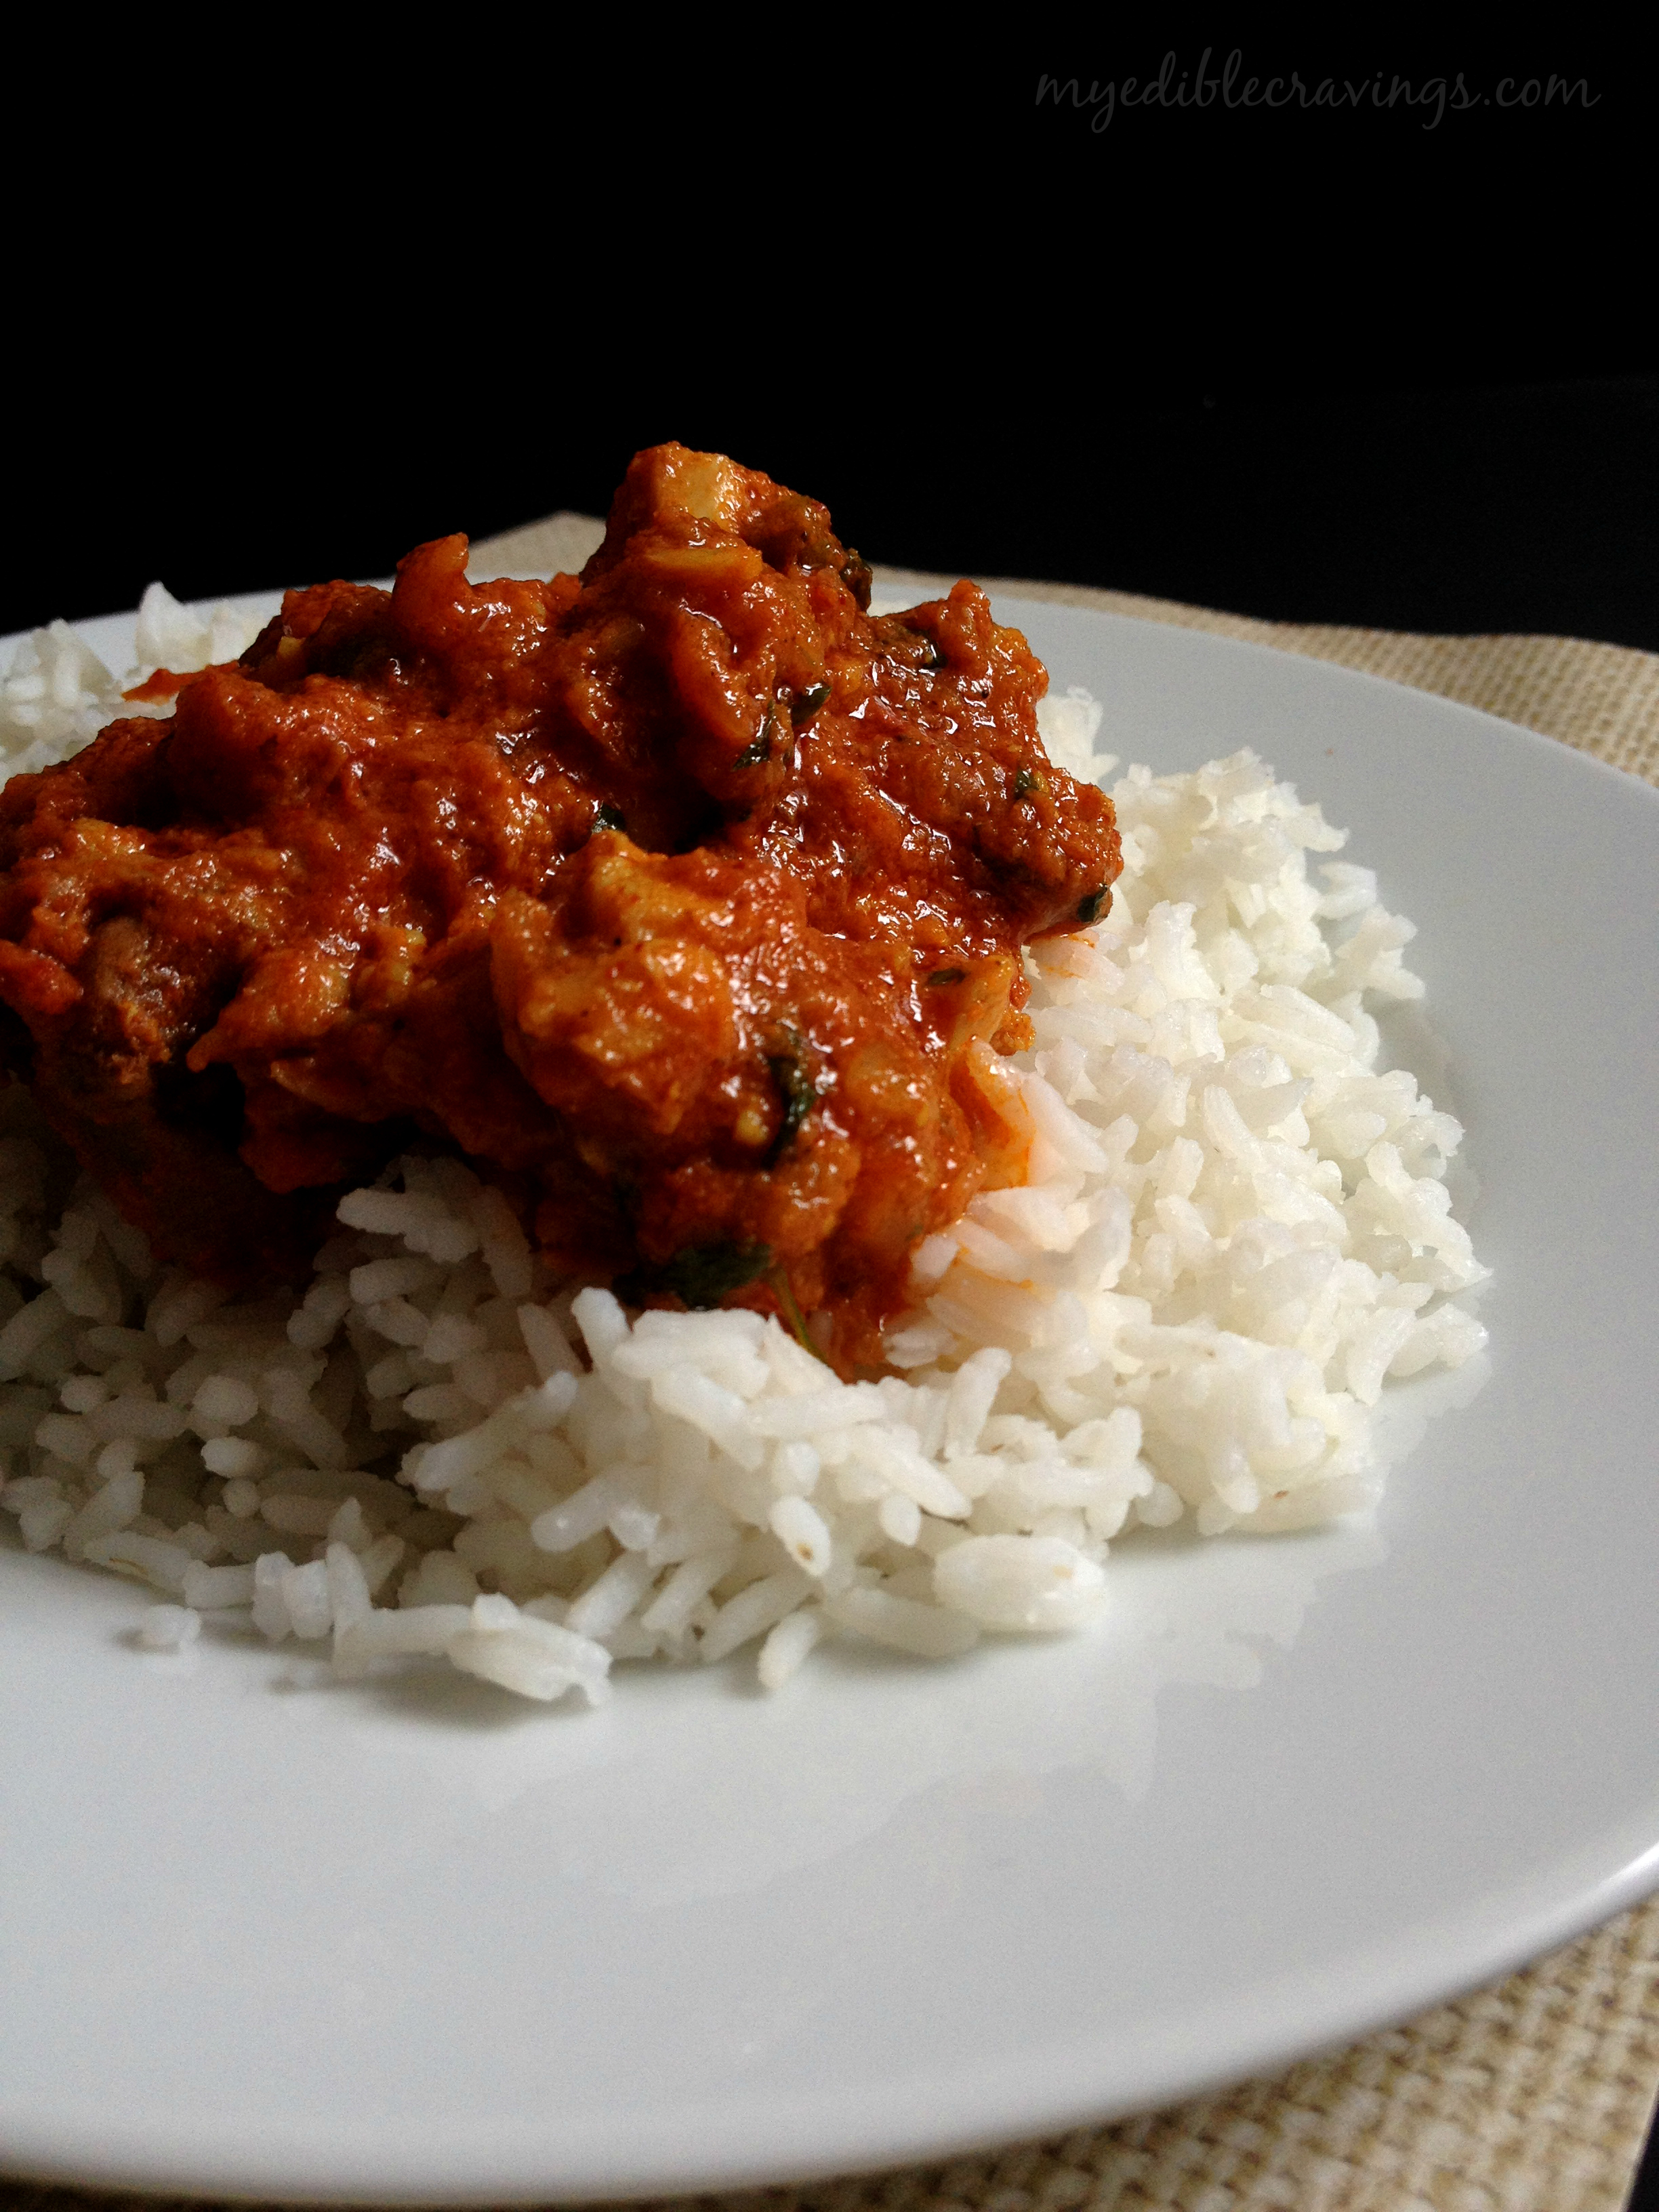
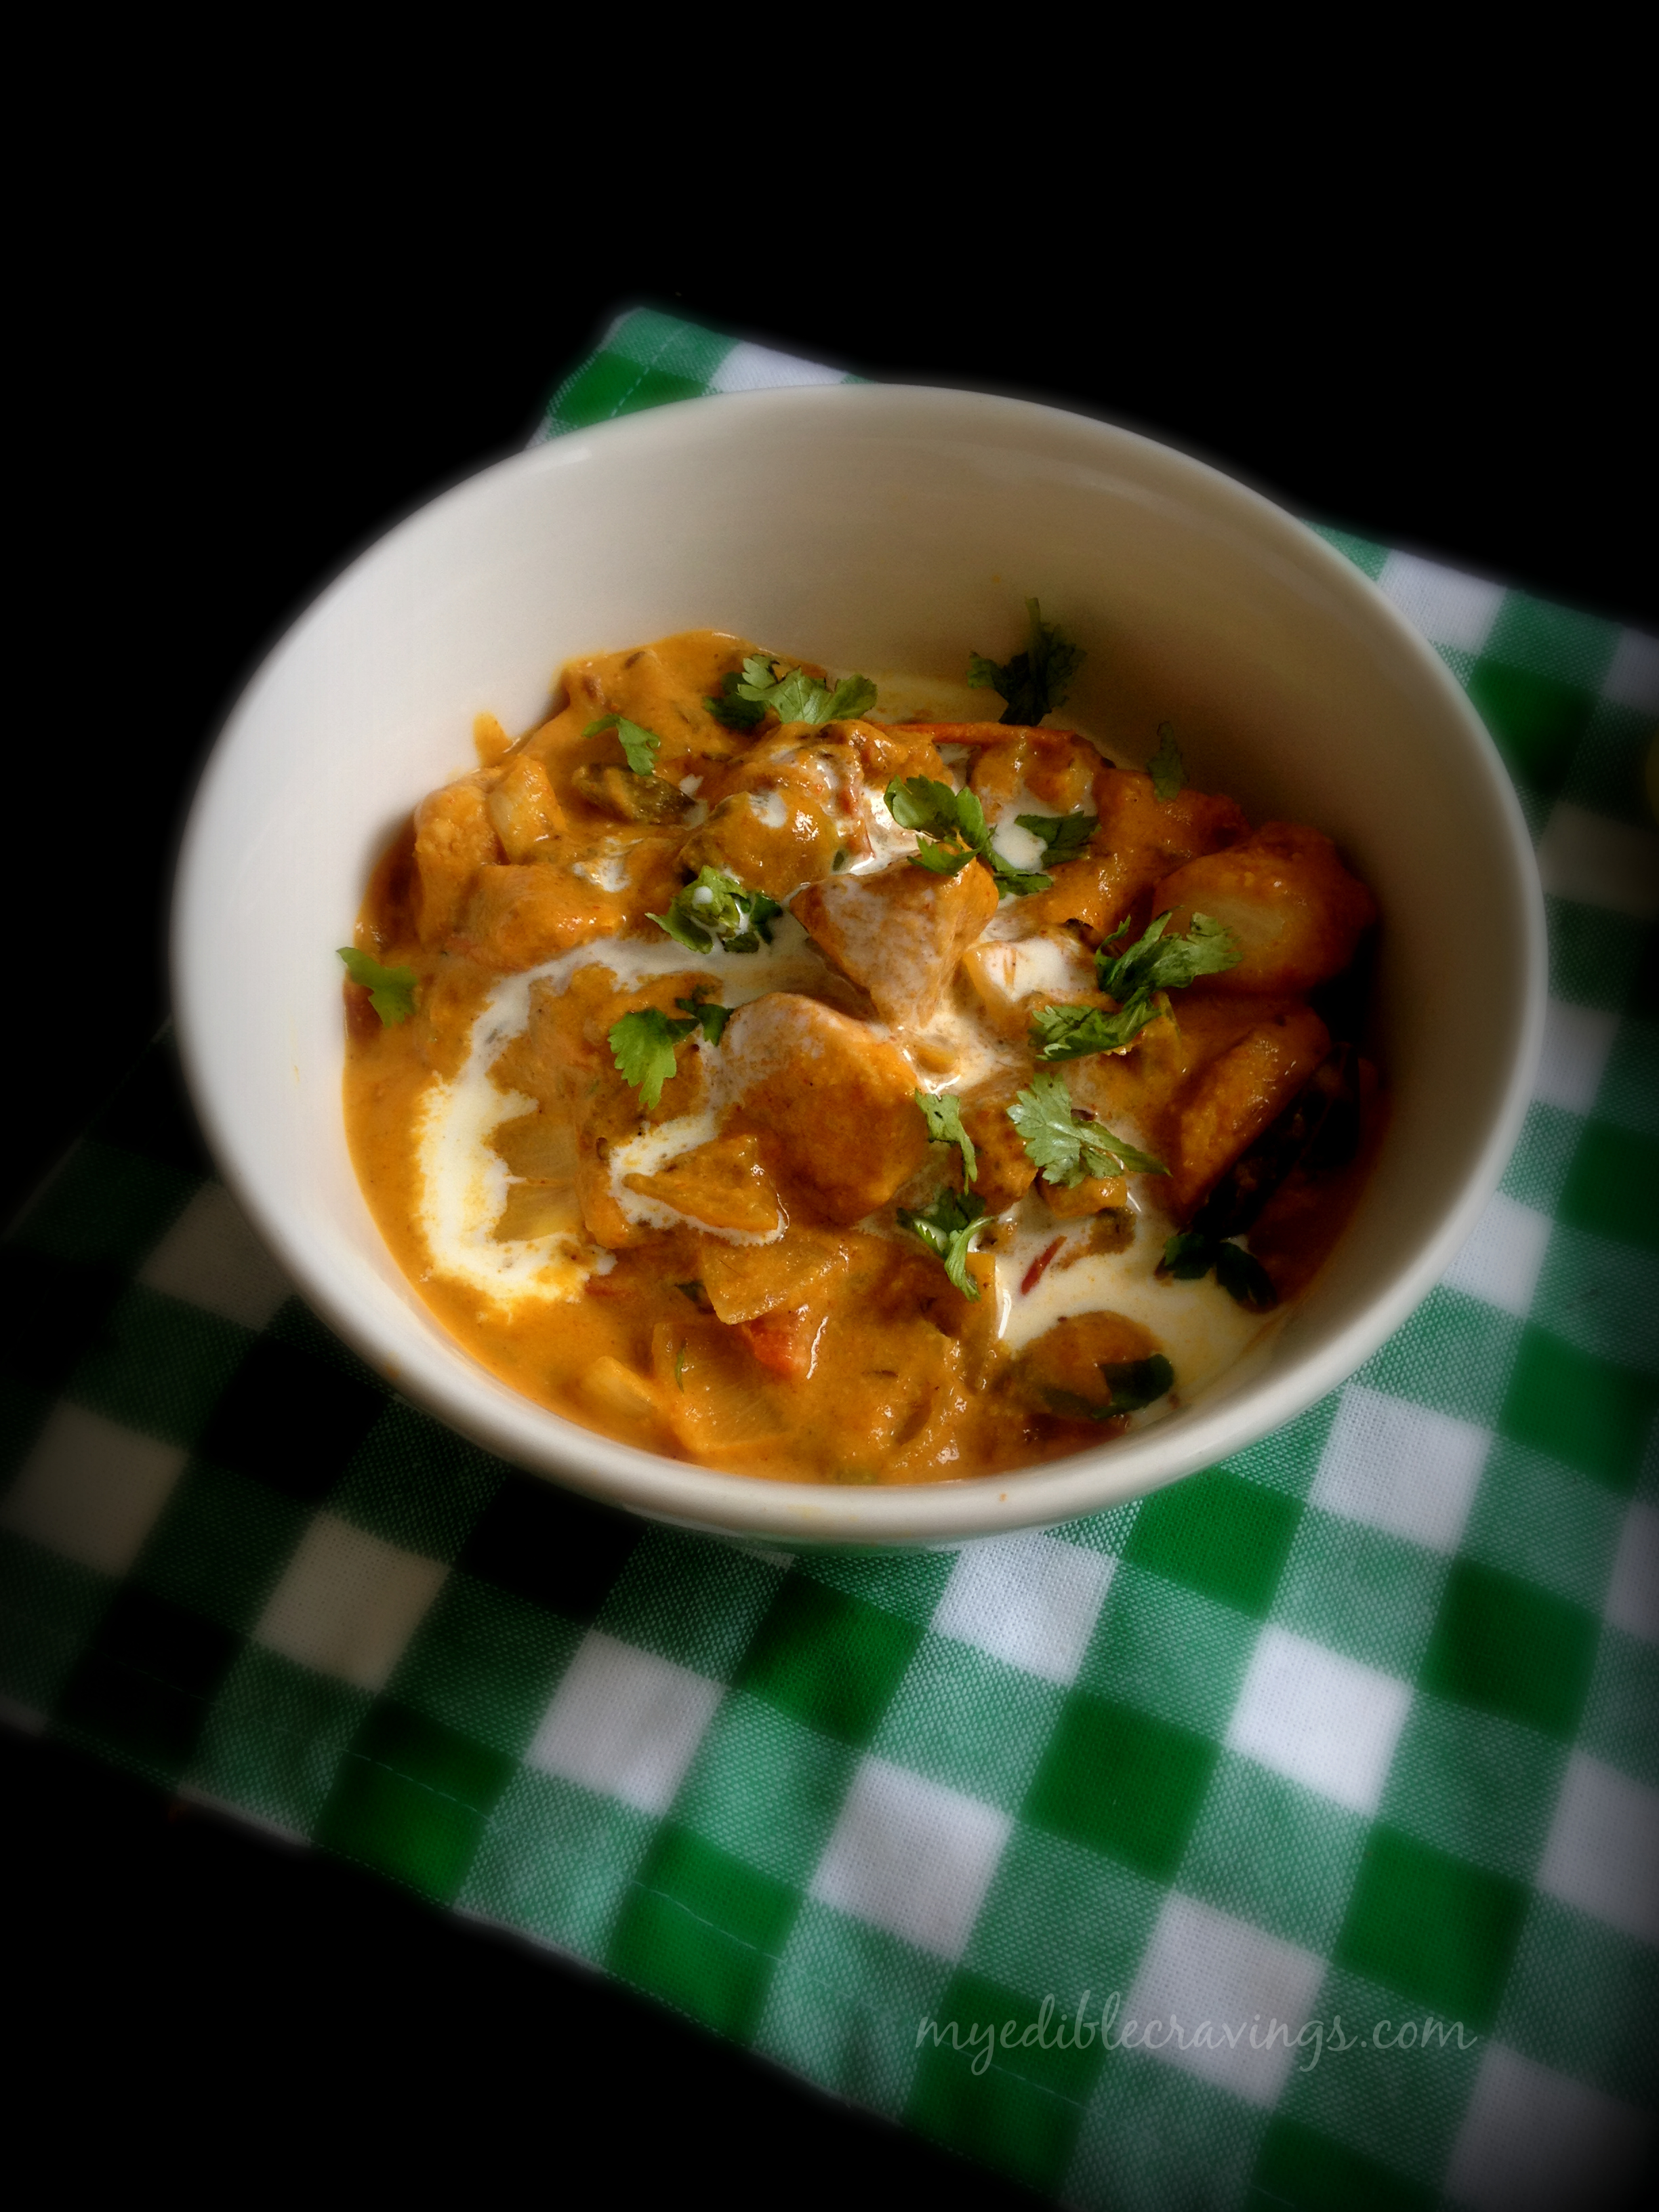
Chicken Tikka Masala is a quintessential north Indian dish that has wide popularity here in US as well. Tikka means small pieces of meat mixed with spices. So Chicken Tikka Masala is a dish made of small pieces of chicken cooked with spices in a gravy.
Chicken Tikka Masala
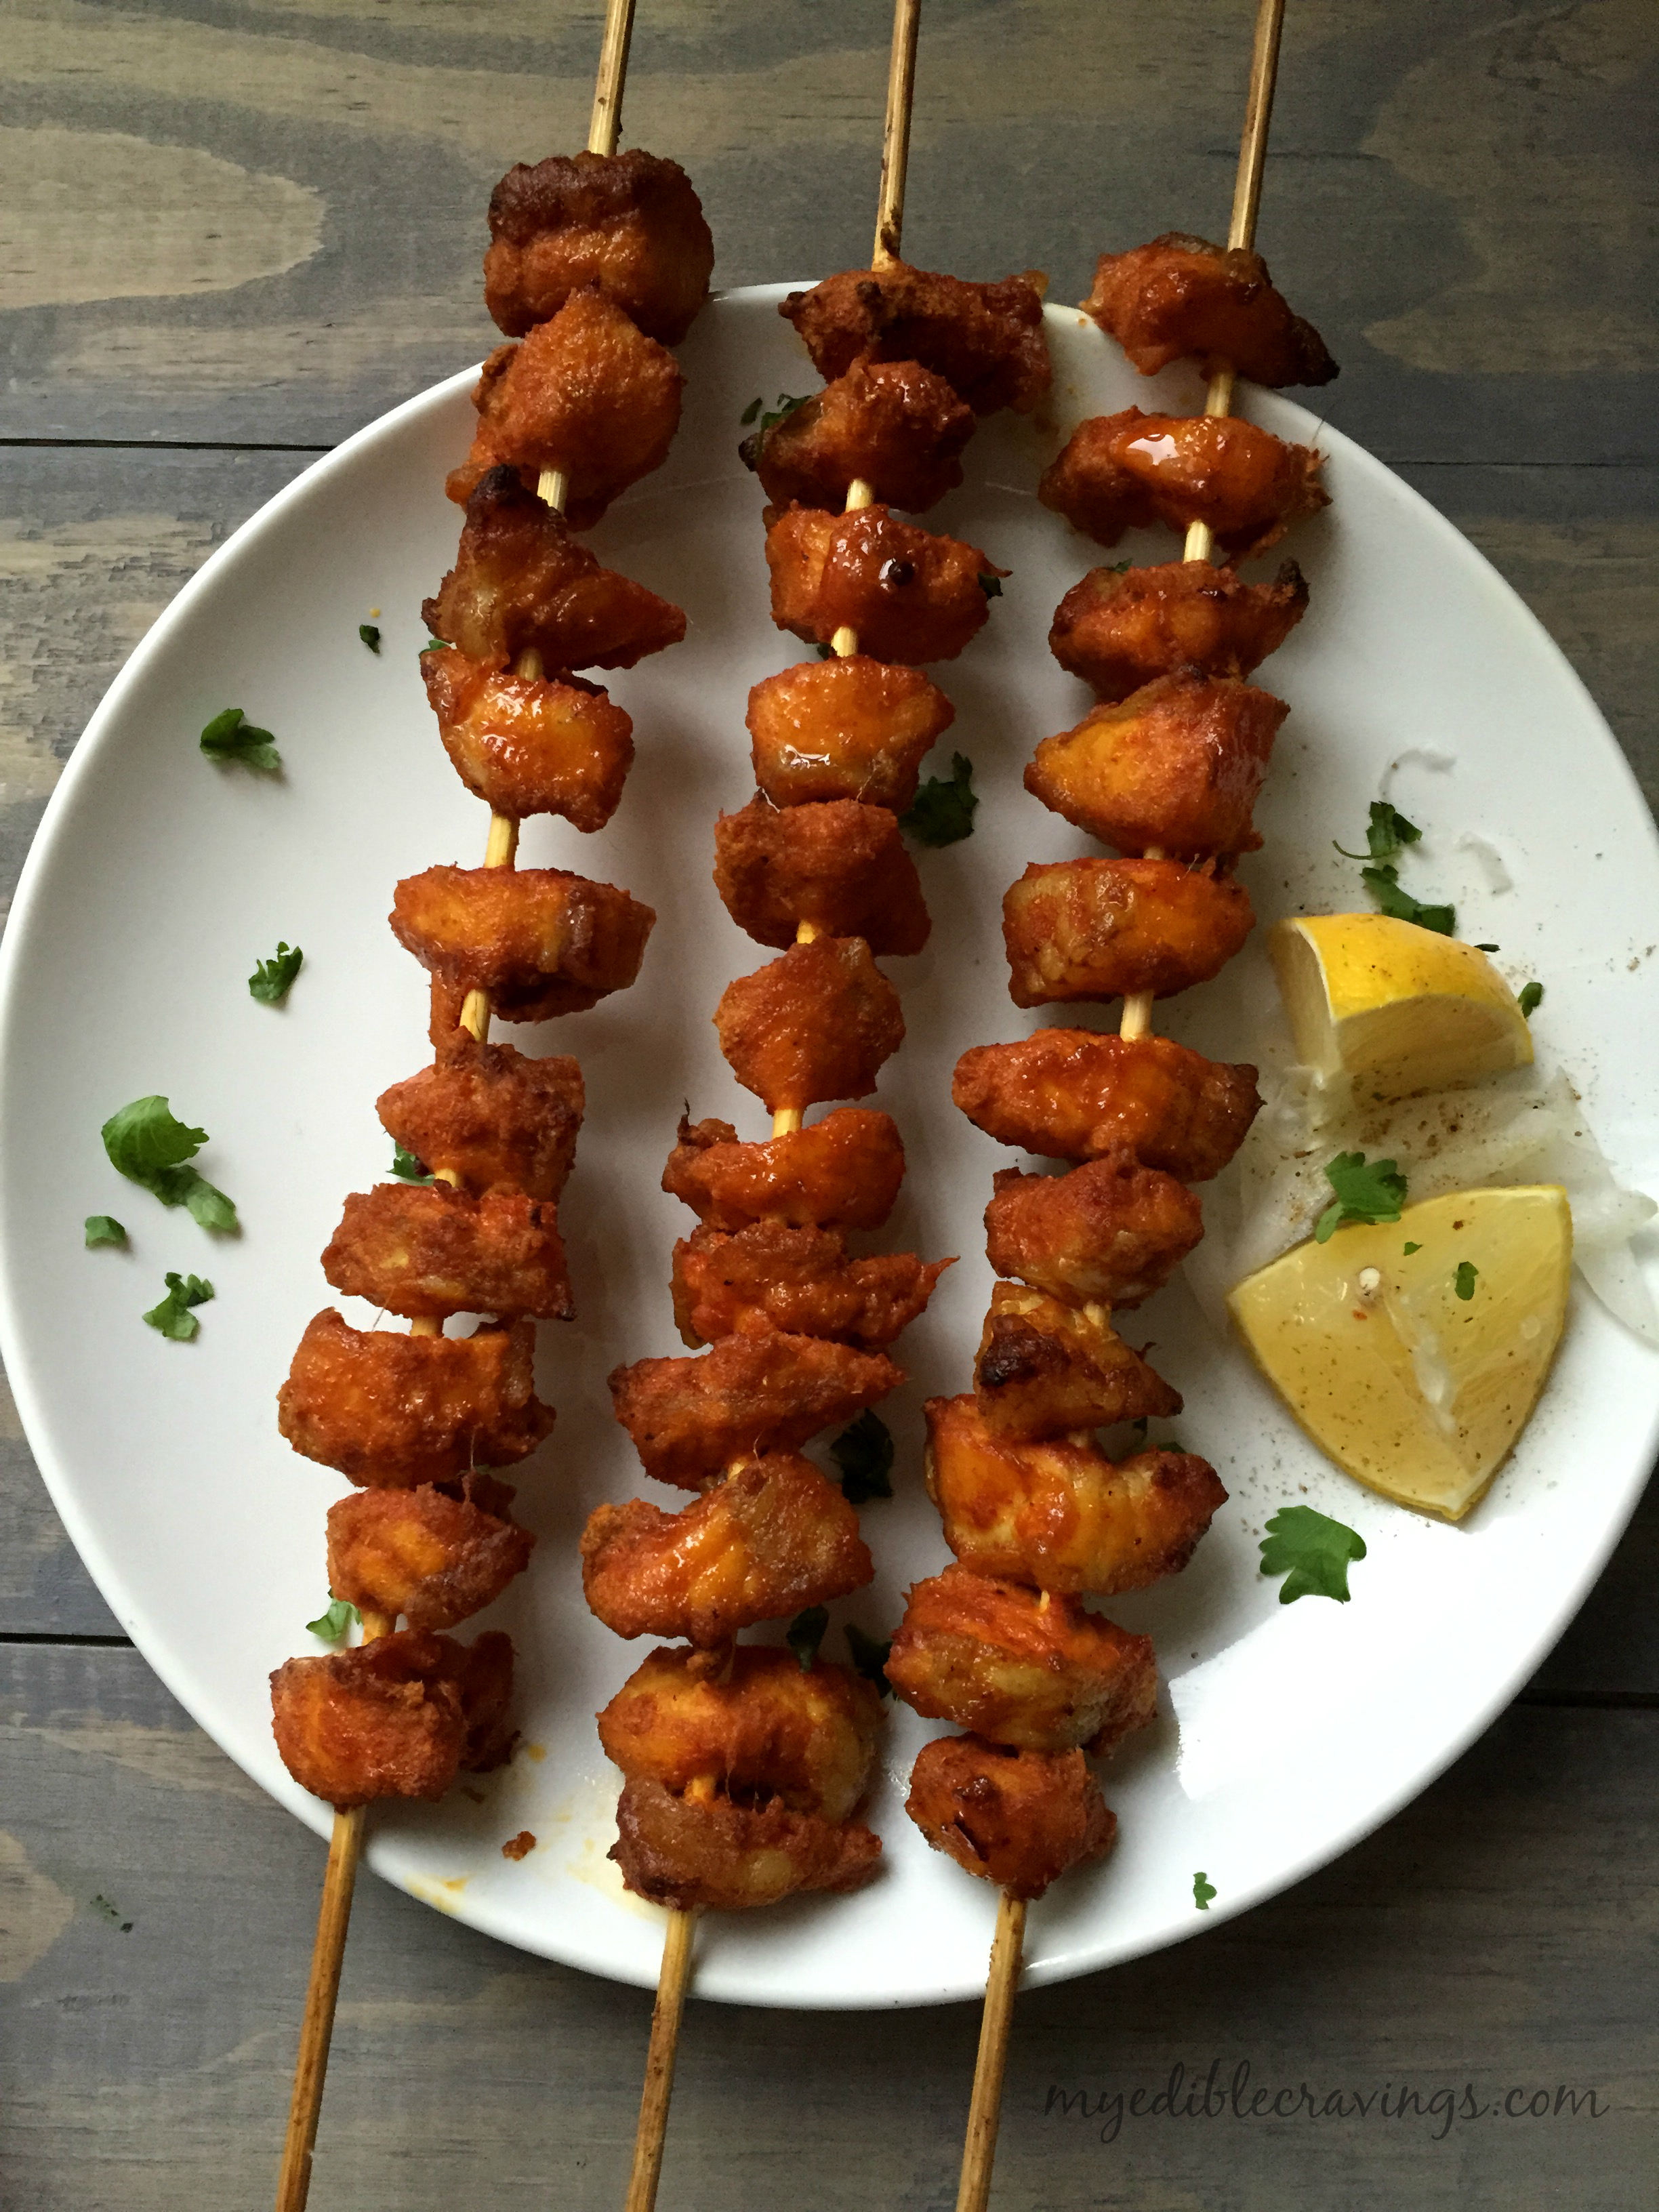
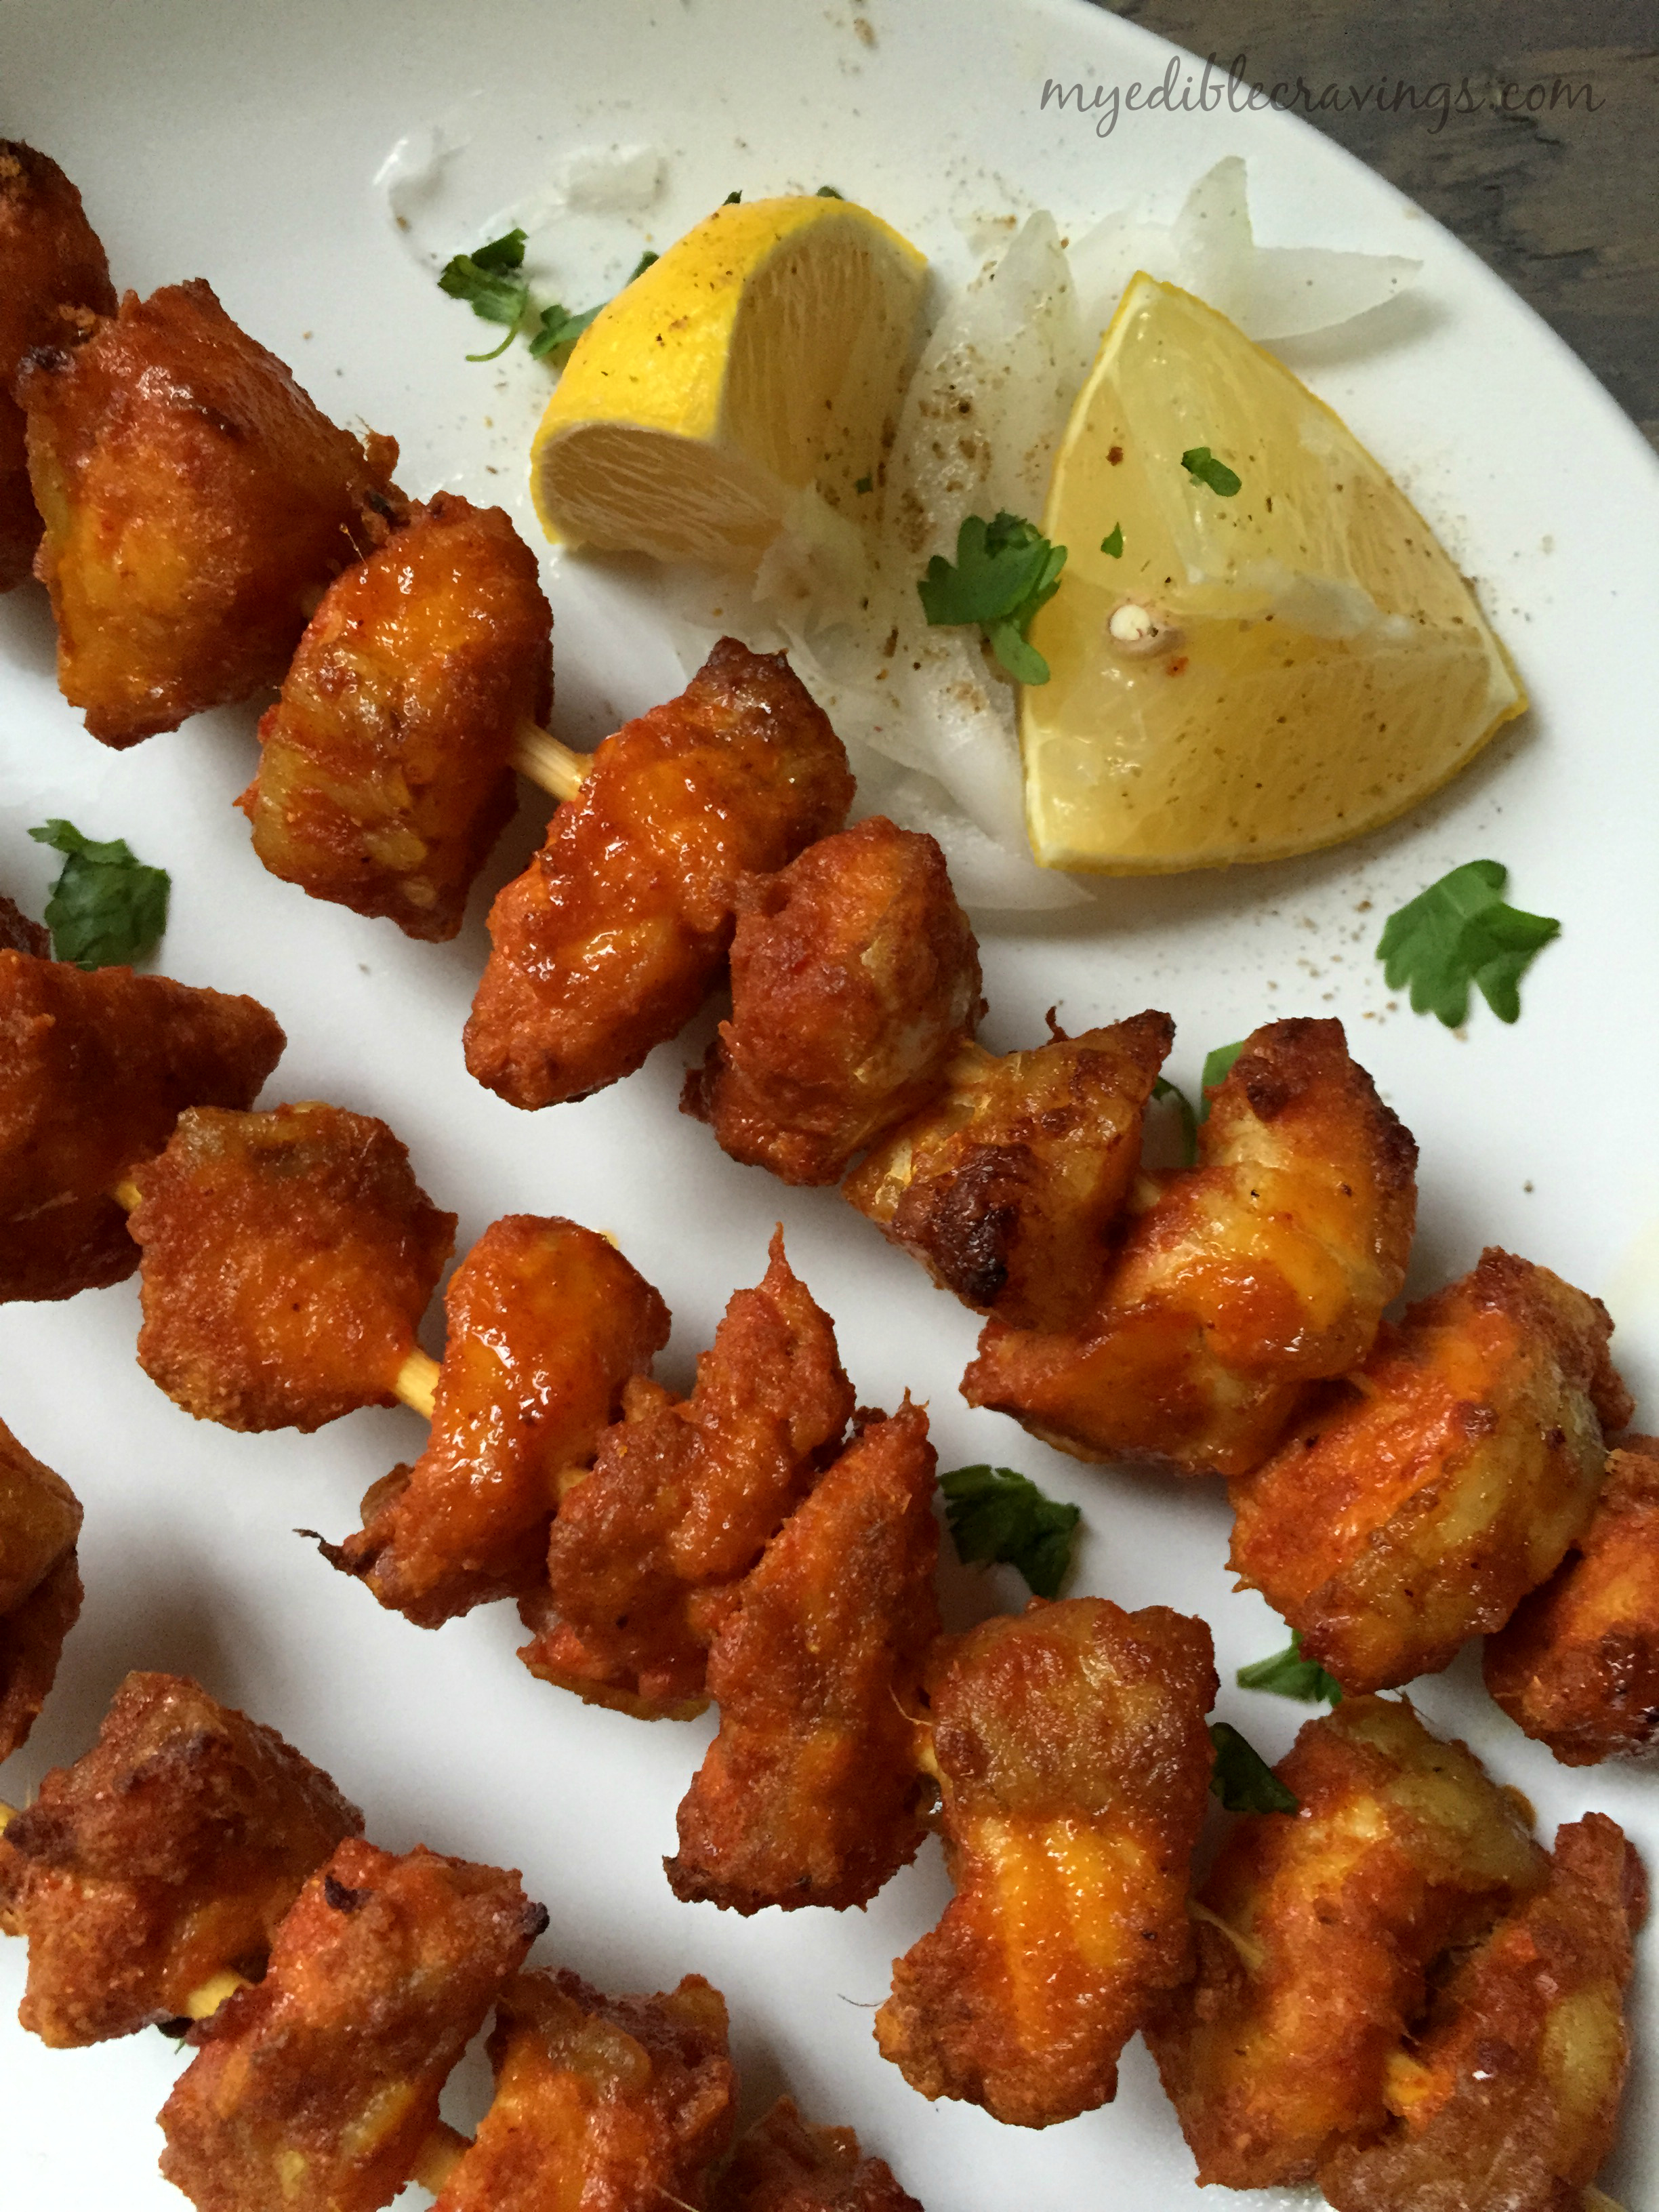
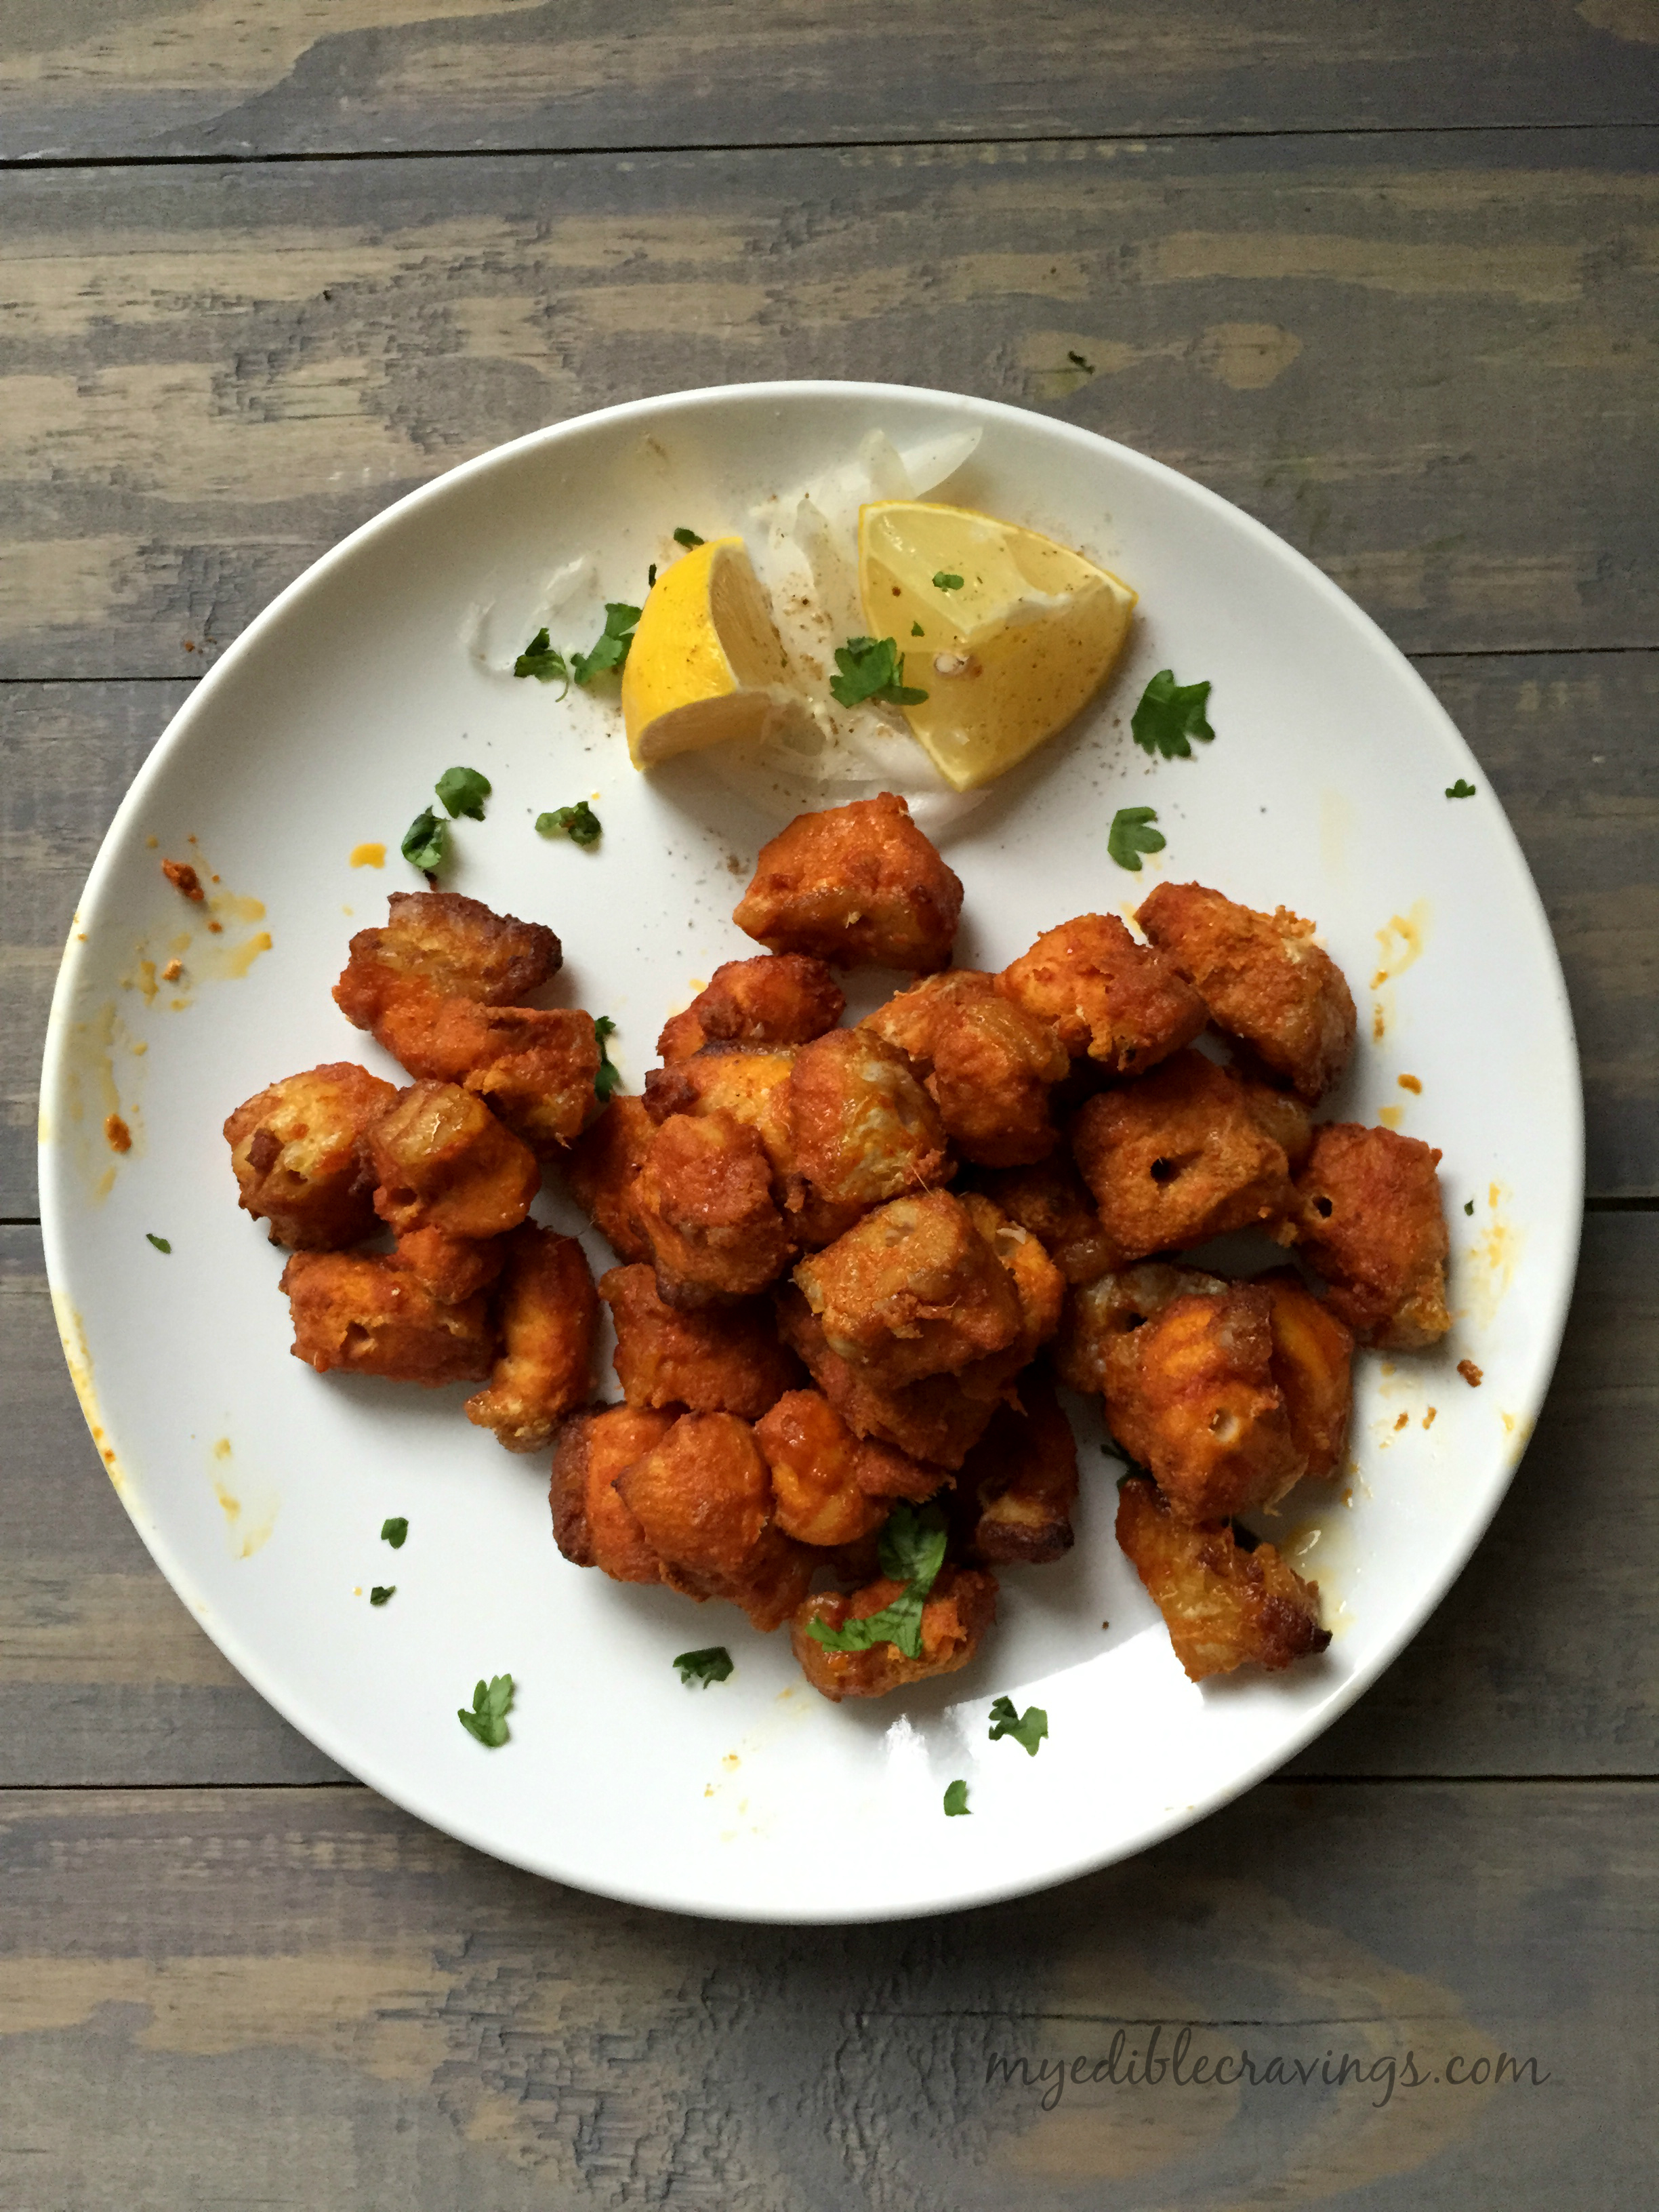
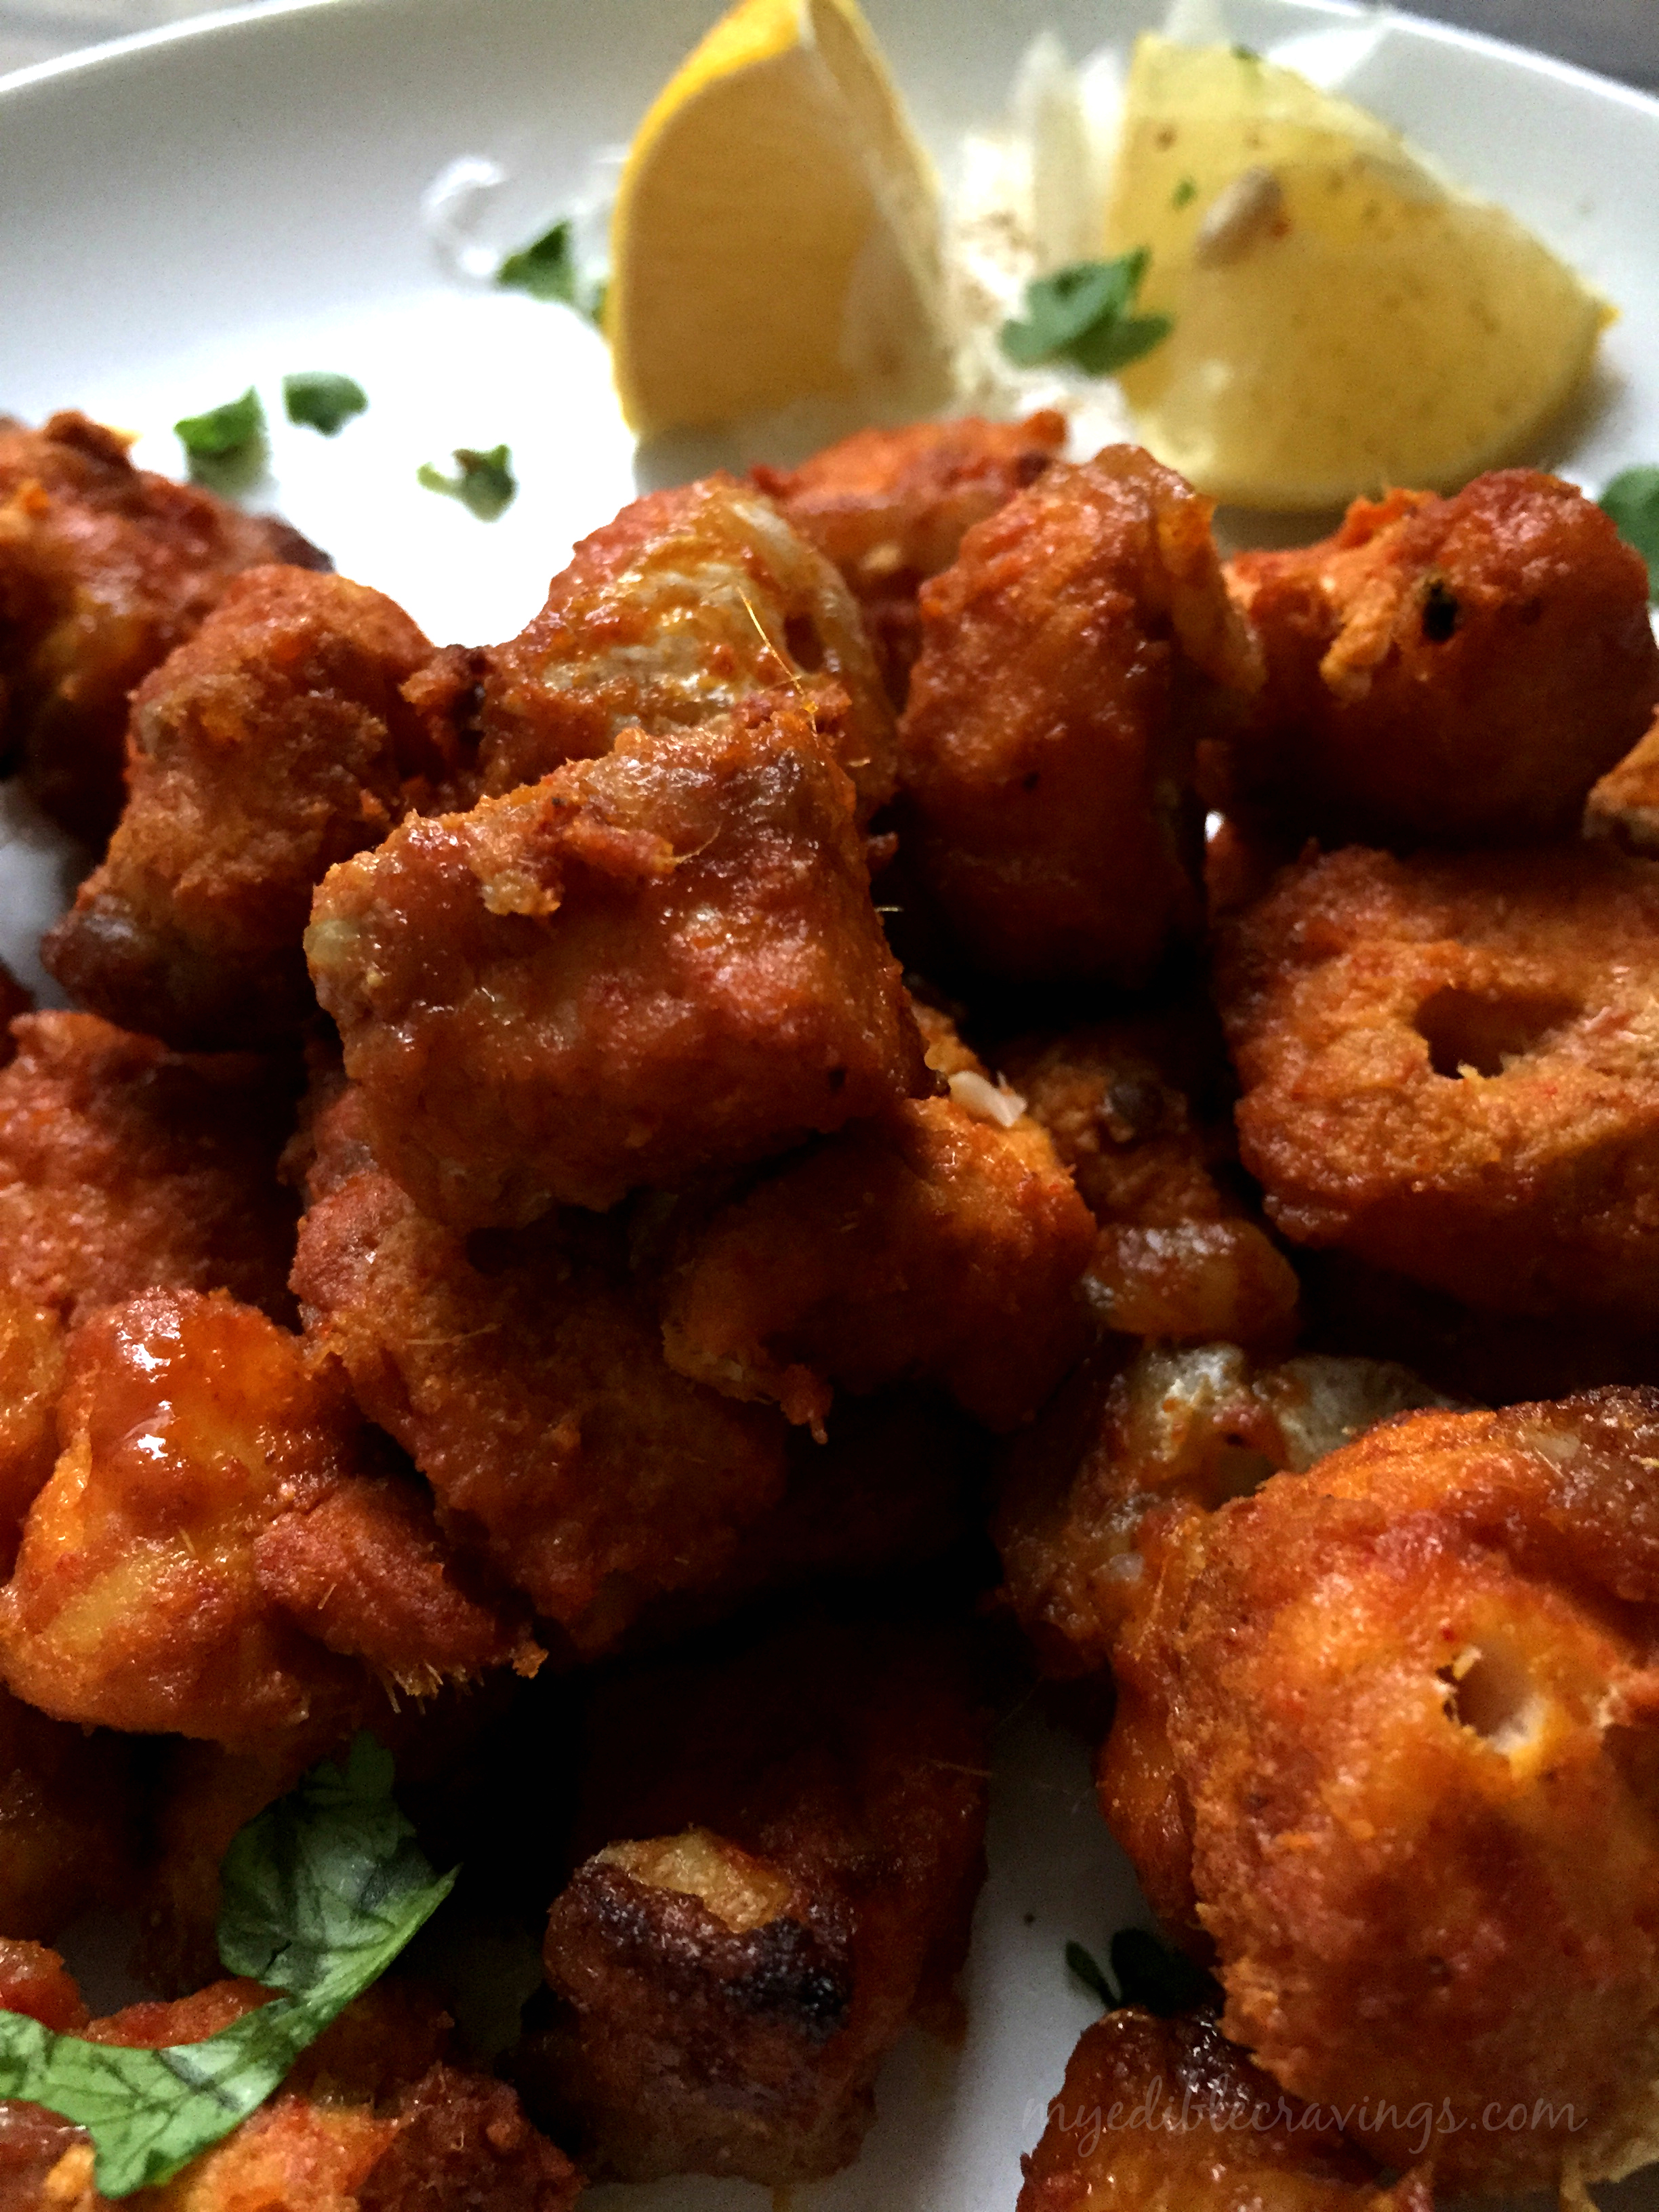
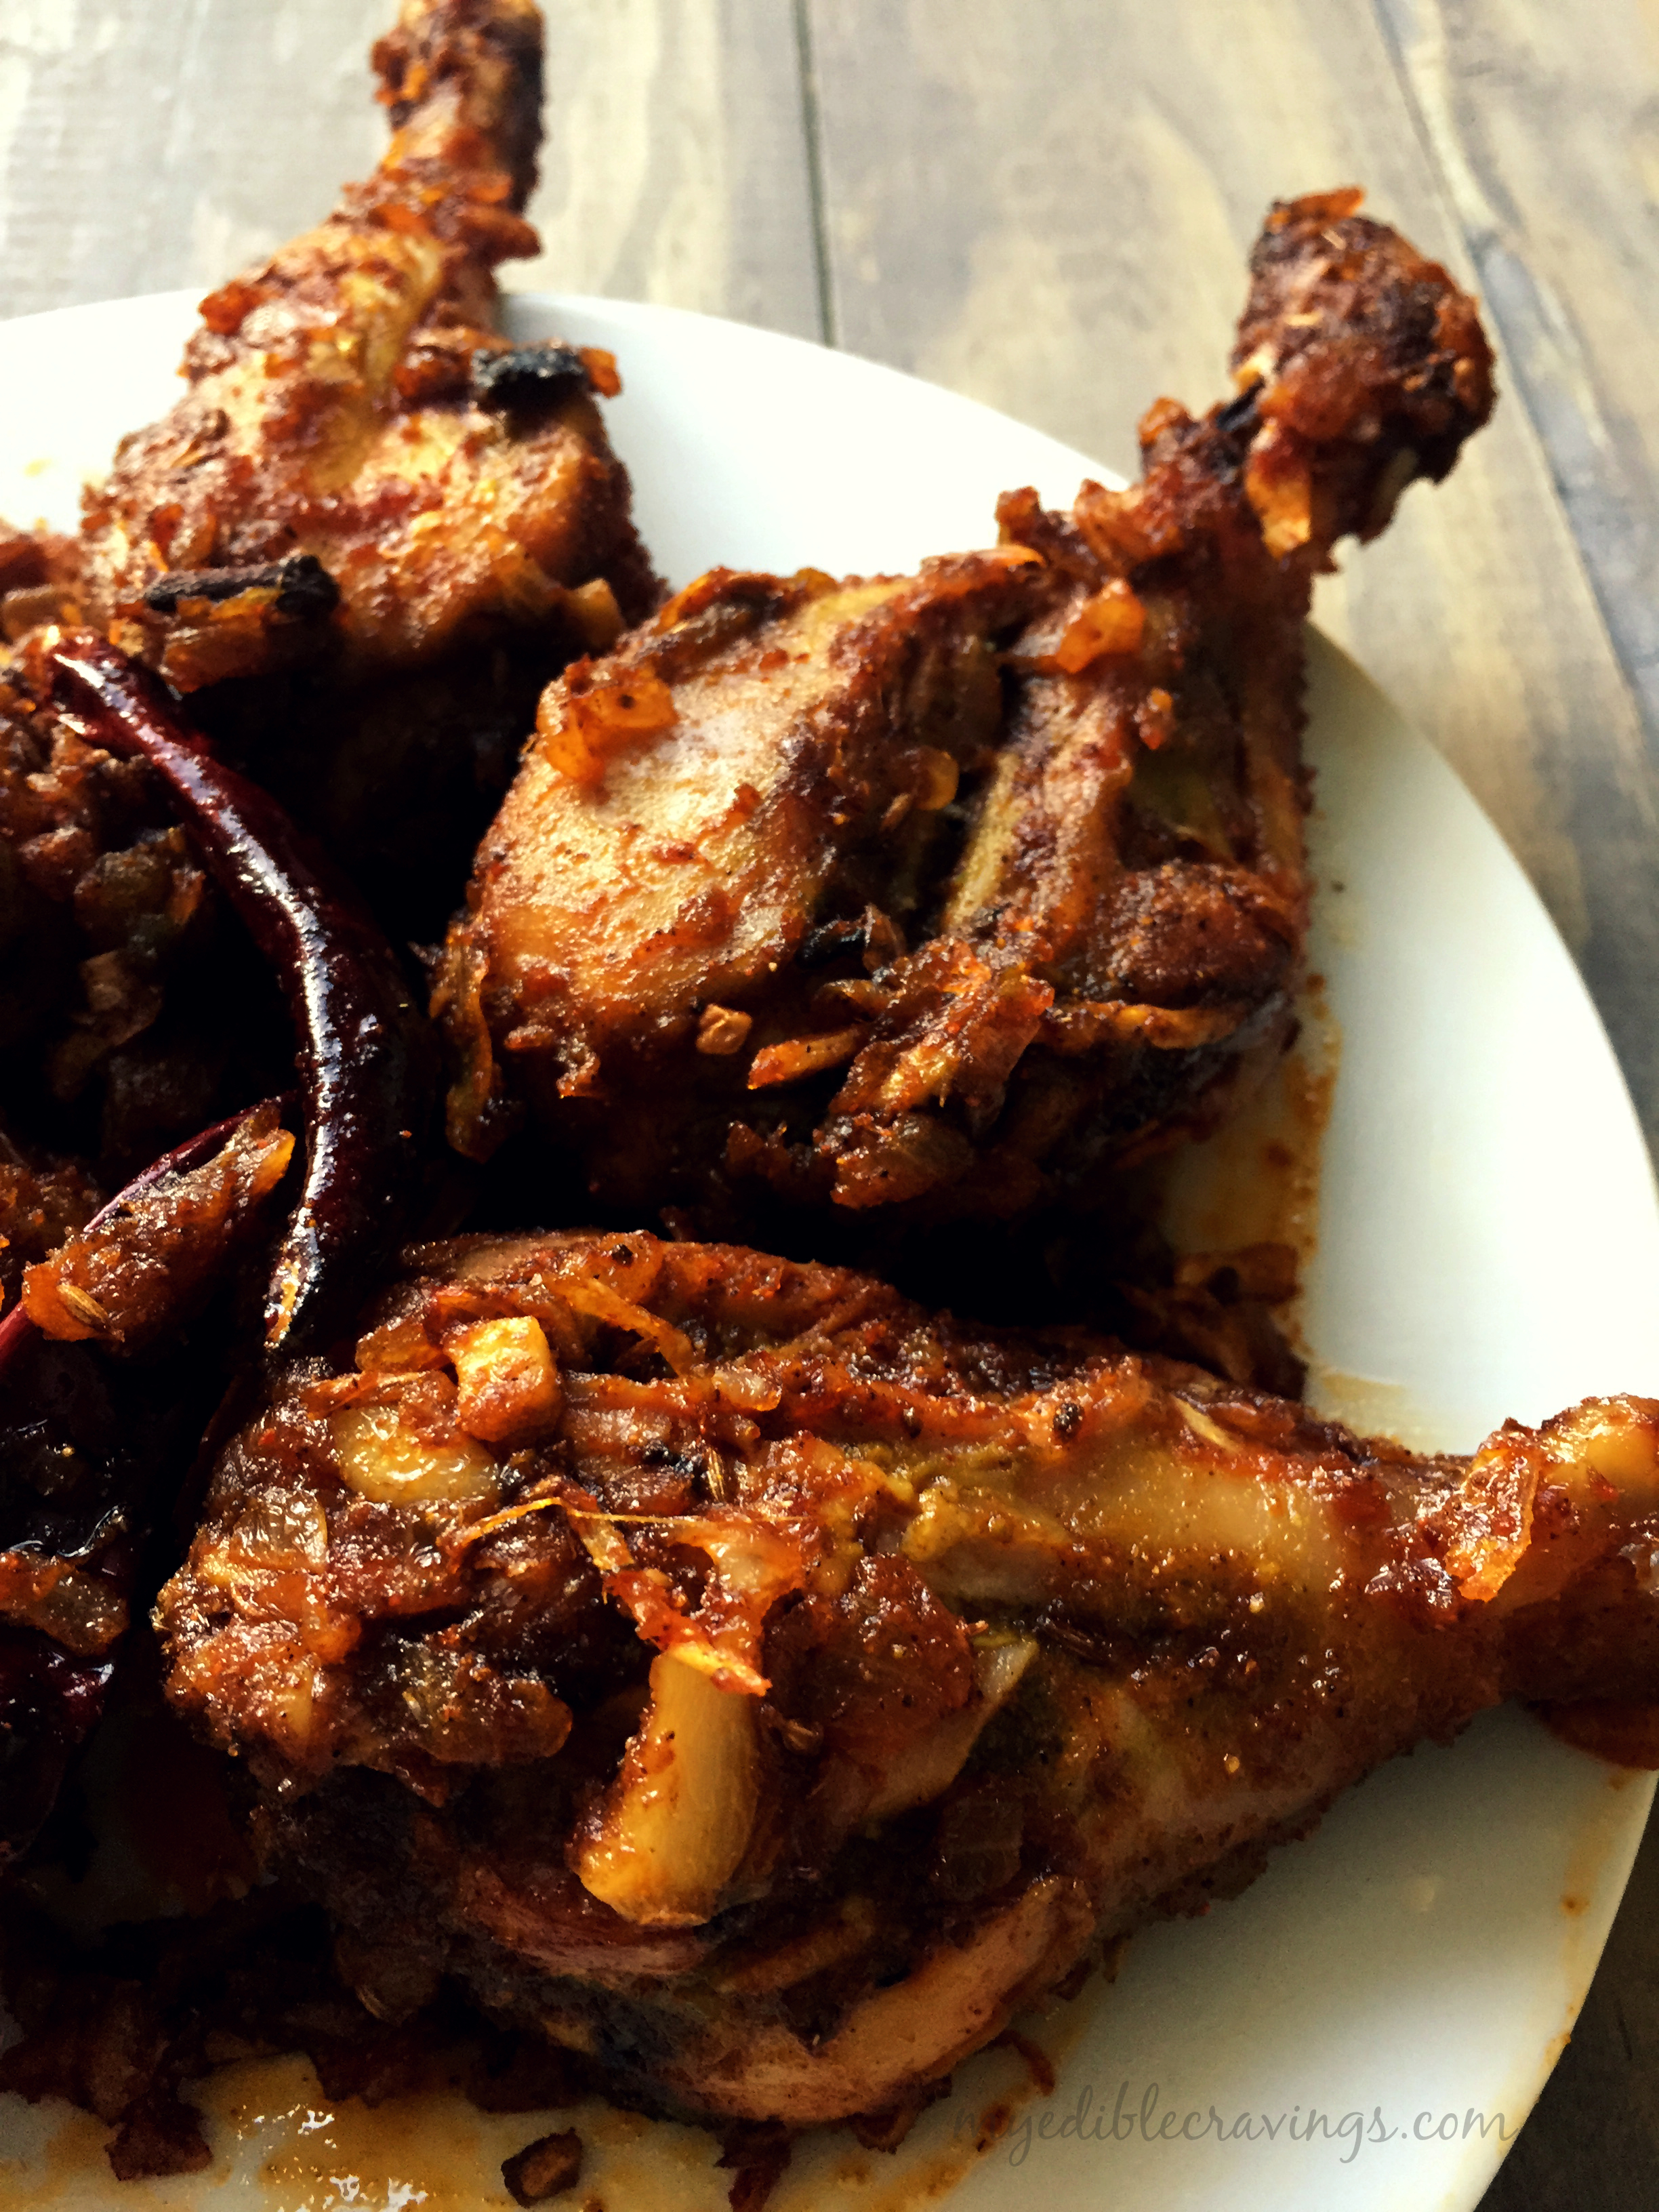
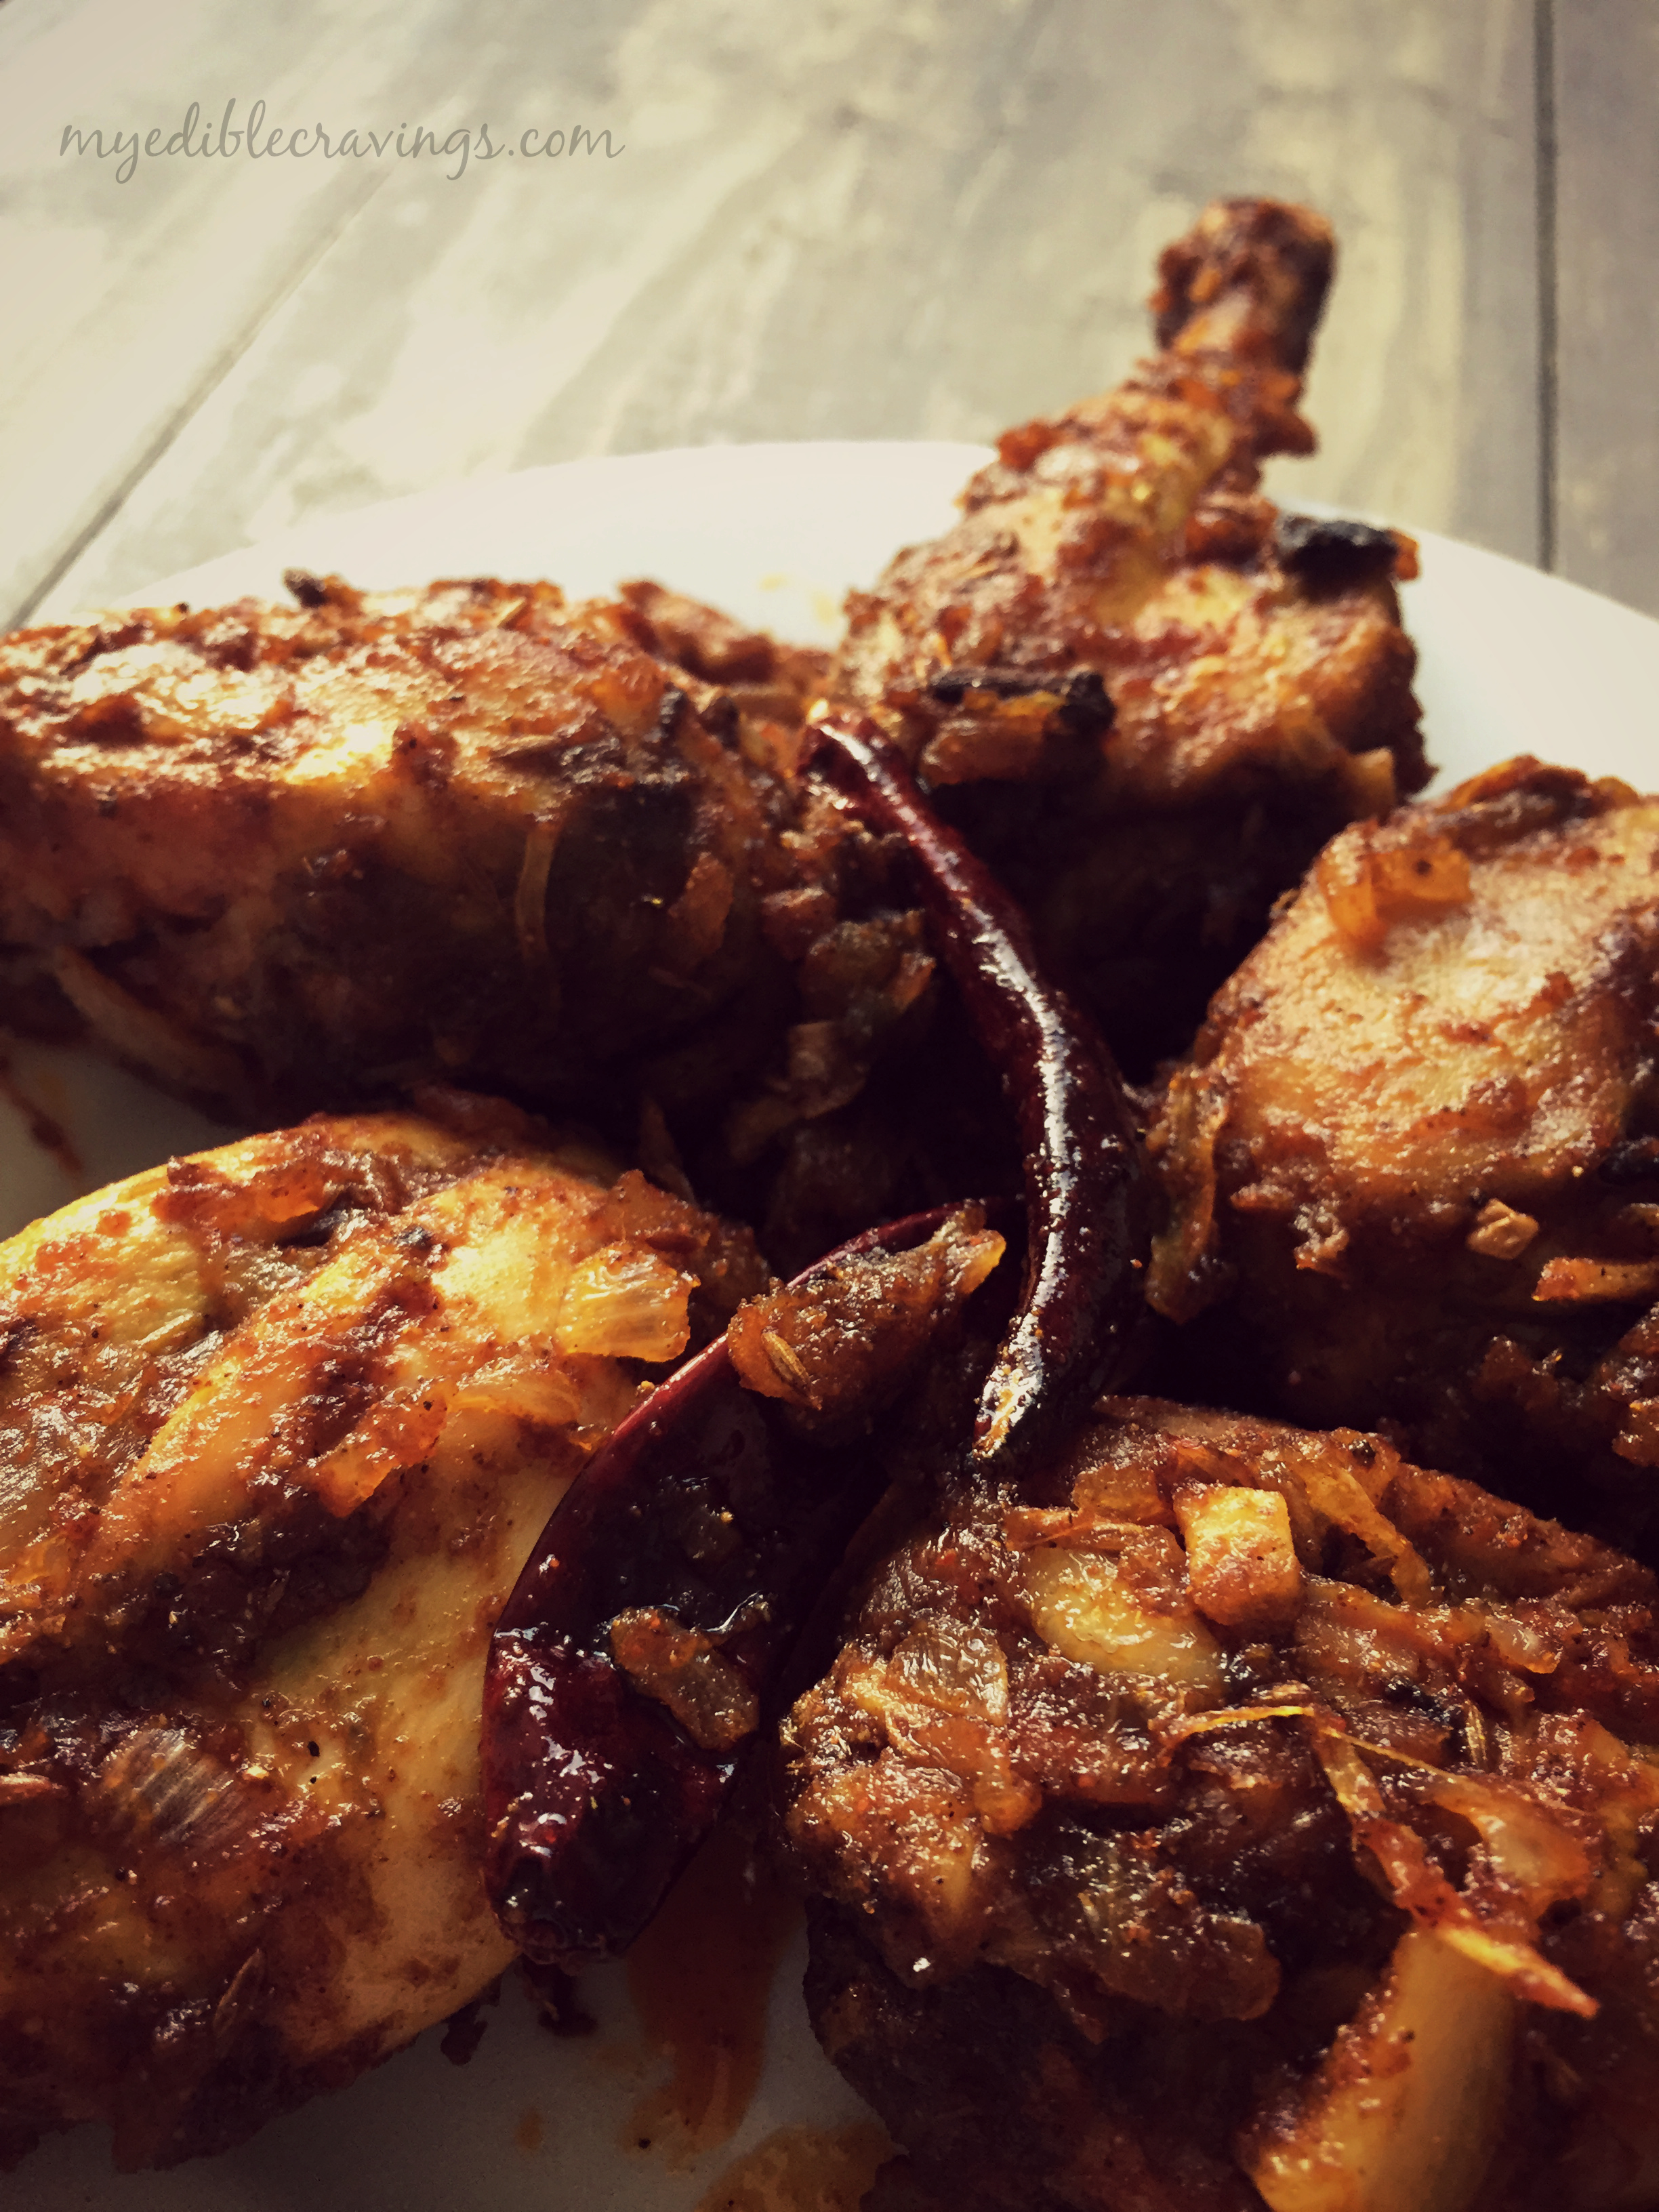
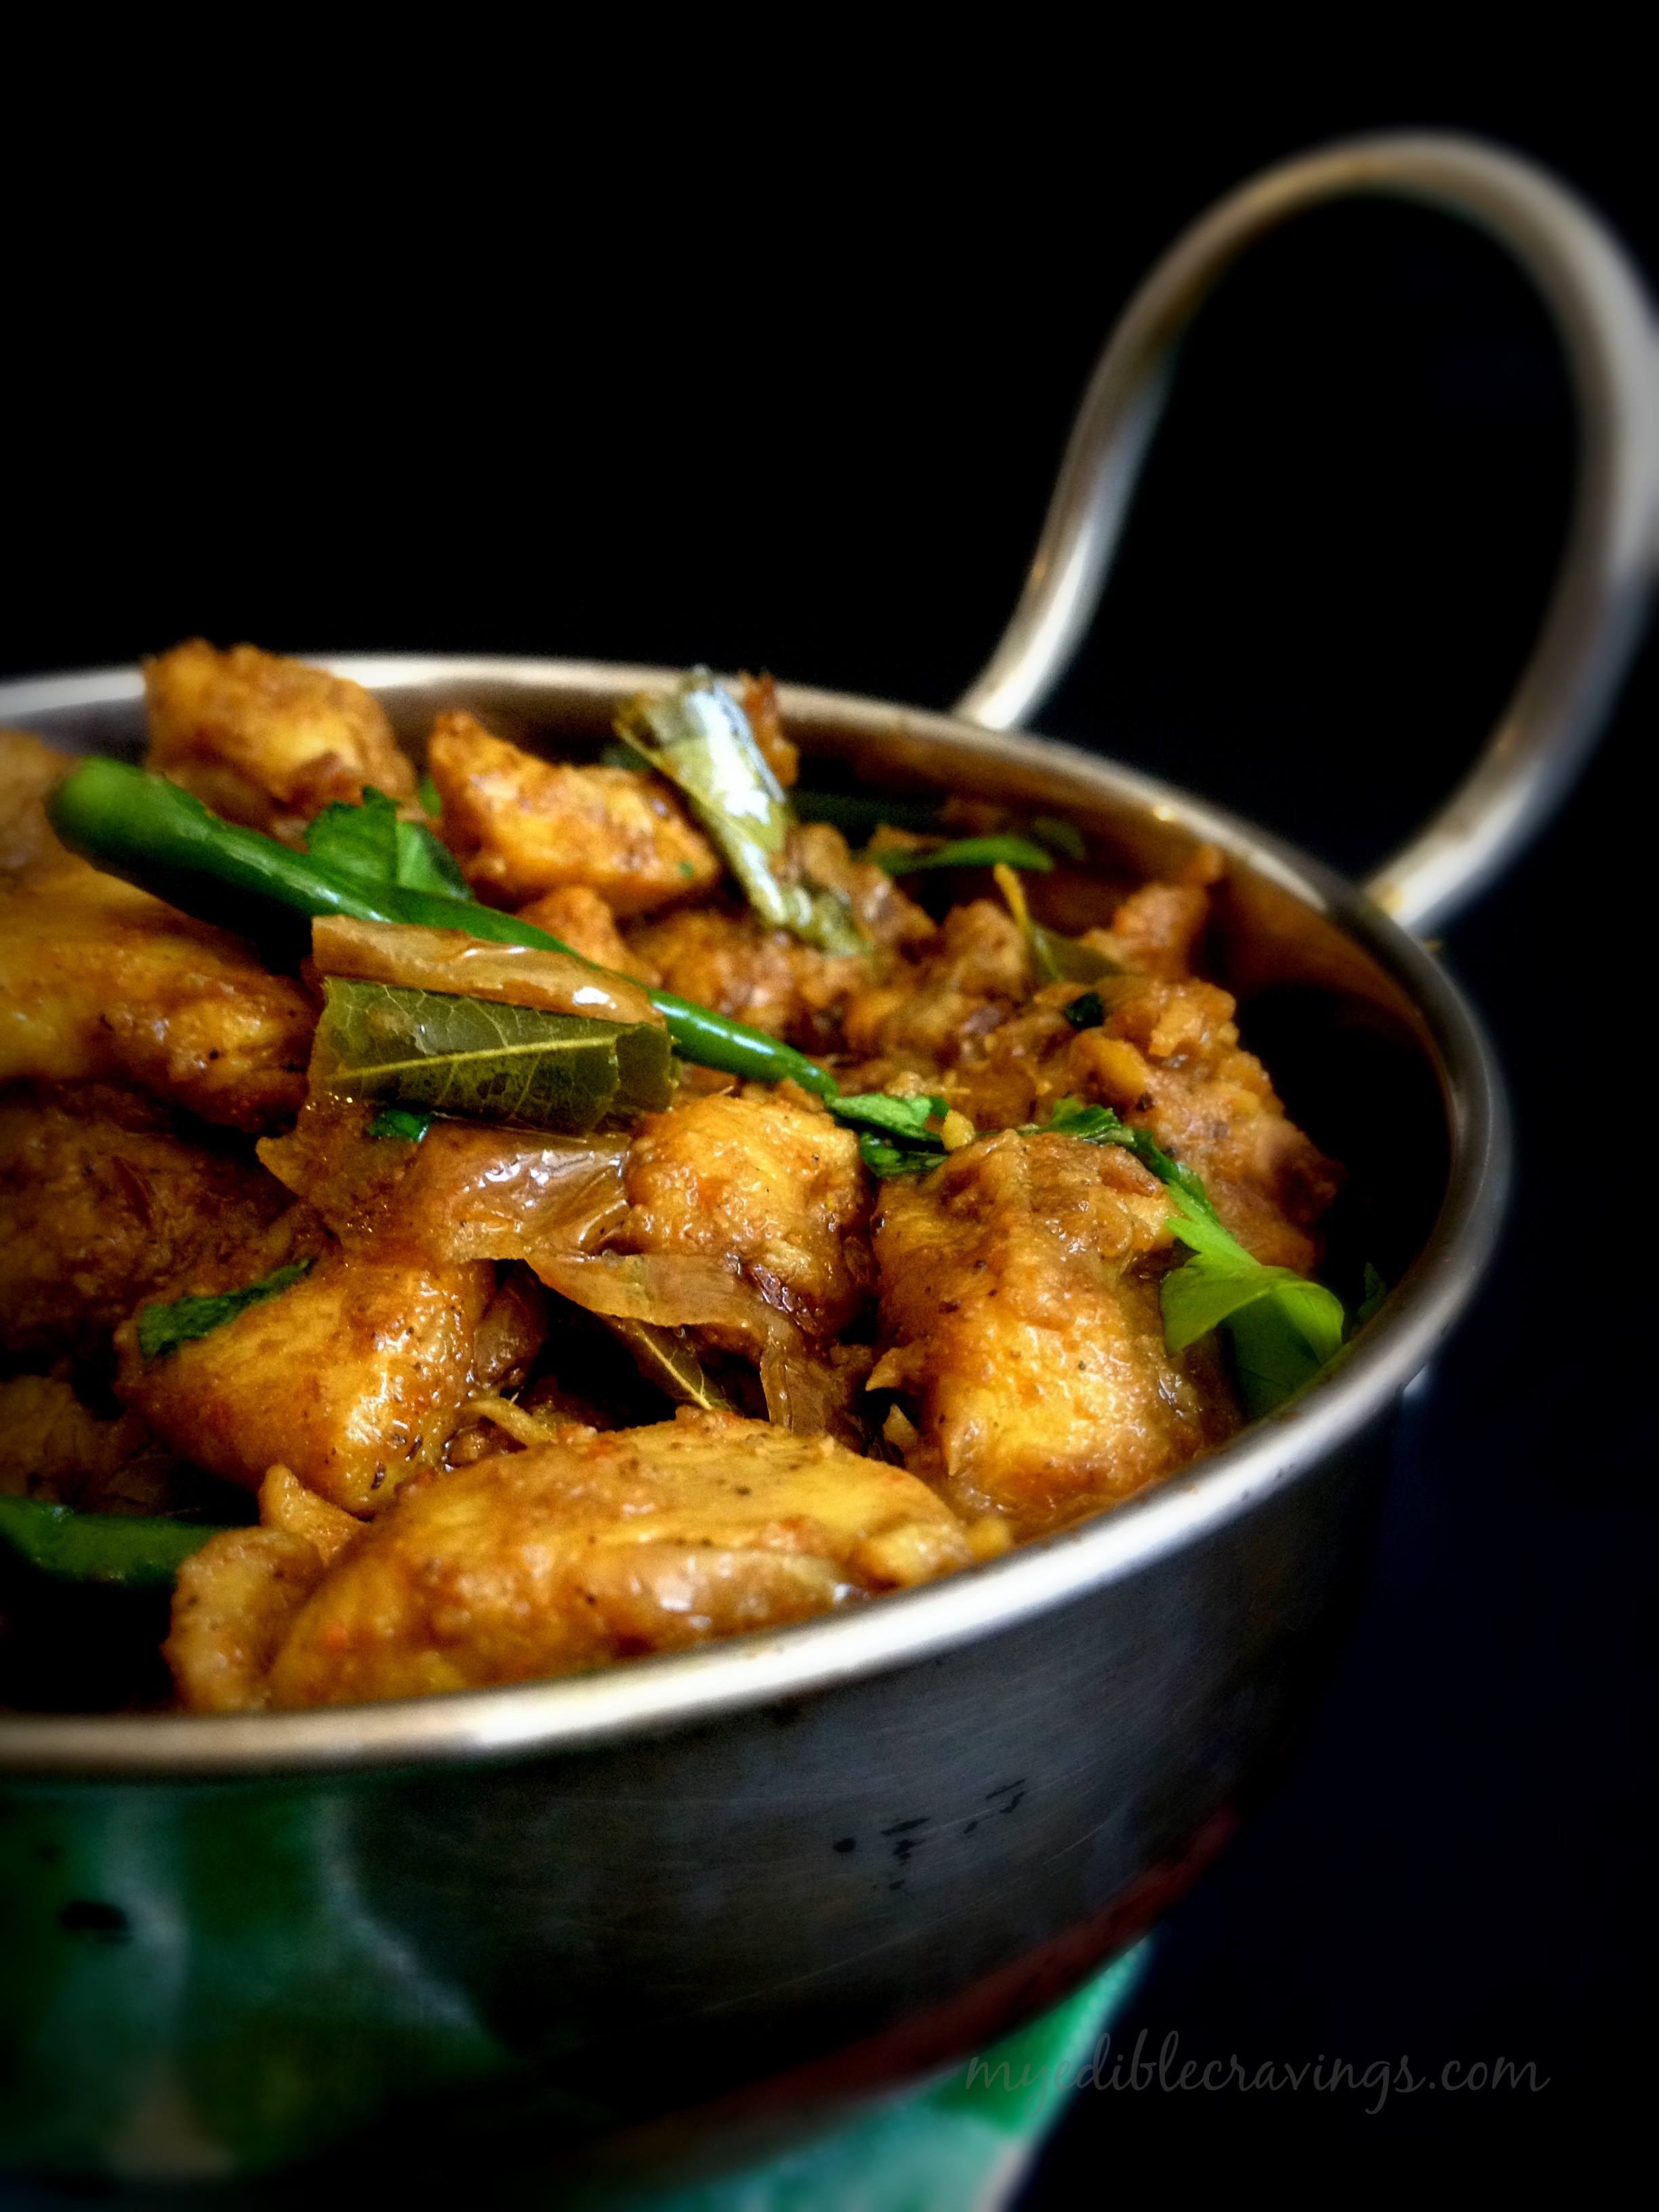
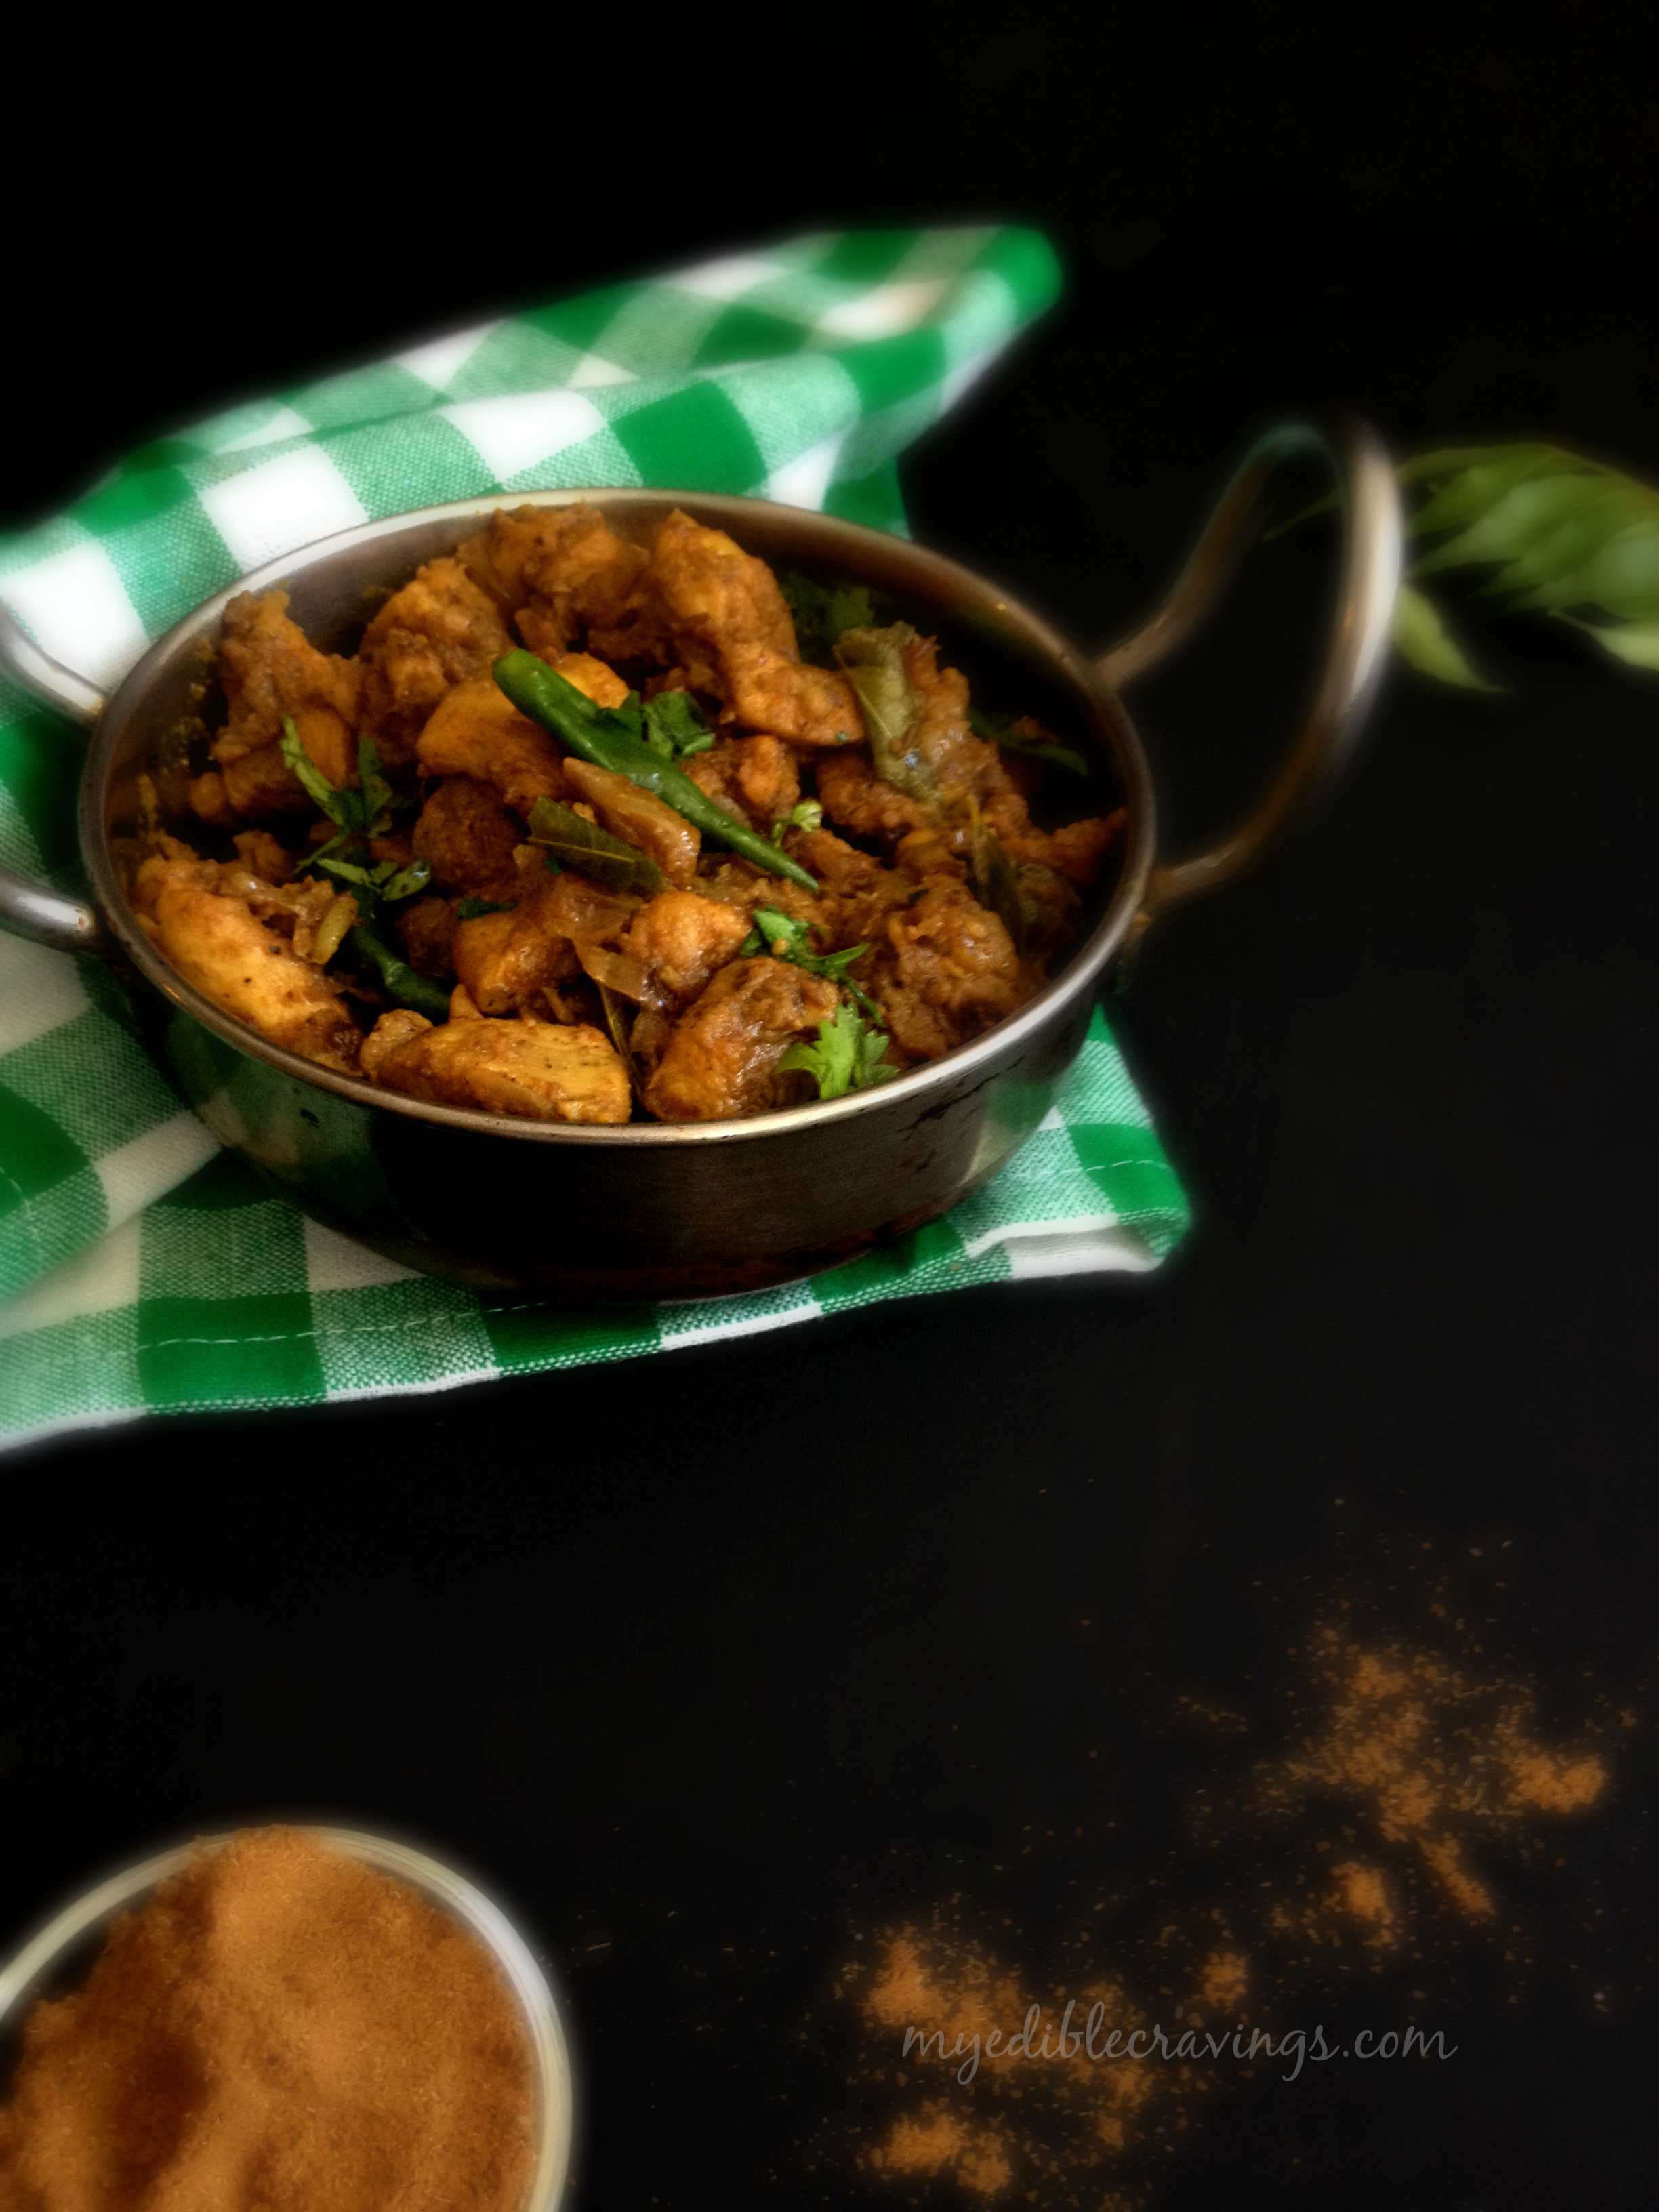
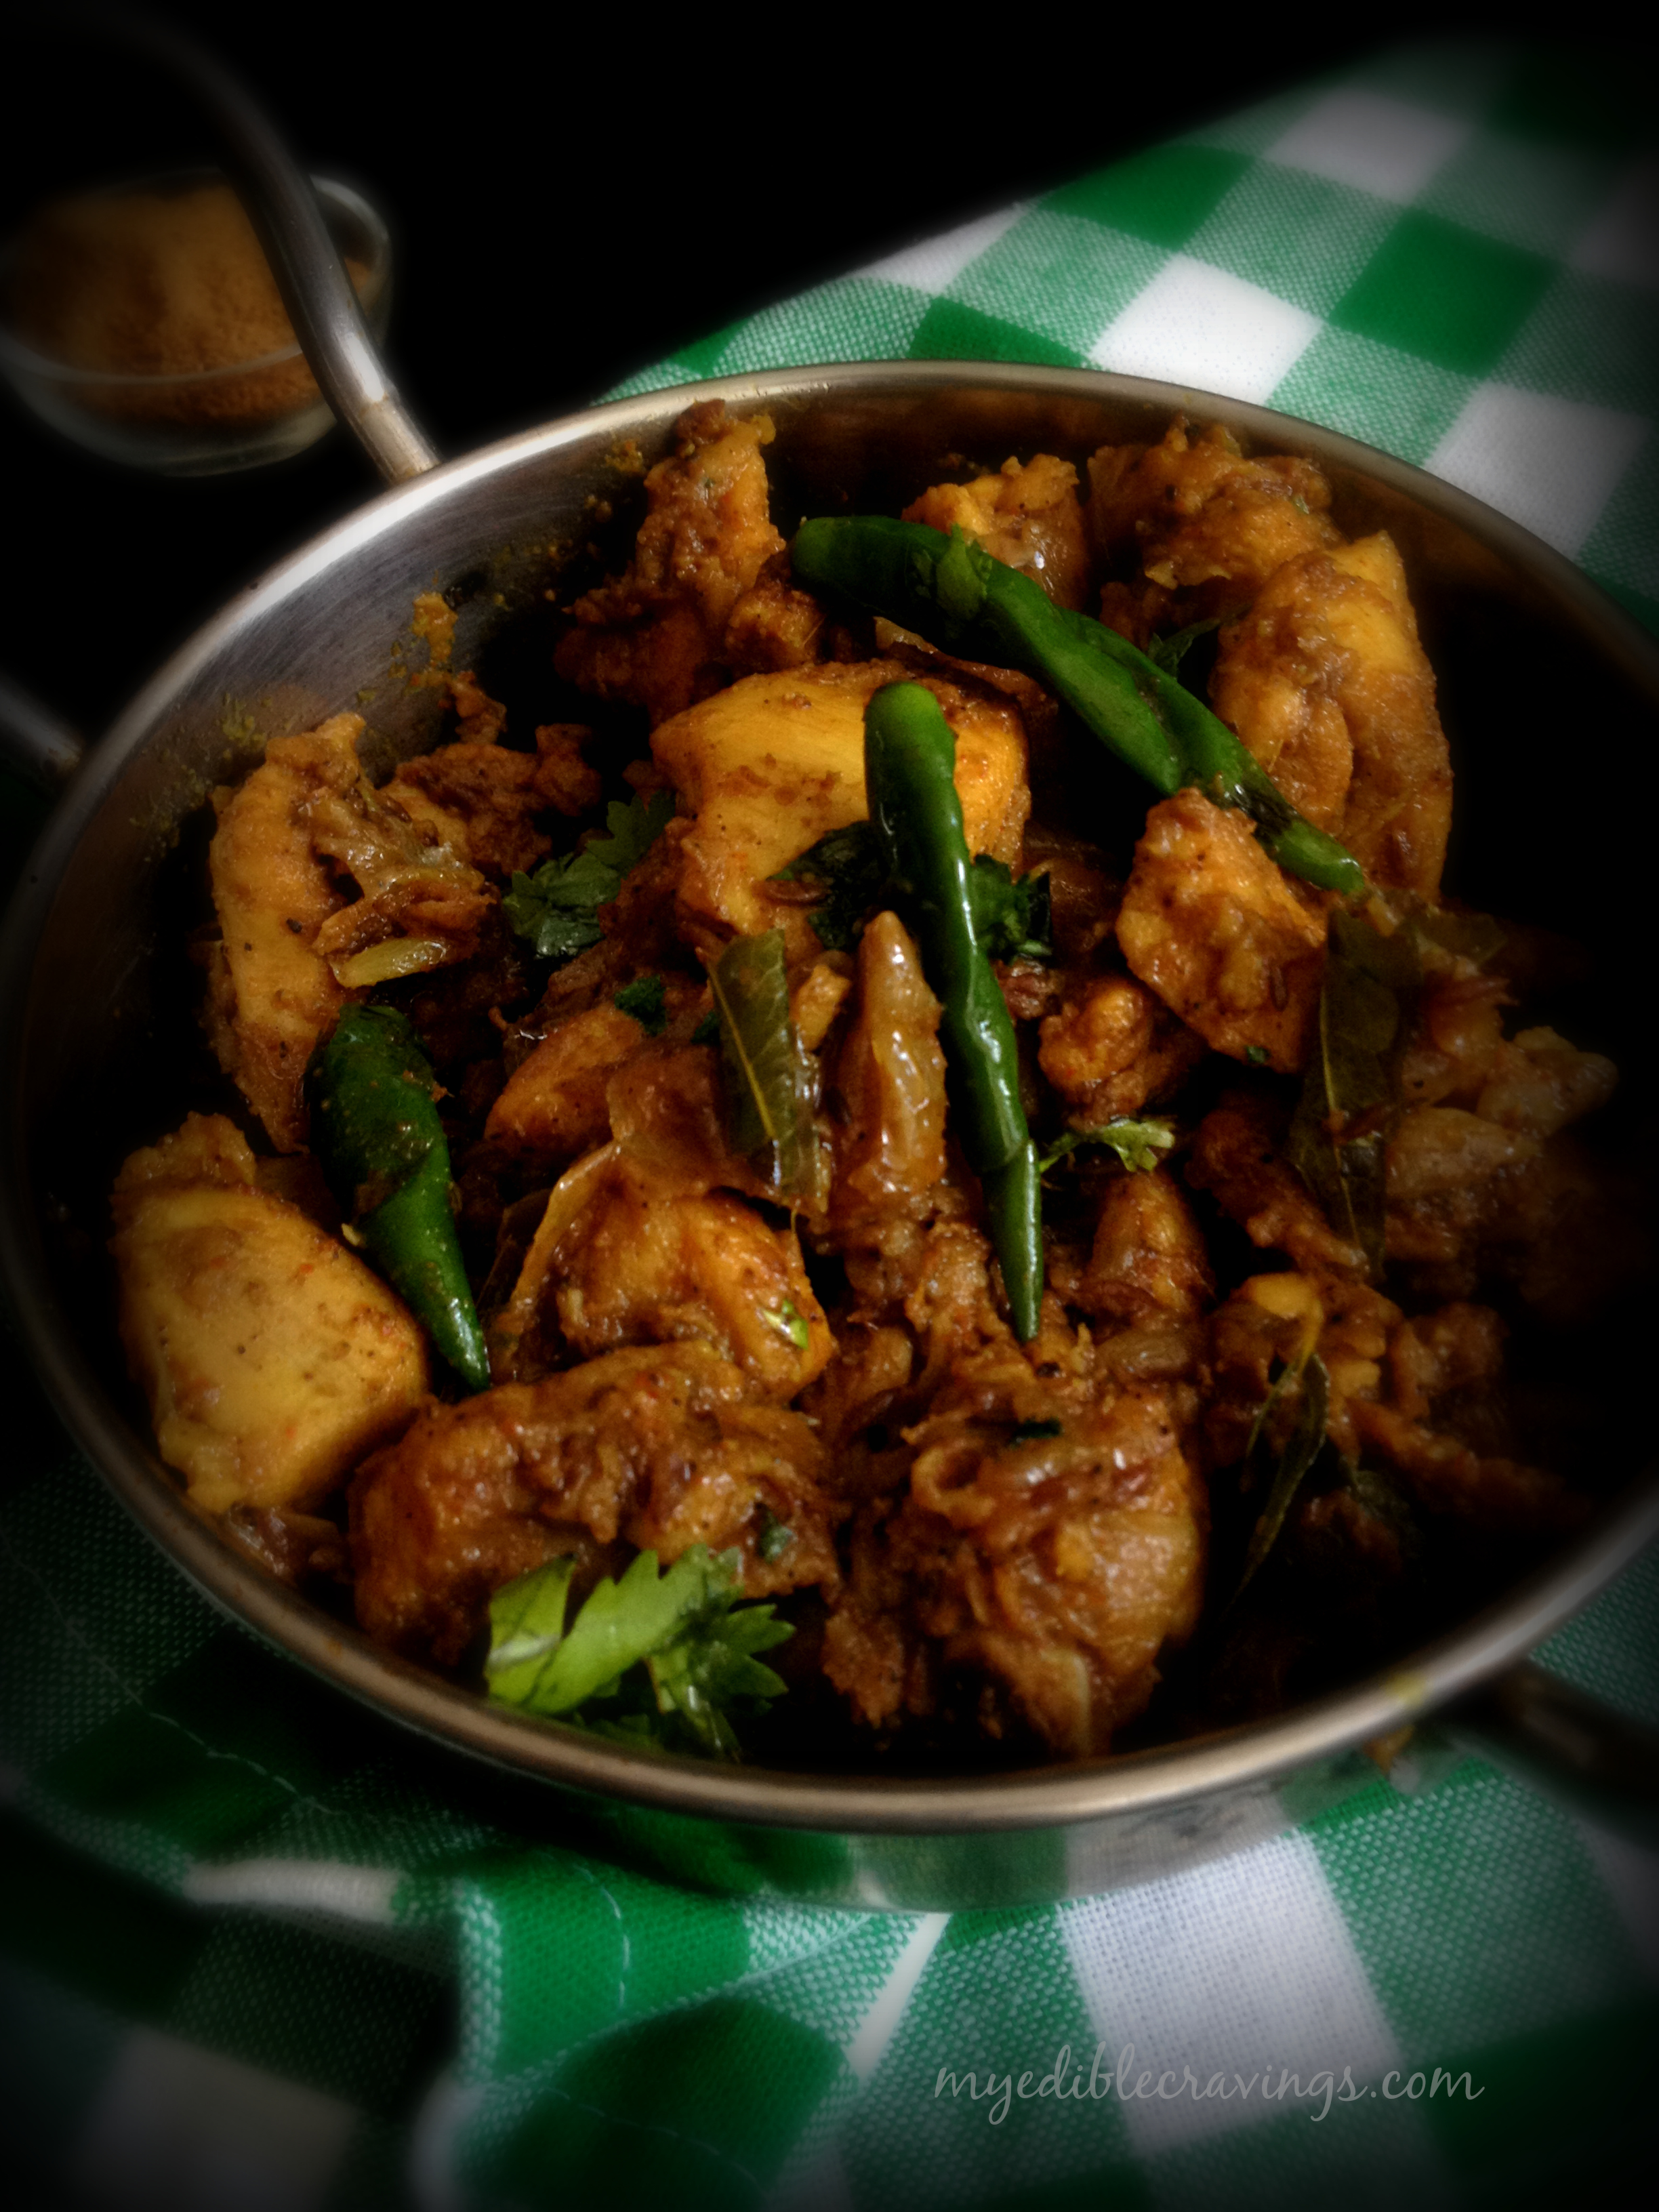
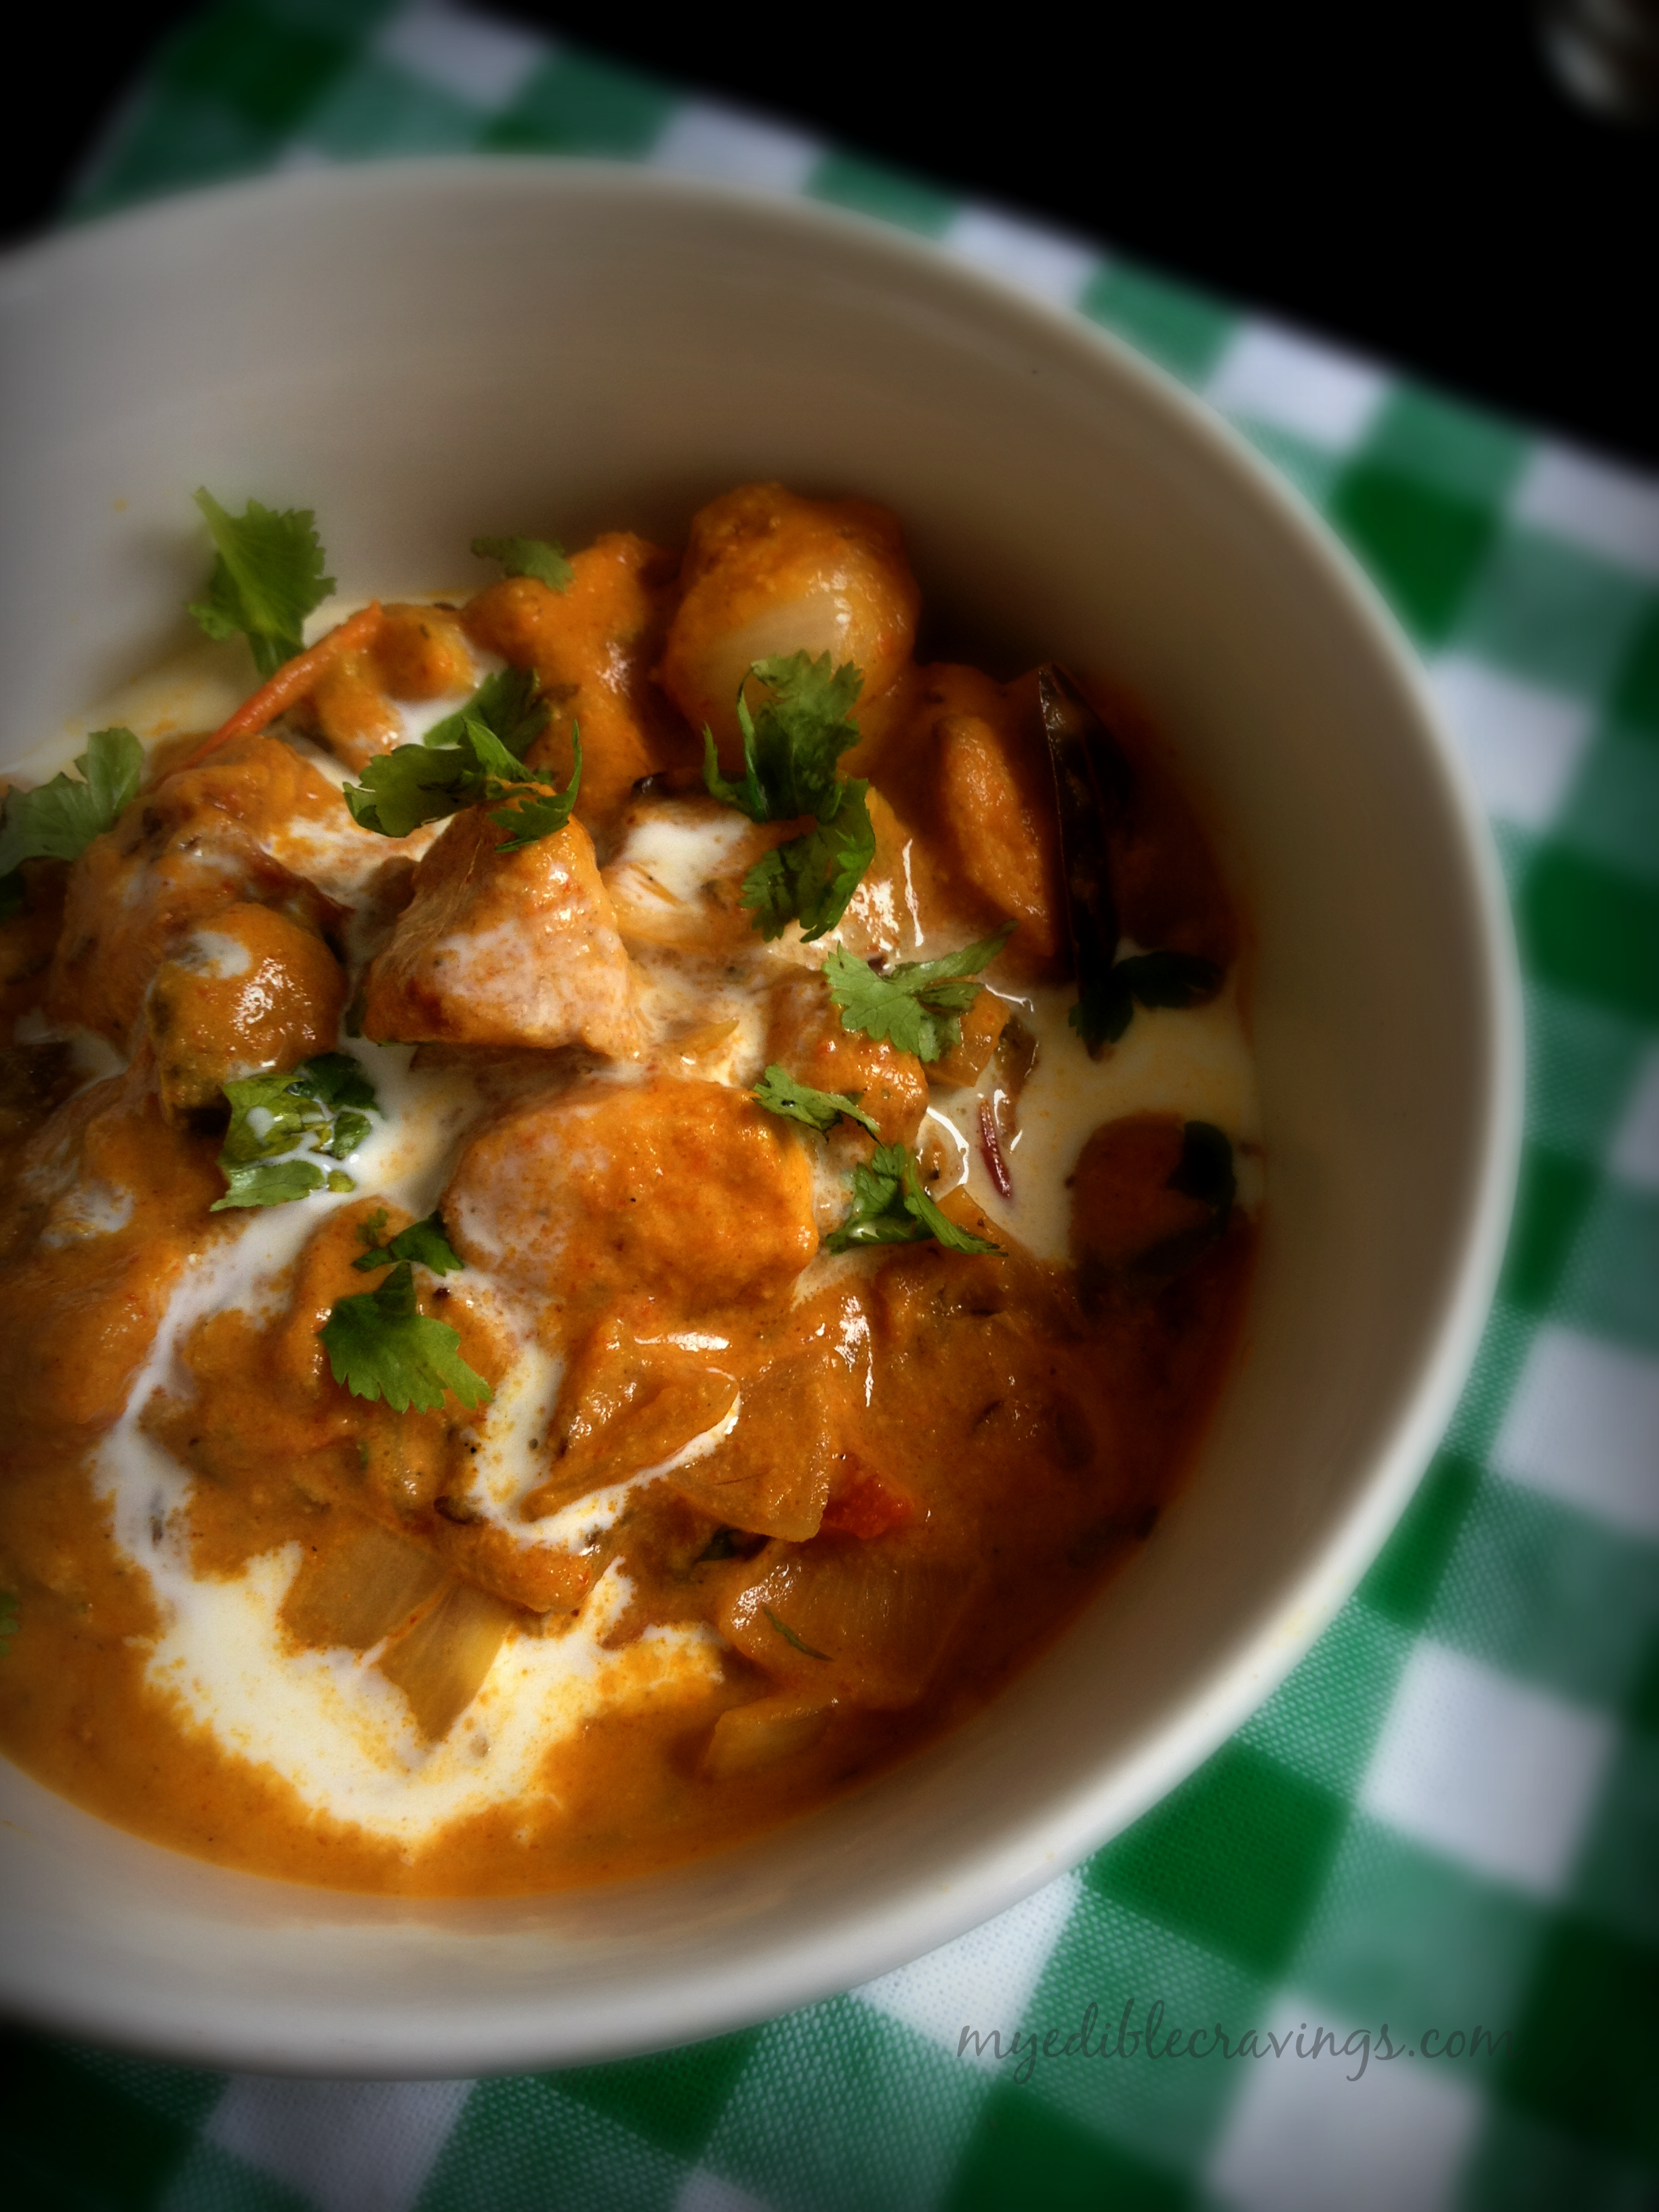
Traditionally, Chicken Tikka Masala is made first by baking chicken tikkaΒ (here is the recipe for Chicken Tikka) using skewers in a tandoor (cylindrical clay or metal oven) and then using that tikka to prepare the gravy (masala). In my preparation method given below, I had used conventional oven for baking the chicken tikka. The taste of Chicken Tikka Masala is mostly dependent on the marinade that you make.
Chicken Tikka MasalaAs I had mentioned earlier, Chicken Tikka Masala is universally popular and is very easy to make. The origin of this dish is unclear, with various proponents claiming its invention. In fact there was even a motion set to be passed in the UK parliament to give geographically protected status for Chicken Tikka Masala in the UK (Glasgow, I believe). Good that it did not happen since I personally believe that Chicken Tikka Masala originated in India (ofcourse :))
Chicken Tikka Masala
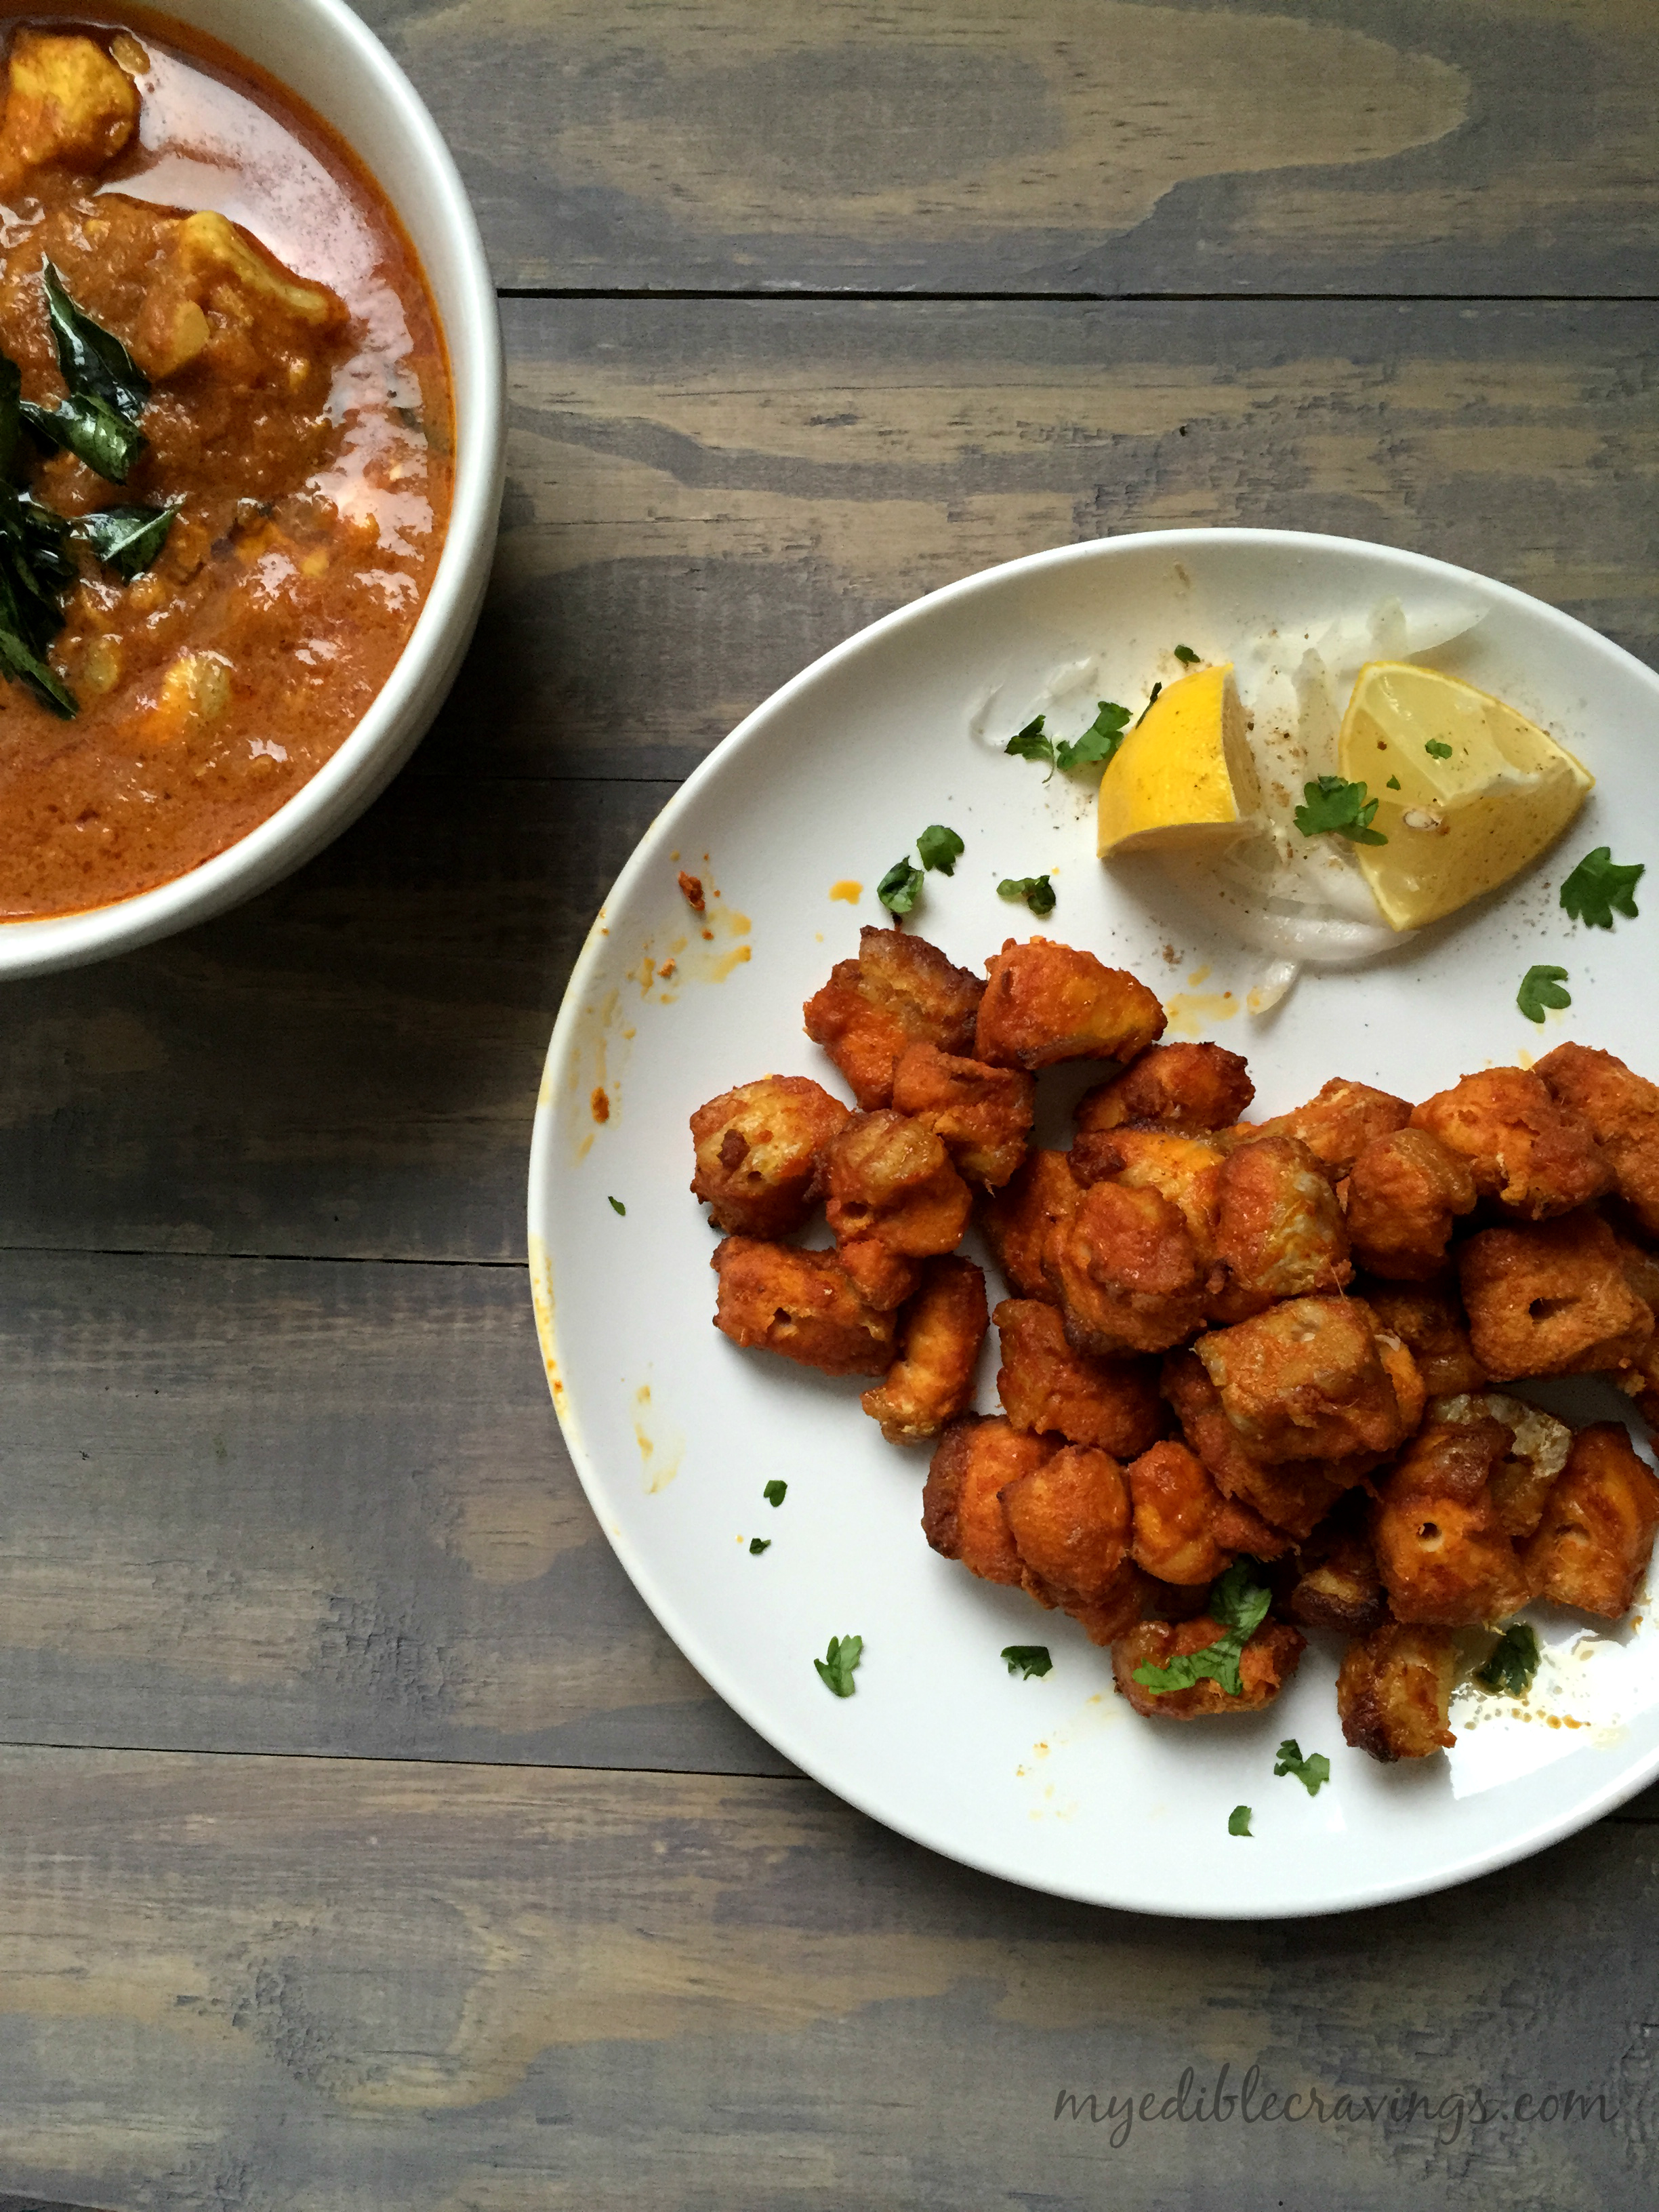
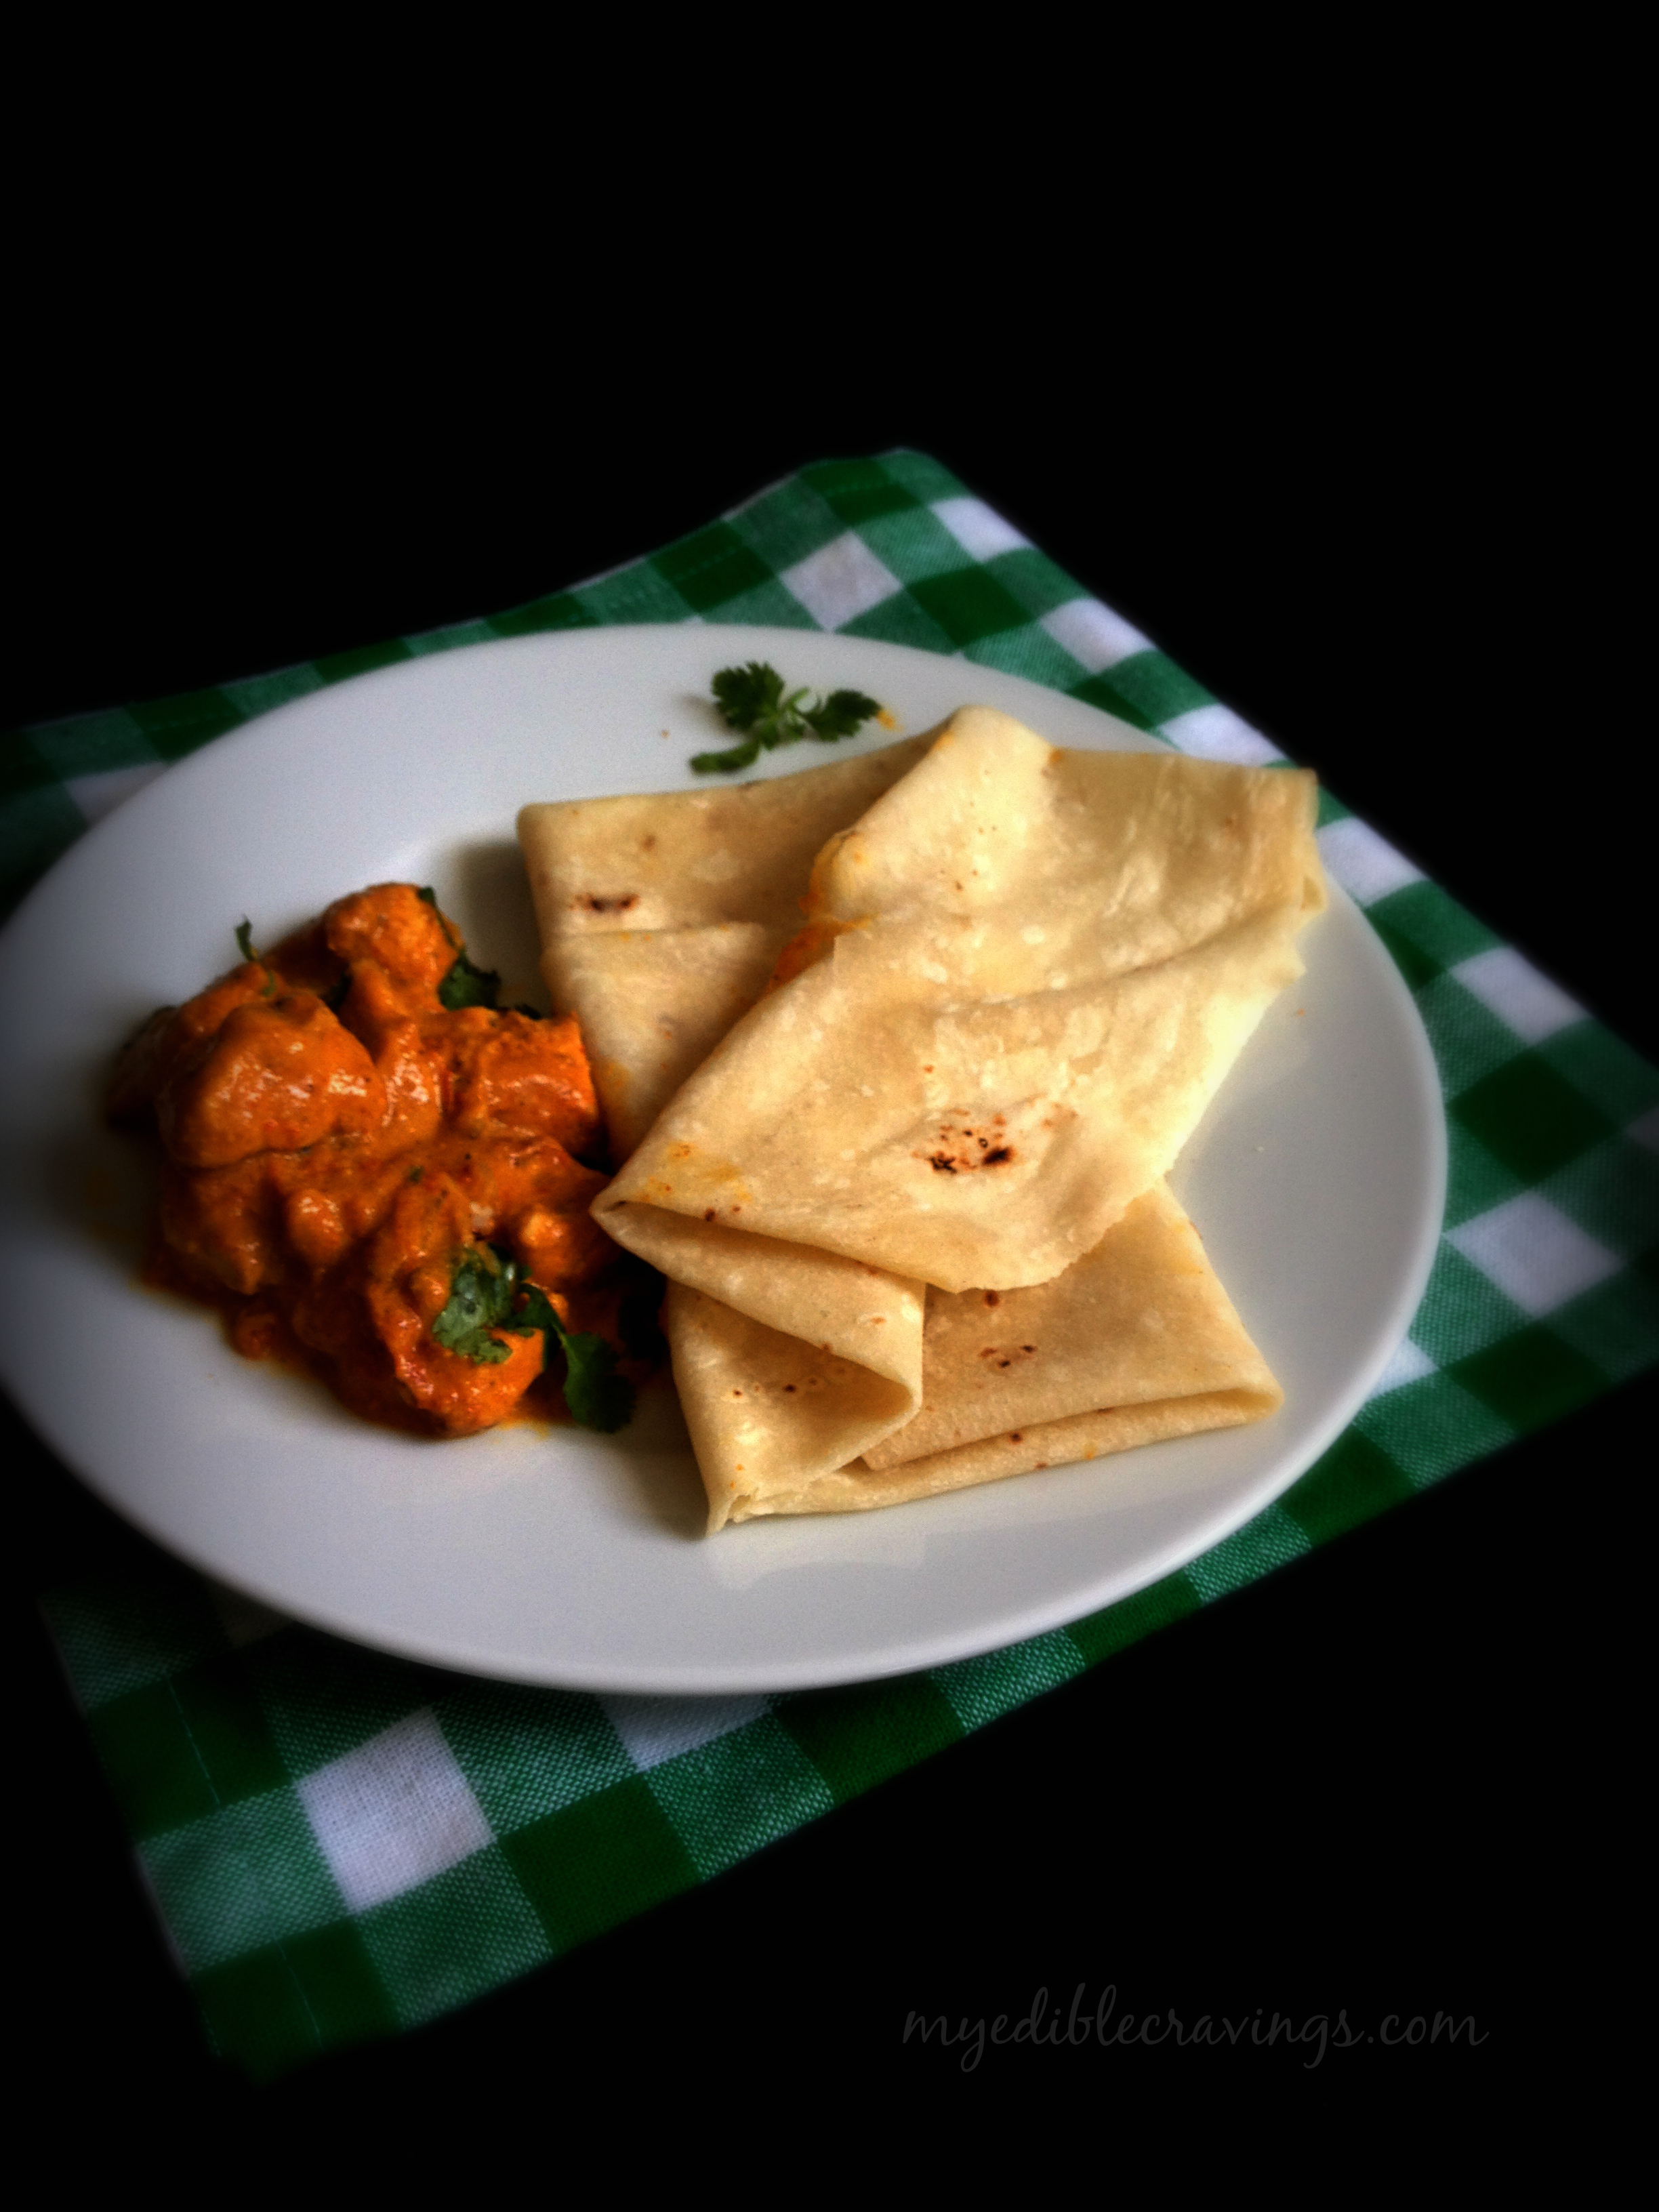
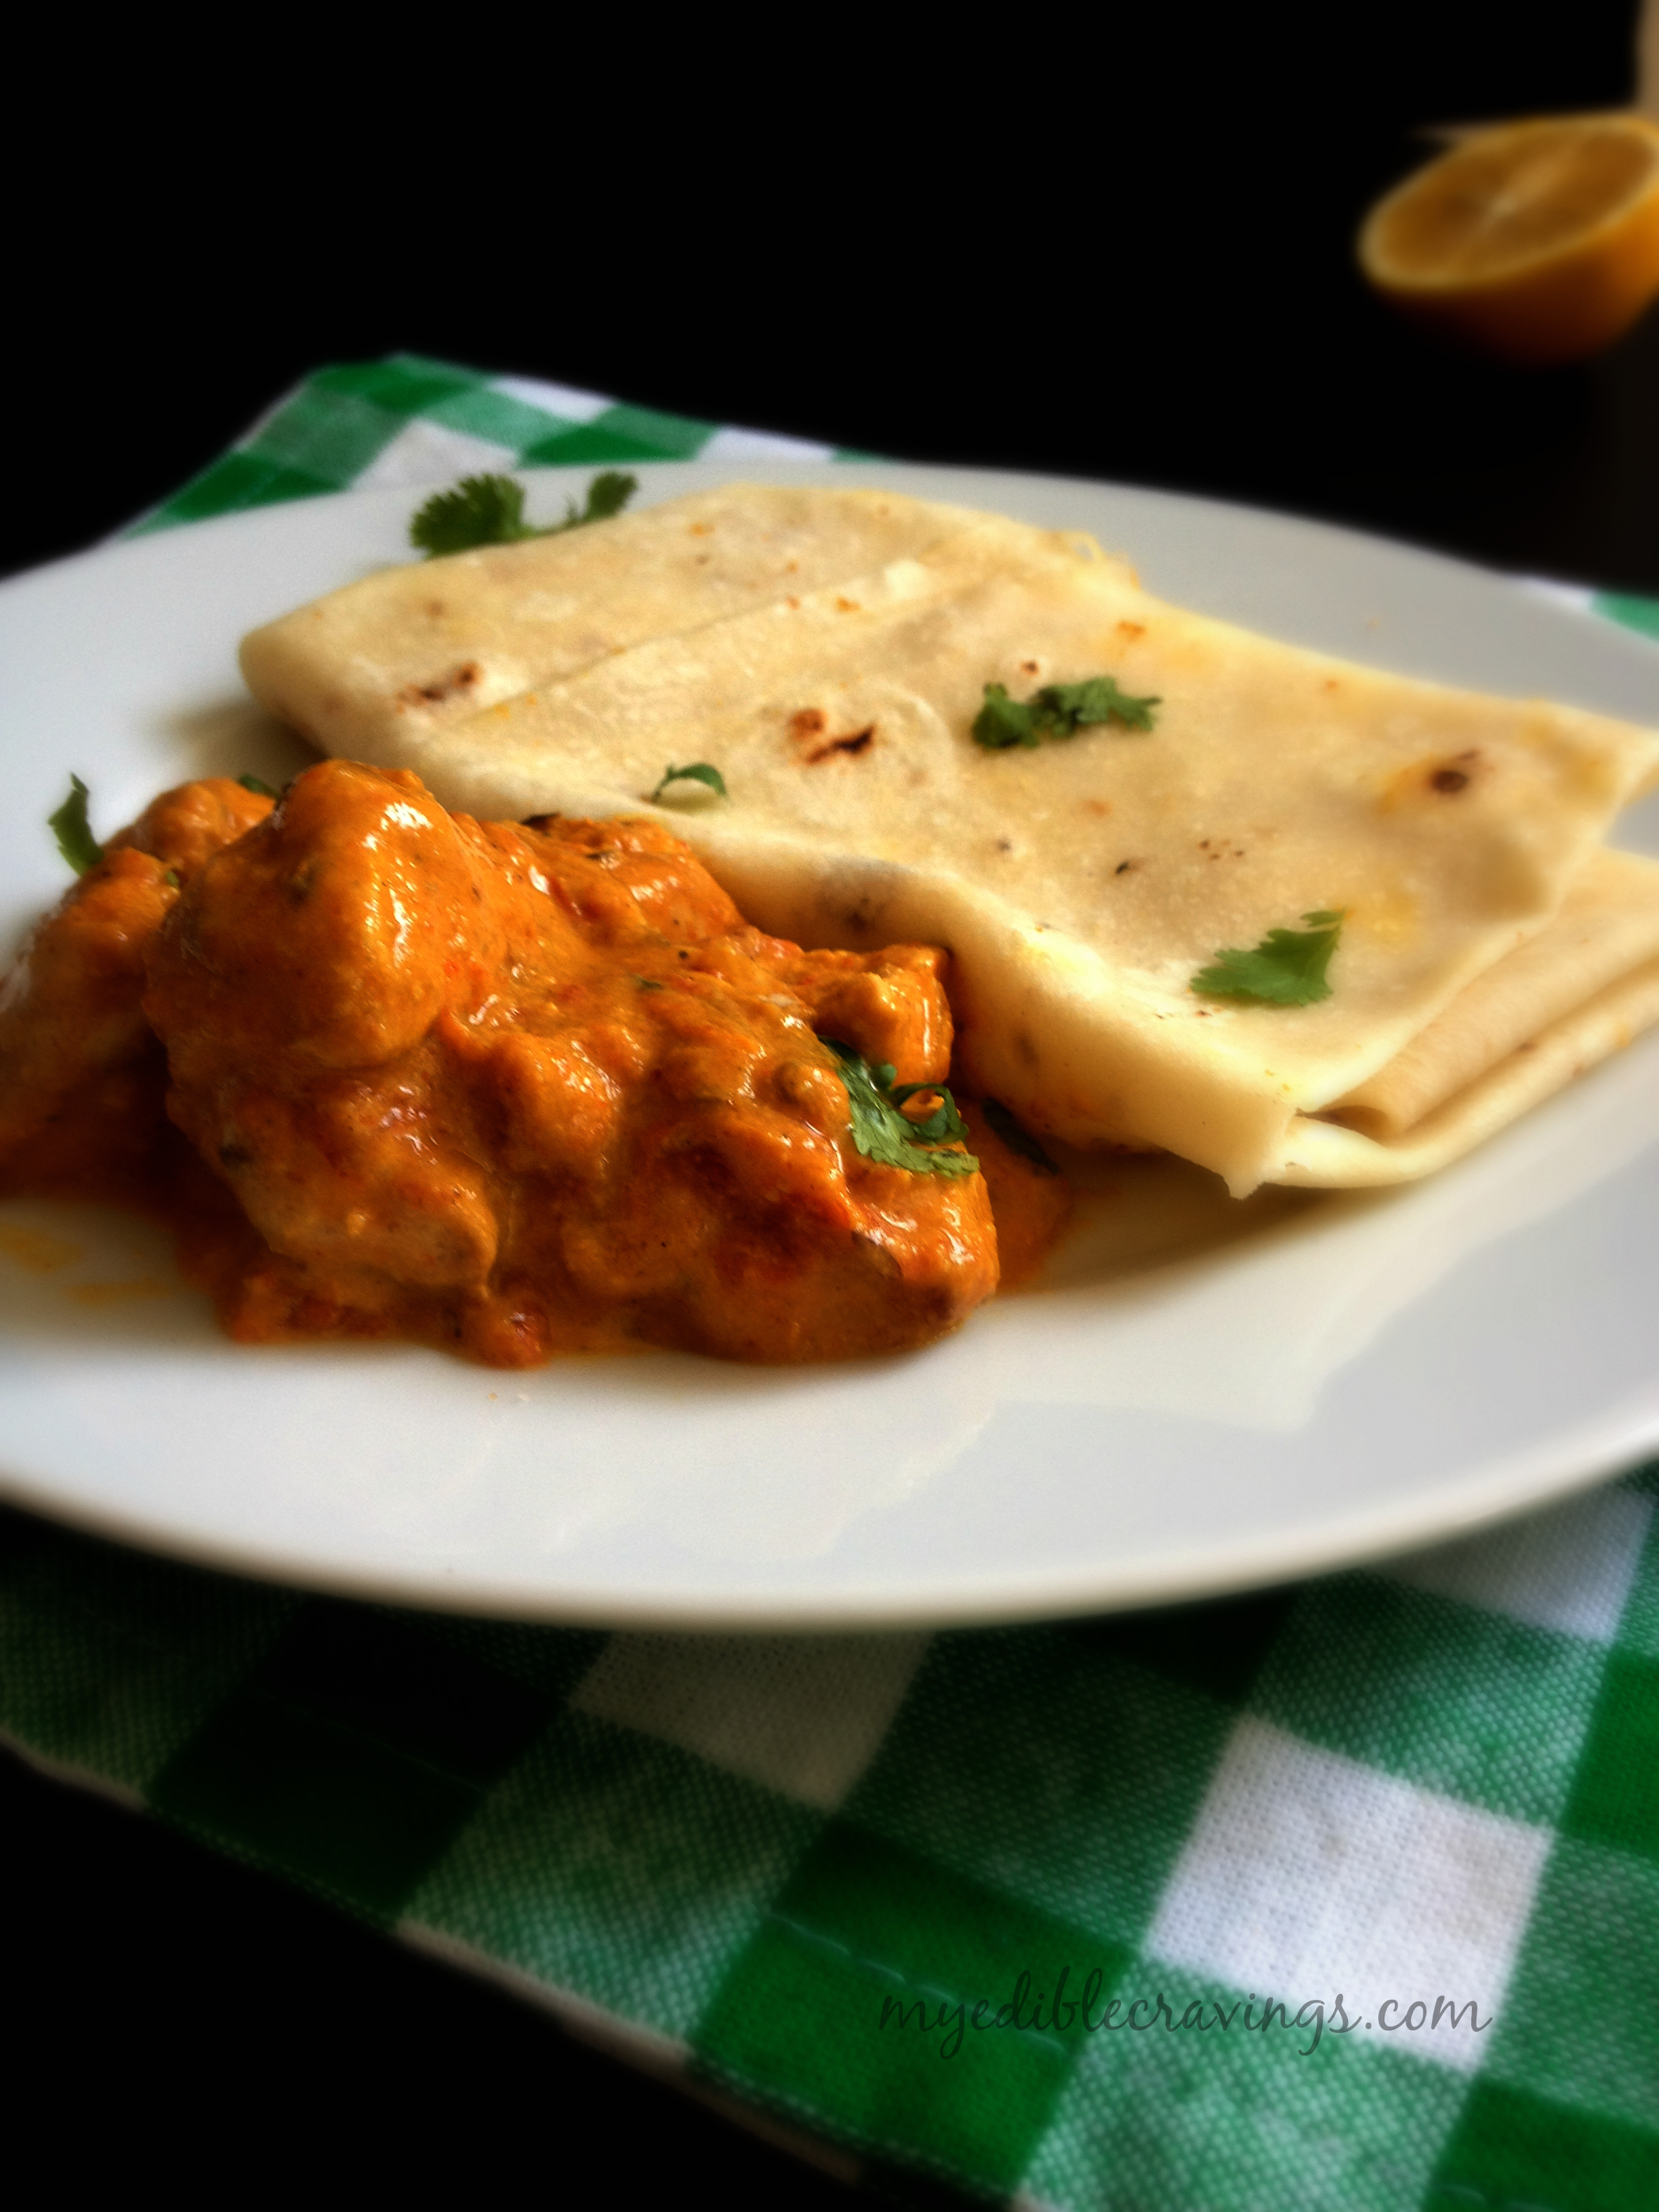
I would say Chicken Tikka Masala is two dishes combined in to one, i.e., chicken tikka and the Chicken Tikka Masala. You can serve the chicken tikka as is as an appetizer and the Chicken Tikka Masala as an entree dish.Try this widely popular and very tasty Indian πŸ™‚ dish and let me know your wonderful experiences, as always…

Chicken tikka masala
Recipe type: Main
Cuisine: Indian
Prep time: 
Cook time: 
Total time: 
Serves: 3
 
Ingredients
  • Cashews – 1 tbsp (soaked in water for half an hour)
  • Cinnamon stick – 1”
  • Cloves – 3 nos
  • Green Cardamom – 2 nos
  • Bay leaf – 1 no
  • Cumin seeds – 1 tbsp
  • Onion – 1 no (cut into cubes)
  • Ginger garlic paste – 1 tbsp
  • Tomato – 1 no (cut into cubes)
  • Green pepper – 1 no (cut into cubes)
  • Green chilli – 3 nos
  • Coriander powder – 1 tbsp
  • Cumin powder – ½ tsp
  • Kashmiri chilli powder – ½ tbsp
  • Turmeric powder – ½ tsp
  • Salt – as required
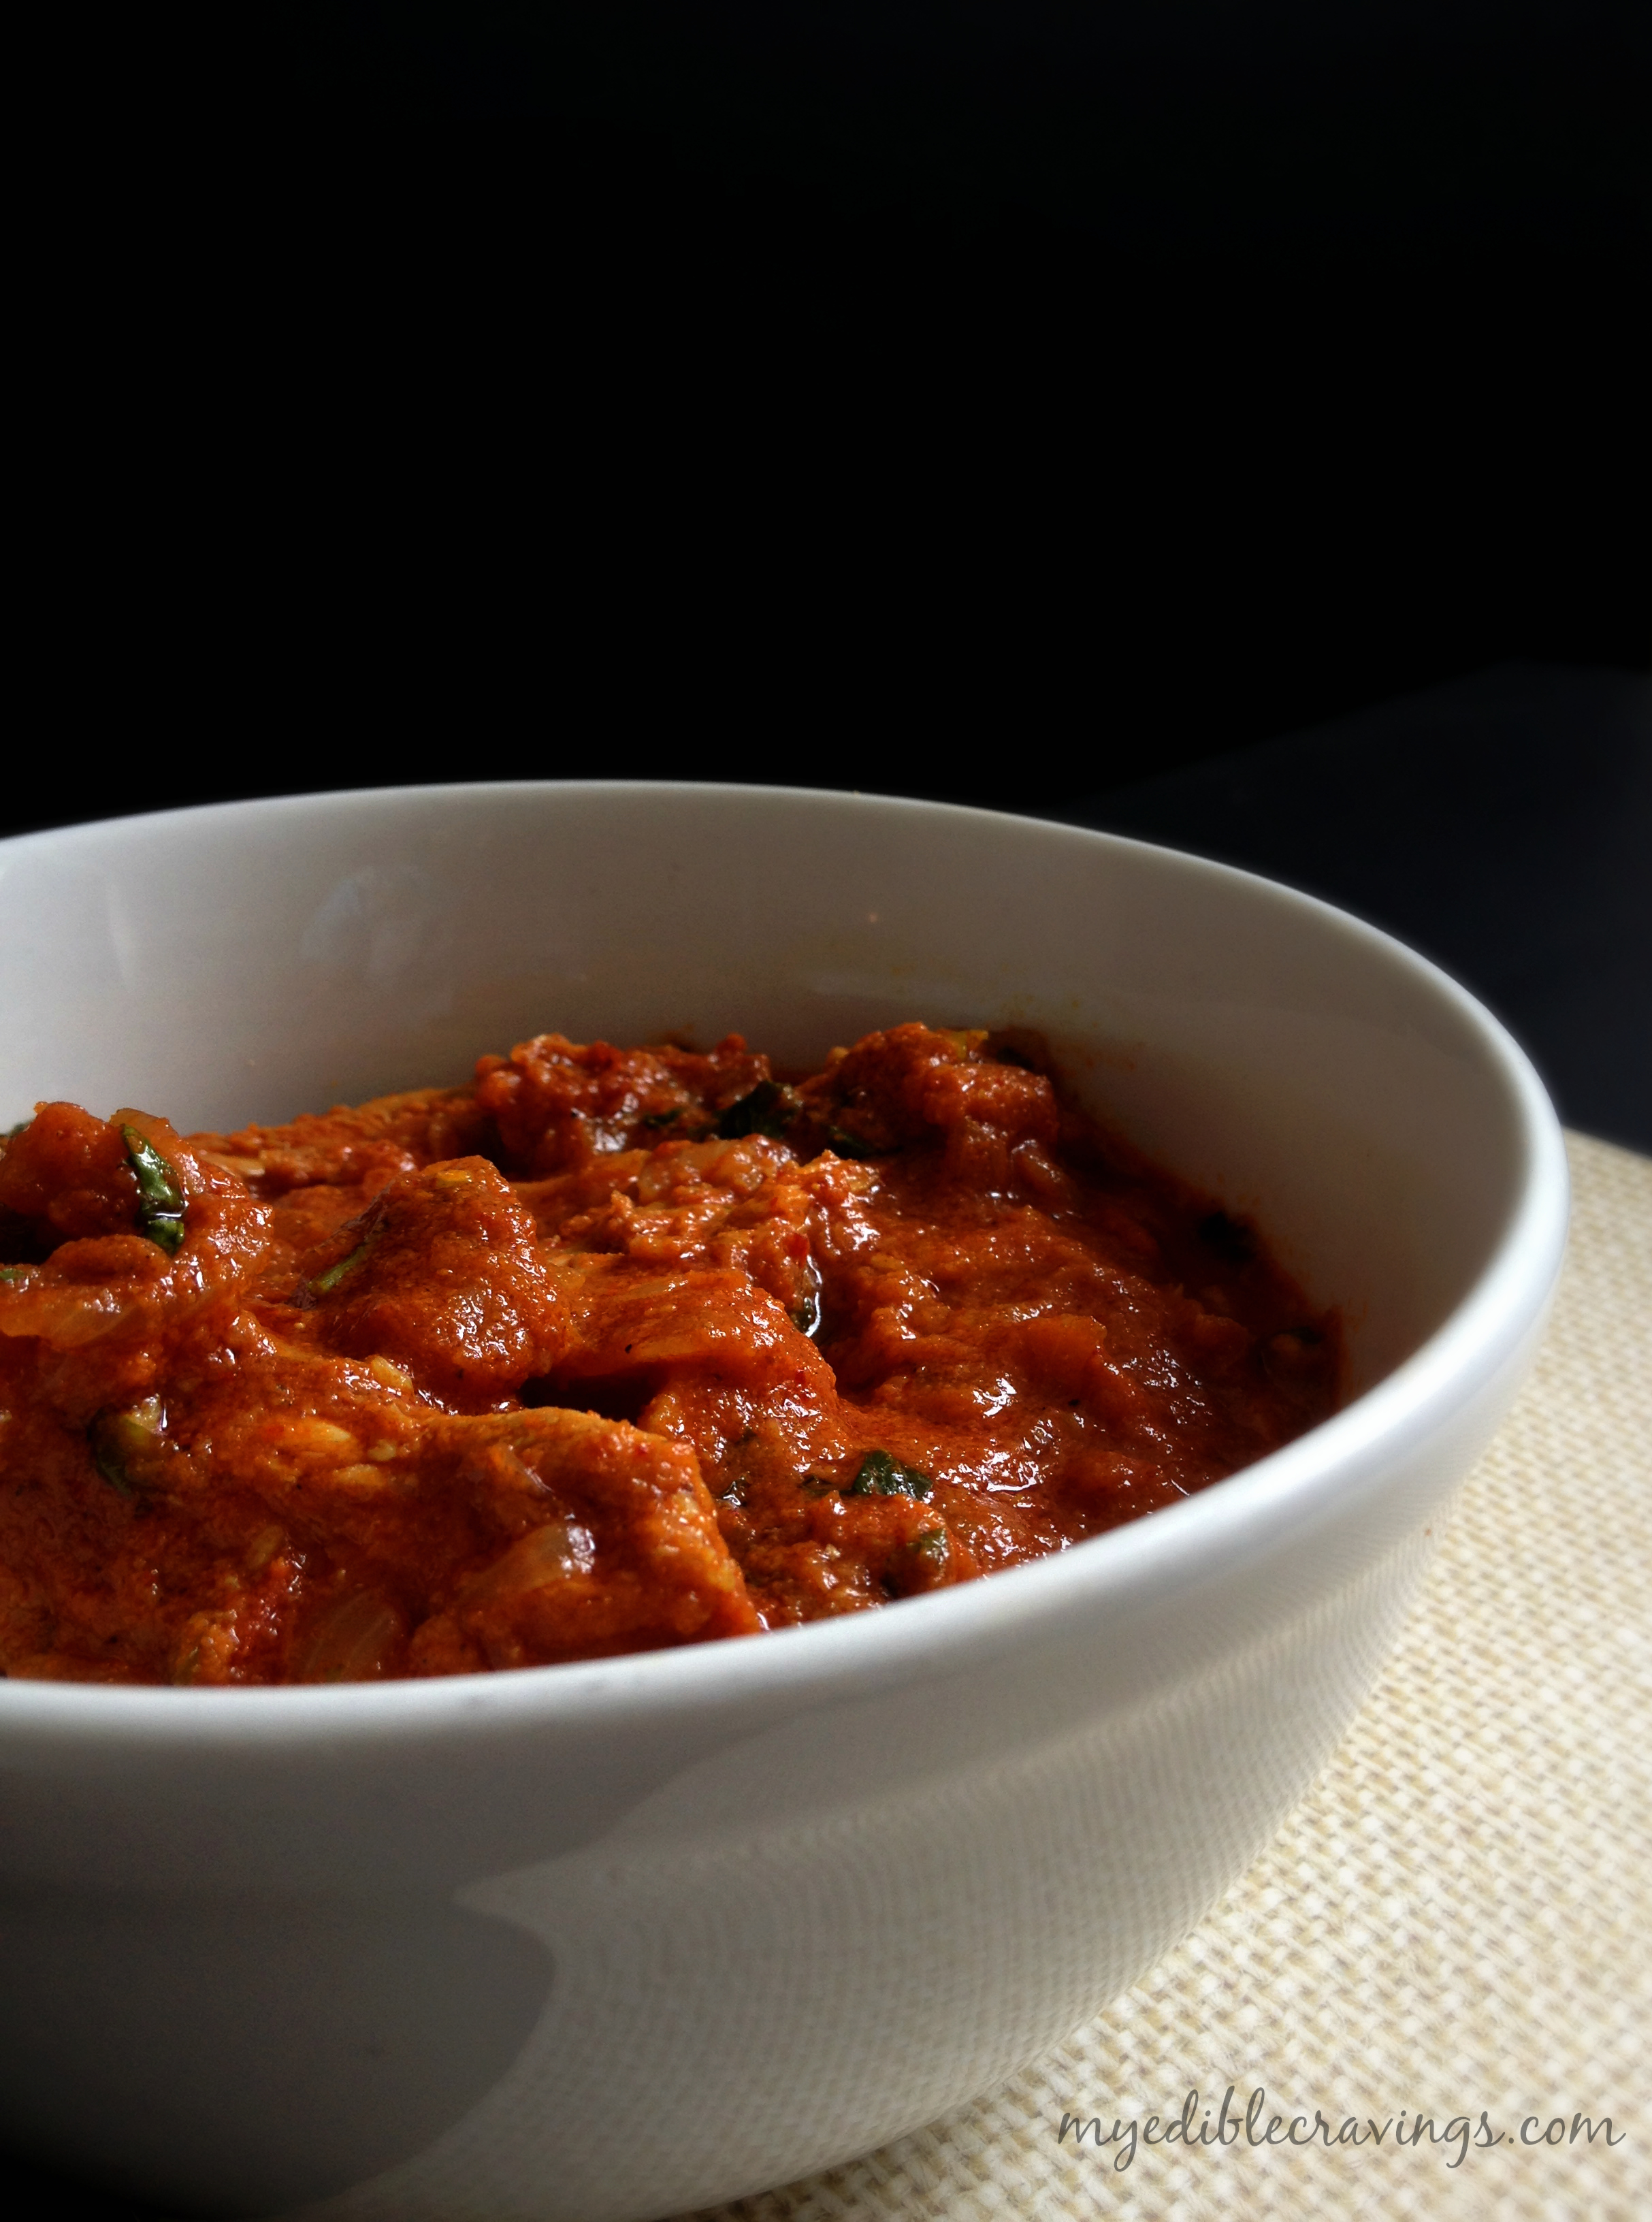
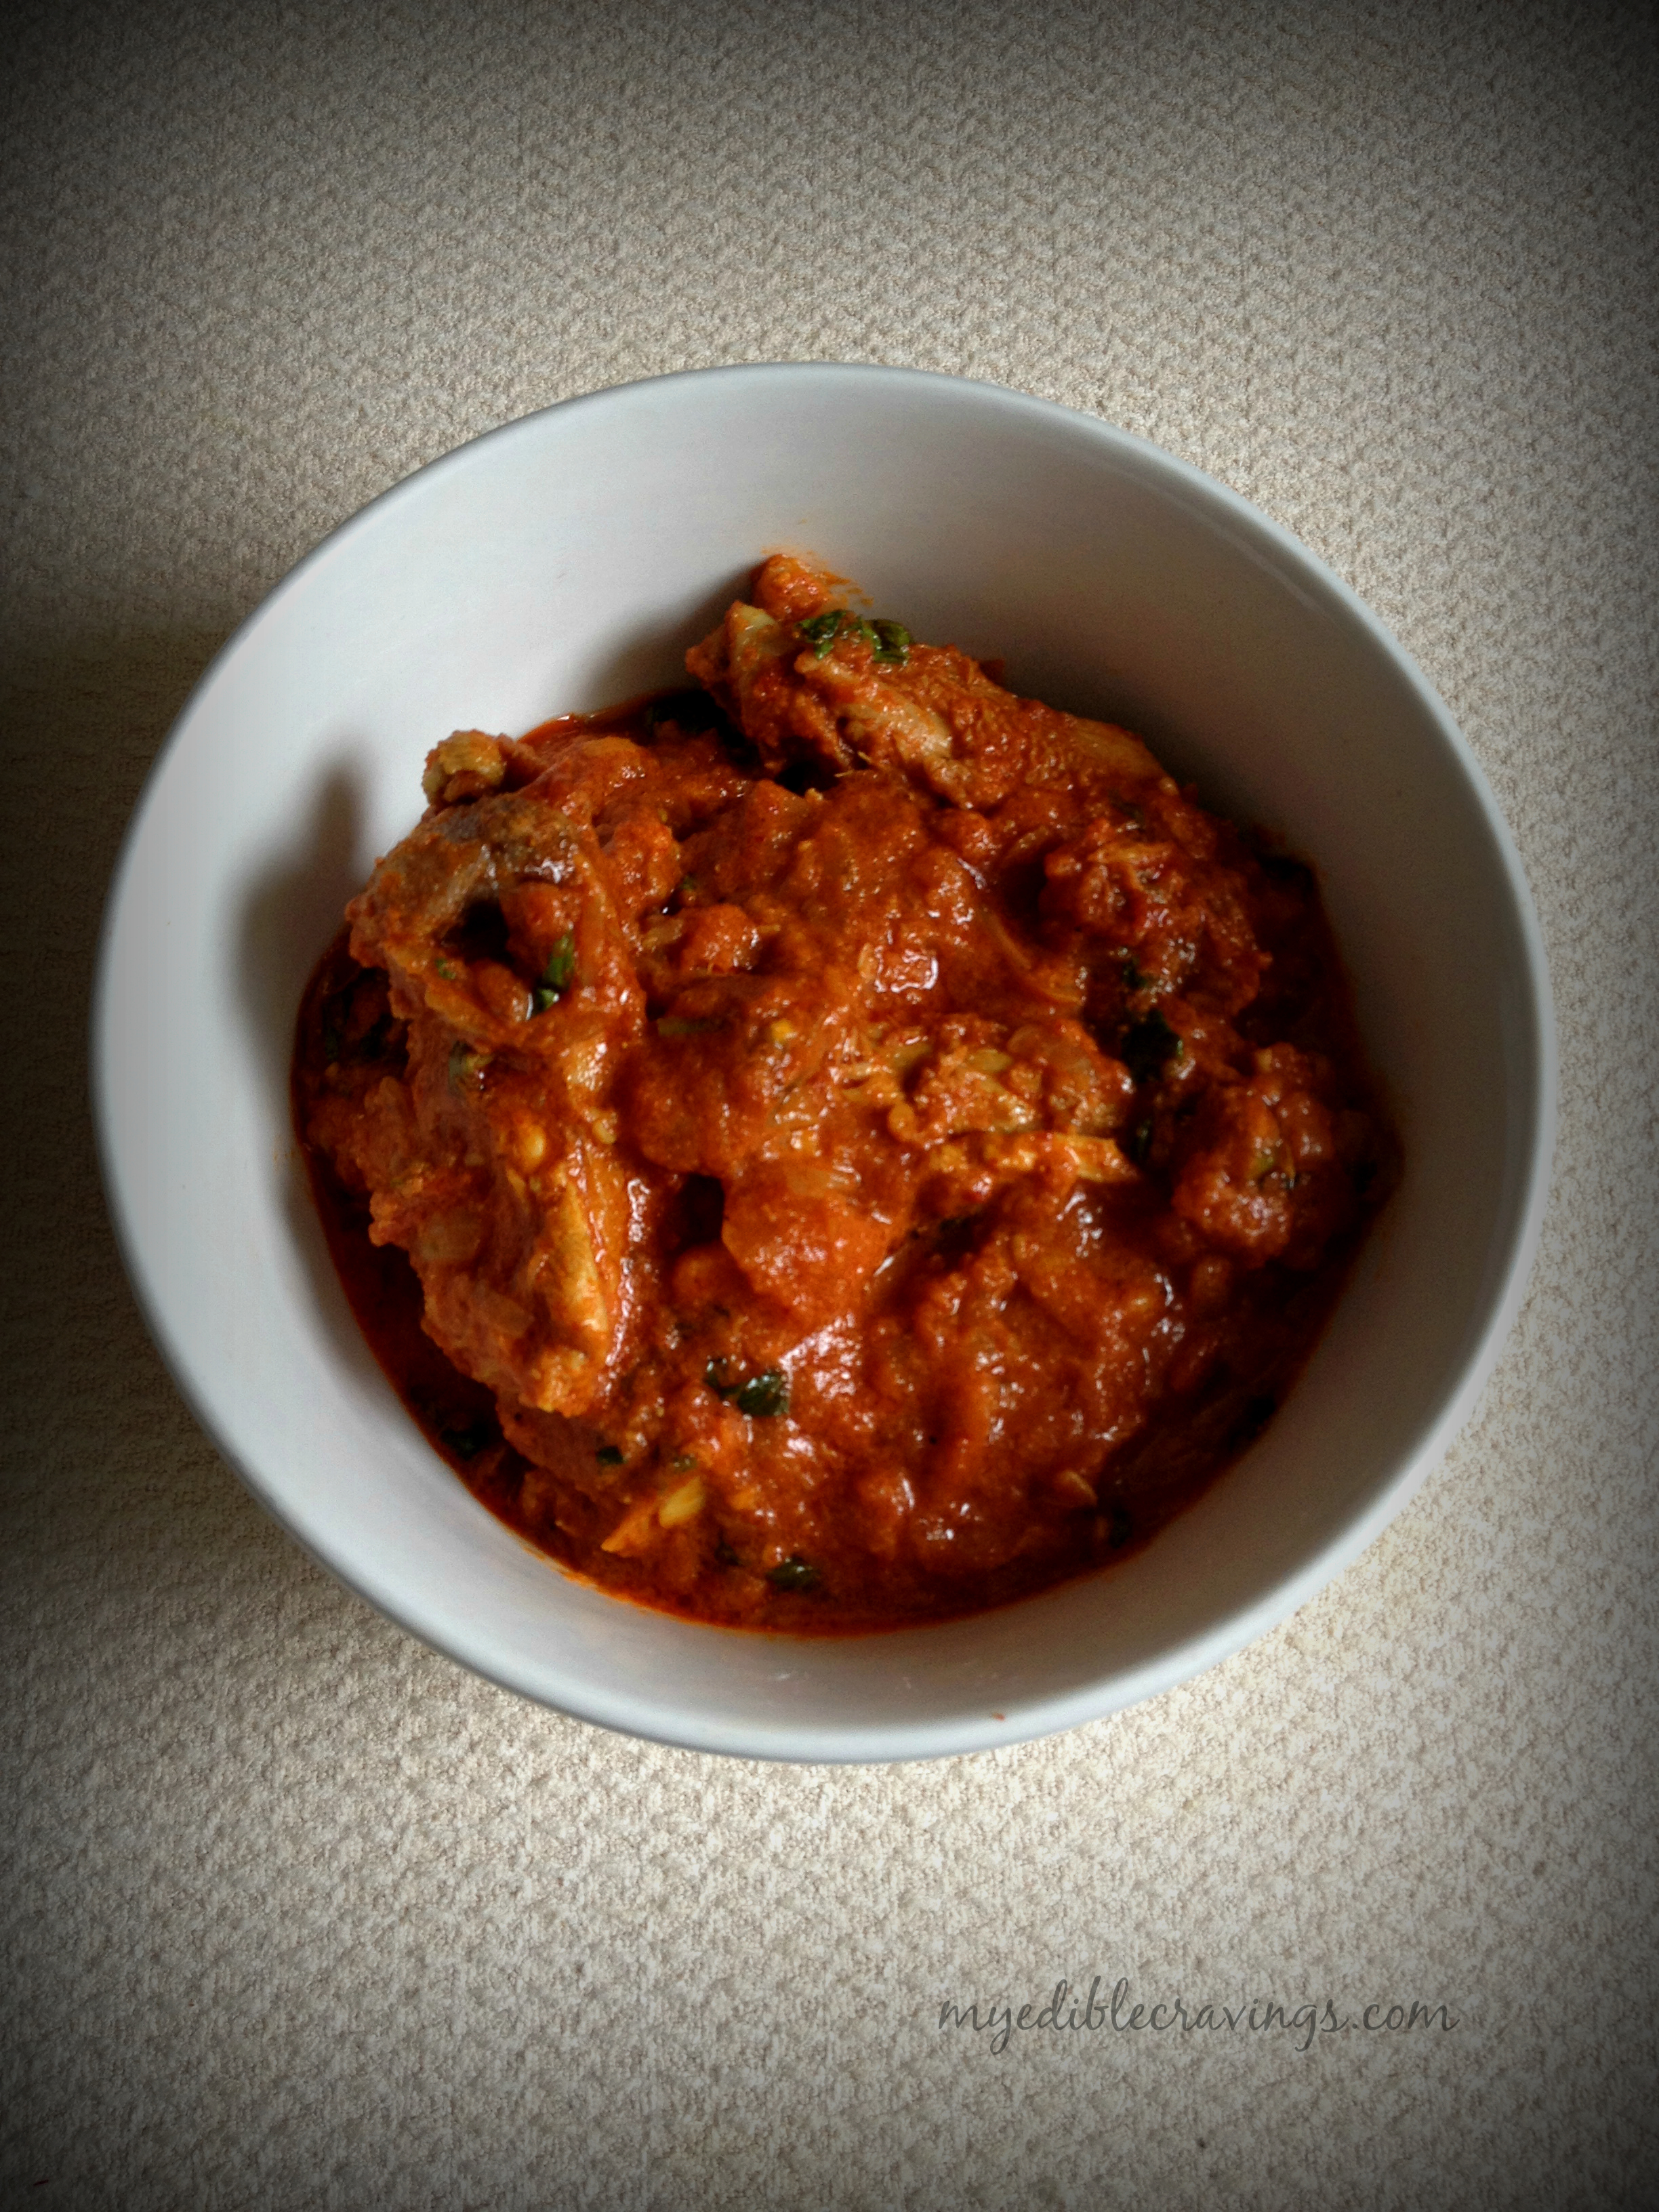
  • Cooked chicken tikka – 1 cup
  • Lemon juice – 2 tbsp
  • Fresh cream – 2 to 3 tbsp
  • Coriander leaves – for garnishing
Instructions
  1. Add soaked cashews with few pieces of onions and tomatoes in a blender, make a paste and keep it aside.
  2. Heat a wide open pan with a tbsp of oil. Add cumin seeds and whole spices. Once you get the nice aroma of cumin seeds and whole spices, add chopped onions. SautΓ© it and cook till the onions turns brown.
  3. Add a tbsp of ginger-garlic paste and stir fry till the raw aroma of ginger-garlic disappears
  4. Add the chopped tomatoes and green pepper. Cook the tomatoes until they are soft and pulpy.
  5. Add coriander powder, kashmiri red chilli powder, cumin powder, turmeric, salt and little water. SautΓ© for a minute.
  6. Add cashew paste. Cook until the oil oozes out.
  7. Now add in the cubes of cooked chicken tikka and mix well. Pour in some water if the mixture is dry.
  8. Add in cream and sprinkle some chopped coriander leaves and lime juice and mix it well.
  9. The tasty chicken tikka masala is ready to be served with hot butter naan or rumali roti.

Chicken Tikka Masala

Dum ka chicken

Dum ka chcikenDum Ka Chicken is the latest dish that I came across, courtesy from one of our friends. It is a very tasty and sumptuous dish made using chicken. As the name suggests, the chicken is dum cooked (cooked in a sealed pot) which I have explained in the cooking instructions below. Dum Ka Chicken is one of the easiest dishes that I have ever cooked and it is one of the many reasons for it to be my most favorite dish in recent memory.
Dum ka chcikenDum Ka chicken is a Hyderabadi nawab dish meaning it’s a royal dish :). As I had mentioned above, it is very easy to make. All you need to do is marinate the chicken overnight and then cook it using dum method the next day. Also, it is, as I would like to say, an one pot dish, meaning, you just need to use one utensil during the entire preparation i.e., you use the same pot in which the chicken is marinated to cook as well. You can also prepare Dum Ka Chicken using a conventional oven.
Dum ka chcikenDum Ka Chicken is very rich in flavor and goes well with almost any entree items like rice, chapati, paratha, naan etc. Do try this royal, very tasty, simple (I am running out of adjectives :)) dish and post your wonderful comments!

Dum ka chicken
Recipe type: Main
Cuisine: Indian
Prep time: 
Cook time: 
Total time: 
Serves: 4
 
Ingredients
To make a paste:
  • Chironji or charoli- 1 tbsp
  • Cashews– 1 tbsp
  • Green chilli – 4 nos
Other ingredients:
  • Cinnamon stick – 1”
  • Green cardamom – 3 nos
  • Cloves – 3 nos
  • Shahi jeera – Β½ tsp
  • Ginger garlic paste – 1 tbsp
  • Lemon juice – from half a lemon
  • Yogurt – ½ cup (2 tbsp)
  • Turmeric powder – Β½ tsp
  • Chilli powder – 1 tbsp
  • Coriander powder – 1 Β½ tbsp
  • Garam masala – Β½ tsp
  • Cumin powder – Β½ tsp
  • Mint, finely chopped – Β½ cup
  • Cilantro, finely chopped – Β½ cup
  • Onion , big, sliced – 1 to 2 nos
  • Olive Oil – 2 tbsp
  • Salt
  • Chicken – 750 grams
  • Water – 1 Β½ cup
Instructions
Step 1: Marination
  1. Add all the above given ingredients in a deep thick bottomed sauce pan.
  2. Make a paste of the above given ingredients and add it to the pan.
  3. Heat oil and deep fry the onions to golden brown. Add them to the marinade.
  4. Mix everything together and check for salt and spices.
  5. Add the chicken to the marinade and mix well.
  6. Finally add water and mix well. Cover the lid and refrigerate it overnight.
Step 2:
Dum cooking – Stove top method
  1. Next day seal the lid with dough or aluminium foil and tightly close the pan (This method is called dumming). Cook in medium to medium low flame for 10 minutes.
  2. Meanwhile heat a dosa pan in another burner. After ten minutes transfer the sauce pan on to the dosa pan and reduce the flame. Cook in low flame for 40 minutes.
  3. Switch off the flame and leave it for another 20 minutes.
  4. After 20 minutes open the lid and check if the chicken is well cooked. By this time chicken should be juicy and cooked well.
  5. Enjoy dum ka chicken with white rice and egg on the side! 
Dum cooking – Conventional oven method
  1. Marinate the chicken in any oven safe pan.
  2. Preheat the oven to 180 degrees F.
  3. Cover the pan with aluminum foil and then close the lid.
  4. Cook on the stove top for 20 minutes in low flame. And then place it in the oven and cook for 2 hours and 30 minutes. Enjoy! 
Notes
1.Use the same oil you used to fry the onions. It enhances the taste of the gravy.
2.And I recommend to always use freshly fried onions and not the store bought.
3.If you are calorie conscious then you can shallow fry the onions with olive oil or vegetable oil and add it to the marinade.
4.Mint and cilantro quantity is equal to one handful amount.
5.Chironji or charoli is a nut that can be found in any Indian grocery store.

Dum ka chciken

Spicy prawn masala

spicy prawn masala
Prawn is a very tasty seafood with high calorie content. But who cares as long as you have itΒ once in a while and work out to compensate :). For those who love spicy food, I bet this is a recipe that you will love. For a long time I was curious to know the difference between a prawn and a shrimp. But apparently there is no real difference between them except for the fact that the name shrimp is widely used in America and prawn in rest of the world! So the dish I have presented here can be called as spicy prawn masala or spicy shrimp masala,Β depending on how you want it to be called πŸ™‚
spicy prawn masala
Spicy prawn/Shrimp gravy is a personal favorite of my HB. It is one of the easiest dishes to make and can be made quickly as well since prawn gets cooked very soon. But care should be taken so as to not overcook and make the prawns rubbery. Spicy prawn gravy involves two main steps – marination of the prawn and making the gravy. Once the gravy is made, all you have to do is mix the marinated prawns and cook for like 5 minutes.
Spicy prawn gravy can be had with dosa, rice, chapati etc. It tastes good with most non vegetarian main course dishes. Try this easy dish in your kitchen and let me know how it went πŸ™‚

Spicy prawn masala
Recipe type: Main
Cuisine: Indian
Prep time: 
Cook time: 
Total time: 
Serves: 3
 
Ingredients
To marinate:
  • Prawn, deveined, tail removed - 60 count
  • Ginger garlic paste – ½ tsp
  • Red chilli powder – ½ tsp
  • Turmeric powder – a pinch
  • Coriander powder – 1 tsp
  • Salt – ¼ tsp
  • Sakthi biriyani masala – a generous pinch
Other ingredients:
  • Oil – 1 tbsp
  • Cinnamon stick – 1”
  • Clove – 1 no
  • Cardamom – 2 nos
  • Fennel seeds – 1 tsp
  • Onion, big, finely chopped – 1 no
  • Ginger garlic paste – ½ to 1 tsp
  • Tomato, medium, finely chopped – 1 Β½ to 2 nos
  • Green chilli, finely chopped – 1 nos
  • Red chilli powder – 1 Β½ tsp
  • Coriander powder – 1 tbsp
  • Turmeric powder – ⅓ tsp
  • Salt – as required
  • Sakthi biriyani masala – ⅓ tsp
  • Cilantro, finely chopped – 1 to 2 tbsp (for garnishing)
Instructions
  1. Wash and clean the prawns and marinate with the above given ingredients. cover and leave them for at least 30 minutes.
  2. Heat a kadai with oil and temper with cinnamon, cloves, cardamom and fennel seeds. When they start to sizzle, add in chopped onion. SautΓ© until the onions turn golden brown.
  3. Add ginger garlic paste and cook until the raw smell disappears.
  4. Now add in chopped green chillies and tomatoes. Cook until the tomatoes are mushy and well cooked. It takes around 3 to 4 minutes.
  5. Now reduce the flame and add in all the spice powders (coriander, turmeric, red chilli, biriyani masala) mentioned above along with required amount of salt. Stir well and cook until the raw smell disappears. (Be careful not to burn the masalas. It tastes bitter when burnt).
  6. Add half a cup of water to the masala and cook for another minute. You can skip this step if you want the gravy to be thick.
  7. Finally add in the marinated prawns to the gravy. Mix well and cook for just 5 to 8 minutes. Switch off the flame when the prawns are well cooked and the gravy is thick. Garnish with chopped cilantro. Enjoy the spicy prawn masala with biriyani, chappathi, idli or dosa! 

spicy prawn masala
spicy prawn masala

Stuffed chicken breast with lemon butter sauce

stuffed chicken breast
Stuffed chicken breast is not my usual cup of milk (I hate tea :)). For a long time, I had wanted to cook something different than the run-of-mill cuisines like Indian or Chinese (they are the best though). After much deliberation I decided to make stuffed chicken breast with lemon butter sauce. I was hooked right away with this recipe as soon as I saw the lemon butter sauce.
stuffed chicken breast
Stuffed chicken breast is a healthy dish. You don’t use that much oil and the little that you use is olive oil. Also, you can customize this recipe with your own stuffing – can be an Indian stuffing made of potato and green peas, or stuffing made of nuts or your own stuffing recipe.
stuffed chicken breast
Stuffed chicken breast literally gets you stuffed πŸ™‚ It is a rich and satisfying dish good for dinners. Try this wonderful, healthy dish in your home and let me know your thoughts.

Stuffed chicken breast with lemon butter sauce
Recipe type: Main
Cuisine: American
Cook time: 
Total time: 
Serves: 2
 
Ingredients
To marinate:
  • Lemon juice – 1 tbsp
  • Salt – a pinch
  • Chicken breast, - 2 pieces
For the stuffing:
  • Butter,unsalted – 1 tbsp
  • Cumin seeds – ½ tsp (optional)
  • Onion, medium, finely chopped – 1 no
  • Ginger garlic paste – 1 tbsp
  • Salt as required
  • Coriander powder – 1 tsp
  • Biriyani masala powder – 1 tbsp (I used Sakthi brand)
  • Broccoli, blanched, finely chopped – ½ cup
  • Paneer, grated – 2 tbsp
  • Cashews, roughly chopped, roasted– 5 nos
To powder the chicken:
  • Cayenne pepper – 1 tbsp
  • Onion powder – 1 tbsp
  • Garlic powder – Β½ tbsp
  • Black pepper powder – 1 tsp
Lemon butter sauce:
  • White cooking wine – ½ cup
  • Lemon juice – from 1 Β½ lemon
  • Shallots, finely chopped – 1 tbsp
  • Garlic, finely chopped – 1 tbsp
  • Salt – ¼th tsp
  • Black pepper powder – 1 tsp
  • Worcestershire sauce – a dash
  • Hot pepper sauce – a dash
  • Fresh cream – ½ cup
  • Butter, unsalted – ½ stick
  • Parsley, finely chopped – 1 tbsp
For garnishing:
  • Parsley, finely chopped – ½ tbsp
  • Pistachio, finely chopped – 1 tbsp
Instructions
Step 1:
  1. Start by slicing the chicken into two thinner slices each. Wrap the plastic wrap over the chicken breast, flatten the chicken using meat hammer, one at a time. Keep it to one side.
Step 2:
  1. Marinate the chicken with the above given ingredients and refrigerate overnight.
Step 3:
  1. Heat butter in a pan and add cumin seeds. When they start to splutter, add chopped onions and sautΓ© until they turn brown. Add ginger garlic paste and sautΓ© until the raw smell disappears. Add salt, coriander and biriyani masala powder. Give a quick stir. Add a tbsp of water at this stage to avoid the masalas from getting burnt. Add the blanched and finely chopped broccoli to the masalas and sautΓ© well. Cook for a minute or two. Finally add grated paneer and fried cashews and mix well.
Step 4:
  1. Repeat step 1 only if you want to flatten the chicken even more (completely optional).
  2. Pre-heat the oven to 400 degrees Fahrenheit.
  3. Dust the chicken with the above given seasonings on both sides.
  4. Spoon some of the broccoli stuff in the corner.
  5. Roll the chicken into a tight roll and secure it with some tooth picks or strings (To keep the chicken from unrolling).
Step 5:
  1. Heat an iron skillet (Or any oven proof skillet) smearing some butter. Place the rolled chicken and cook for a minute until they change to white color, flipping in between. And then pop the pan in the oven for 15 to 20 minutes – Do not overcook the chicken breast as it tends to get harder when overcooked.
Step 6:
  1. Heat a skillet until it gives smoke. Take out and add wine, lemon juice, garlic and shallots. Place it again on the burner and cook for a minute stirring or whisking continuously. Make sure to take the skillet away from the flame while adding wine since wine is combustible.
  2. Add salt, pepper, and the sauces. Stir and cook for 3 minutes until the sauce comes to a syrupy consistency.
  3. Finally add cream and butter. Stir well and cook for 2 minutes. Strain the sauce and garnish with parsley.
  4. Drizzle the sauce on top of the sliced chicken breast and garnish with pistachios and parsley.
Notes
1.Make sure your lemon butter sauce is still warm while serving.
2.Do not overcook the chicken breast as it tends to get harder when overcooked.
3.Make sure to take the skillet away from the flame while adding wine for lemon butter sauce, because wine is combustible.

stuffed chicken breast

Nellore chepala pulusu

Nellore chepala pulusu
Nellore Chepala Pulusu is a non vegetarian delicacy from Nellore, a coastal town in the state of Andhra Pradesh. Chepala Pulusu means fish curry in tamarind sauce. After numerous misadventures with fish, this is the one that I was satisfied with. I came across this recipe during one of my diligent searches πŸ™‚ for a fish curry recipe.
Nellore chepala pulusu
Nellore Chepala Pulusu is usually made using seer fish but I used catfish (you can use other fish varieties as well). As the name suggests, this curry tastes tangy because of the tamarind and goes excellent with rice. We had Achari fish as the side dish, which is another dish that tastes equally awesome (you can find the recipe for Achari fish here).Β Also, mango is added as one of the ingredients butΒ the recipe that I have given below does not include it.
Nellore chepala pulusu
Do try this tangy and tasty fish curry in your kitchen and let me know your thoughts.

Nellore chepala pulusu

Nellore chepala pulusu

Ingredients

    To dry roast and grind:
  • Fenugreek seeds – 1/2 tsp
  • Mustard seeds – 1 tsp
  • Cumin seeds – 1 1/2 tsp
  • Other ingredients:
  • Vegetable oil – 2 tbsp
  • Garlic cloves, roughly chopped – 10 nos
  • Tomatoes, medium sized , roughly chopped – 4 nos
  • Big onion, finely chopped – 1 or 2 nos
  • Curry leaves – a sprig
  • Tamarind, big gooseberry size, extracted – 1 cup
  • Turmeric powder – Β½ tsp
  • Red chilli powder – 1 tsp
  • Coriander powder – 1 1/2 tbsp
  • Green chilli , slit – 1 or 2 nos
  • Sheer fish, boneless, cubes – 1/2 kg
  • Ground powder – 1 tbsp
  • Salt as required

Instructions

  1. Heat oil in a pan and add chopped garlic and stir it occasionally.
  2. Meanwhile puree the tomatoes and keep it ready.
  3. When the garlic turns brown, add in chopped onions and sautΓ© well. Add curry leaves and cook until the onions turn translucent.
  4. Add in the tomato puree.
  5. While the gravy is getting cooked, make the Nellore koora powder as given below.
  6. Heat a small flat pan and add fenugreek seeds. Dry roast until they turn golden brown and remove it from the pan. Next add mustard seeds and dry roast them separately. When they start to crackle, remove it from the pan. Next add cumin seeds and toss them for few seconds until the nice aroma spreads. When cumin seeds seeds are well roasted, remove it from the pan. Allow them to cool and grind to a fine powder.
  7. When the tomato gravy is well cooked add enough water and tamarind paste and allow them to boil.
  8. Add all the powders and mix well. Add the slit green chilli and give it a stir. Cover and simmer the gravy until the raw smell disappears. It takes around a couple of minutes.
  9. Now add the fish to the gravy. Cover and cook for 8 to 10 minutes.
  10. Finally add the ground powder and enough salt to the gravy, mix well and cook for another couple of minutes. By now the gravy would have released oil on the sides. Sprinkle loosely crushed fresh curry leaves lavishly and switch off the flame.
  11. It tastes excellent with steamed white rice.
  12. Note:
  13. Do not roast the ingredients too much otherwise the entire dish will be spoiled as they give bitter taste when roasted too much. Always to make the Nellore chaapala pulusu powder make the ratio as 1:2:3.
  14. Try to make this powder just before adding to the gravy and so the fresh flavor retains.
http://myediblecravings.com/nellore-chepala-pulusu/

Nellore chepala pulusu

Achari Fish Tikka

Achari Fish Tikka
Achari fish tikka is a Hyderabadi non-vegetarian dish supposedly having its origin from the Nizam cuisine. Achar is pickle in Hindi. So as the name suggests, Achari fish tikka is simply a variety of dish made from fish and pickle.
First when I came across this dish I was intrigued by the combination of fish and pickle (pickle with any other meat, for that matter). But after tasting it, I do see the use of pickle in this dish, it just tastes awesome.
Achari Fish Tikka
I have had my own troubles when attempting to cook fish. For some reason, I am never satisfied with the end product when I prepare a fish based dish. So it has become the meat that I cook occasionally. But after coming across Achari fish tikka, I have cooked it twice already in the span of a month πŸ™‚ Achari fish tikka is really easy to make and is healthy as well since we grill the fish in the oven. Please make sure to remove all moisture from the marinating ingredients as mentioned in my earlier post of chicken tikka found here. It goes well with almost any main dishes, be it rasam, sambar, chicken gravy or fish gravy etc. Usually Achari fish tikka is eaten as an appetizer with mint chutney on the side. But in our home, on days when I cook this dish, it is often had as a snack πŸ™‚ and as a side dish.
Achaari Fish Tikka
Achaari Fish Tikka
Try this healthy and wonderful Achari fish tikka in your kitchen and let me know your equally wonderful thoughts and experience πŸ™‚

Achaari Fish
Recipe type: Starter
Cuisine: Indian
Prep time: 
Cook time: 
Total time: 
Serves: 2
 
Ingredients
  • Yogurt, hunged – 1 tbsp
  • Lemon juice – 1 tbsp
  • Turmeric powder – ¼th tsp
  • Ajwain – ¼th tsp (optional)
  • Amchur powder – ¼th tsp
  • Ginger garlic paste – 1 tbsp
  • Kashmiri red chilli powder – 1 tsp
  • Red chilli powder – ¼th tsp
  • Any pickle of your choice – ¼th tsp ( I used Priya onion pickle)
  • Salt as required
  • Olive oil or vegetable oil – 1 to 2 tbsp
  • Seer fish, cubes, skin removed – ½ pound (250 gms) – I used catfish
Instructions
  1. Squeeze excess water in ginger garlic paste with the help of cheese cloth.
  2. In a mixing bowl add all the above ingredients and make a paste.
  3. Add fish cubes to the marinade and mix well.
  4. Marinate the fish in the refrigerator at least for 2 hours.
  5. Soak the wooden skewers in water for 15 mins.
  6. Preheat the oven to 360 degrees F.
  7. Insert the fish cubes on each skewers. Brush olive or vegetable oil on top of the fish and arrange skewers across the broiler pan.
  8. Place the pan inside the oven and cook for 10 minutes.
  9. Remove the pan, turn over the skewers and brush the fish cubes with little oil on top. Place the pan inside the oven and cook for another 10 to 15 minutes.
  10. Enjoy the achari fish tikka with mint chutney or just as it is! 
Stove top method:
  1. Heat the grilled pan and smear with little oil. Place the skewers and cook the fish turning over in between.
Notes
Fish cooks really fast when compare to other meats. So make sure to check in between and do not overcook the fish.
You could also add onion, tomato or bell peppers to this dish according to your choice.

Achaari Fish

Thalasseri Biriyani

Thalasseri Biriyani
Thalasseri Biriyani
Biriyani in general is a wonderful dish and is one of the most famous dishes from India. As many of you know, there are many varieties of biriyani like thalappakatti, anjappar, mughalai, hyderabadi, ambur etc. Today I have given you the recipe of a biriyani variety from Kerala called as the Thalasseri biriyani.
Thalasseri Biriyani
Thalasseri Biriyani
There is a story behind me making Thalasseri biriyani. To be frank, I had not even thought about this variety. When we went for Indian grocery shopping recently, I came across a rice variety called the Kalajeera rice. It closely resembled Seeraga Sambha rice variety from my state in India, Tamilnadu. Biriyani prepared in Tamilnadu use this rice variety and it literally adds an amazing taste to biriyani. So when I saw this rice variety I assumed kalajeera must be the name of Seeraga Sambha in Kerala and I was eager to try it out. But when I open the rice bag, I did not smell that distinct aroma that emanates from Seeraga Sambha rice and realized that I made a mistake. Still I did not want to waste a bag of rice just because it was not the variety that I want. Then I came across Thalasseri biriyani recipe. It is a very popular biriyani variety in Kerala and kalajeera rice is used to prepare it.
Thalasseri Biriyani
Thalasseri biriyani is a little bit similar to Hyderabadi biriyani except that we use tomatoes here. Also, if making a chicken variant of this biriyani, we need to cook the chicken first in tomato based gravy and then use that gravy with chicken to do the layering. Don’t get anxious by the number of steps given below; it is easy to prepare Thalasseri biriyani.

Thalasseri Biriyani
Recipe type: Main
Cuisine: Indian
Prep time: 
Cook time: 
Total time: 
Serves: 3
 
Ingredients
To marinate :
  • Chicken - 500 grams or ½ kg
  • Red chilli powder – 1 tbsp
  • Turmeric powder – ½ tsp
  • Salt – ¼ tsp
  • Lemon juice – 2 tbsp
  • Ginger garlic paste – ½ tbsp (optional)
To make rice:
  • Ghee – 2 tbsp
  • Bay leaf – 1 no
  • Cloves - 3 nos
  • Cinnamon – 1”
  • Cardamom – 2 nos
  • Fennel seeds – ¼ tsp
  • Onion, big, sliced – 1 no
  • Kala jeera rice or Basmati rice – 1½ cups (soaked in water for 20 minutes)
  • Water – 2 ΒΌ cup ( 1 : 1 Β½ )
  • Salt as required
To make gravy:
  • Ghee – 2 tbsp
  • Onion, big, sliced – 1 no
  • Green chillies, slits – 4 nos
  • Ginger garlic paste – 1 tbsp
  • Tomato, big, chopped – 1 Β½ nos (if medium – 2 nos)
  • Cilantro & mint leaves, chopped – a handful
  • Garam masala – ½ tbsp
  • Sakthi biriyani masala – ½ tbsp (optional)
  • Yogurt – 2 to 3 tbsp
  • Salt as required
  • Fried chicken
For the toppings:
  • Cilantro, finely chopped – 1 to 2 tbsp
  • Onions, medium, sliced, deep fried – ½ to 1 no
  • Ghee – 1 tbsp
  • Garam masala – a generous pinch
  • Saffron, soaked in warm milk – a pinch
  • Food color – a pinch (optional)
Instructions
Step 1:
  1. Make a paste of the given ingredients β€˜to marinate’. - Try to extract excess water in ginger garlic paste before adding to the marinated paste. Marinate the chicken with the paste and leave it for at least an hour.
  2. Heat enough oil in a deep flat pan and shallow fry the marinated chicken.
Step 2:
  1. Heat ghee in a deep flat sauce pan (which has a tight lid) and all the whole garam masalas (bay leaves, cloves, cinnamon, cardamom and fennel seeds).
  2. When they start to sizzle, add sliced onions and sautΓ© well. Cook until the onion turns slight brown.
  3. Add the rice, enough water and salt. Close the lid, simmer and cook for 5 to 10 minutes until the rice is ΒΎ th done – do not add excess water in this stage, or else you will not get the right texture.
  4. When the rice is done, transfer them carefully to another container and keep it aside.
Step 3:
  1. Heat ghee in the same thick bottomed sauce pan (which you used to cook rice), add onions and sautΓ© well. When the onions turn translucent, add ginger garlic paste and cook until the raw smell disappears. Add green chilli slits and stir well.
  2. Add the chopped tomatoes and cook until they turn mushy.
  3. When the tomatoes are well cooked, add freshly chopped coriander and mint leaves.
  4. Add yogurt, garam masala powder, biriyani masala and salt. Stir well and finally add the chicken. Mix well, cover and cook for another five minutes until the gravy is well blended with the chicken and forms the semi gravy.
  5. Check salt and switch off the flame.
Step 4:
  1. Heat a dosa pan and keep it ready.
  2. Meanwhile layer the cooked rice on top of the gravy.
  3. Sprinkle the freshly chopped cilantro and lemon juice on top.
  4. Layer the remaining rice and sprinkle the remaining cilantro, garam masala(optional), fried onions, saffron milk and food color.
  5. Cover the lid- the lid has to be really tight.
  6. Place the sauce pan on top of the dosa pan, simmer and cook for 10 minutes.
Notes
1. I used the same sauce pan to cook the rice (step 2) as well as to make gravy (step 3) and to dum the biriyani (step 4) as my pan was very thick. You could also cook the rice in pressure cooker. But make sure the rice is ¾th cooked.
2. Try not to use store bought fried onions instead deep fry the onions at home. This will enhance the flavor to the biriyani.

Thalasseri Biriyani

Chicken Cawla

Chicken Cawla
Chicken Cawla, interesting name, right? I am not sure about the origin of this dish but I am immensely grateful to whoever came up with this recipe – it is that good. I came across Chicken Cawla while watching a talk show and was hooked the moment I saw it. It is one of my HB’s most favorite dishes ever (no surprises here ;))
Chicken Cawla
Chicken Cawla
Chicken Cawla is something of a new entrant in my kitchen and right now, one of our favorite dishes. It is healthy (grilled) and tastes heavenly. The actual recipe for Chicken Cawla uses mustard oil but I used olive oil (trust me, it does tastes good!). One small trick to this wonderful recipe is to crush or grind the peppers right before adding to the chicken. This gives a fresh aroma and taste to the recipe.
Chicken Cawla

Try this wonderful recipe and let me know your experience. As for me, I am off to make Chicken Cawla, yes, typing this recipe has made me hungry for it πŸ˜‰

Chicken Cawla
Recipe type: Entree
Cuisine: Indian
Prep time: 
Cook time: 
Total time: 
Serves: 3
 
Ingredients
Cilantro paste:
  • Cilantro – ½ a bunch
  • Curd – ½ cup
  • Green chillies – 2 nos
  • Salt – a generous pinch
To marinate :
  • Lemon juice – 2 tbsp
  • Ginger garlic paste – 1 tsp
  • Cilantro paste – 1 cup
  • Mustard oil or olive oil – 1Β½ tbsp
  • Salt as required
  • Chicken thighs – 5 pieces
Other ingredients:
  • Mustard oil or olive oil – 1 tbsp
  • Cooking oil – 1Β½ tbsp
  • Cloves – 4 nos
  • Fenugreek seeds – ½ tsp
  • Cumin seeds – 1 tsp
  • Garlic, crushed – 4 nos
  • Ginger, julienned – 1 tbsp
  • Whole red chillies – 2 nos
  • Onion, finely chopped – 1 no
  • Red chilli powder – 1 tbsp
  • Cumin powder – 1 tsp
  • Black pepper powder – 1 Β½ tsp
  • Salt as required
Instructions
Step 1:
  1. Grind together cilantro, green chillies and ginger garlic paste to a fine paste and mix them with curd.
  2. Marinate the chicken with the above given ingredients and refrigerate it overnight or at least for an hour.
  3. Chop onions, crush garlic and julienne ginger.
Step 2:
  1. You can either tandoor the chicken in the oven or shallow fry them.
Tandoor method:
  1. Preheat the oven to 420 degrees F.
  2. Place the marinated chicken on the tandoori pan, spray cooking oil on top of the chicken and cook for 20 minutes. Remove the pan, turn over the chicken and brush them with little oil on top. Cook for another 5 to 10 minutes.
Stove top method:
  1. Heat oil in a flat pan and place the chicken pieces one by one in the pan. Cook until the chicken is done on one side. When the chicken is done on one side, turn over the chicken pieces and repeat the same. When the chicken is well done on both sides, remove from the pan, filtering all the excess oil. Add the chicken to the masala we have made.
Step 3:
  1. Heat oil (cooking & mustard) in a flat pan and add cloves, fenugreek seeds, cumin seeds, whole red chillies, crushed garlic and julienned ginger. SautΓ© well and add onions. SautΓ© until the onions turn brown. Add chilli powder, cumin powder, black pepper powder and salt. Add the grilled or shallow fried chicken to the gravy. SautΓ© well until the masalas are well blended with the chicken. Switch off the flame and serve hot.
Notes
I used olive oil to make this recipe.
Try to grind fresh pepper powder just before adding to the dish, as it enhances the taste of the dish.

Chicken Cawla

Kundapur Chicken Gravy

kundapur chicken It has been a while since I posted a non vegetarian recipe and now I am giving you a speciality from my neighboring state, Karnataka. It is called as the Kundapur Chicken gravy, a popular dish from Mangalorean cuisine that has its origins from Kundapur, a coastal town in Karnataka. Kundapur chicken is a versatile dish that goes well with all main course dishes like, rice, naan, parotta, biriyani, chapati, dosa etc. Kundapur Chicken Kundapur chicken gravy’s main ingredient, the one that gives its distinct taste, is the kundapur masala powder. Kundapur chicken gravy is one of HB’s favorite dishes and he makes me to cook it at least once in like two months (I know that is a considerable gap but I do have to try other interesting recipes, right? ;)). We normally have Kundapur chicken with Biryani and Chappati. Kundapur Chicken I would say Kundapur was one of the first dishes I tried which was not from Tamilnadu or a hand down from my mom or MIL πŸ™‚ Do try this Mangalorean dish in your kitchen and let me know your comments as well as the favorite main course dish that you would like to have with.

Coondapur Chicken Gravy
Recipe type: Main
Cuisine: Indian
Prep time: 
Cook time: 
Total time: 
Serves: 4
 
Ingredients
To dry roast and grind:
  • Kashmiri red chilli – 2 nos
  • Black peppercorns- 1 tbsp
  • Coriander seeds – 1½ tbsp
  • Fenugreek seeds – 8 nos
  • Tamarind – marble size
  • Coconut - 2 tbsp
Other ingredients:
  • Oil – 3 tbsp
  • Onion, finely chopped – 1 no
  • Ginger garlic paste – 1 tbsp
  • Turmeric powder – a pinch
  • Green chillies – 2 nos
  • Curry leaves – a sprig
  • Chicken, with bones -
  • Salt as required
  • Coconut milk – 2 tbsp
  • Cilantro, chopped – 1 tbsp
Instructions
  1. Heat a pan and dry roast all the above ingredients except coconut for a minute or until they spread aroma. Allow them to cool and grind it along with coconut to a fine paste.
  2. Heat oil in a pan and add finely chopped onion. SautΓ© well. when the onions turn translucent add ginger garlic paste. SautΓ© until the raw smell disappears. Add a pinch of salt and turmeric powder.
  3. Add green chillies and curry leaves. Give it a stir and add the ground coconut paste. SautΓ© well, reduce to medium flame and allow them to cook for 20 minutes.
  4. When the oil start to ooze out, add the chicken and mix well. when the gravy is well blended with the chicken, cover the lid and cook for another 15 to 20 minutes in a low flame. When the chicken is ΒΎ th cooked, add coconut milk mix well. cover and cook for another 10 minutes. Sprinkle chopped cilantro on top and switch off the flame.
  5. Enjoy the tasty kundapur chicken with roti, white rice or even for dosa!

Kundapur Chicken

KERALA CHICKEN ROAST

A while ago, I had mentioned about my HB’s attempt at cooking tandoori chicken and the awesome result. Most recently he attempted another variety of chicken called the Kerala Chicken Roast. And again it turned out to be an awesome dish! As the name suggests, Kerala Chicken Roast is a specialty of God’s Own Country and also my neighboring state as well, Kerala. kerala chicken roast Kerala Chicken roast is an easy to cook, spicy yet a tasty dish. It is a dry variety and hence a side dish essentially. The main ingredient in preparing Kerala Chicken Roast is the kerala garam masala. It is different from regular garam masala in the sense that it has the strong fennel seed flavor. And using shallots is must for this dish. You can have Kerala Chicken Roast with almost all main entrees like Rice (with some gravy, or just rasam), parotta, chapati, biriyani etc. kerala chicken roast Back to my HB’s cooking experiments, it is two out of two so far (Tandoori Chicken and Kerala Chicken Roast). Kerala Chicken Roast is a new dish to me and my HB. I have never had it back home but after tasting it for the first time here, I had noted to myself to try it back home in a Kerala-cuisine restaurant. Try this simple and spicy recipe at your home and share your experiences in the comments section below πŸ™‚

KERALA CHICKEN ROAST
Recipe type: Lunch
Cuisine: Indian
Prep time: 
Cook time: 
Total time: 
Serves: 2
 
Ingredients
To marinate:
  • Chicken – 200 grams
  • Red chilli powder – 1 tbsp
  • Coriander powder – 1 tsp
  • Salt – a generous pinch
  • Turmeric powder – ½ tsp
Kerala garam masala:
  • Fennel seeds – 2 tbsp
  • Green cardamom – 5 nos
  • Cloves – Β½ tbsp
  • Black pepper corn – 1 tbsp
  • Star anise – 1 no
  • Javetri- ½ no
  • Cinnamon stick – 1 β€œ
  • Nutmeg – a pinch
Other ingredients:
  • Oil – 2 tbsp
  • Cumin seeds – 1 tsp
  • Shallots – 6 nos, cut into slits
  • Curry leaves – a sprig , divided
  • Ginger garlic paste – 1 tbsp
  • Kerala garam masala – 1 tbsp
  • Whole green chillies – 5 nos
  • Freshly ground pepper – ½ tbsp
  • Salt as required
  • Cilantro – for garnishing
Instructions
  1. Wash and marinate the chicken with the above given ingredients for at least two hours.
  2. Dry roast the garam masala ingredients for a minute, allow it to cool, blend into powder.
  3. Heat oil in a pan and add cumin seeds. When it starts to sizzle add shallots and few curry leaves. SautΓ© for a minute.
  4. Add the marinated chicken and sautΓ© well. close the lid and cook until the chicken is half done.
  5. Add the kerala garam masala and salt and give it a stir.
  6. Add whole green chillies and sautΓ© until all the water is well absorbed and oil ooze out from the chicken.
  7. Now add in the remaining curry leaves and freshly crushed pepper. SautΓ© for a minute and switch off the flame.
  8. Garnish with chopped cilantro. Enjoy with hot rice or Indian flat breads!

kerala chicken roast