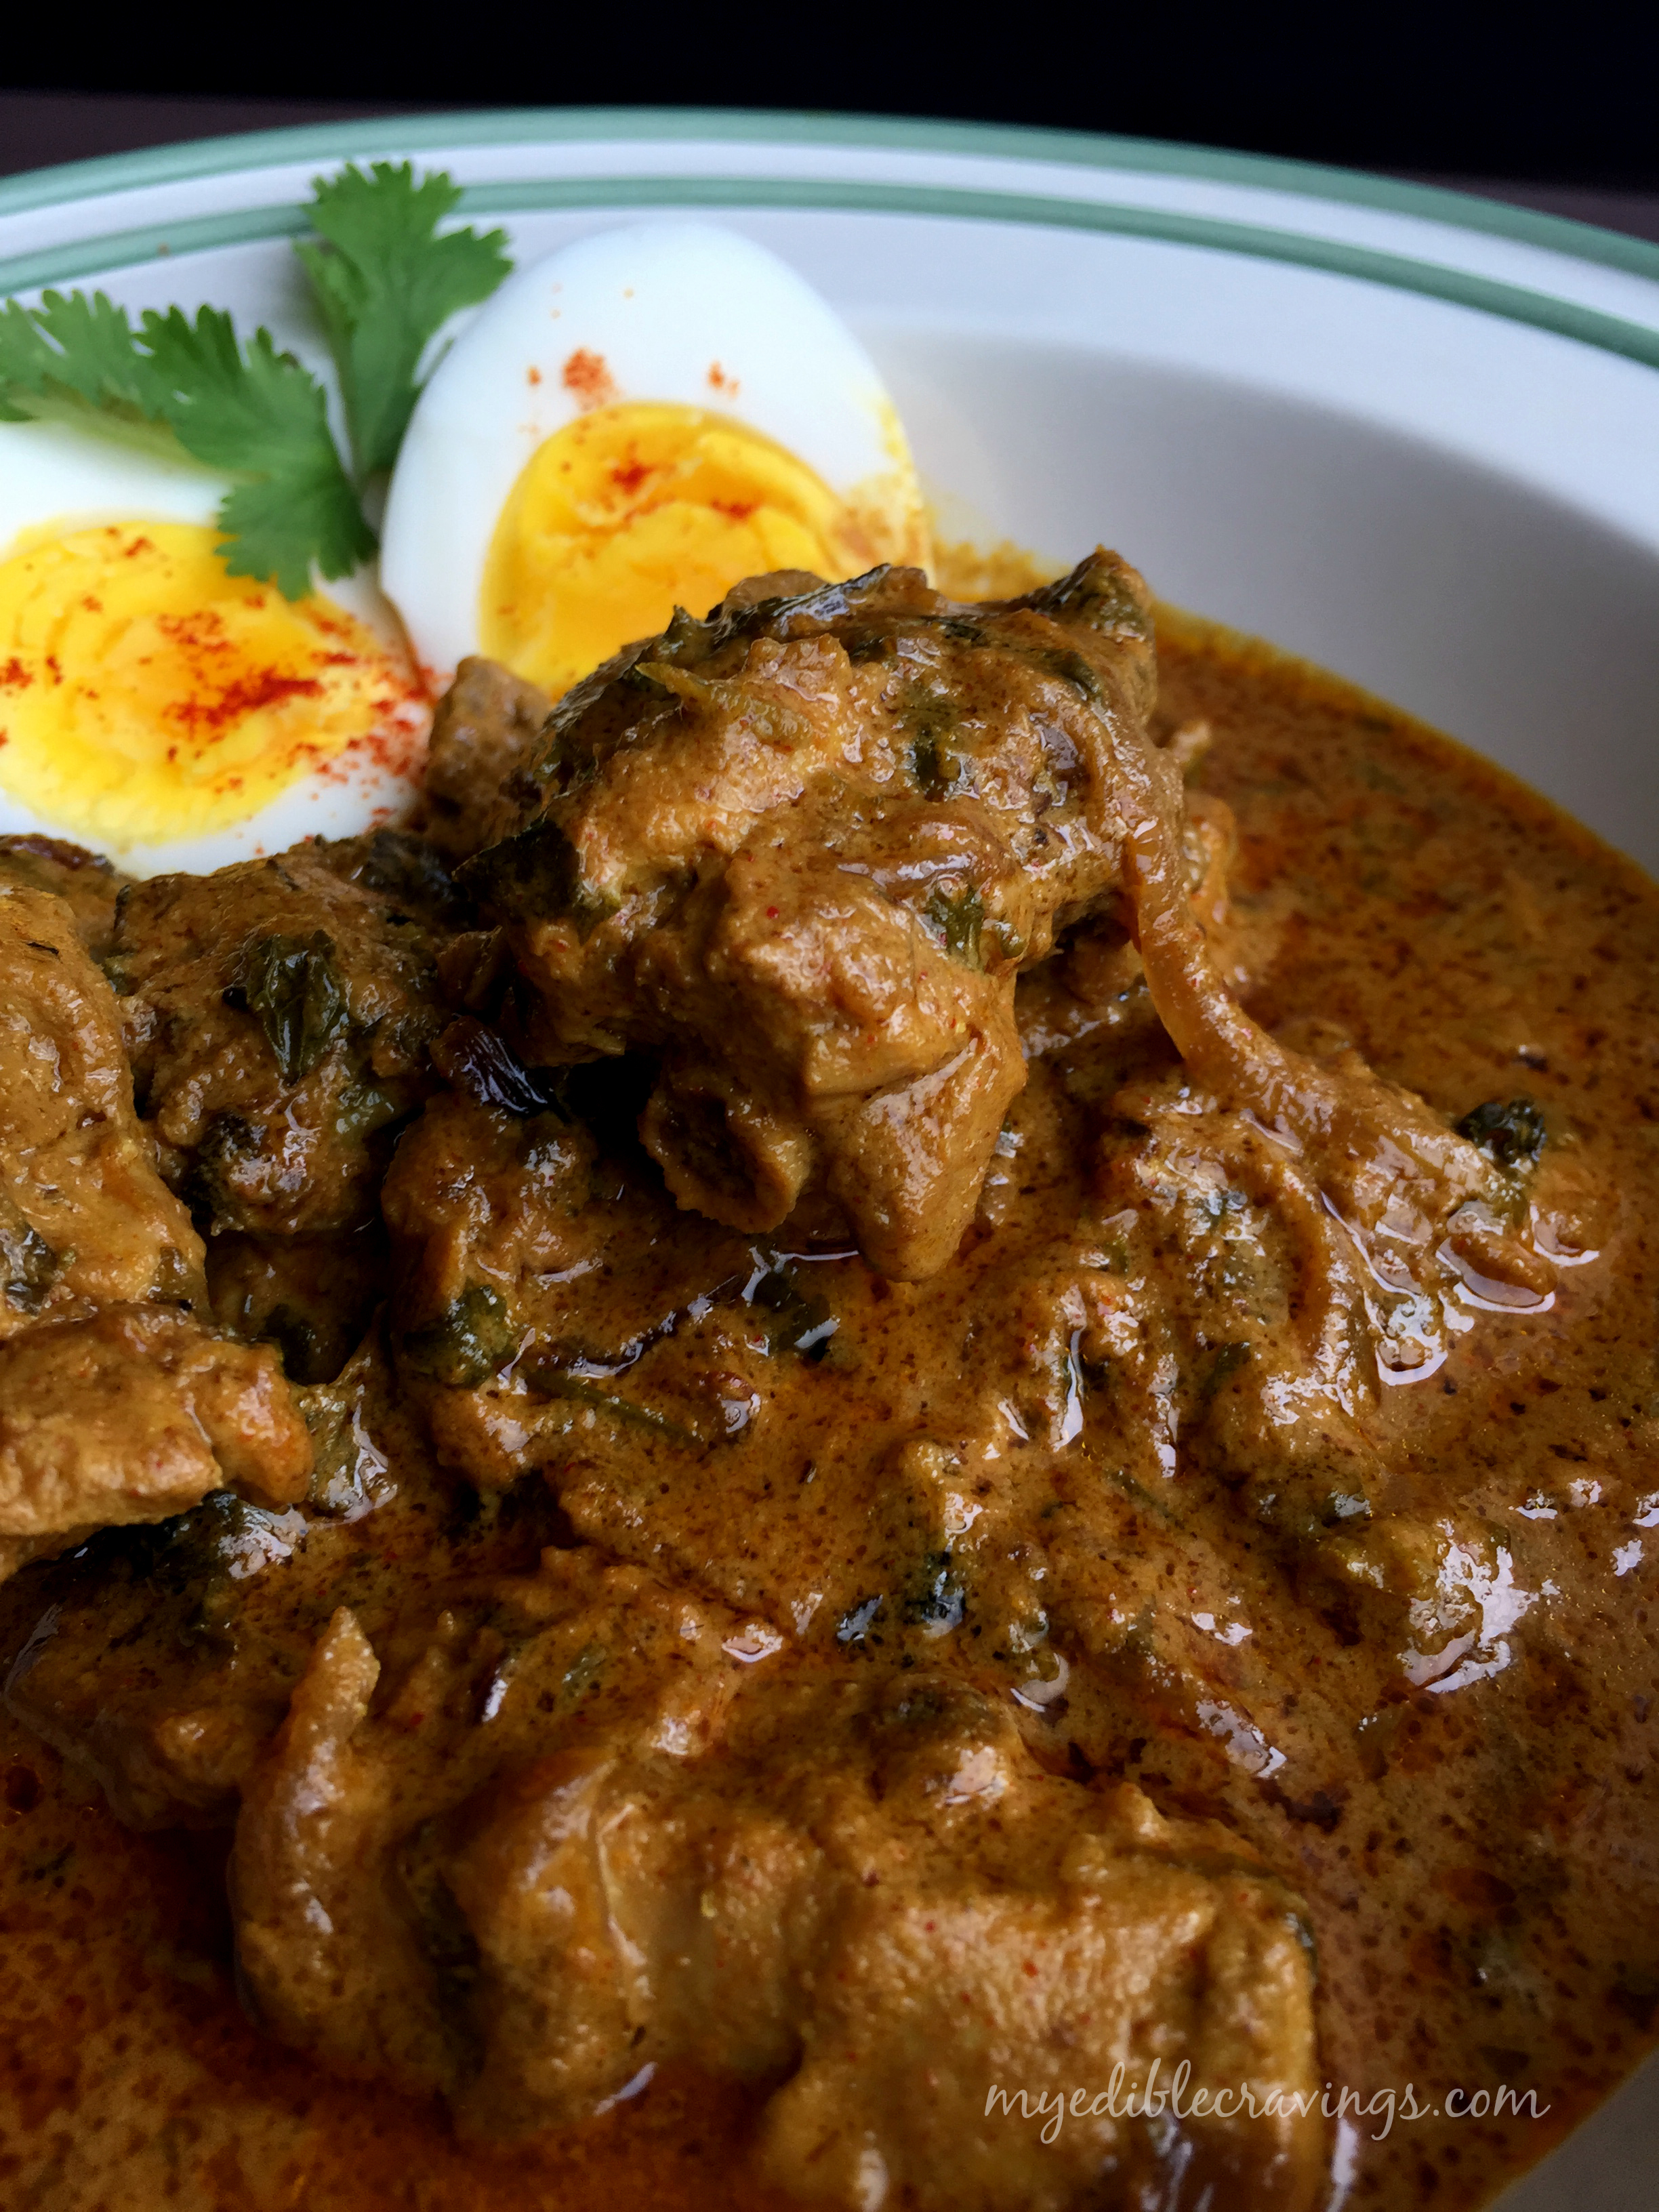
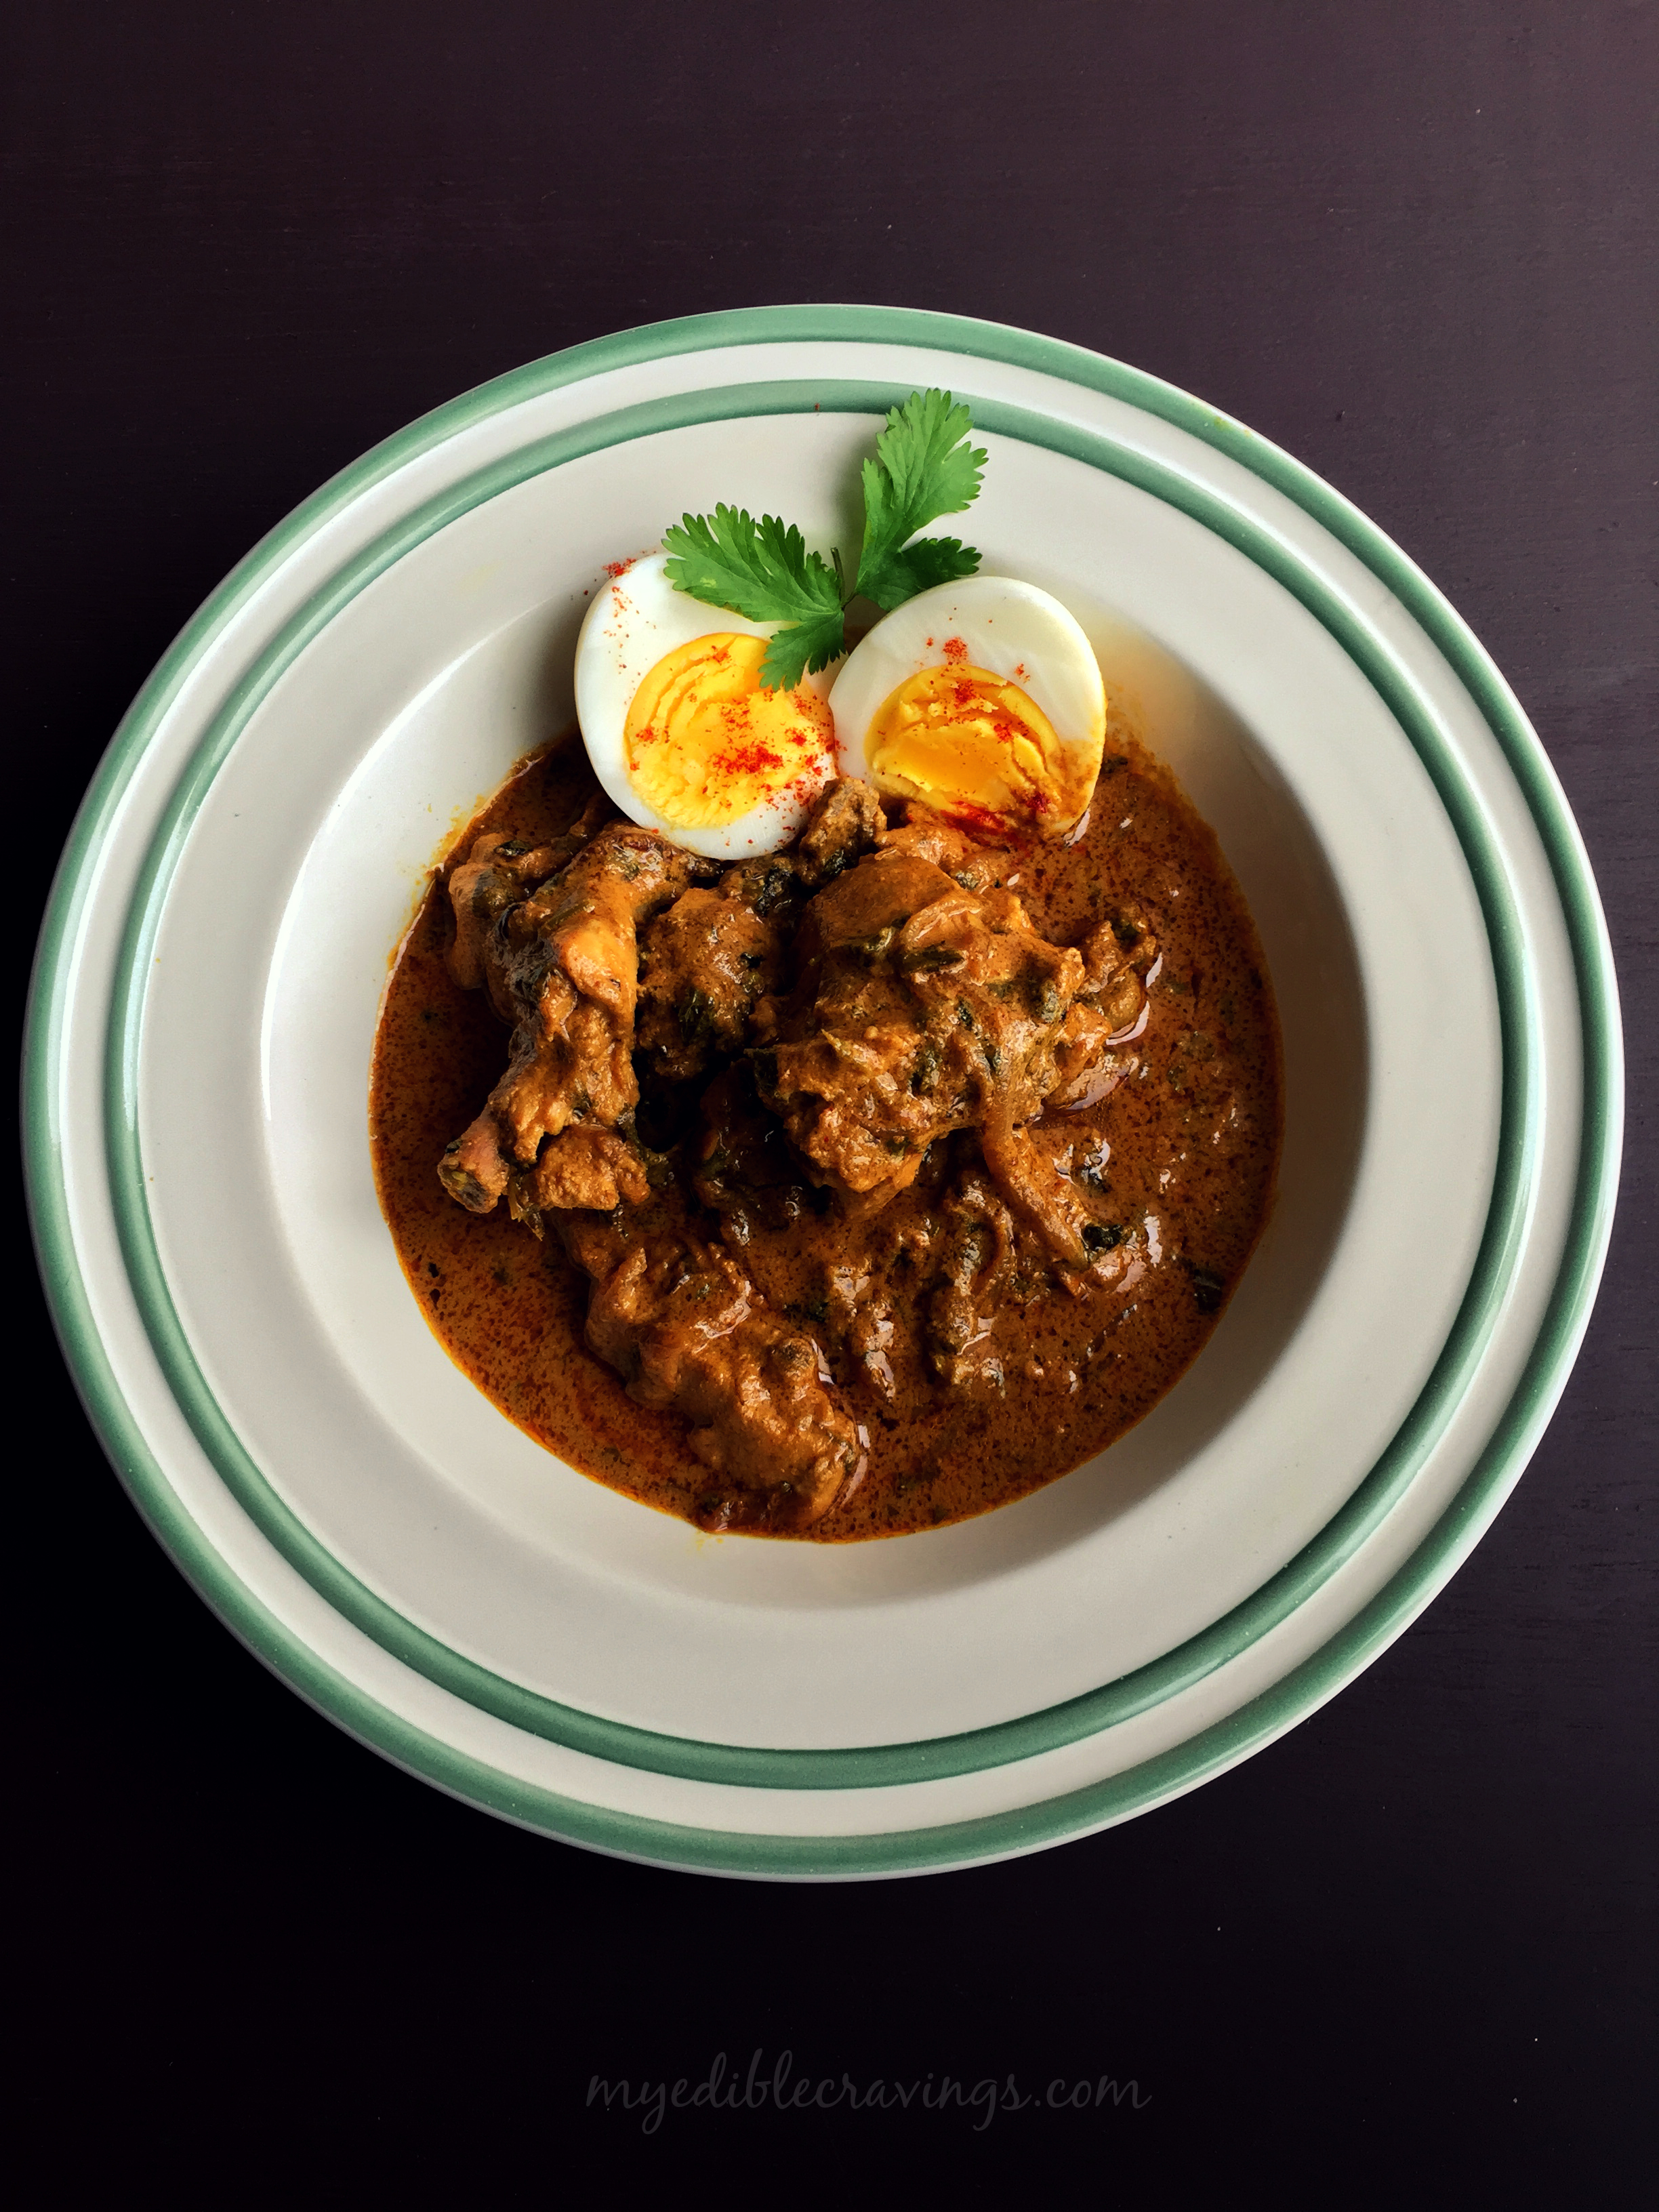
 Dum Ka Chicken is the latest dish that I came across, courtesy from one of our friends. It is a very tasty and sumptuous dish made using chicken. As the name suggests, the chicken is dum cooked (cooked in a sealed pot) which I have explained in the cooking instructions below. Dum Ka Chicken is one of the easiest dishes that I have ever cooked and it is one of the many reasons for it to be my most favorite dish in recent memory.
 Dum Ka chicken is a Hyderabadi nawab dish meaning it’s a royal dish :). As I had mentioned above, it is very easy to make. All you need to do is marinate the chicken overnight and then cook it using dum method the next day. Also, it is, as I would like to say, an one pot dish, meaning, you just need to use one utensil during the entire preparation i.e., you use the same pot in which the chicken is marinated to cook as well. You can also prepare Dum Ka Chicken using a conventional oven.
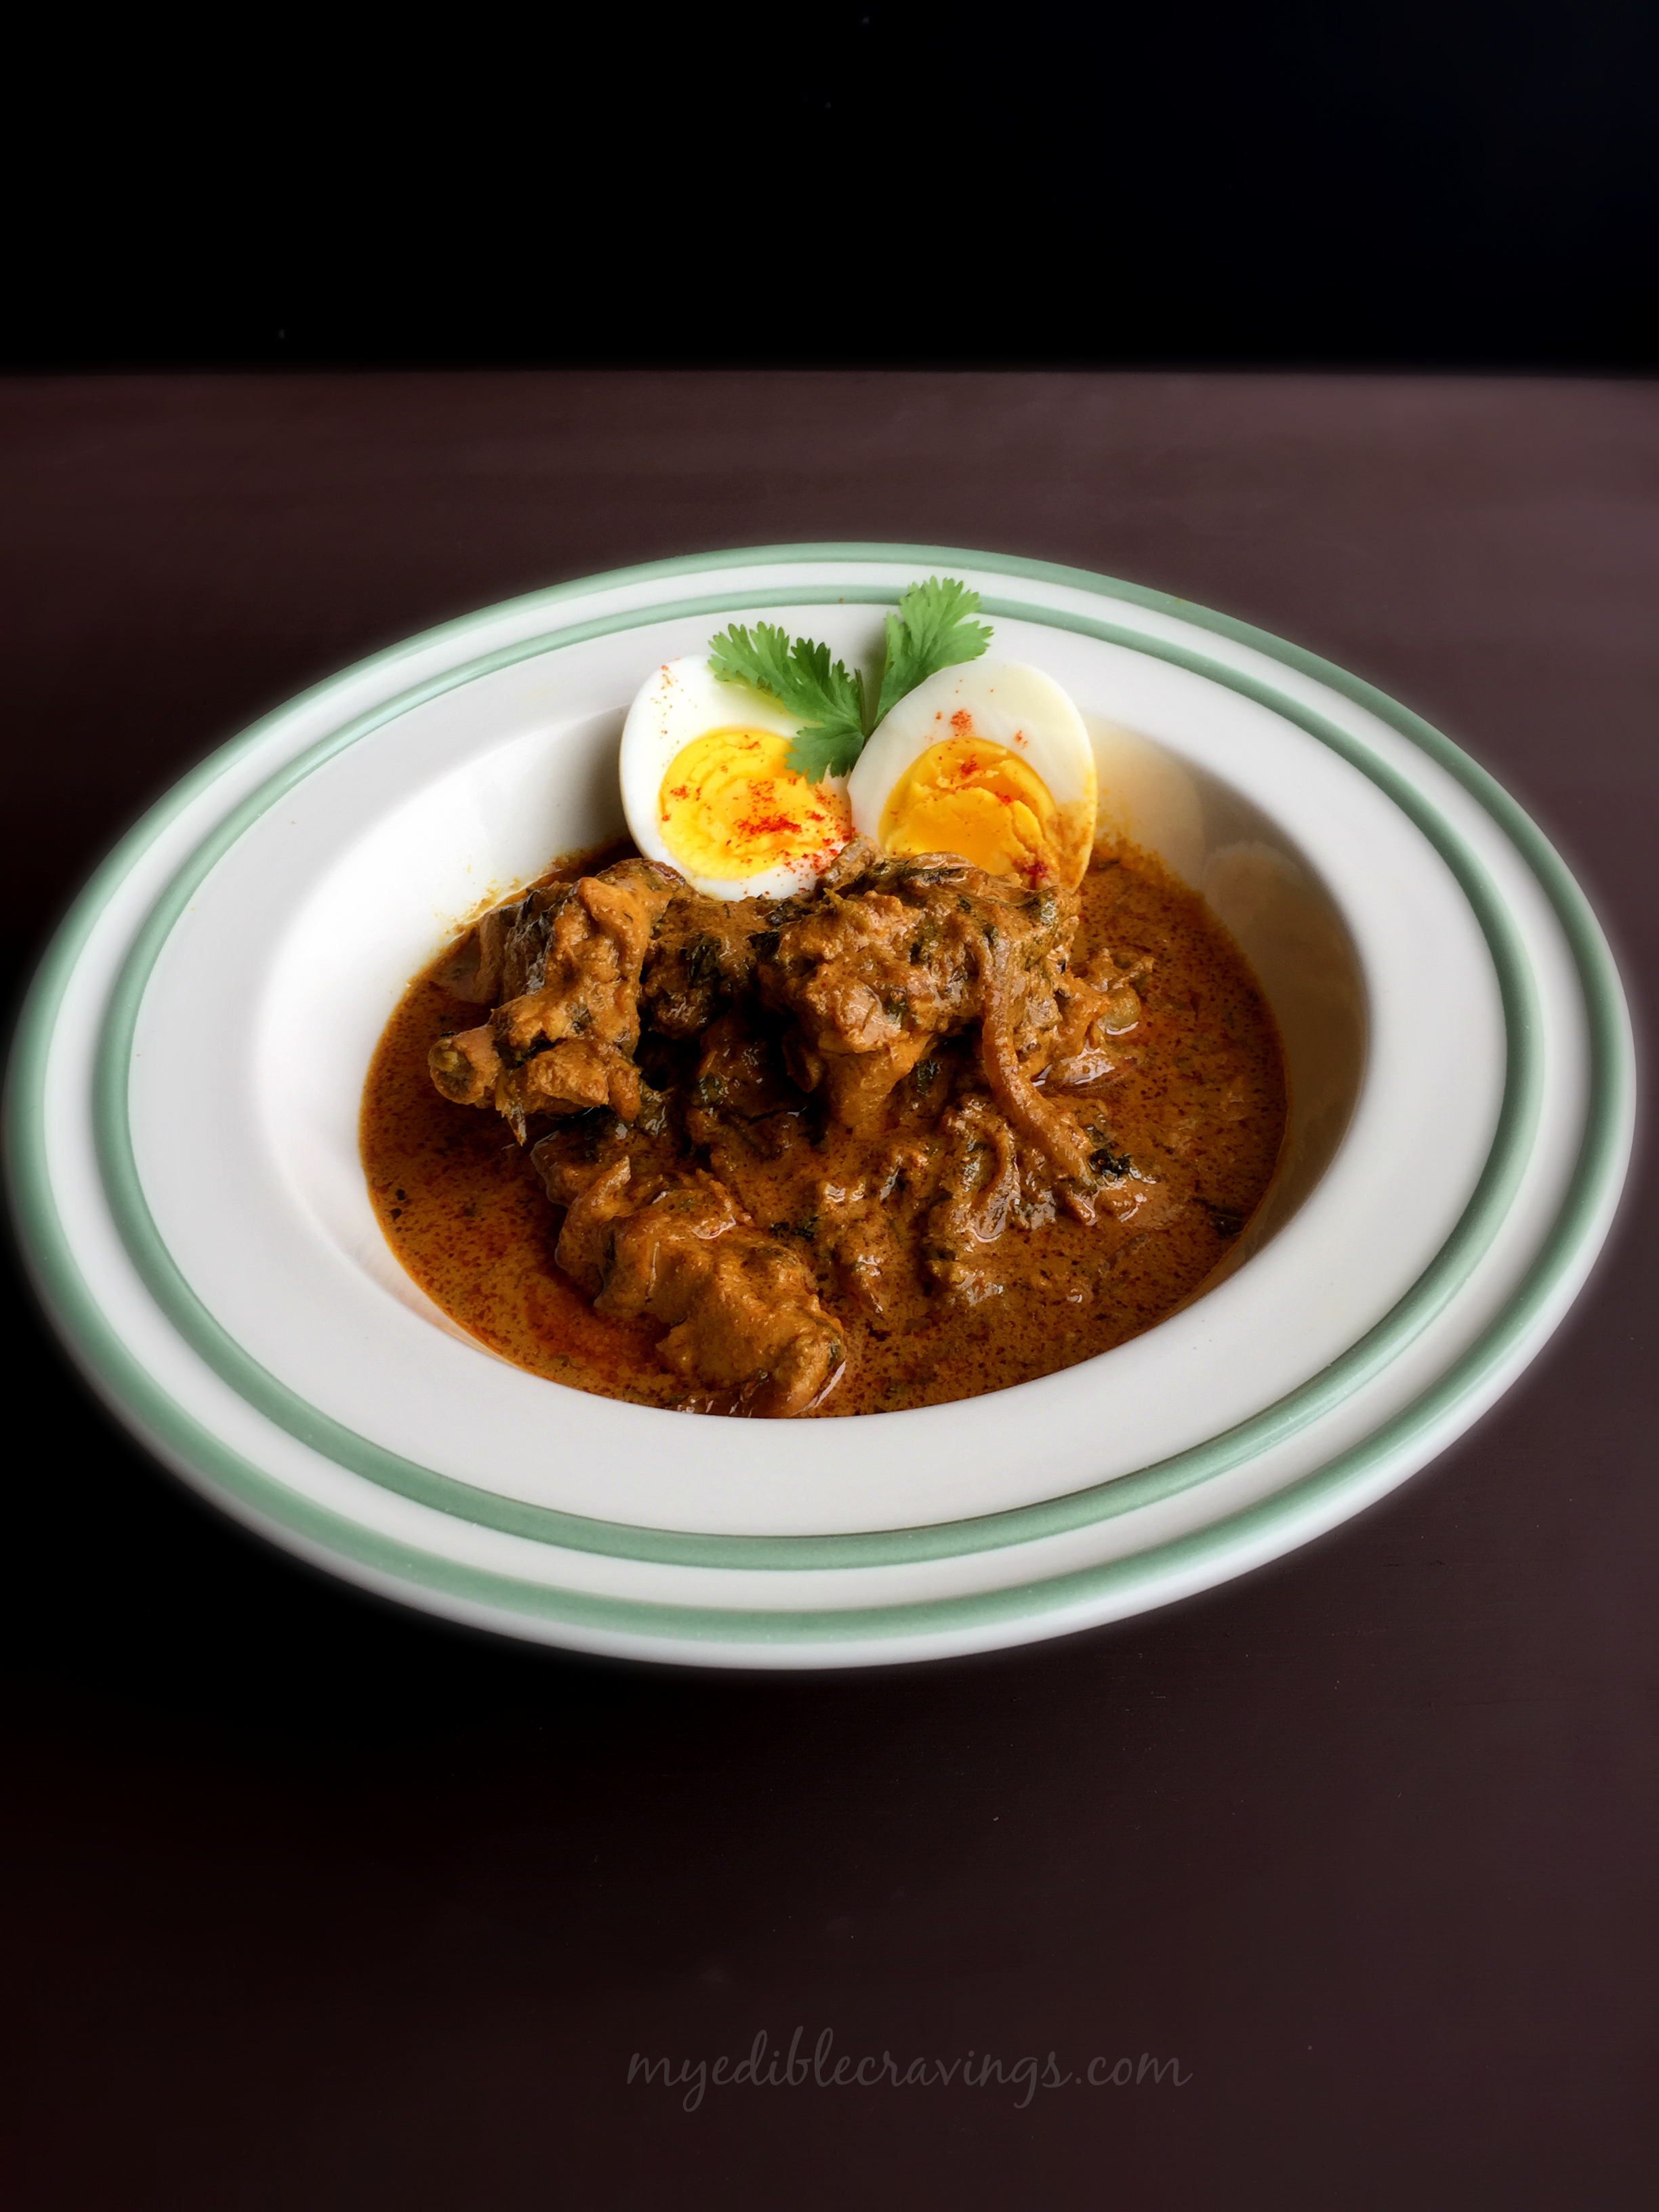
 Dum Ka Chicken is very rich in flavor and goes well with almost any entree items like rice, chapati, paratha, naan etc. Do try this royal, very tasty, simple (I am running out of adjectives :)) dish and post your wonderful comments!
- Chironji or charoli- 1 tbsp
- Cashews– 1 tbsp
- Green chilli – 4 nos
- Cinnamon stick – 1”
- Green cardamom – 3 nos
- Cloves – 3 nos
- Shahi jeera – ½ tsp
- Ginger garlic paste – 1 tbsp
- Lemon juice – from half a lemon
- Yogurt – ½ cup (2 tbsp)
- Turmeric powder – ½ tsp
- Chilli powder – 1 tbsp
- Coriander powder – 1 ½ tbsp
- Garam masala – ½ tsp
- Cumin powder – ½ tsp
- Mint, finely chopped – ½ cup
- Cilantro, finely chopped – ½ cup
- Onion , big, sliced – 1 to 2 nos
- Olive Oil – 2 tbsp
- Salt
- Chicken – 750 grams
- Water – 1 ½ cup
- Add all the above given ingredients in a deep thick bottomed sauce pan.
- Make a paste of the above given ingredients and add it to the pan.
- Heat oil and deep fry the onions to golden brown. Add them to the marinade.
- Mix everything together and check for salt and spices.
- Add the chicken to the marinade and mix well.
- Finally add water and mix well. Cover the lid and refrigerate it overnight.
- Next day seal the lid with dough or aluminium foil and tightly close the pan (This method is called dumming). Cook in medium to medium low flame for 10 minutes.
- Meanwhile heat a dosa pan in another burner. After ten minutes transfer the sauce pan on to the dosa pan and reduce the flame. Cook in low flame for 40 minutes.
- Switch off the flame and leave it for another 20 minutes.
- After 20 minutes open the lid and check if the chicken is well cooked. By this time chicken should be juicy and cooked well.
- Enjoy dum ka chicken with white rice and egg on the side!
- Marinate the chicken in any oven safe pan.
- Preheat the oven to 180 degrees F.
- Cover the pan with aluminum foil and then close the lid.
- Cook on the stove top for 20 minutes in low flame. And then place it in the oven and cook for 2 hours and 30 minutes. Enjoy!
2.And I recommend to always use freshly fried onions and not the store bought.
3.If you are calorie conscious then you can shallow fry the onions with olive oil or vegetable oil and add it to the marinade.
4.Mint and cilantro quantity is equal to one handful amount.
5.Chironji or charoli is a nut that can be found in any Indian grocery store.