Quinoa


lemon quinoa

Quinoa (pronounced as Kin-wa) is a product of South America and is a relative of spinach and beets. It looks like a variety of grain but actually is grown as plants. The part we eat is the seed which is gluten-free. You can even eat the leaves of a quinoa plant!

While no single food can supply all the essential life sustaining nutrients, quinoa comes as close as any other in the plant or animal kingdom. That’s because quinoa is what’s called a complete protein, meaning it contains all nine of the essential amino acids, which cannot be made by the body and therefore must come from food.

quinoa
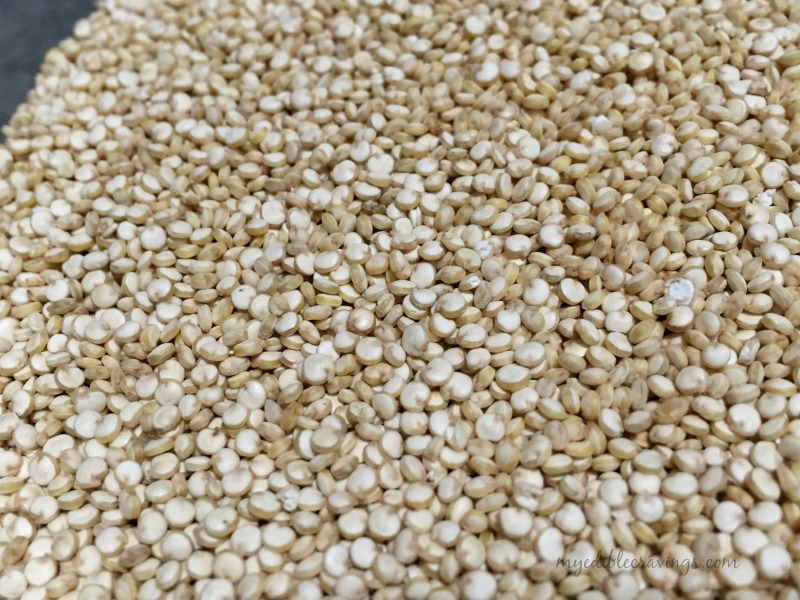
There are different varieties of quinoa but red, white and black quinoas are the most widely available. Among these white quinoa is the most popular variety. Red quinoa is more often used in salads. Black quinoa has sweeter taste. I have had only white quinoa so far. I find its taste closely resembling to rice but much healthier as mentioned above. I have given a detailed description of what quinoa is because I was not sure about the prevalence of this super food among people and wanted to create awareness as well.

lemon quinoa
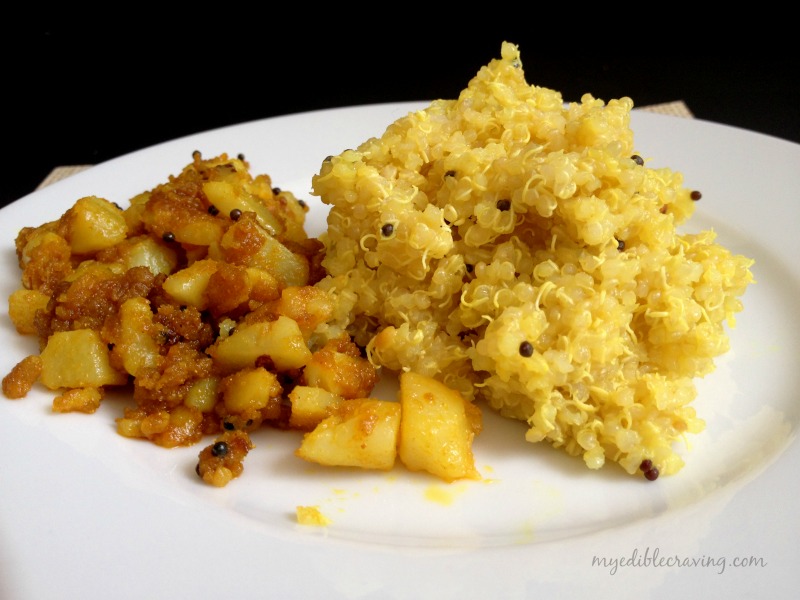
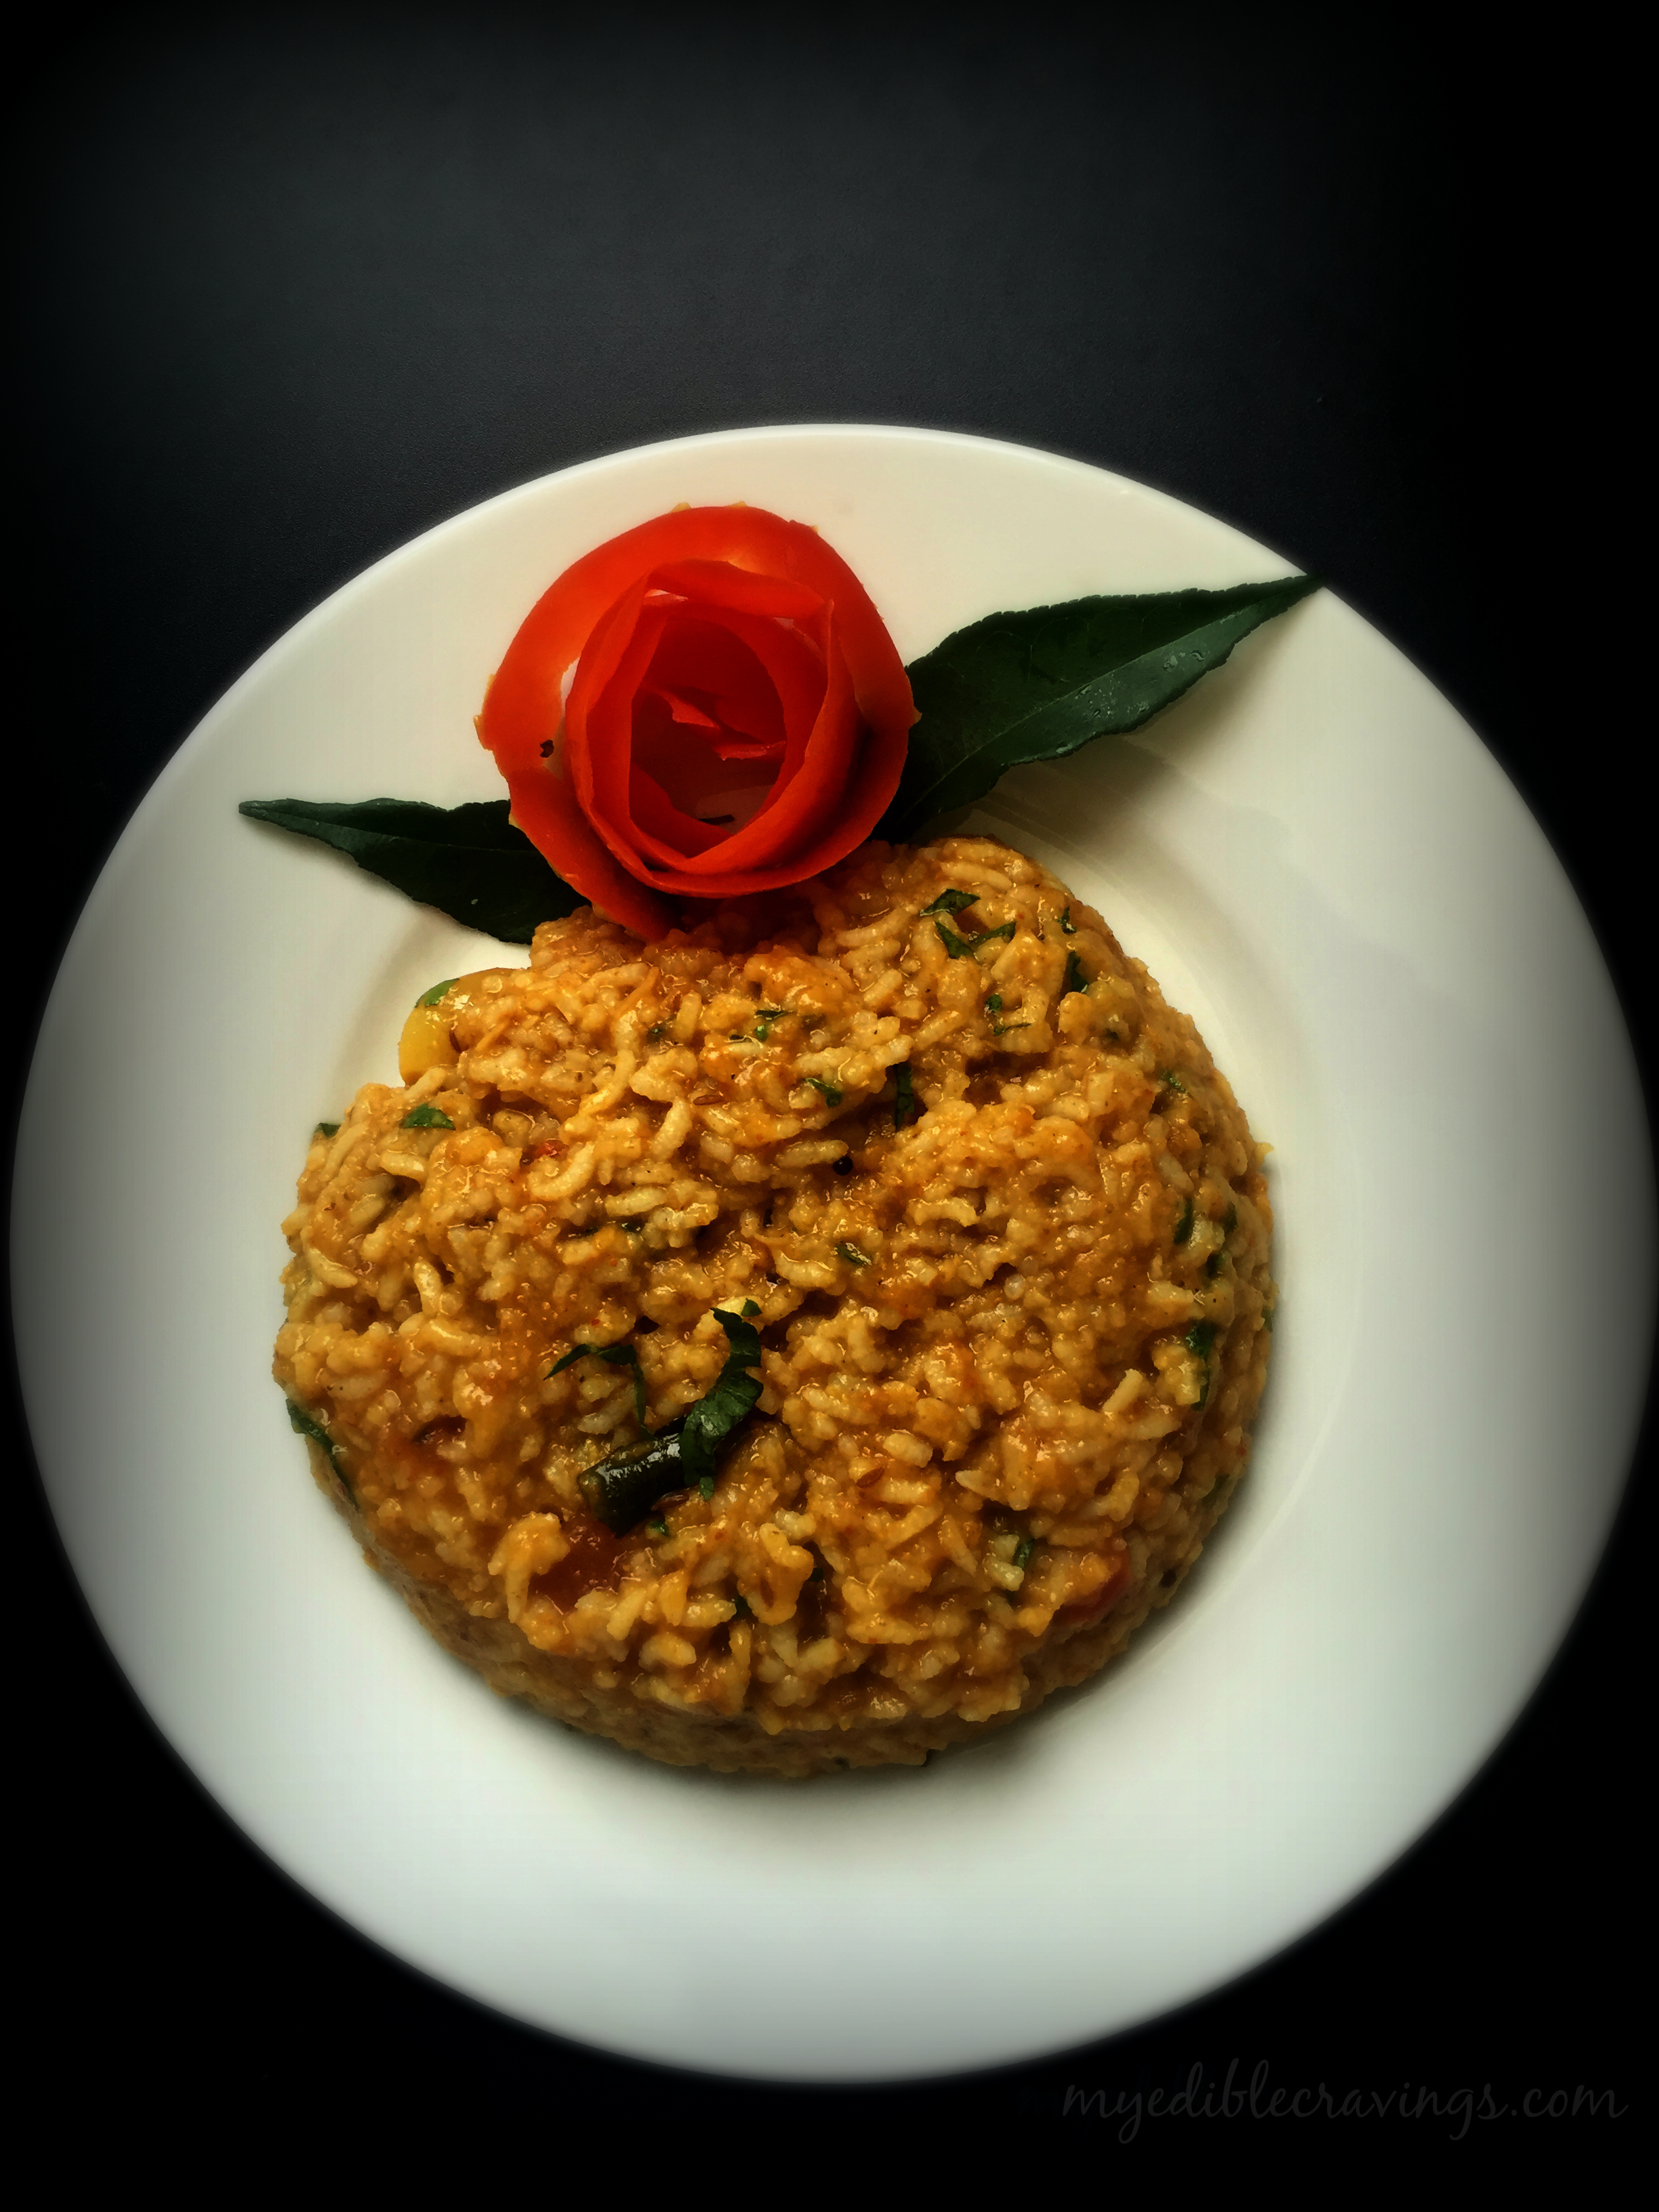
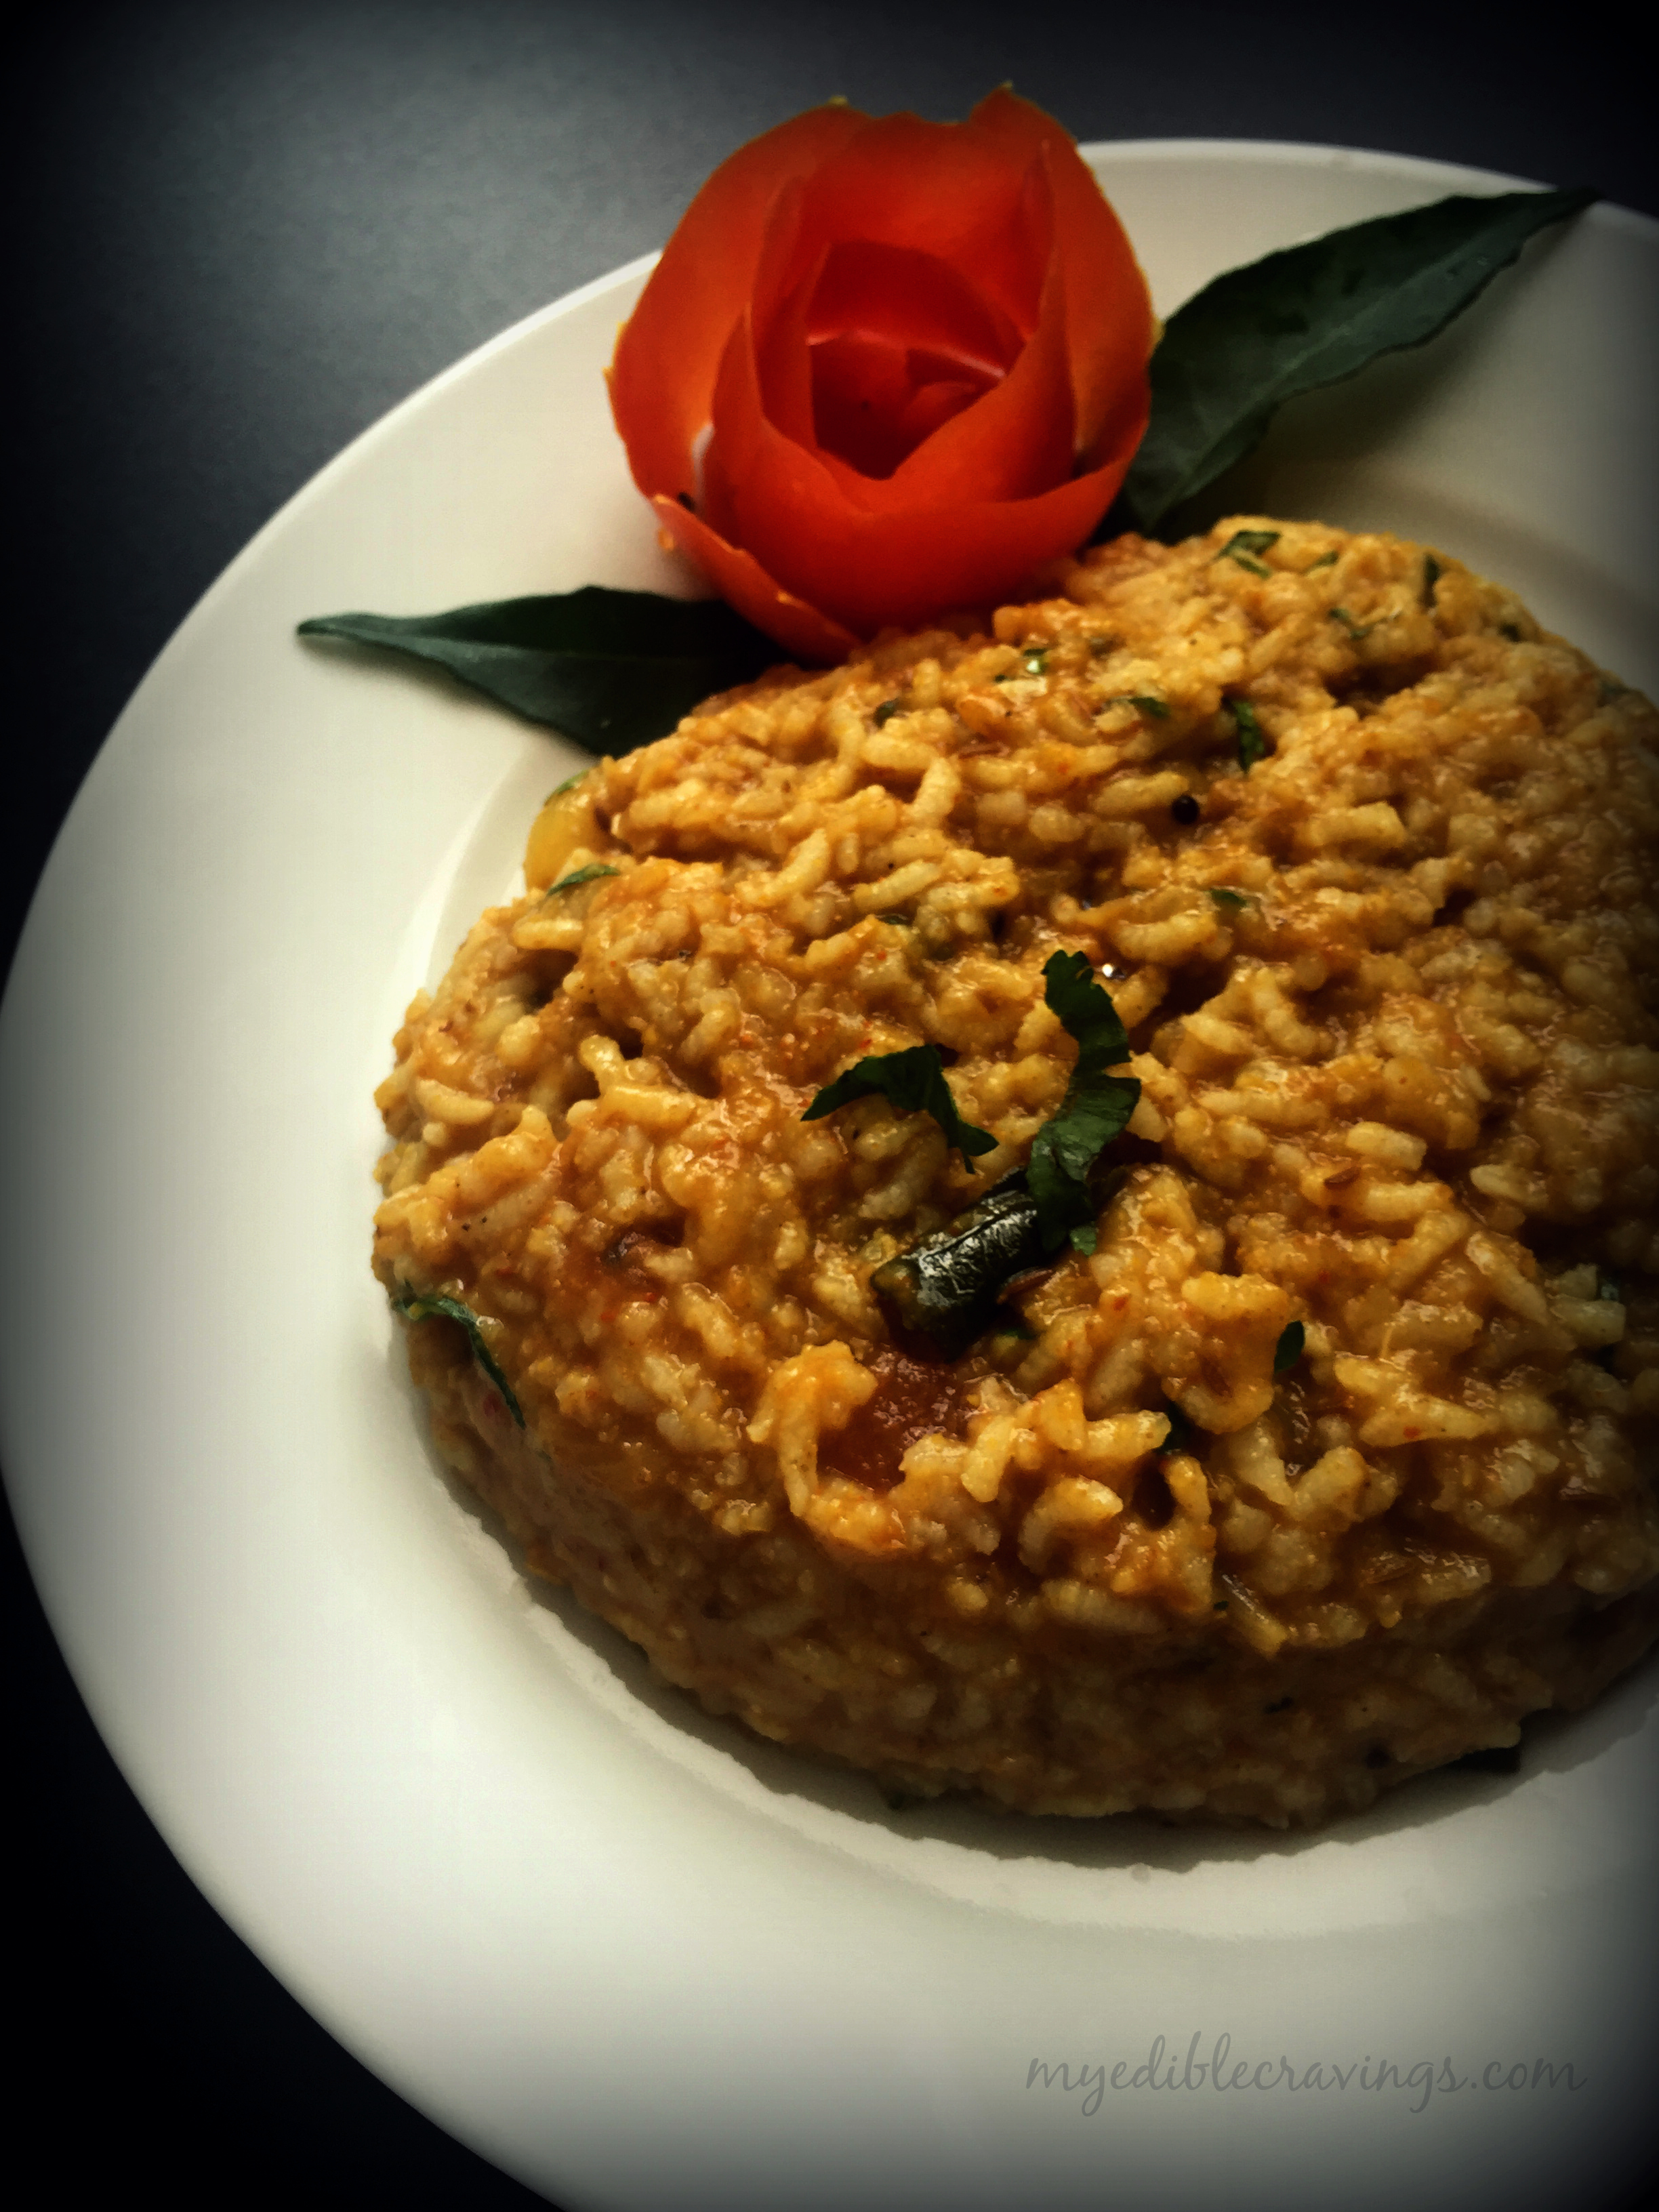
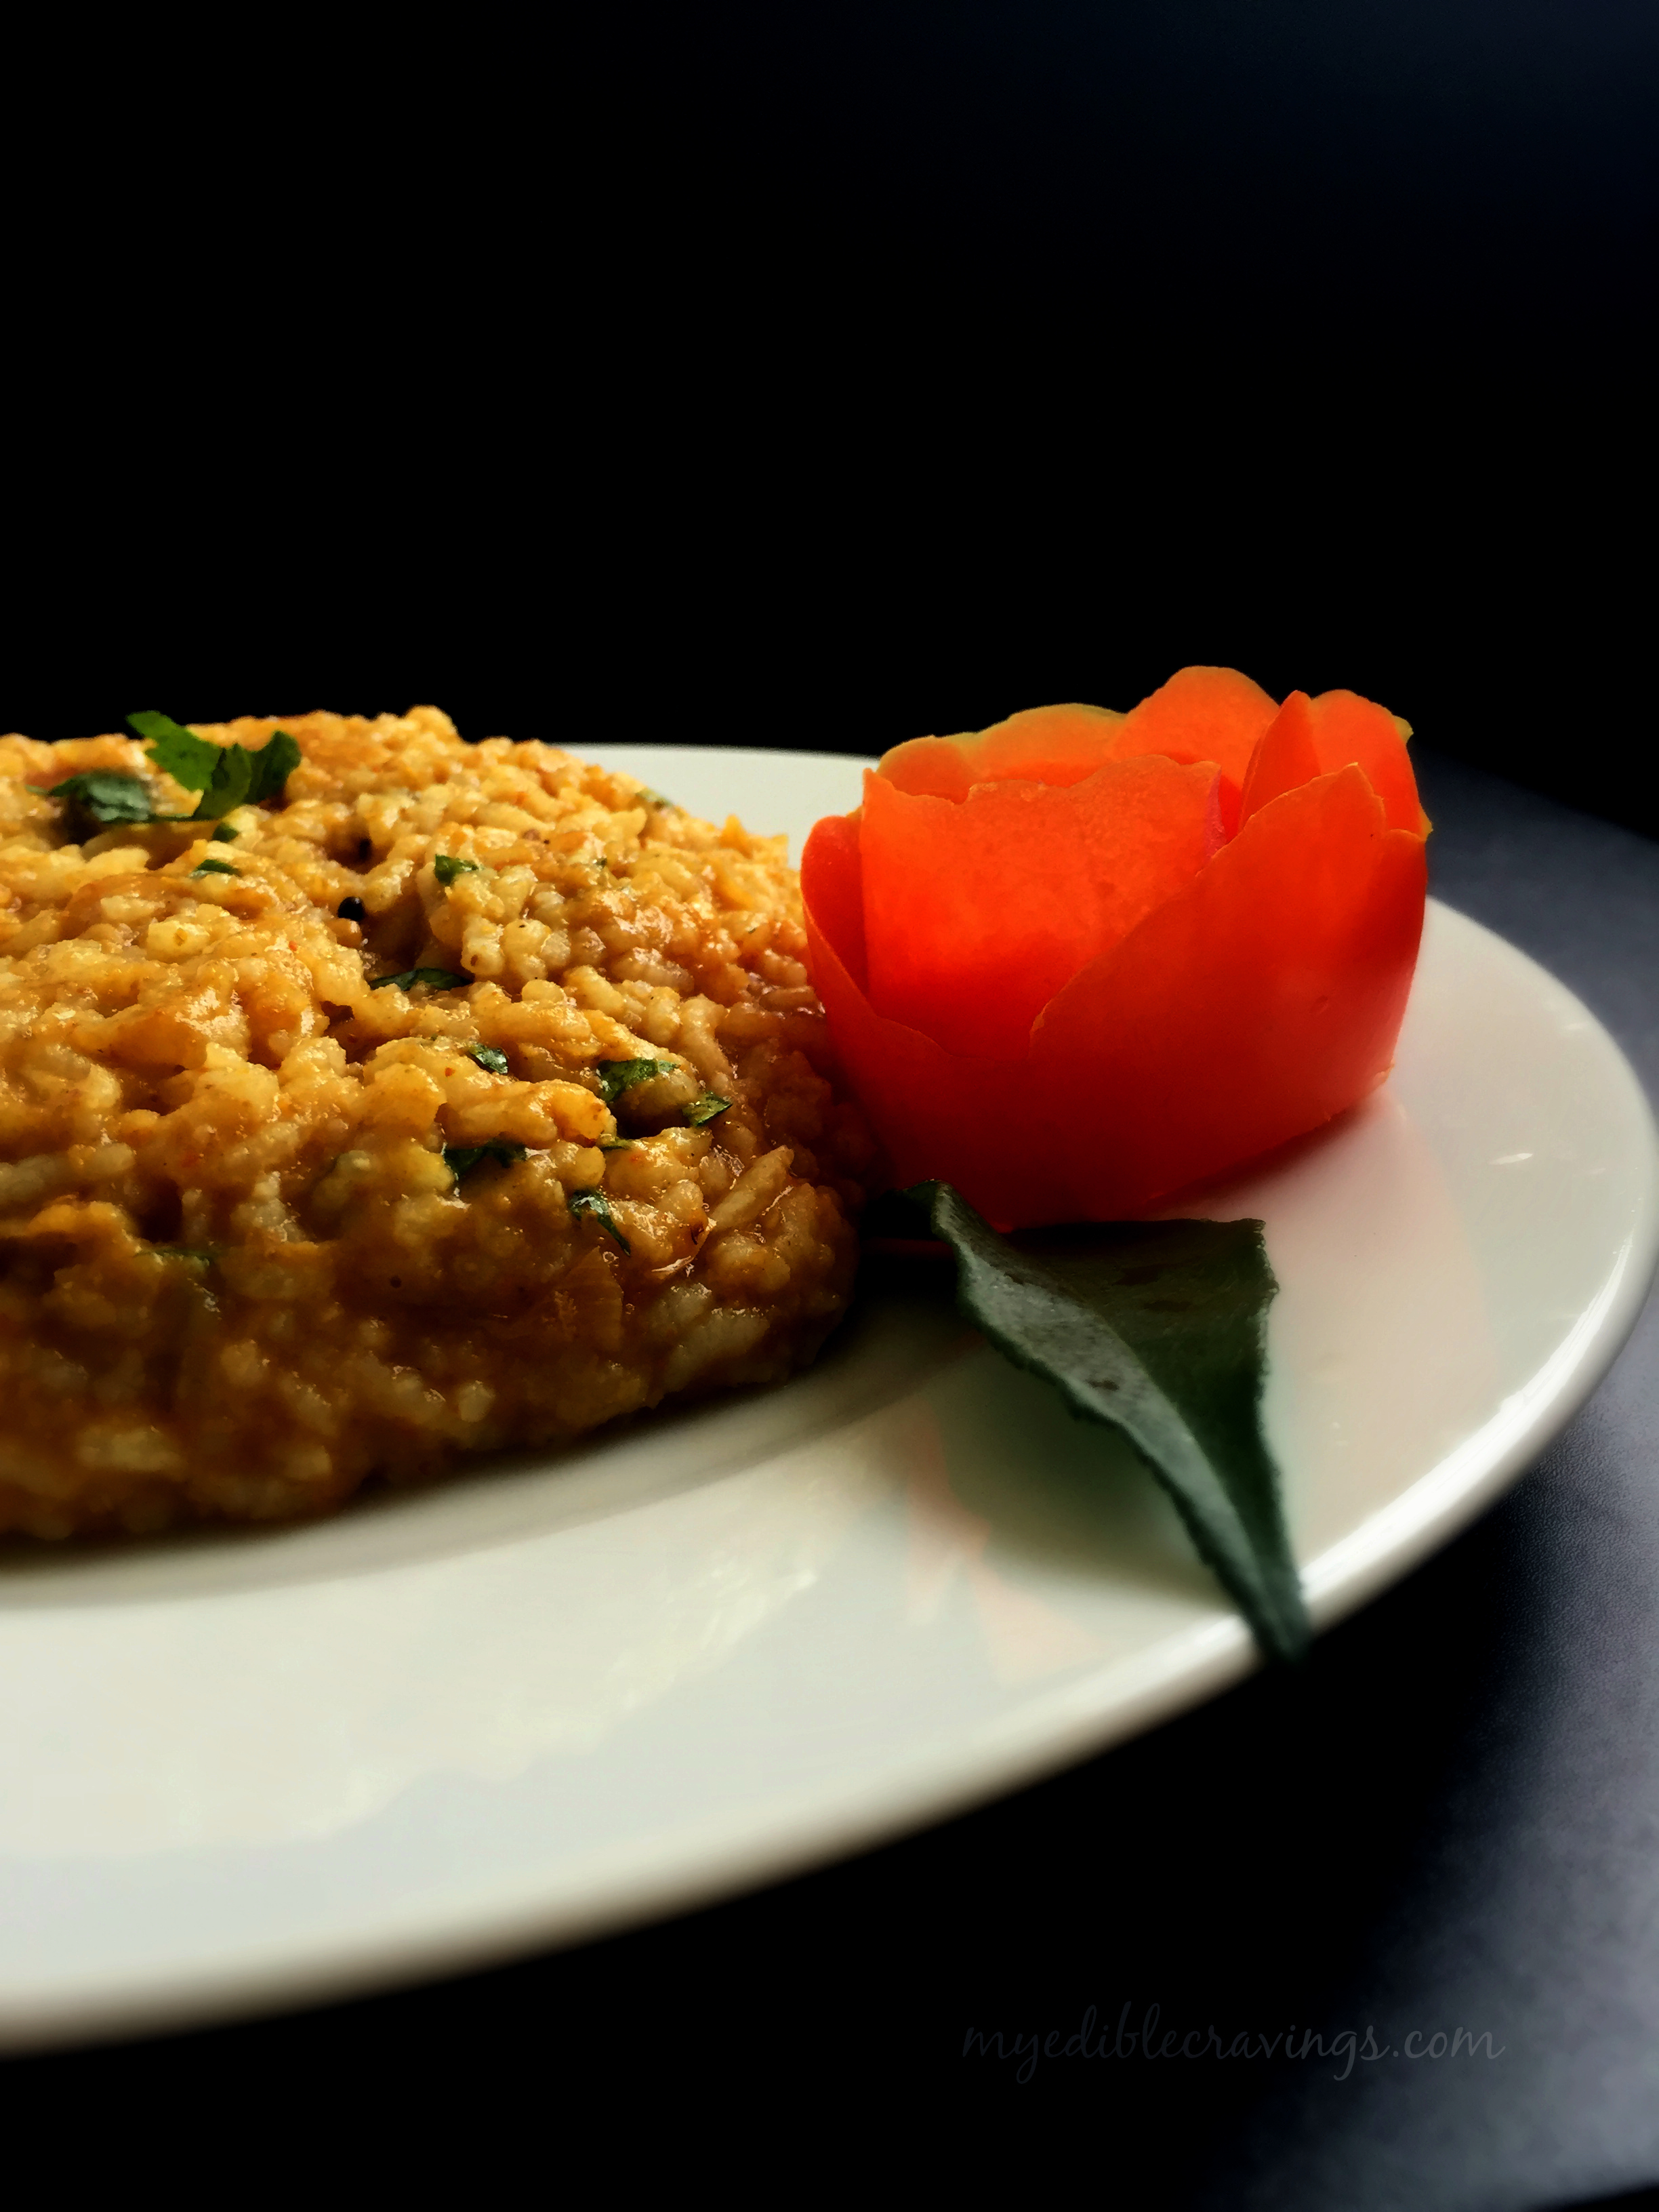
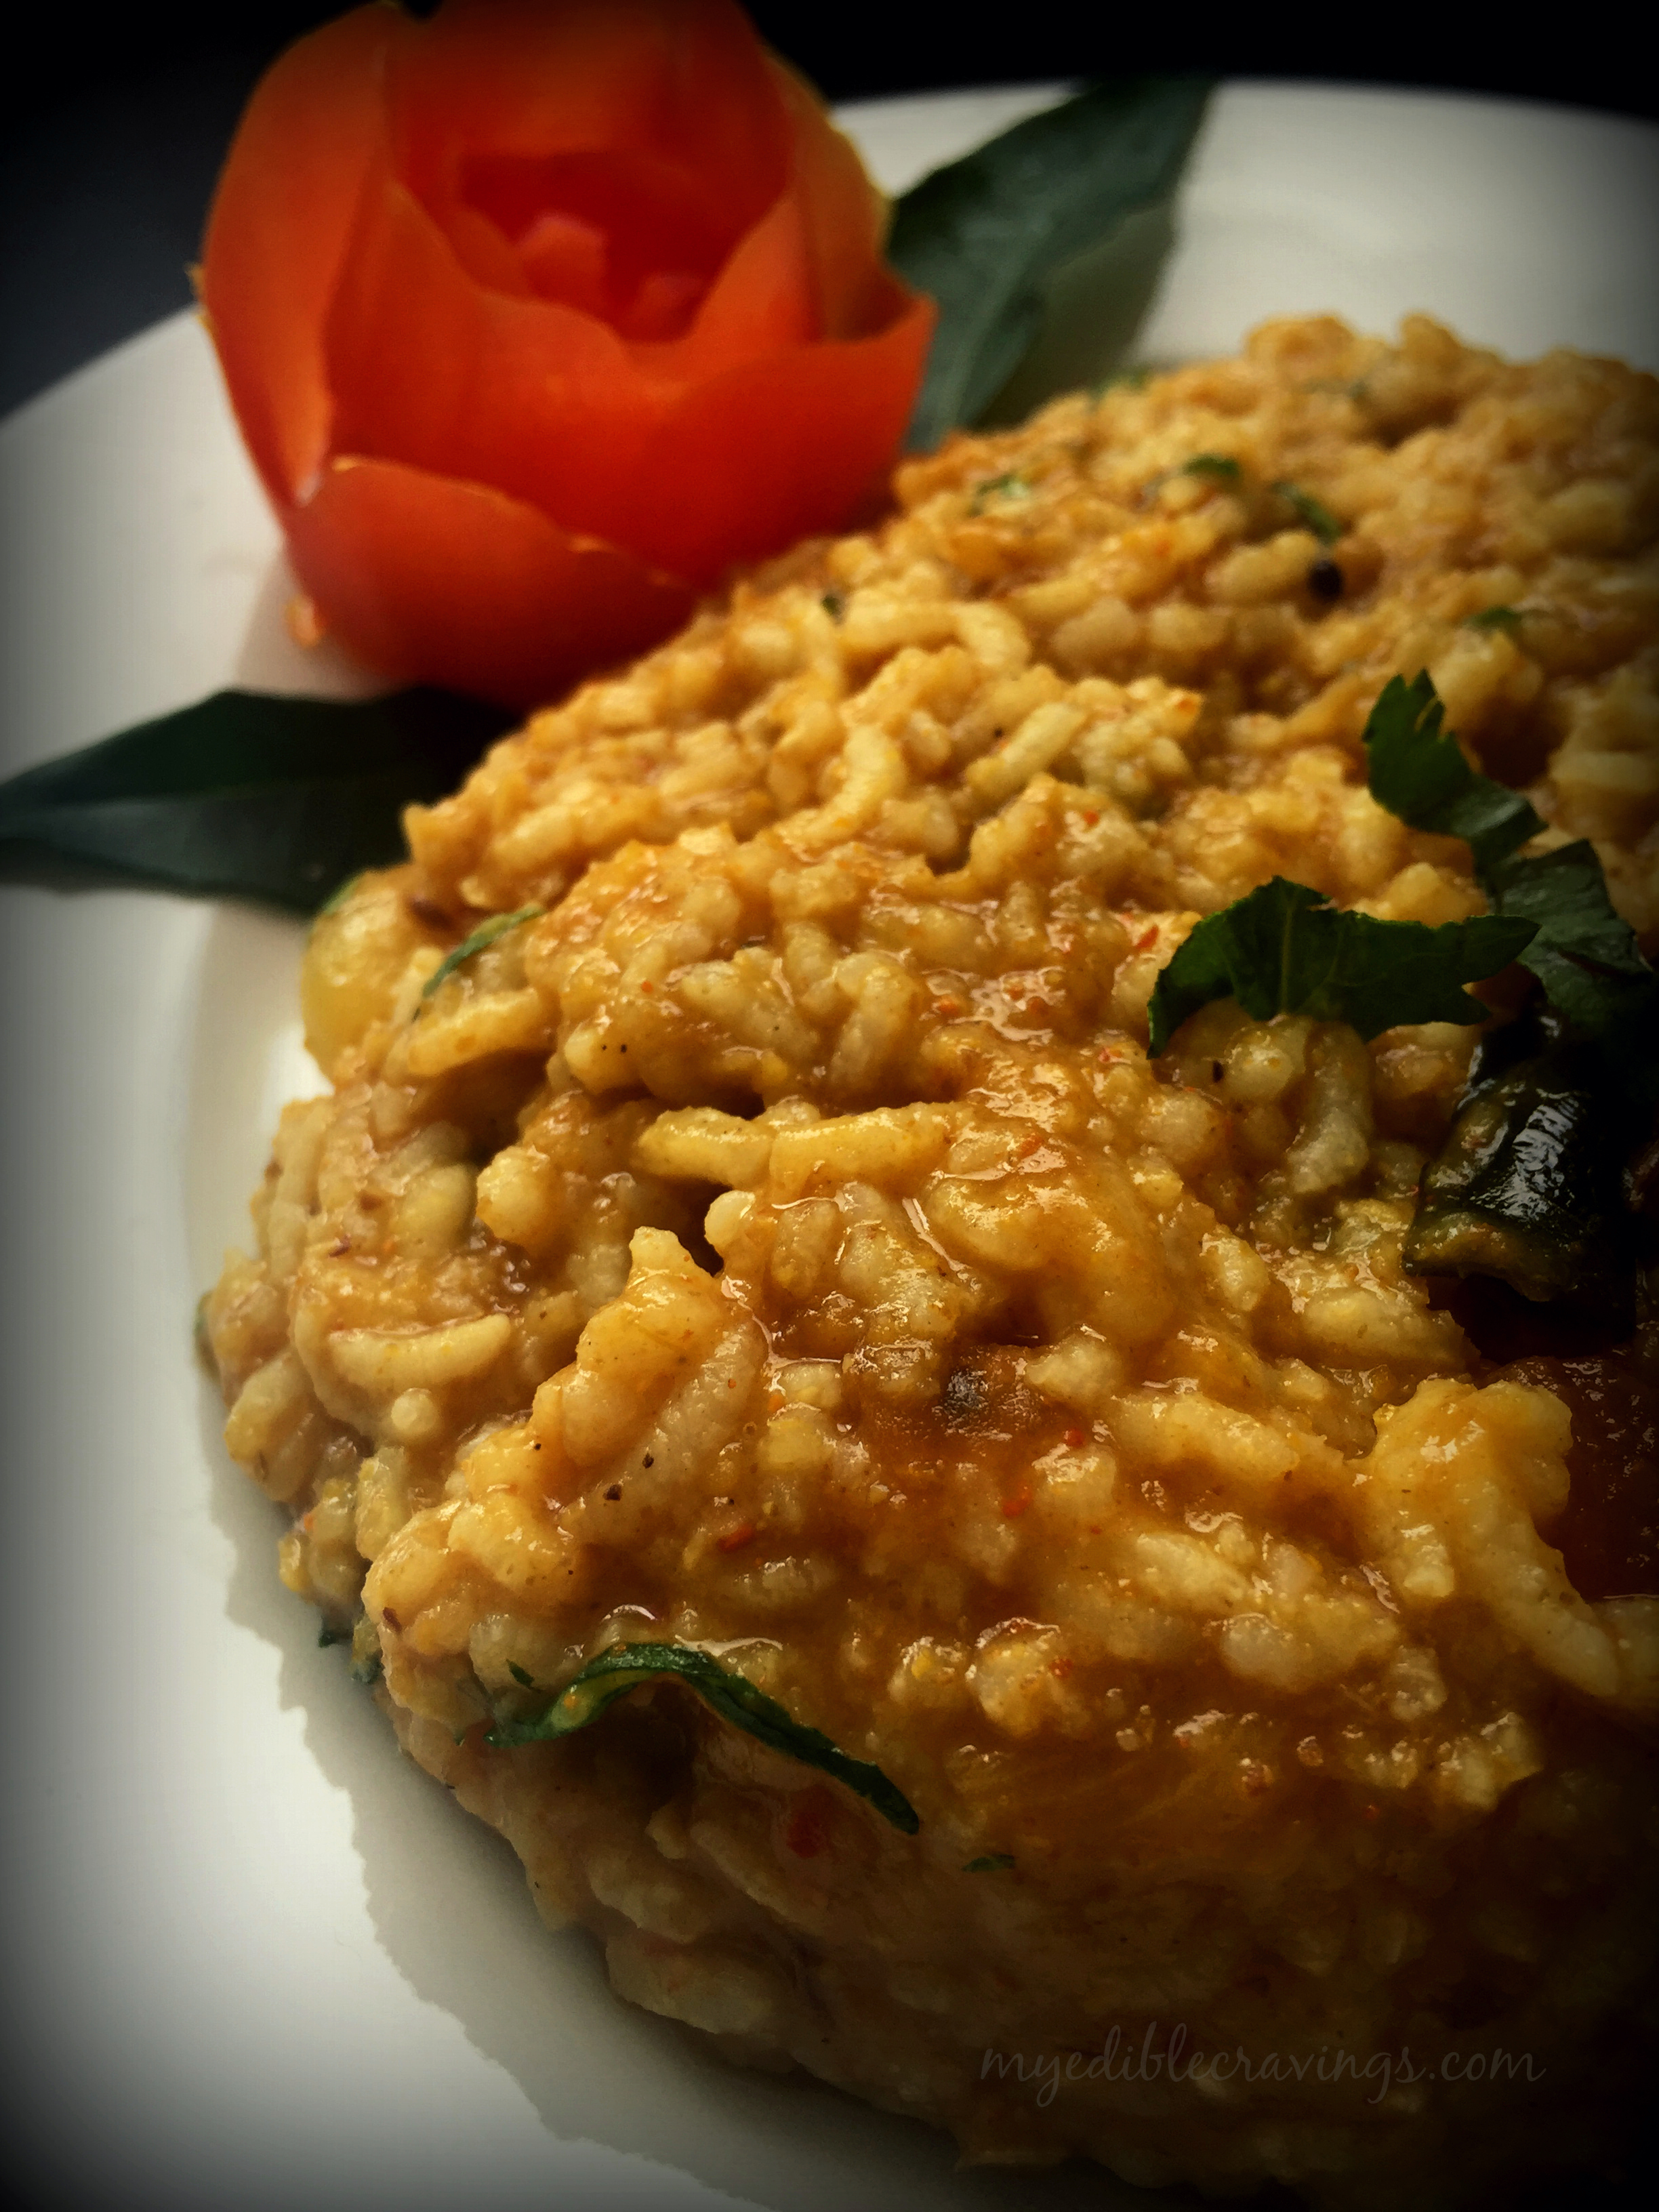
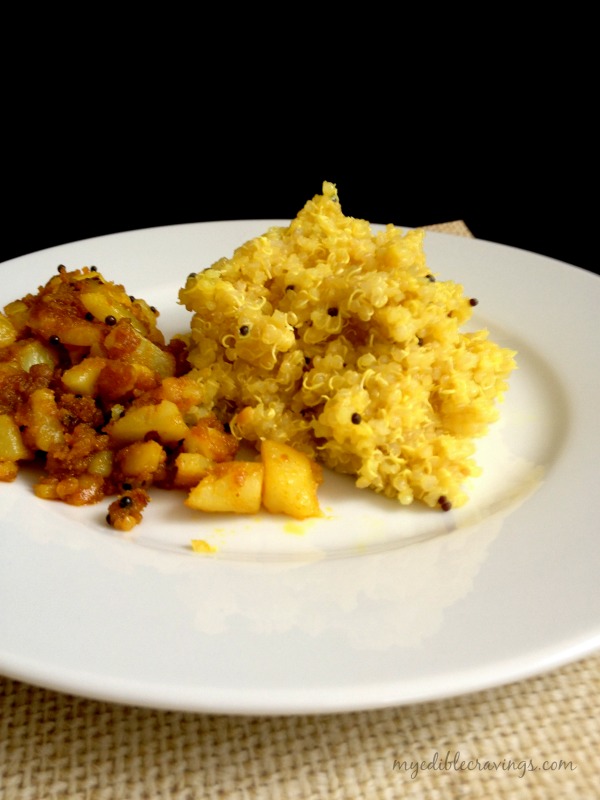
Quinoa is very easy to cook and there are no special instruction as far as cooking is concerned. Just follow the same steps that you normally do for cooking rice. Below I have given the recipe for lemon quinoa which is very similar to lemon rice except that we substitute quinoa for rice. You can also alter this recipe to make tamarind quinoa just like tamarind rice. My dear friends have been requesting for a while to post quinoa recipes and I can’t wait to share the interesting recipes that I have in store.  🙂

Quinoa
Recipe type: Main
Cuisine: Indian
Prep time: 
Cook time: 
Total time: 
Serves: 2
 
Ingredients
  • Quinoa – 1 cup
  • Water - 1 ½ cups
  • Salt as required
  • Oil – 1 tbsp
  • Mustard seeds – ½ tsp
  • Urad dal – ½ tsp
  • Curry leaves - a sprig
  • Red chilli – 3 nos
  • Asafetida or hing – a generous pinch
  • Turmeric powder – ¼ tsp
  • Lemon, big – 1 no (or 2 if small)
Instructions
  1. Wash the quinoa thoroughly in water, add 1 ½ or 2 cups of water and enough salt and pressure cook for three whistles.
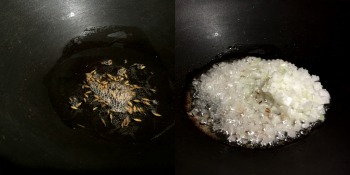
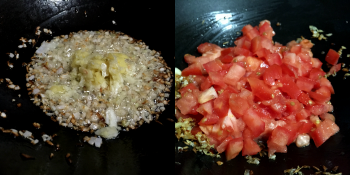
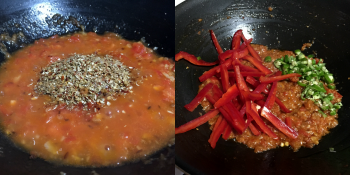
  2. Squeeze the juice of lemon and keep it ready. Heat a tempering ladle with oil and temper with mustard and urad dal. When they start to sizzle, add split red chillies and curry leaves. Add turmeric powder and hing. Switch off the flame and add lemon juice.
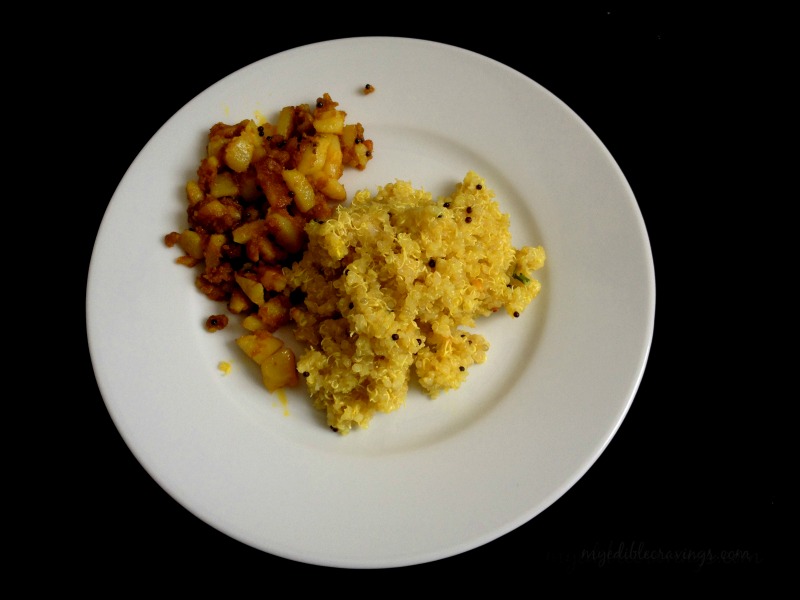
  3. Add the tempering to the cooked quinoa. Mix well and serve it hot with potato fry or chips on the side. Enjoy! 

lemon quinoa

Kadai Paneer

Kadai PaneerPaneer is a type of cheese that is common in South Asian cuisine. Paneer is made by curdling milk with the addition of lime or vinegar. Here in the US, cottage cheese or queso fresco (a variety of Mexican cheese) is the recommended substitutes. There are a variety of dishes made from paneer in north Indian cuisine. Here I have posted the recipe for one such popular dish called Kadai Paneer.
Kadai PaneerKadai PaneerKadai Paneer literally means paneer that is cooked in a cooking pot. It is a popular dish in Indian restaurants and often served during festivals and in functions. Kadai Paneer is one of the few dishes that I liked in the first taste. The recipe I have given below is of restaurant style Kadai Paneer. It is spicy and colorful dish (mainly because of the bell peppers) and goes well with chappati (or any Indian flatbreads), pulav/pulao etc.
Kadai PaneerFor Kadai Paneer, fresh ingredients are the key. You have to make the ingredients like crushed ginger garlic, coriander powder and chilli powder only when it is time for them to be added, unlike other recipes where they are prepared beforehand. Try this restaurant style Kadai Paneer and enjoy it with hot rotis on a lay afternoon like I do – It does feel heavenly. 🙂

Kadai Paneer
Recipe type: Main
Cuisine: Indian
Prep time: 
Cook time: 
Total time: 
Serves: 3
 
Ingredients
  • Cumin seed – a pinch
  • Onion, medium, finely chopped – ½ no
  • Garic cloves – 4 nos
  • Ginger – ¾”
  • Tomatoes, big, finely chopped – 2 nos
  • Coriander seeds – 1 tsp
  • Red chilli flakes – ½ tsp
  • Green or red bell pepper or capsicum, julienned – ½ no
  • Green chilli, finely chopped – 1 nos
  • Salt as required
  • Garam masala – a pinch
  • Paneer, cut to cubes – ½ pk
  • Kasthoori methi leaves or dry fenugreek leaves – 1 ½ tsp
  • Ginger, julienned – ¼ “
  • Cilantro, finely chopped - for garnishing
Instructions
  1. Heat a kadai and add oil. When the oil is hot add cumin seeds. Wait until they start to sizzle. Add finely chopped onion. Sauté until they turn translucent. Meanwhile crush ginger and garlic in a motor and pestle.
  2. Add the crushed ginger and garlic. Sauté until the raw smell disappears.
  3. Add in finely chopped tomato and sauté well in a low flame. Meanwhile coarsely pulse the coriander seed and red chilli flakes for very few seconds. See notes below.
  4. Add the coriander powder and mix well. Sauté and cook until oil separates.
  5. Add in the julienned capsicum and green chilli. Mix and sauté them for couple of minutes until capsicum is half cooked – you could add very little water if you feel the mixture is dry.
  6. Add salt and garam masala. Stir to mix.
  7. Add in the paneer cubes and mix until the masala is well coated. Cook for 2 to 3 minutes and add kasthoori methi, julienned ginger and coriander leaves. Stir and cook for another couple of minutes and switch off the flame.
  8. Serve delicious kadai paneer with any pulao or roti. Enjoy!
Notes
1.Fresh ingredients are the key for this recipe. Make crushed ginger garlic and coriander powder then and there when needed.
2.I added chilli flakes so it took me only very few seconds to blend them to a coarse powder. You could also add one red chilli in place of chilli flakes.
3.The coriander mixture has to be coarse and do not blend it to fine powder.

Kadai Paneer

Dal makhani

Dal makhaniDal Makhani is a popular north Indian dish that has its origin in Punjab. It literally means ‘buttery lentils’. It is supposed that the original Dal makhani recipe has only black gram lentil (urad) in it. Makhani means buttery and so it is butter and cream along with urad dal. As per Wikipedia, Dal Makhani became popular after the partition, thanks to the Punjabi diaspora. It is a typical punjabi dish that can be found in almost all Dhabas (roadside eateries, very popular in North India) and in Indian restaurants here in the US.
Dal makhani
Dal makhaniThere are so many varieties of sauces like cashew, tomato, white sauce, curry sauce, rogan josh, buna, madrasi etc and Makhani is one among them. Through out my experience with cooking different dishes, I have noticed that most often cooking a recipe can be broadly defined as first preparing a sauce/gravy and then adding the main ingredient, the one that defines the dish, to it. This method of preparation of dishes is particularly useful in restaurants where a variety of sauces are prepared first and then different recipes are cooked using those sauces. And Dal Makhani is prepared the same way as well; you first prepare the Makhani and then add lentil (urad dal here) to it.
Dal makhani
Dal makhani
Dal Makhani is a very rich and flavorful dish. This is mainly because of the lentils which gives you a fullness when eaten due to the high protein content. Hence it is a healthy dish as well. Dal Makhani goes well with almost all entree items like rice, chappati, paratha, naan etc. Also, it is very easy to make. So without further delay, go prepare this easy and tasty punjabi dish in your kitchen and let me know your comments 🙂

Dal makhani
Recipe type: Main
Cuisine: Indian
Prep time: 
Cook time: 
Total time: 
Serves: 4
 
Ingredients
  • Black gram dal – 1 cup
  • Ginger garlic paste – 1 tbsp
  • Kashmiri red chilli powder – 1 ¼ tbsp
  • Unsalted butter – 5 tbsp (120 gr)
  • Tomato, large, pureed – 2 ½ nos (pureed to 1 cup)
  • Fresh cream – 4 to 5 tbsp (250 gr)
  • Salt as required
Instructions
  1. Soak dal in water for 8 hours or overnight.
  2. Rub the dal using your two hands and filter the skins. Repeat this for 5 to 8 times until 70% of the skin is removed.
  3. Add 3 cups of water and ½ tsp salt and pressure cook the dal for 5 whistles.
  4. Transfer the dal into a thick bottomed non stick sauce pan and bring them to boil. Add ginger garlic paste, chilli powder and butter. Cook until the butter is melted, mixed and well blended.
  5. Add in tomato puree and fresh cream. Mix well and add enough salt.
  6. Bring the dal makhani to boil in a low to medium flame. Cook for around 20 to 25 minutes until a thin glaze is formed at the top.
  7. Serve it hot with a dollop of butter on top. It goes excellent with naan, rotis and other Indian flat bread varieties.
To make tomato puree:
  1. Heat a sauce pan with a tbsp of oil. Add in roughly chopped tomatoes and very little salt. Sauté until oil seperates.
  2. Allow it to cool and make a thick puree adding very little water.
Notes
1.Amount of dal and tomato puree should be 1:1 ratio (equal).
2.Use non stick pan to make this dal makhani dish to avoid the dal sticking at the bottom.
3.could also add rajma and other kinds of dal to this dish. i have tried both and all tasted equally good.

Dal makhani

Green Chilli Pickle

007Pickle is an accompaniment in Indian cuisine similar to mustard and ketchup in American or salsa in Mexican cuisines. Pickle in the US has a different meaning altogether where it is cucumber fermented in brine or vinegar. Pickle is very popular in Andhra cuisine where it is almost had with all main entrée dishes.
Back home, there are literally hundreds of variety of pickles (both sweet and spicy) and green chilli pickle is one among them. Green Chilli pickle is a recipe from my grandmother, passed on to my mother and now to me (and I will pass on to my daughter when she is ready ). Green Chilli pickle is the best complement for curd rice.
009
I love Green Chilli pickle very much and have wanted to make it for a long time. As the name suggests, green chilli is the main ingredient (and mango-ginger as well) in this recipe. I am sure all spicy food lovers will love this one. Try this wonderful pickle , have it with curd rice and let me know your thoughts.

GREEN CHILLI PICKLE/ INJI MANGA OORGAI
Recipe type: Lunch
Cuisine: Indian
Prep time: 
Cook time: 
Total time: 
Serves: 5-10 servings
 
Ingredients
  • Mustard seeds – 1 tsp
  • Chopped Shallots – 10
  • Garlic cloves – 10 (minced)
  • Chopped green chillies – 10
  • Chopped ginger and/or mango ginger – 1 ½ tbsp
  • Red chilli powder – 1 tsp
  • Tamarind – big gooseberry size
  • Coriander powder -1 tbs
  • Turmeric powder – 1 tsp
  • Gingelly oil – 2 tbs
  • Salt as required
Instructions
  1. Soak tamarind in water and make a thick paste out of it.
  2. Heat gingelly oil in a pan and temper with mustard seeds. Add onions and sauté until the color changes. Add chopped ginger, garlic and green chillies and sauté for few minutes.
  3. Add chilli powder, coriander powder, turmeric powder, salt and immediately add the tamarind extract.
  4. Give it a stir and switch off the flame when the oil separates.
Notes
1.You could also substitute ginger with mango ginger (Inji maanga) and that tastes awesome too.
2.You can refrigerate the pickle and use it for a week. If you want to store it for more days add very little jaggery while making the pickle.


008

Vegetarian liver fry

veg liver fryToday I am going to give you one of the most unusual and tastiest dishes that I (or my husband to be precise) have ever had. It is the vegetarian liver fry. Sounds unusual, right? It is totally vegetarian and is made of Moong Dal.
veg liver fry
I personally love liver fry and when I came across this recipe, I was skeptical. How would you compare a vegetarian dish to the awesome liver fry? But I was stumped when I tasted it. It was so good that my husband emphatically declared that it was one among my top 3 dishes that I have ever cooked 😉
veg liver fry
veg liver fry
Vegetarian liver fry is nutritional and very healthy. I would even say that it can be included in your diet routine. For those who miss non vegetarian dishes due to fasting or for health reasons, vegetarian liver fry will really be a welcome addition to the menu.
I thing I have said enough about vegetarian liver fry and it is time for you guys to try it in your kitchen and let me know your opinions 🙂

5.0 from 2 reviews
Vegan liver fry
Recipe type: side dish
Cuisine: Indian
Prep time: 
Cook time: 
Total time: 
Serves: 2
 
Ingredients
  • Moong dal – ½ cup
  • Oil – 4 tbsp
  • Cumin seeds – ¼ tsp
  • Onion, medium, finely chopped – 1 no
  • Curry leaves – a sprig
  • Tomato, big, finely chopped – 1 no
  • Turmeric powder – ¼ tsp
  • Red chilli powder – ¼ to ½ tsp
  • Coriander powder – 1 tbsp
  • Garam masala powder – ¼ tsp
  • Sakthi biriyani masala – ¼ tsp (optional)
  • Salt as required
  • Coconut milk – ½ cup
  • Black pepper powder – ¼ tsp
  • Cilantro, finely chopped – 1 tbsp
Instructions
  1. Soak moong dal over night. Drain the water and grind them in a blender into thick batter (idli batter consistency). Do not add too much water while grinding. Add quarter tsp of salt (or as required) to the batter and mix well.
  2. Pour the batter on idli plates with a small ladle and steam them for 15 minutes in a cooker.
  3. Meanwhile heat oil in a flat pan and add onions and curry leaves. Cook until onions turn translucent.
  4. Add tomatoes and cook until they become mushy. Meanwhile cut all the idlis i.e vegan liver into an inch cubes or to the desired size pieces.
  5. When the tomatoes are well cooked add all the masala powders (except pepper) and salt and mix well. Add in coconut milk and bring it to boil. It takes very few minutes.
  6. Now add the idli cubes to the gravy and mix well. Close the lid and cook for a minute - For those of you who wants the gravy consistency can stop here.
  7. Cook until the gravy is well absorbed and turns into a semi gravy. You will start noticing the oil in the sides of the pan.
  8. Add pepper powder and stir well. Cook until it forms into a nice dry fry. Garnish with cilantro on top and serve hot! 
Notes
1.This vegan liver fry tastes even more better when it comes to room temperature.
2.Please be careful not to add excess water while grinding the moong dal.

veg liver fry

Cauliflower fry

Cauliflower fry
Cauliflower is one of those vegetables that is not often found in South Indian palate (especially Tamilnadu). It is a low fat, low in carbohydrates but rich in fiber vegetable. Cauliflower fry is one of the many varieties prepared using this vegetable. I came across this recipe when searching for a supplement to our diet (and yes we start a diet system many times a year, but sticking to one is a different story  🙂 )
Cauliflower fry
The main specialty about this Cauliflower fry is the way it is cooked. Though it is called a fry, I actually use a conventional oven to cook. It is a very tasty dish, trust me. When you are uncertain about what side dish to prepare for Chappati or Naan etc remember this wonderful Cauliflower fry.
Cauliflower fry
For those who don’t have an oven, you can cook this dish using a stove as well. Try this simple, delicious and healthy dish in your kitchen and tell me your experience. 🙂

Cauliflower fry
Recipe type: Main
Cuisine: Indian
Prep time: 
Cook time: 
Total time: 
Serves: 4
 
Ingredients
To bake:
  • Cauliflower florets – 2 to 3 cups
  • Olive oil – 5 tbsp
  • Tomato paste or puree, thick – 4 tbsp (I used hunt’s)
  • Garlic cloves, minced – 1 tbsp
  • Kashmiri red chilli powder – 1 tbsp
  • Black pepper powder – 1 tsp
  • Coriander powder – 2 tbsp
  • Turmeric powder – ½ tsp
  • Garam masala - ½ tsp
  • Salt – ½ tsp
For the seasoning:
  • Oil – 2 tbsp
  • Mustard seeds – ½ tsp
  • Curry leaves – a sprig
  • Green chilli, slits – 4 nos
  • Ginger, julienned – 1 tbsp
  • Onion, big, slits – 1 no
  • Kashmiri red chilli powder – ½ tbsp
  • Red chilli powder – ½ tsp (optional)
  • Coriander powder – 1 tbsp
  • Dry fenugreek leaves or kasthoori methi, crushed – 1 tbsp
  • Spring onions or scallions – 1 to 2 tbsp
Instructions
  1. Preheat the oven to 400 degrees F and mix all the above ingredients in a large aluminium pan given under 'To bake'. Place it inside the oven and cook for 30 to 45 minutes until the cauliflowers are crunchy (stirring in between). For those who do not have conventional oven, just fry it in a pan on the stove until they are nicely done.
  2. Meanwhile heat oil in a flat pan and season with mustard, urad dal, curry leaves and green chillies. When they start to splutter add onions and sauté until they turn translucent.
  3. Add julienned ginger.
  4. Add all the powders (coriander, chilli, salt, turmeric) and kasthoori methi. Add oven baked or stove cooked cauliflower. Sauté well and cook for 10 minutes.
  5. Garnish with scallions and cilantro.
Notes
!To make tomato puree at home:
Roughly chop the tomatoes and sauté with little onion until they leave oil. Blend them to make a thick paste.

Cauliflower fry

Keerai Kootu

Keerai kootu
Keerai (also called as spinach, greens etc) is one of the most healthy foods around. It is a very good source of iron and Vitamin A. Keerai (spinach) is a very popular ingredient and is found in almost all cuisines around the world. Keerai kootu (spinach side dish) is one such item that is popular in south Indian (Tamilian in particular) cuisine. It is a simple and tasty dish that can be eaten as is with rice, or as a side dish to another gravy like sambar etc.
Keerai kootu
When ever I think of Keerai, my childhood comes to my mind. I was not a big fan of spinach (as do most other kids I would say) and would always make my mom to cook another side dish whenever Keerai kootu is made. My hate relationship with spinach continued during my college days as well and there my friends made sure that I had some just because it is healthy (thank you dears!).
Keerai kootu
In general, when you cook spinach, make sure not to cover the pot since they lose color and I believe loses some of its nutrients as well. As I had said earlier, Keerai kootu is very easy to make that it literally takes 15 minutes to prepare. Try this wonderful, healthy, simple, tasty (I am running out of adjectives here!) dish in your home and let me know your comments.

Keerai Kootu
Recipe type: Main
Cuisine: Indian
Prep time: 
Cook time: 
Total time: 
Serves: 3
 
Ingredients
  • Green leaves – a bunch
  • Moong dal – ¼ cup
  • Sambar powder – 1 tbsp
  • Turmeric powder – a pinch
  • Salt as required
  • Grated coconut – 2 tbsp
To temper :
  • Oil – 1 tbsp
  • Mustard seeds – ½ tsp
  • Urad dal – ½ tsp
  • Cumin seeds – 1 tsp
  • Shallots, finely chopped – 2 nos
  • Curry leaves – 5 nos
Instructions
  1. Wash the leaves thoroughly and chop them.
  2. Pressure cook the moong dal for 5 whistles. When done mash the dal and keep it aside.
  3. Grind the coconut to fine paste adding very little water.
  4. Boil enough water (2 cups) in a sauce pan and add sambar powder, turmeric powder,salt and green leaves. Allow them to cook for 5 to 10 minutes.
  5. Add the cooked dal and mix well. Add the ground coconut paste and bring them to boil.
  6. When done, finish it off with tempering. Serve hot with white rice.

 
Keerai kootu

Kollu Kuzhambu

Kollu Kuzhambu
Kollu Kuzhambu is a traditional gravy from my home state in India, Tamilnadu. Kollu or horse gram (in english) is a bean variety and is widely used in the cuisine of south Indian states. In Tamilnadu, kollu is widely used in a variety of chutneys, poriyals, rasam etc. In Siddha medicine, kollu is considered to be a bean with medicinal qualities.
Kollu Kuzhambu
I came across this kollu kuzhambu recipe online and as soon as I saw it, I decided to give it a try. I have never had kollu (in any form) in my life and was curious the moment I saw it. And it was worth the try because kollu kuzhambu is the best gravy variety that I have ever had in my life, hands down! The recipe that I have given here requires some ground work. You need to grow sprouts out of kollu before you use it in your recipe. Back to the medicinal properties of kollu, I recently learnt that kollu has anti-glycemic properties and prevents insulin resistence, hence an apt food for diabetic patients. I also learnt from my MIL that it increases your body heat and hence having it in moderation is advisable – as with any other food items.
Kollu Kuzhambu
Without any further delay, below is the recipe to my most favorite gravy of all time, the one and only Kollu Kuzhambu. Try it in your kitchen and let me know if it had become your favorite dish as well 😉

Kollu Kuzhambu
Recipe type: Main
Cuisine: Indian
Prep time: 
Cook time: 
Total time: 
Serves: 4
 
Ingredients
To roast & grind:
  • Oil – 1 tsp
  • Shallots, whole – 10 nos
  • Cumin seeds – 1 tsp
  • Curry leaves – 5 nos
  • Grated coconut – 1 tbsp
  • Coriander seeds – 1 tbsp
  • Red chilli powder – 1 tbsp
  • Turmeric powder – ½ tsp
Other ingredients:
  • Oil – 1 tbsp
  • Shallots, halved – 5 nos
  • Curry leaves - few
  • Tomato, sliced – 1 no (In india 2 nos)
  • Sprouted horse gram – ½ cup
Instructions
To grow bean sprouts:
  1. Soak the bean with enough water and leave it overnight or atleast 8 hours.
  2. Transfer the sprouts to a muslin or cheese cloth, drain the water completely, and tie the cloth with a knot holding the beans inside.
  3. Let it hang overnight leaving the excess water to drain.
  4. The next day you will notice tiny sprouts grown out of the beans.
  5. Let the sprouts grow more for another day which adds taste to the food.
To make gravy:
  1. Half boil the sprouted horsegram along with little salt (for 1 whistle). Keep it aside.
  2. Heat oil in a pan and add shallots. Sauté well. Add cumin seeds and curry leaves. Give a quick stir. Add grated coconut. Sauté well and add all the above given powders and switch off the flame. Allow them to cool and blend to a fine paste.
  3. Heat oil in a pan and add shallots. Sauté well and add tomato. When they turn mushy, add half cooked sprouted horsegram and give it a stir. When the horsegram is half done, add the ground paste and enough water. Add enough salt. Bring the gravy to boil for 15 minutes. Cook until all the raw smell disappears. Garnish with cilantro.
  4. Goes excellent with omelette.

Kollu Kuzhambu

Sambar Rice

Sambar riceSambar rice is a south indian dish similar to Bisibela bath but has a different method of preparation. As the name suggests, it is a mixture of rice and sambar. Sambar is a mainstay in southern cuisine and is popular all over India as well (especially those north Indian celebrities who always make it a point to say that their favorite dish from Tamilnadu is Sambar ;))
Sambar rice
Sambar riceSambar rice is one of my most recent favorite dishes. I came across this recipe online while searching, as usual, for a new recipe to try. This particular one caught my attention because of the way it was prepared. In Bisibela bath, you put all vegetables, along with dal and rice and cook them together. But here in Sambar rice, you prepare the rice and sambar separately and mix them together later (I would suggest doing this right before serving).
Sambar rice
Sambar riceSambar rice always reminds me of my college days when it was served during our industrial visits (those days, huh :)) One good thing about sambar rice is that you don’t need a side dish. It tastes just fine with only chips or pickle. Enjoy this favorite dish by cooking it in your kitchen and as always post your comments

Sambar Rice
Prep time: 
Cook time: 
Total time: 
Serves: 3
 
Ingredients
  • Rice – 1 cup
  • Toor dal – ½ cup
  • Tamarind – marble size
  • Drumstick – 1 no
  • Other vegetables , chopped – ½ cup (carrot, potato, brinjal)
  • Shallots – 10 nos
  • Tomato, chopped – 1 no
  • Sambar powder (sakthi) – ½ tbsp
  • Homemade sambar powder – ½ tsp
  • Turmeric powder – ⅛ tsp
  • Asafetida – ¼ tsp
  • Curry leaves – a sprig
  • Cilantro, chopped – 2 tbsp
To roast & grind :
  • Red chillies – 3 nos
  • Channa dal – 1 tbsp
  • Coriander seeds – 1 & ½ tsp
  • Fenugreek seeds – ¼ tsp
  • Grated coconut – 2 tbsp
To temper:
  • Oil – 1 tbsp
  • Mustard seeds – ½ tsp
  • Cumin seeds – 1 tsp
  • Asafetida – ¼ tsp
Instructions
  1. Cook the rice. Soak tamarind in water and extract the juice.
  2. Soak toor dal in water for an hour and pressure cook for 5 whistles. When done mash it and keep aside.
  3. Heat few drops of oil in a pan and roast the above given ingredients except coconut. Roast until they turn golden brown. Roast coconut separately. Allow them to cool and blend all together to a fine powder.
  4. Heat a pan with a tbsp of oil and temper the given ingredients. Add shallots and curry leaves. Sauté until onions turn translucent.
  5. Add tomatoes and fry till they become soft.
  6. Add the tamarind extract and bring it to boil.
  7. Now add turmeric powder, sambar powders, asafetida and all the vegetables.
  8. When the vegetables are cooked. Sprinkle all the ground sambar powder on top slowly, stirring constantly. Switch off the flame- Do not add sambar powder as aheap as it might form lumps. Sprinkle little by little.
  9. Add the sambar to the cooked rice along with dal and mix well (without breaking the veggies).
  10. Add 2 tbsp of ghee and garnish with cilantro.
  11. Enjoy the hot sambar rice with fryums and pickle! 


Sambar rice

TIFFIN SAMBAR

Tiffin sambar
Tiffin sambar!? I know, right! What is Tiffin sambar? Back home, in restaurants, the sambar served for tiffin items (like idli, dosa etc or to keep it simple, anything that is not rice :)) has a different consistency and taste than that is served with rice during lunches (unless the people in that restaurant is really lazy and serve the same for both tiffin and rice ;)). This variety that is served with tiffin is called as the Tiffin sambar (‘Tiffin saptaacha’ – Had your tiffin?, Tiffin saapidalama – Shall we have tiffin?, are common talk in my native, referring to either breakfast or dinner)
Tiffin Sambar
There are many different varieties of sambar like, Murungai sambar, Kathirikka sambar, Araithuvitta sambar etc and Tiffin sambar is one among them. One advantage with sambar varieties in general is that you can add any vegetable that you want to to the recipe. And in Tiffin sambar, potatoes or drumsticks are added. In my home, my mom usually prepares it for breakfast and calls it as avasara (quick) sambar since it can be prepared in a short while. I still remember my mom stacking up thin dosas with tiffin sambar poured in between for my lunch while in school. It was very popular among my friends.
Tiffin Sambar
Tiffin sambar is one of the recent recipes that I have started to cook and is fast getting to be an ‘often cooked’ recipe. Dosa with Tiffin sambar or Idlis soaked in Tiffin sambar, also called as Sambar idli are some of the dishes that you must have from Tamilian cuisine. So is it going to be Tiffin sambar for breakfast tomorrow in your home? What say? 🙂

TIFFIN SAMBAR
Recipe type: Main
Cuisine: Indian
Prep time: 
Cook time: 
Total time: 
Serves: 4
 
Ingredients
  • Toor dal – ¼ cup
  • Vegetable (potato,drumstick,carrot) - 1 no
  • Shallots – 10 nos
  • Green chilli – 2 nos
  • Tomato – 1 no
  • Tamarind – small gooseberry size
  • Turmeric powder – ¼ tsp
  • Jaggery – a small piece
  • Asafoetida – a generous pinch
  • Curry leaves – few
  • Cilantro – for garnishing
  • Ghee – 1 tsp
  • Salt as required
To roast and grind:
  • Channa dal – 1 tbsp
  • Coriander seeds – ¾ tbsp
  • Red chillies – 3 nos
  • Fenugreek seeds – ½ tsp
  • Cumin seeds – ½ tsp
To temper:
  • Oil – 2 tsp
  • Mustard seeds – ½ tsp
  • Jeera – 1 tsp
  • Curry leaves – a sprig
Instructions
  1. Soak tamarind in water for half an hour and extract the juice. Add two cups of water to it and keep it aside.
  2. Soak toor dal for an hour. Wash the potato or drumstick and cut to desired pieces. Pressure cook the dal with a cup of water, turmeric powder, asaofetida, few drops of sesame oil and potato or drumstick for 4 whistles. When done, allow it to cool, peel off the skin and set aside. Mash the dal with the help of a ladle and set aside.
  3. Now heat a kadai or a pan with few drops of oil and roast the ingredients altogether given above, stirring constantly. When they turn light brown, add cumin seeds at last and give it a stir. Do not over roast it. Let it cool and blend to a powder.
  4. Heat oil in a sauce pan and temper the above ingredients. Add a pinch of asaofetida snd shallots. Sauté until the onion turns translucent. Add green chillies and tomato and sauté for a couple of minutes.
  5. Add the tamarind juice and bring it to boil. Add few curry leaves, cilantro, salt, turmeric powder and asafoetida. Again bring it to boil.
  6. Add the potato and cook for another couple of minutes.
  7. Sprinkle the sambar powder on top stirring constantly – Do not add sambar powder as a whole as it might form lumps.
  8. Add the cooked dal and stir well. Now you can add water according to your desired consistency. Add jaggery and garnish with curry leaves and cilantro. Switch off the flame. Enjoy it with hot idlis, dosas and ven pongal! 

Tiffin Sambar