Cauliflower fry

Cauliflower fry
Cauliflower is one of those vegetables that is not often found in South Indian palate (especially Tamilnadu). It is a low fat, low in carbohydrates but rich in fiber vegetable. Cauliflower fry is one of the many varieties prepared using this vegetable. I came across this recipe when searching for a supplement to our diet (and yes we start a diet system many times a year, but sticking to one is a different story  🙂 )
Cauliflower fry
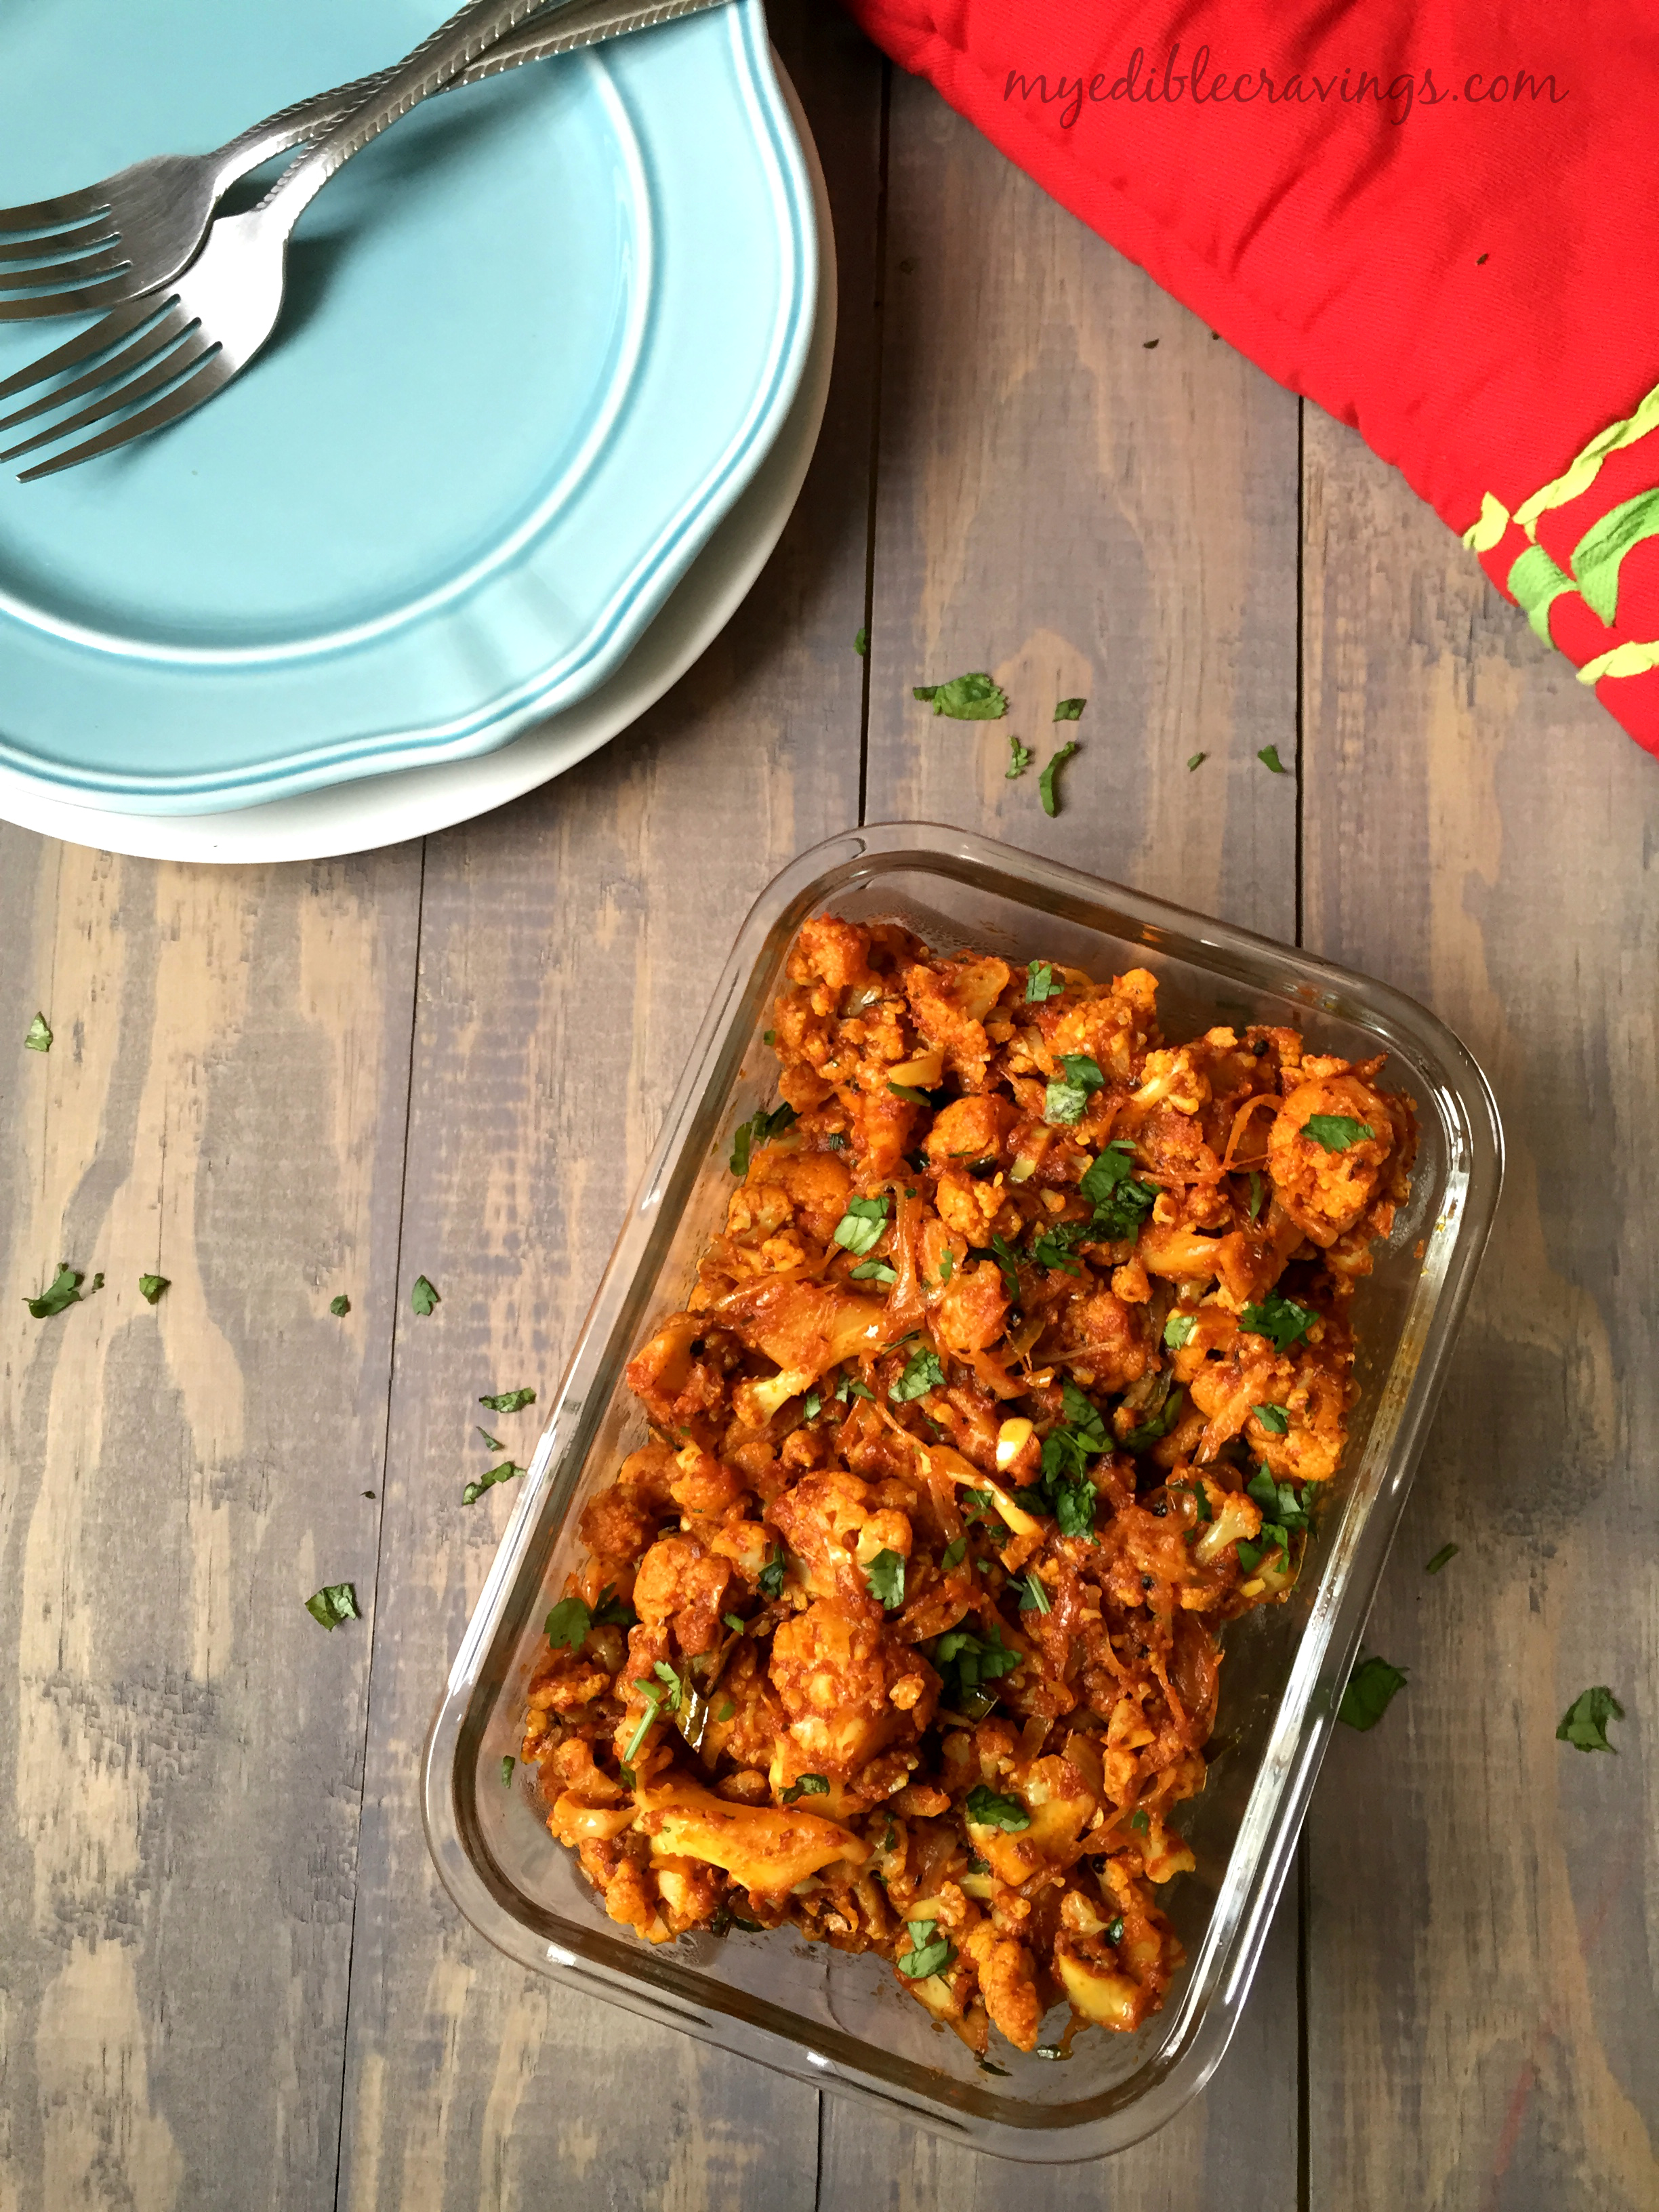
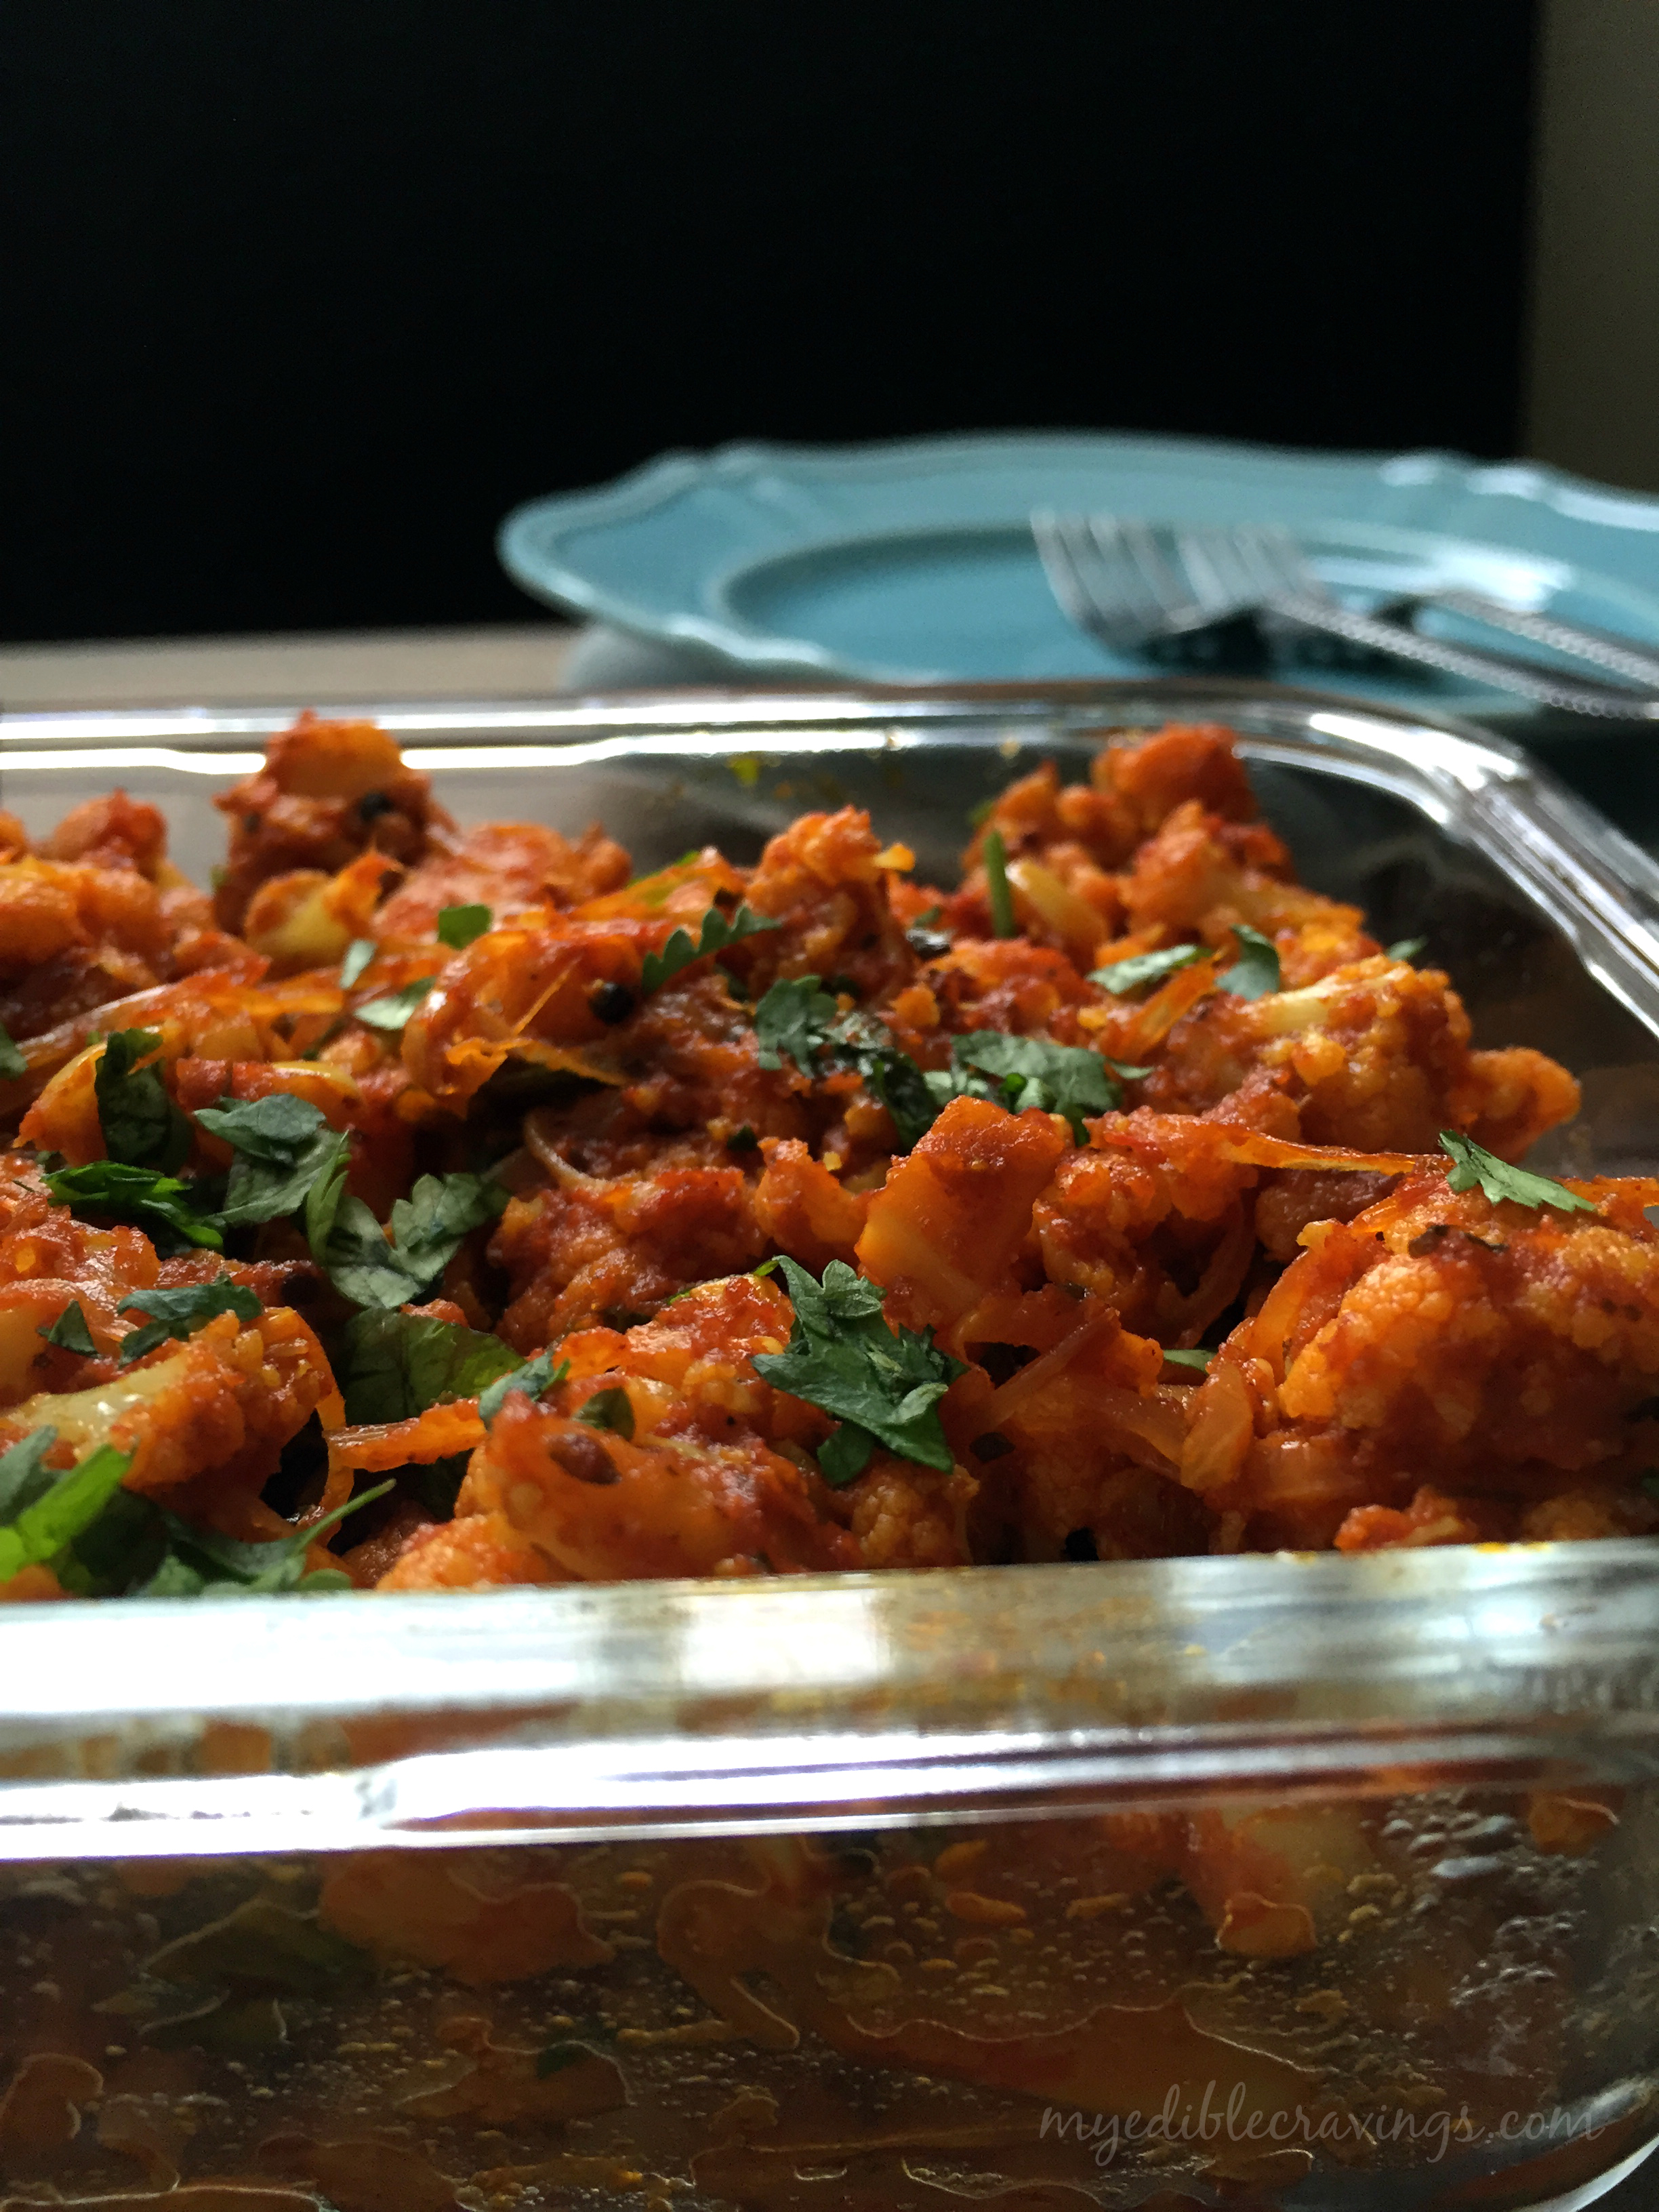
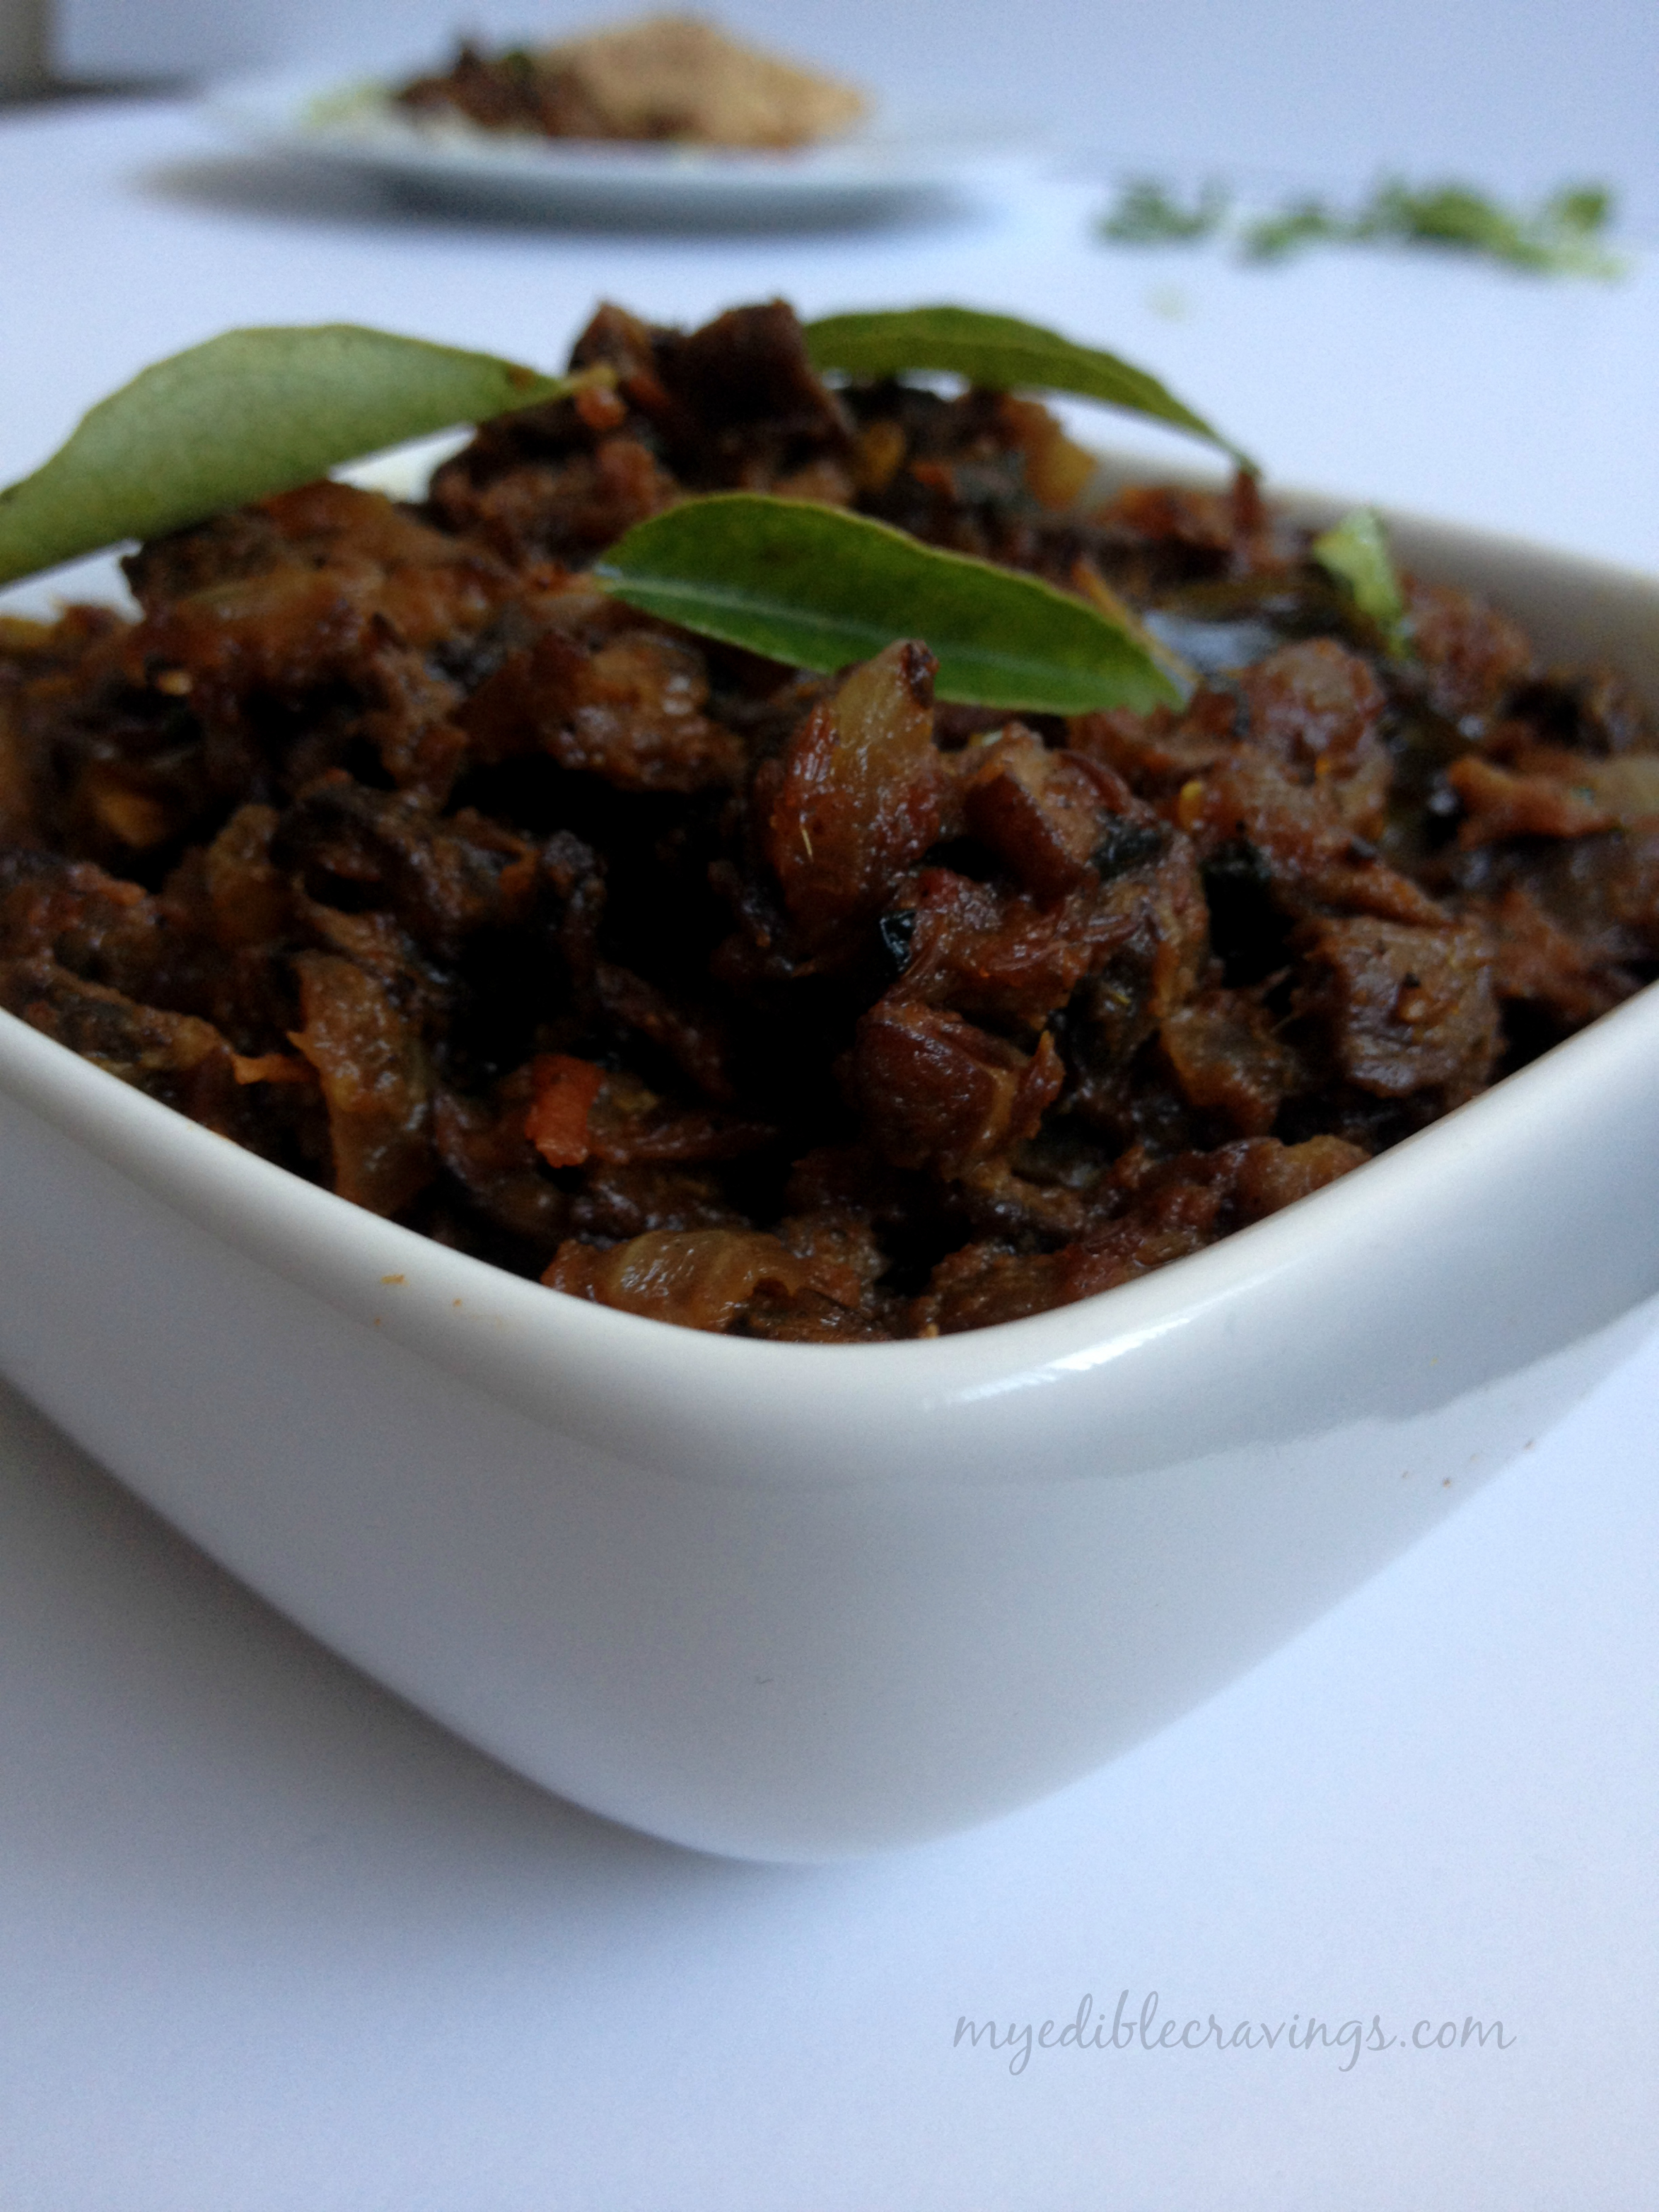
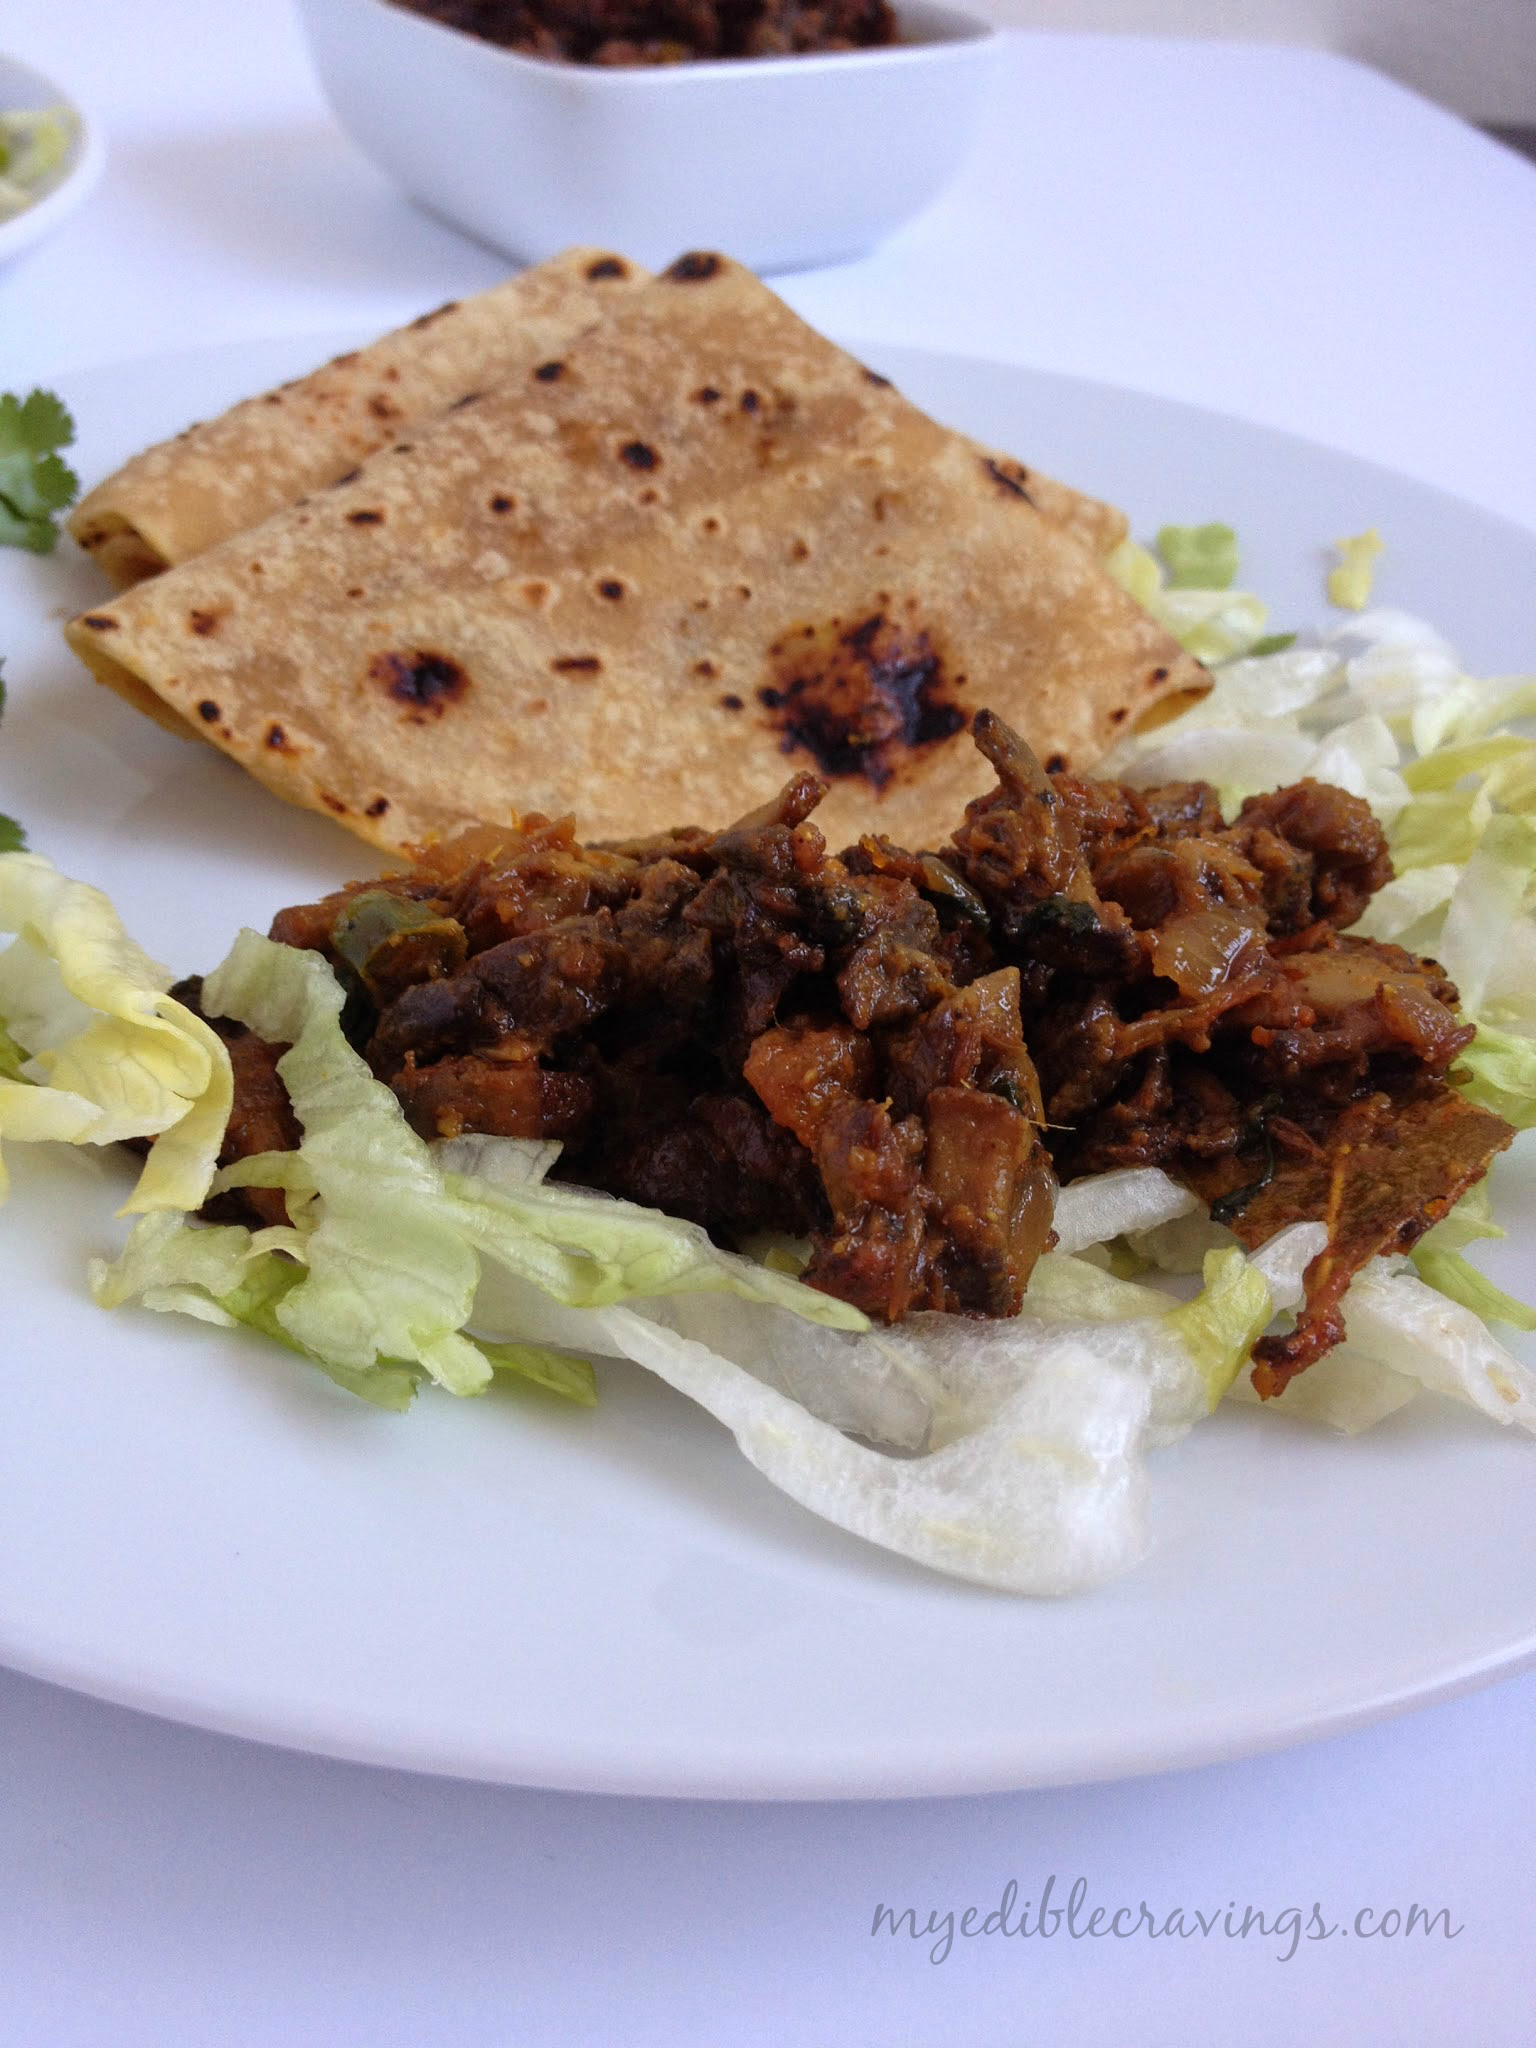
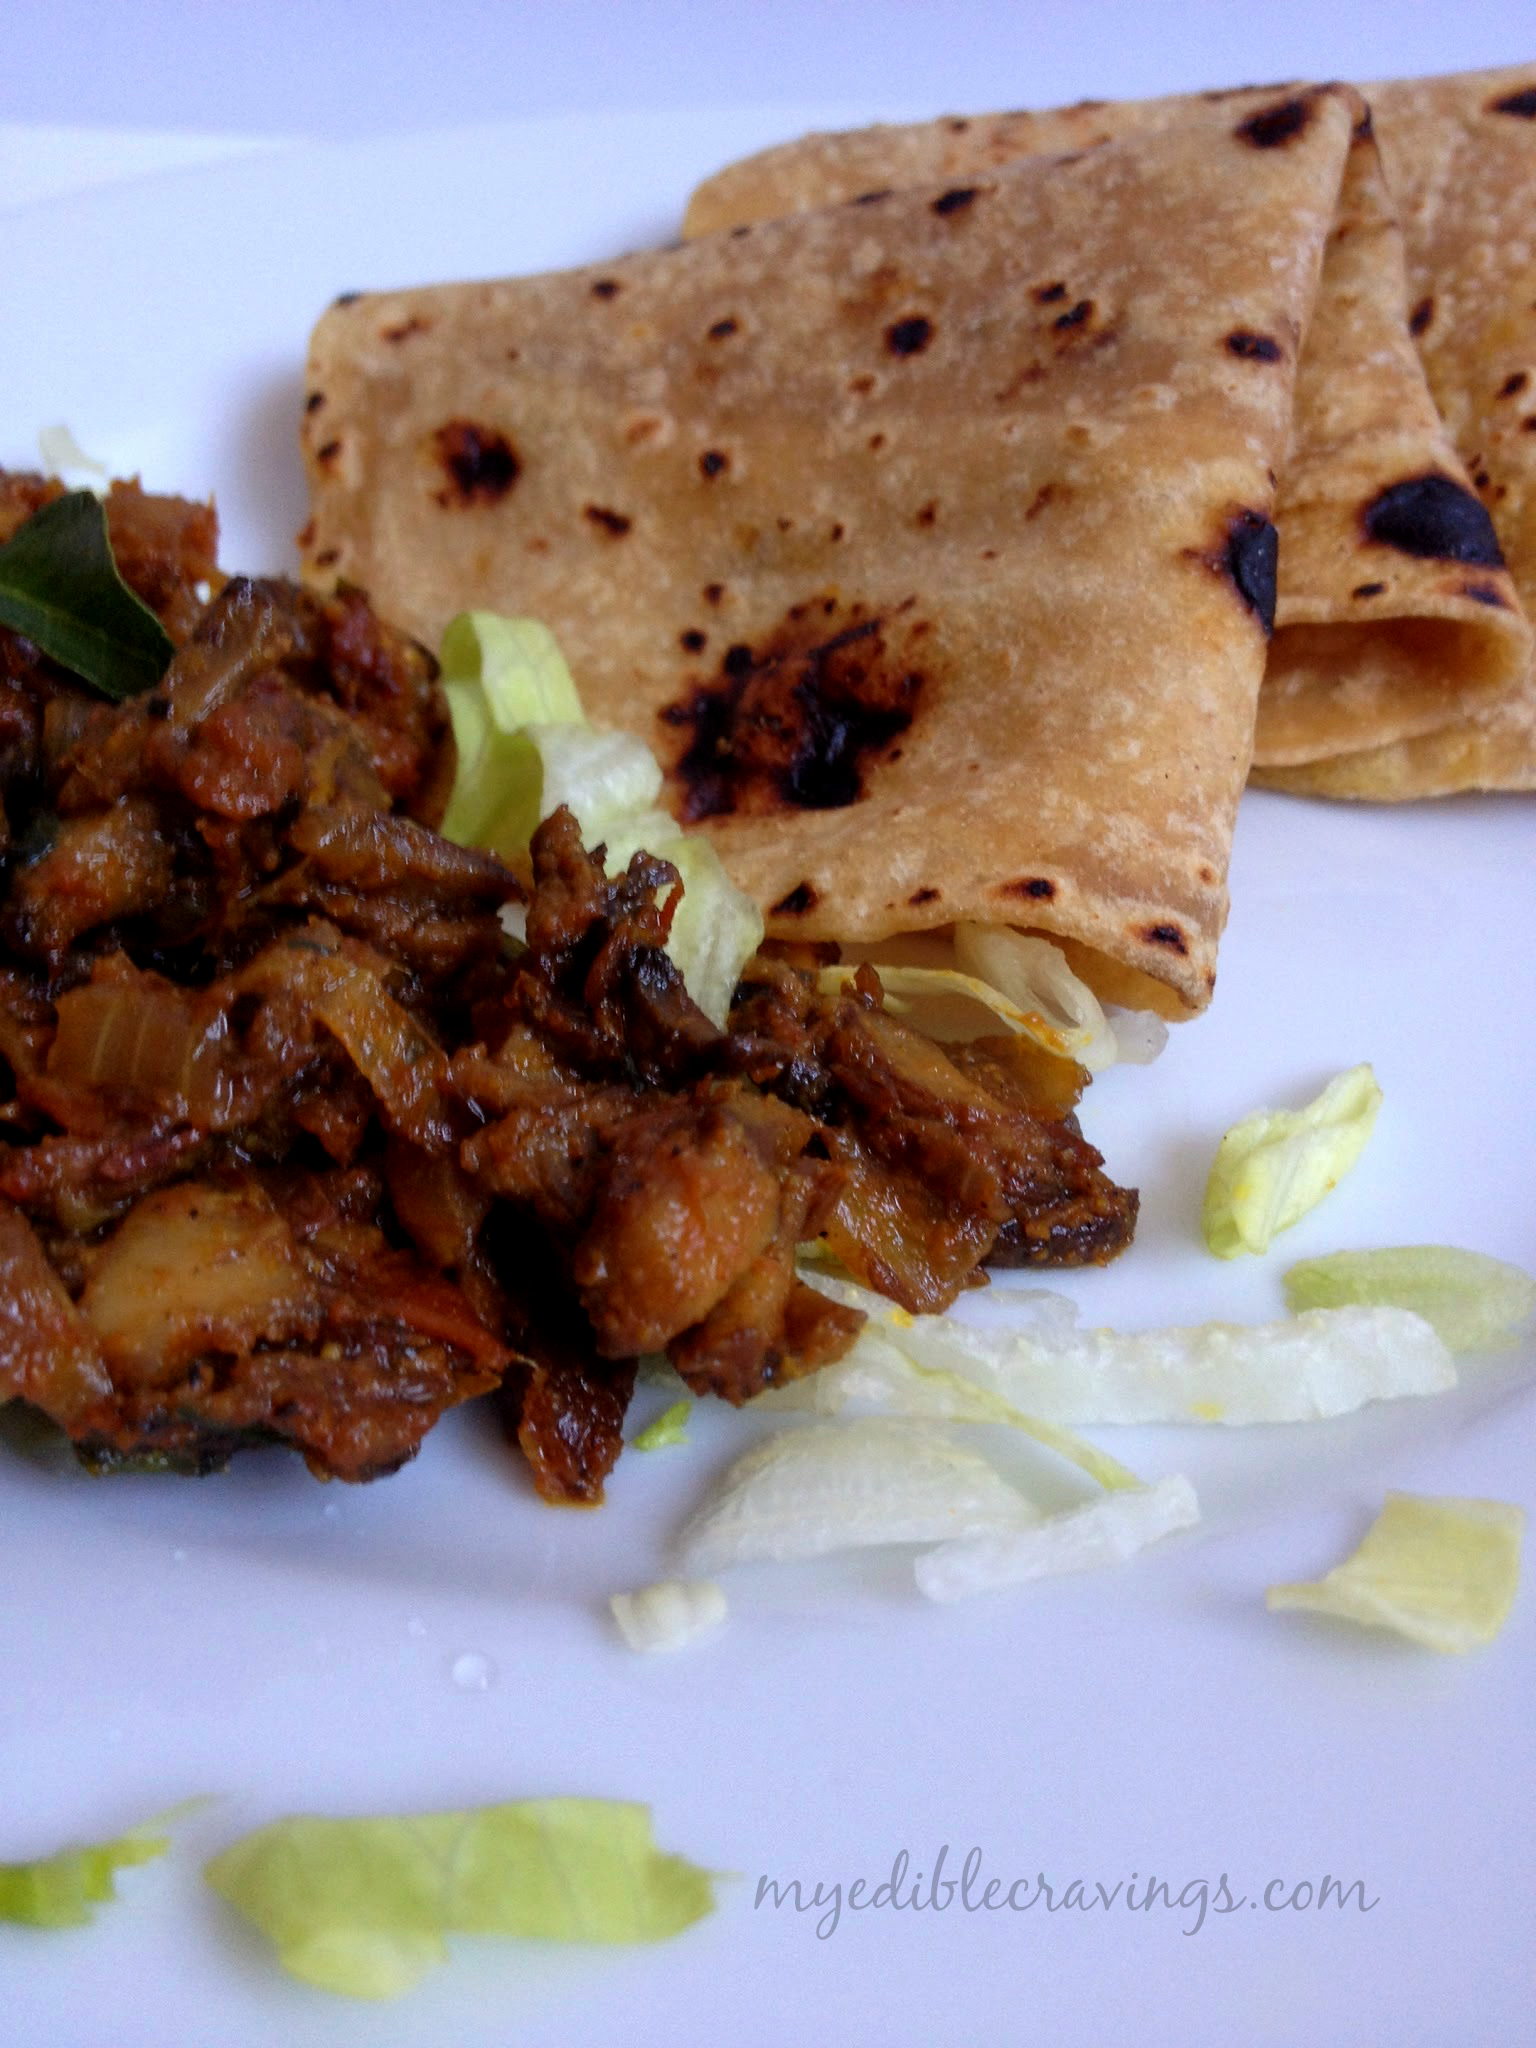
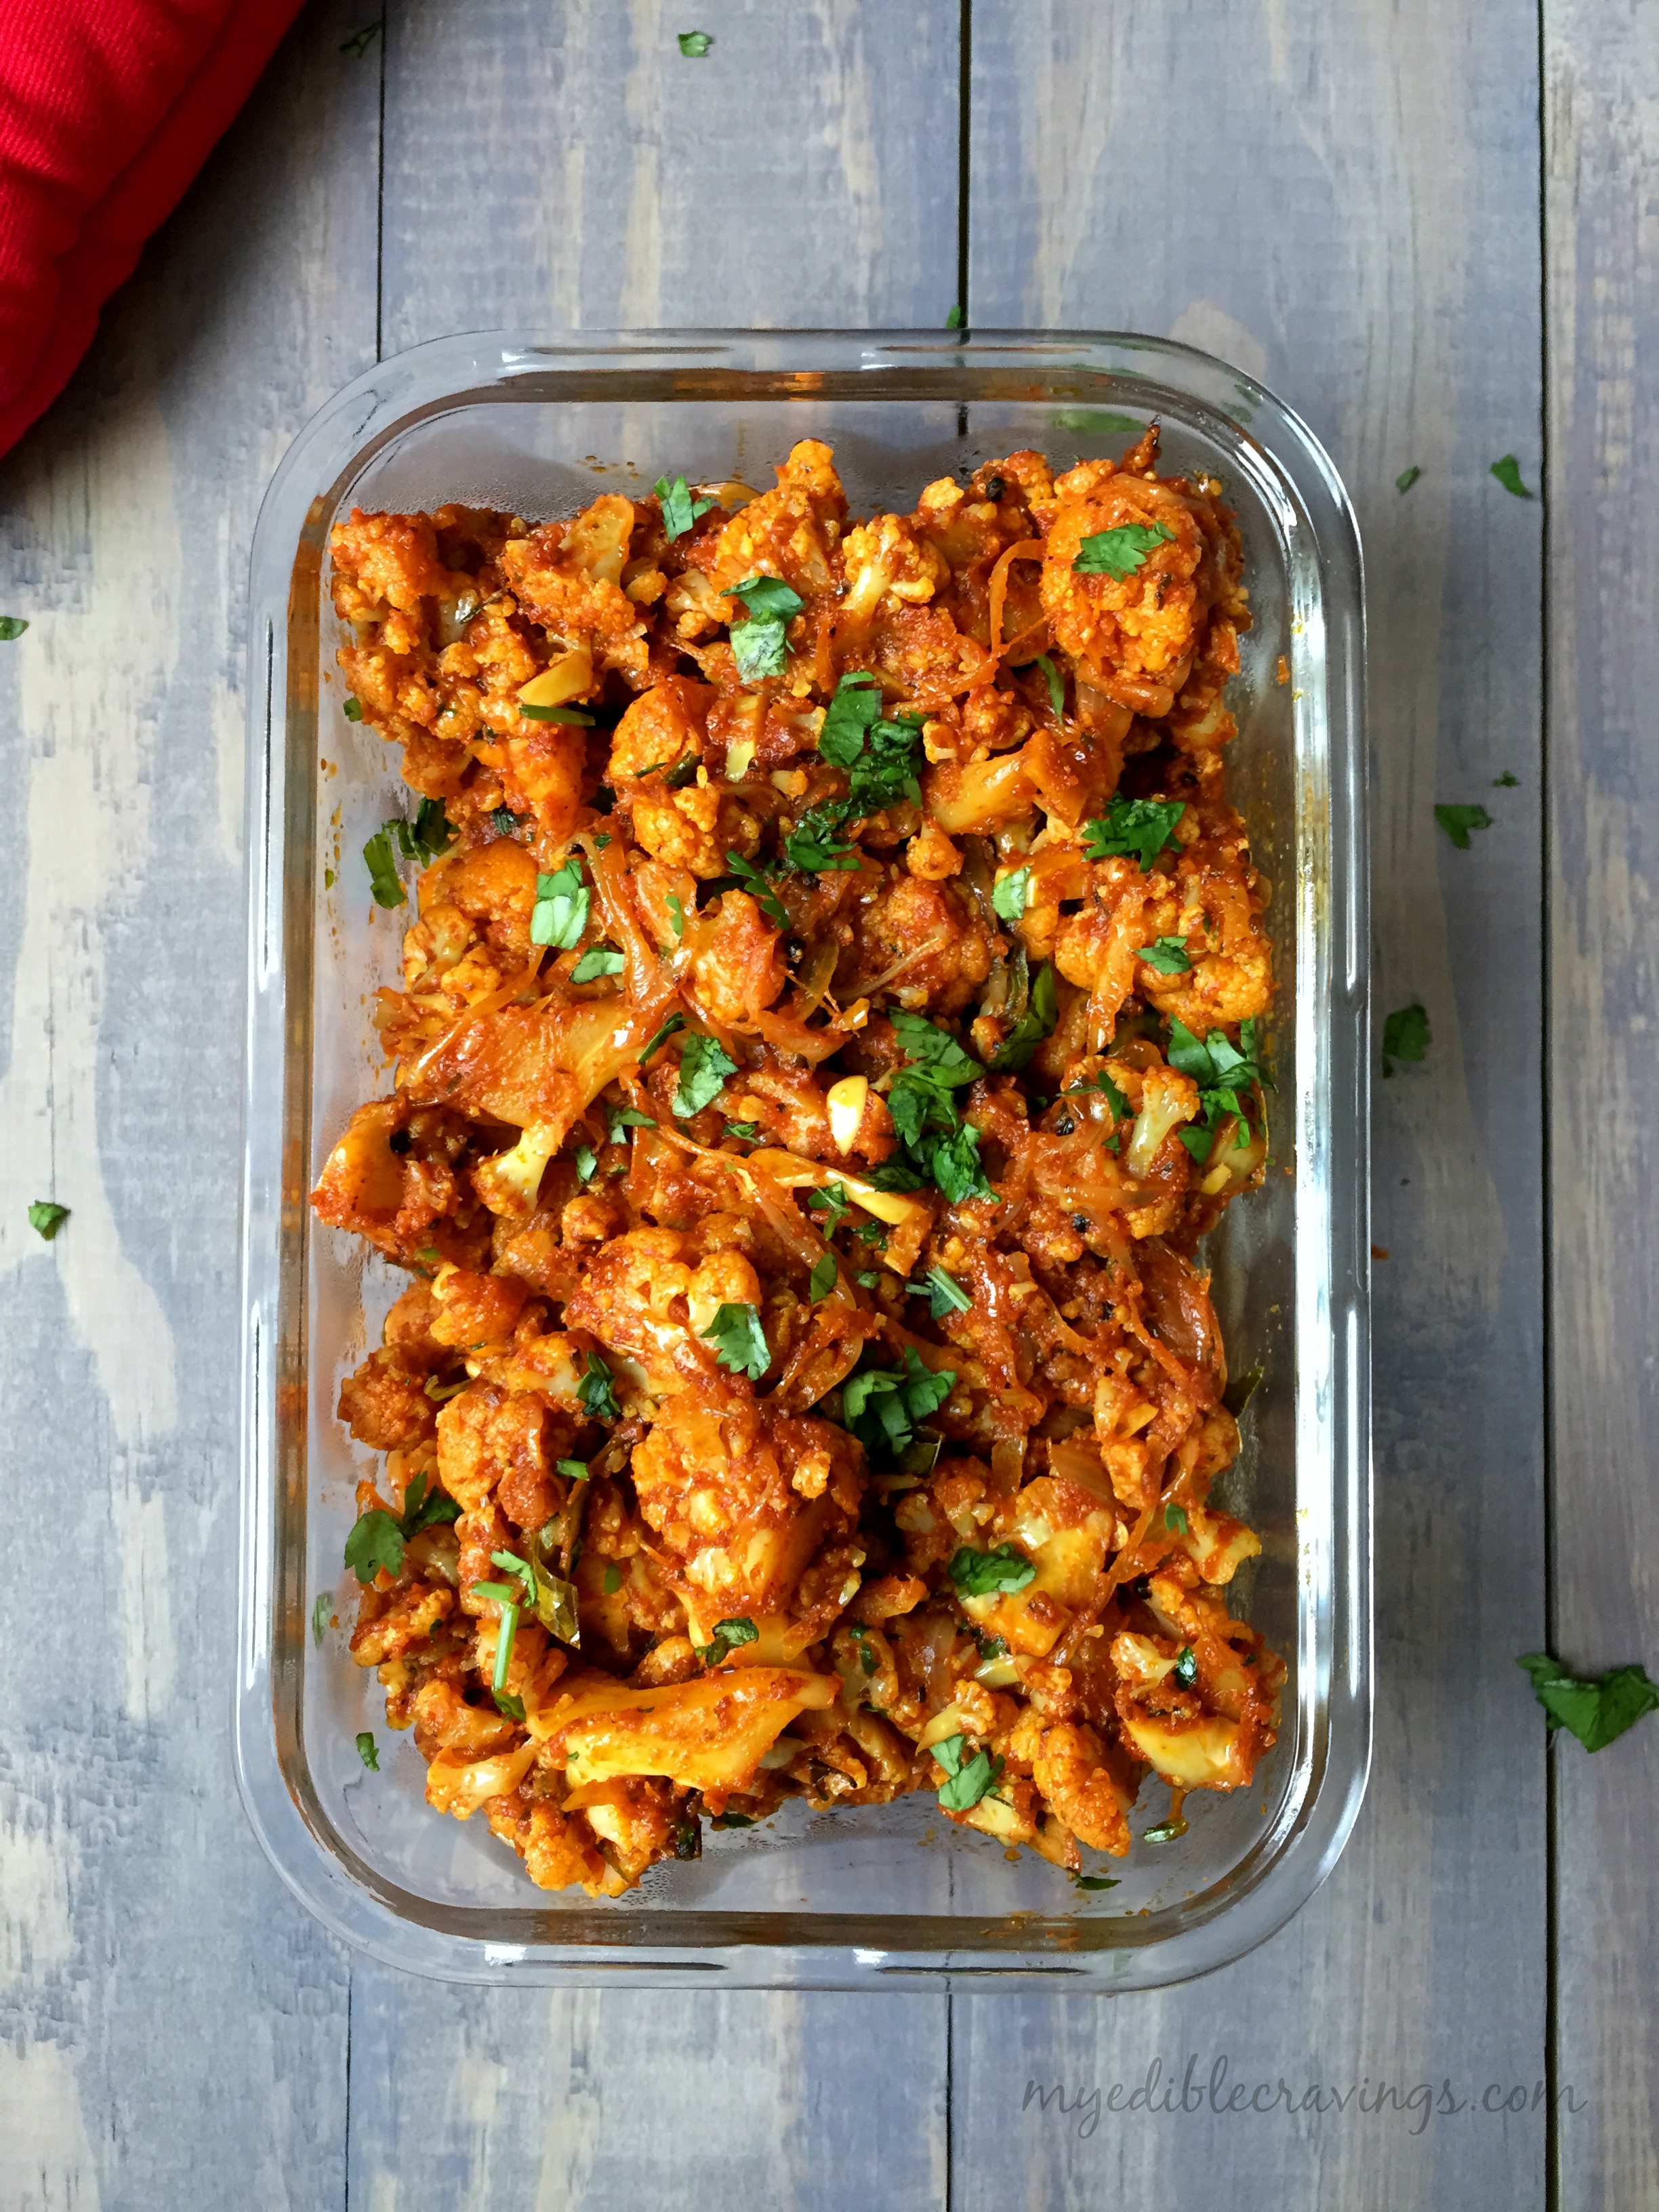
The main specialty about this Cauliflower fry is the way it is cooked. Though it is called a fry, I actually use a conventional oven to cook. It is a very tasty dish, trust me. When you are uncertain about what side dish to prepare for Chappati or Naan etc remember this wonderful Cauliflower fry.
Cauliflower fry
For those who don’t have an oven, you can cook this dish using a stove as well. Try this simple, delicious and healthy dish in your kitchen and tell me your experience. 🙂

Cauliflower fry
Recipe type: Main
Cuisine: Indian
Prep time: 
Cook time: 
Total time: 
Serves: 4
 
Ingredients
To bake:
  • Cauliflower florets – 2 to 3 cups
  • Olive oil – 5 tbsp
  • Tomato paste or puree, thick – 4 tbsp (I used hunt’s)
  • Garlic cloves, minced – 1 tbsp
  • Kashmiri red chilli powder – 1 tbsp
  • Black pepper powder – 1 tsp
  • Coriander powder – 2 tbsp
  • Turmeric powder – ½ tsp
  • Garam masala - ½ tsp
  • Salt – ½ tsp
For the seasoning:
  • Oil – 2 tbsp
  • Mustard seeds – ½ tsp
  • Curry leaves – a sprig
  • Green chilli, slits – 4 nos
  • Ginger, julienned – 1 tbsp
  • Onion, big, slits – 1 no
  • Kashmiri red chilli powder – ½ tbsp
  • Red chilli powder – ½ tsp (optional)
  • Coriander powder – 1 tbsp
  • Dry fenugreek leaves or kasthoori methi, crushed – 1 tbsp
  • Spring onions or scallions – 1 to 2 tbsp
Instructions
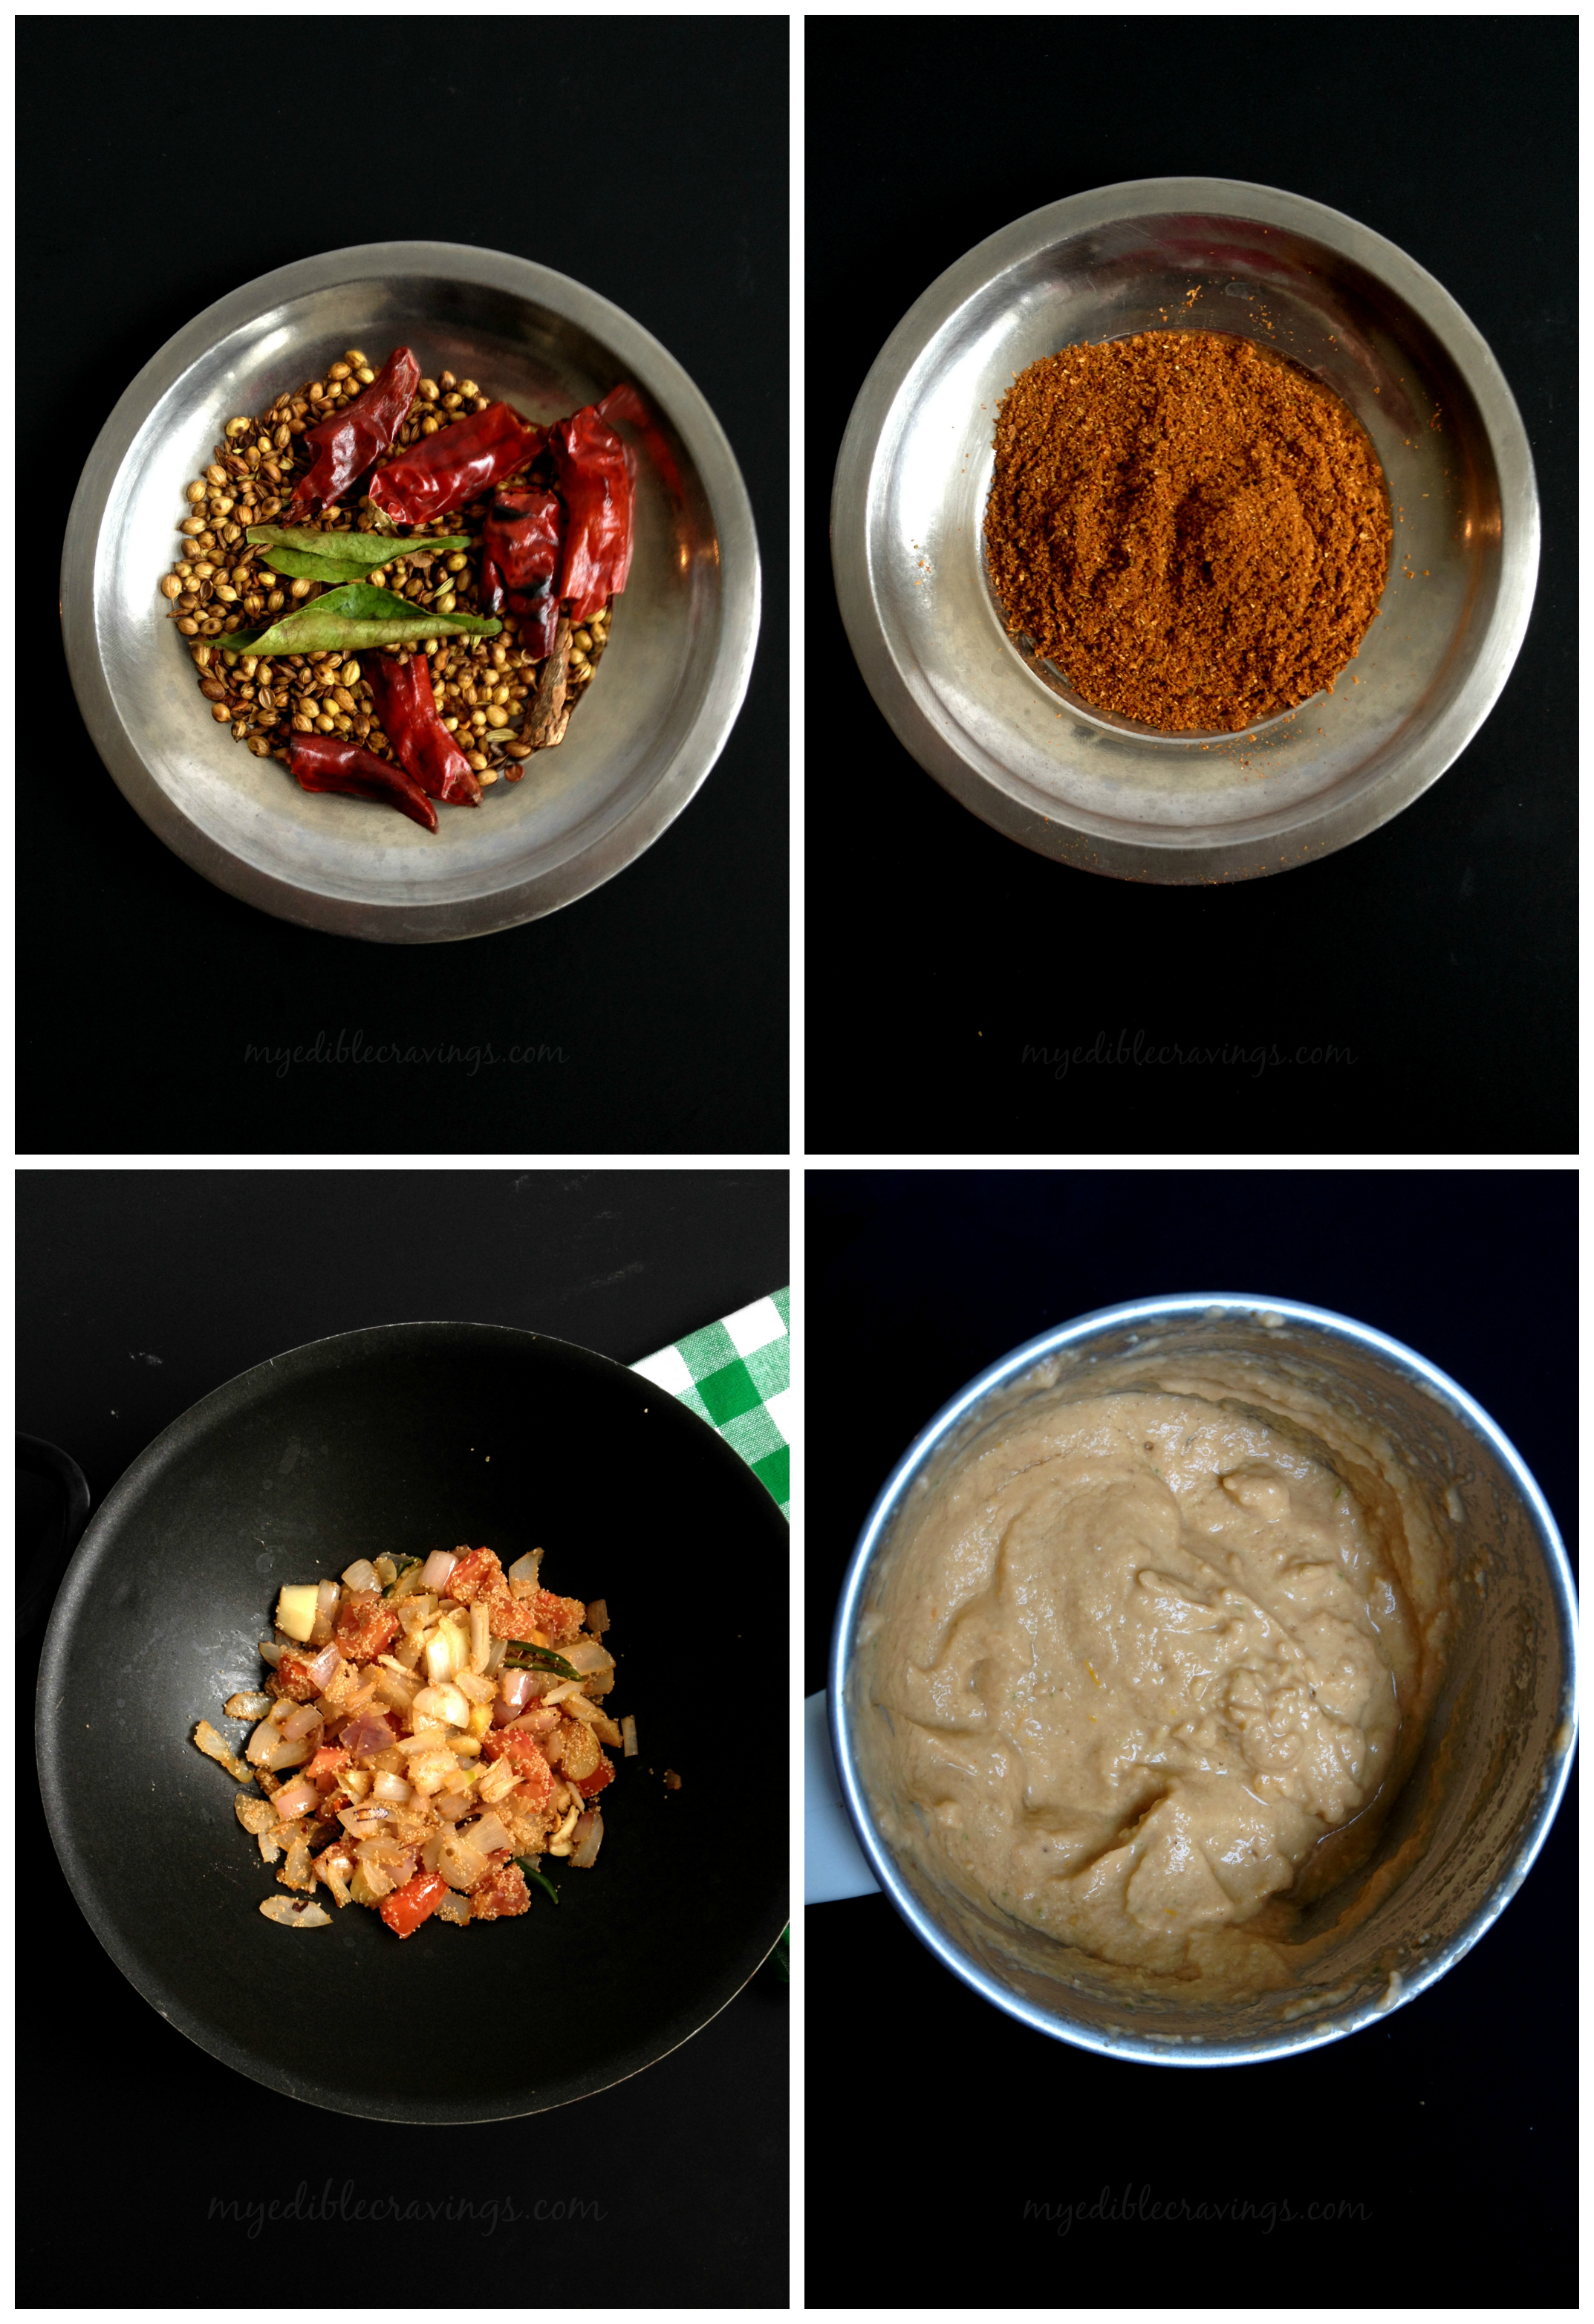
  1. Preheat the oven to 400 degrees F and mix all the above ingredients in a large aluminium pan given under 'To bake'. Place it inside the oven and cook for 30 to 45 minutes until the cauliflowers are crunchy (stirring in between). For those who do not have conventional oven, just fry it in a pan on the stove until they are nicely done.
  2. Meanwhile heat oil in a flat pan and season with mustard, urad dal, curry leaves and green chillies. When they start to splutter add onions and sauté until they turn translucent.
  3. Add julienned ginger.
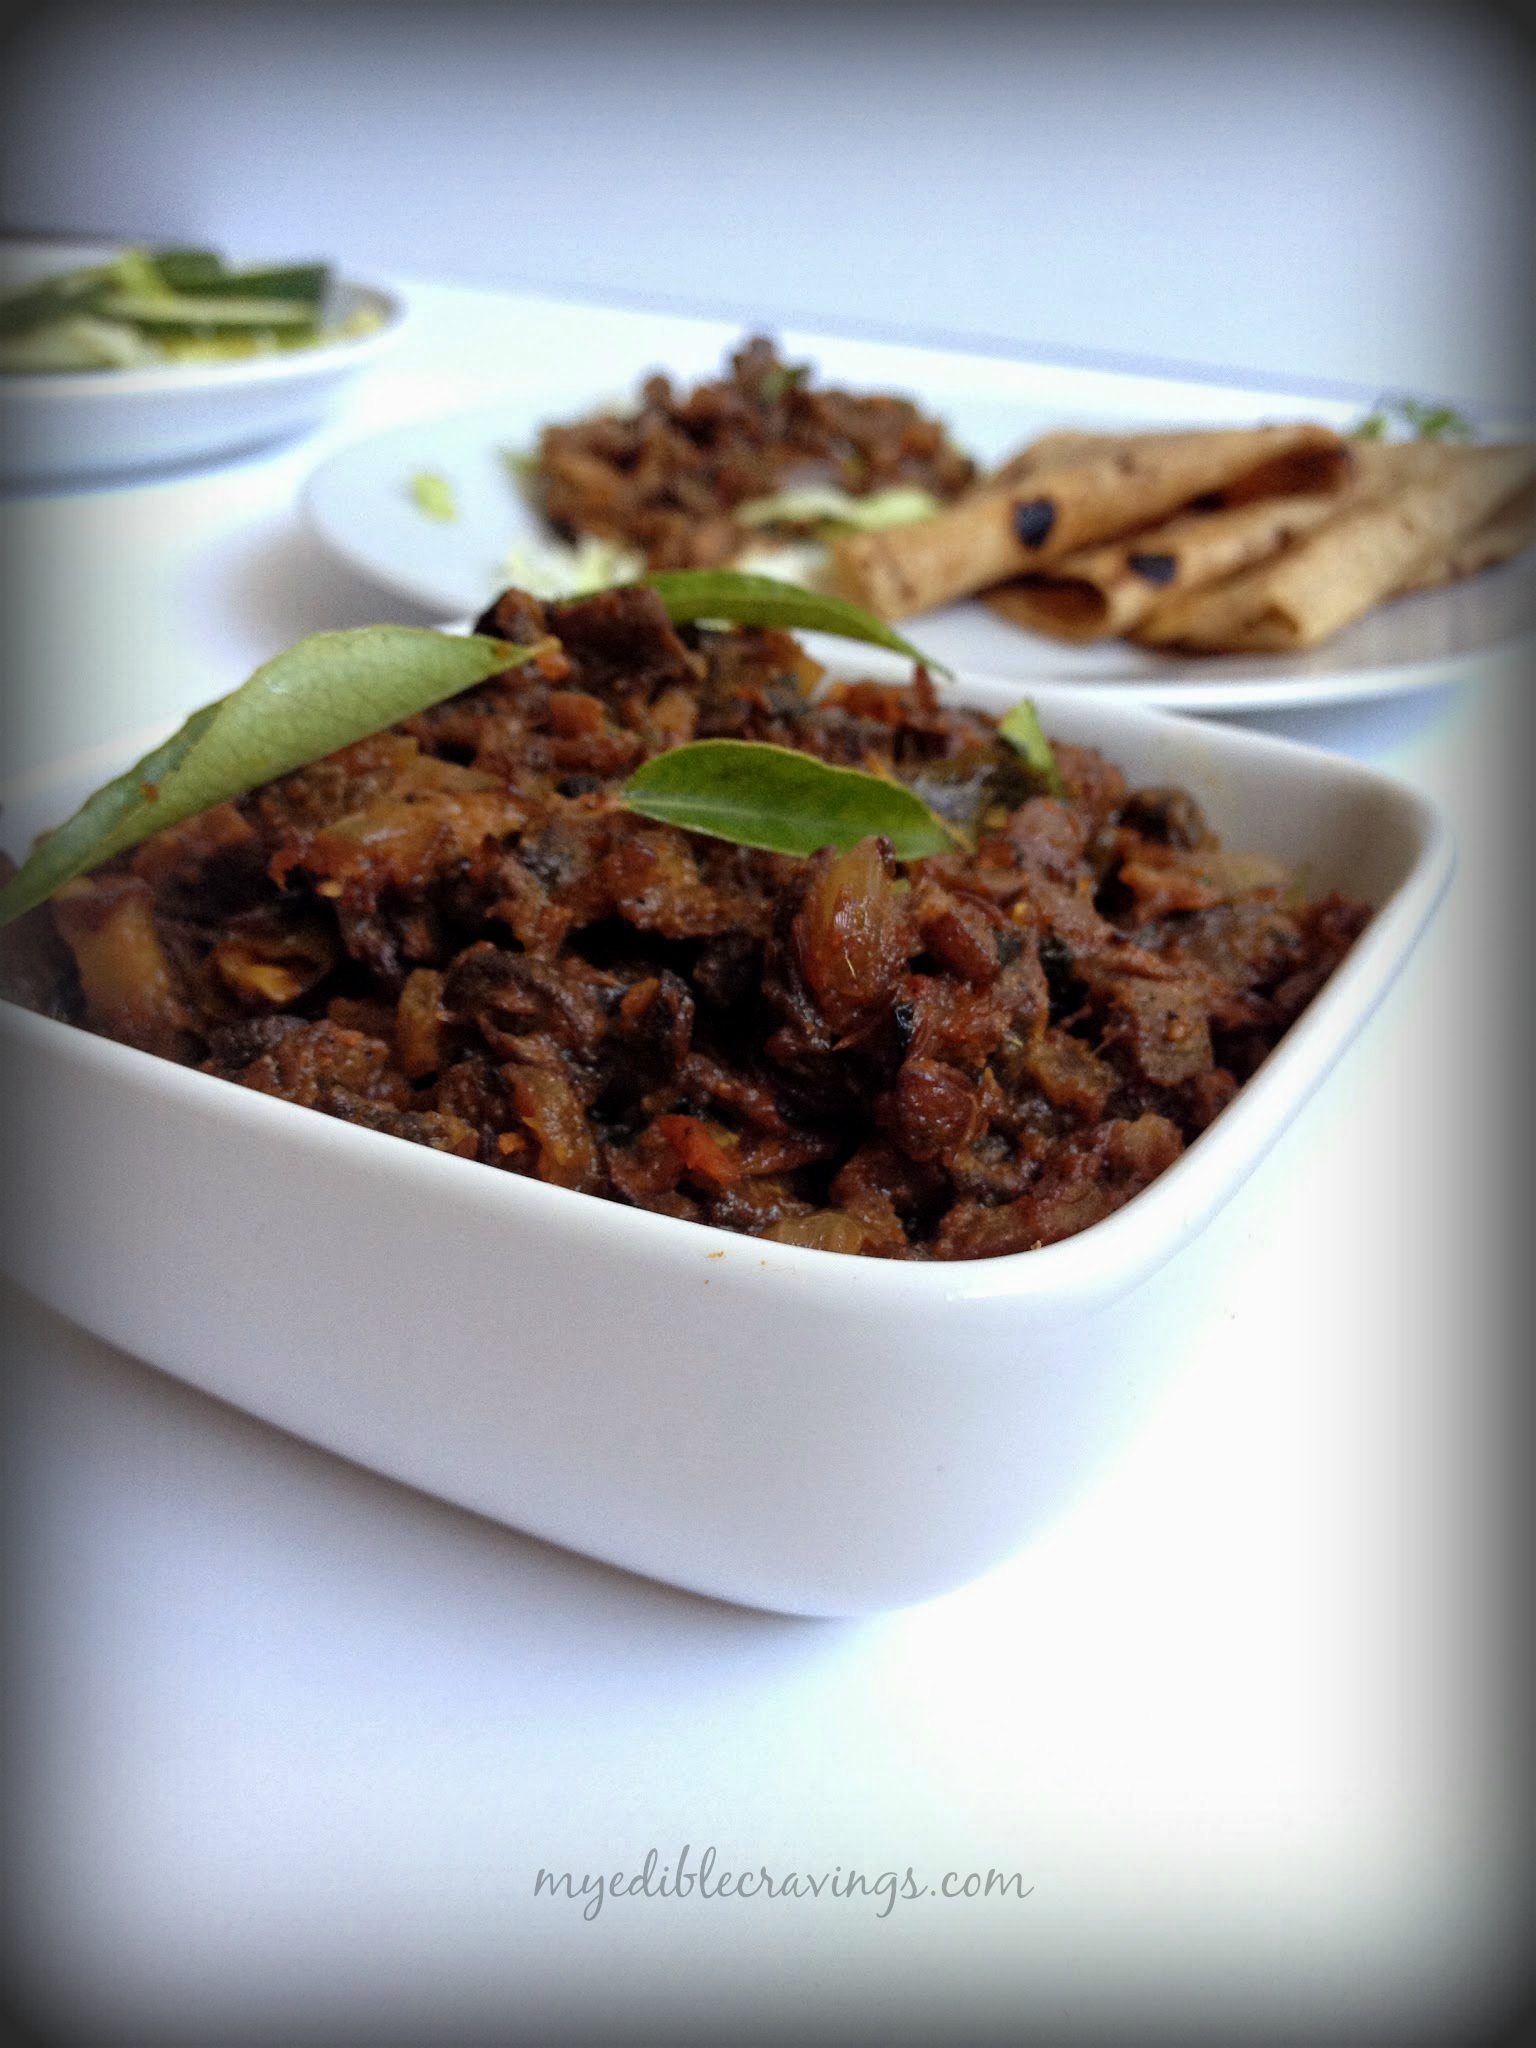
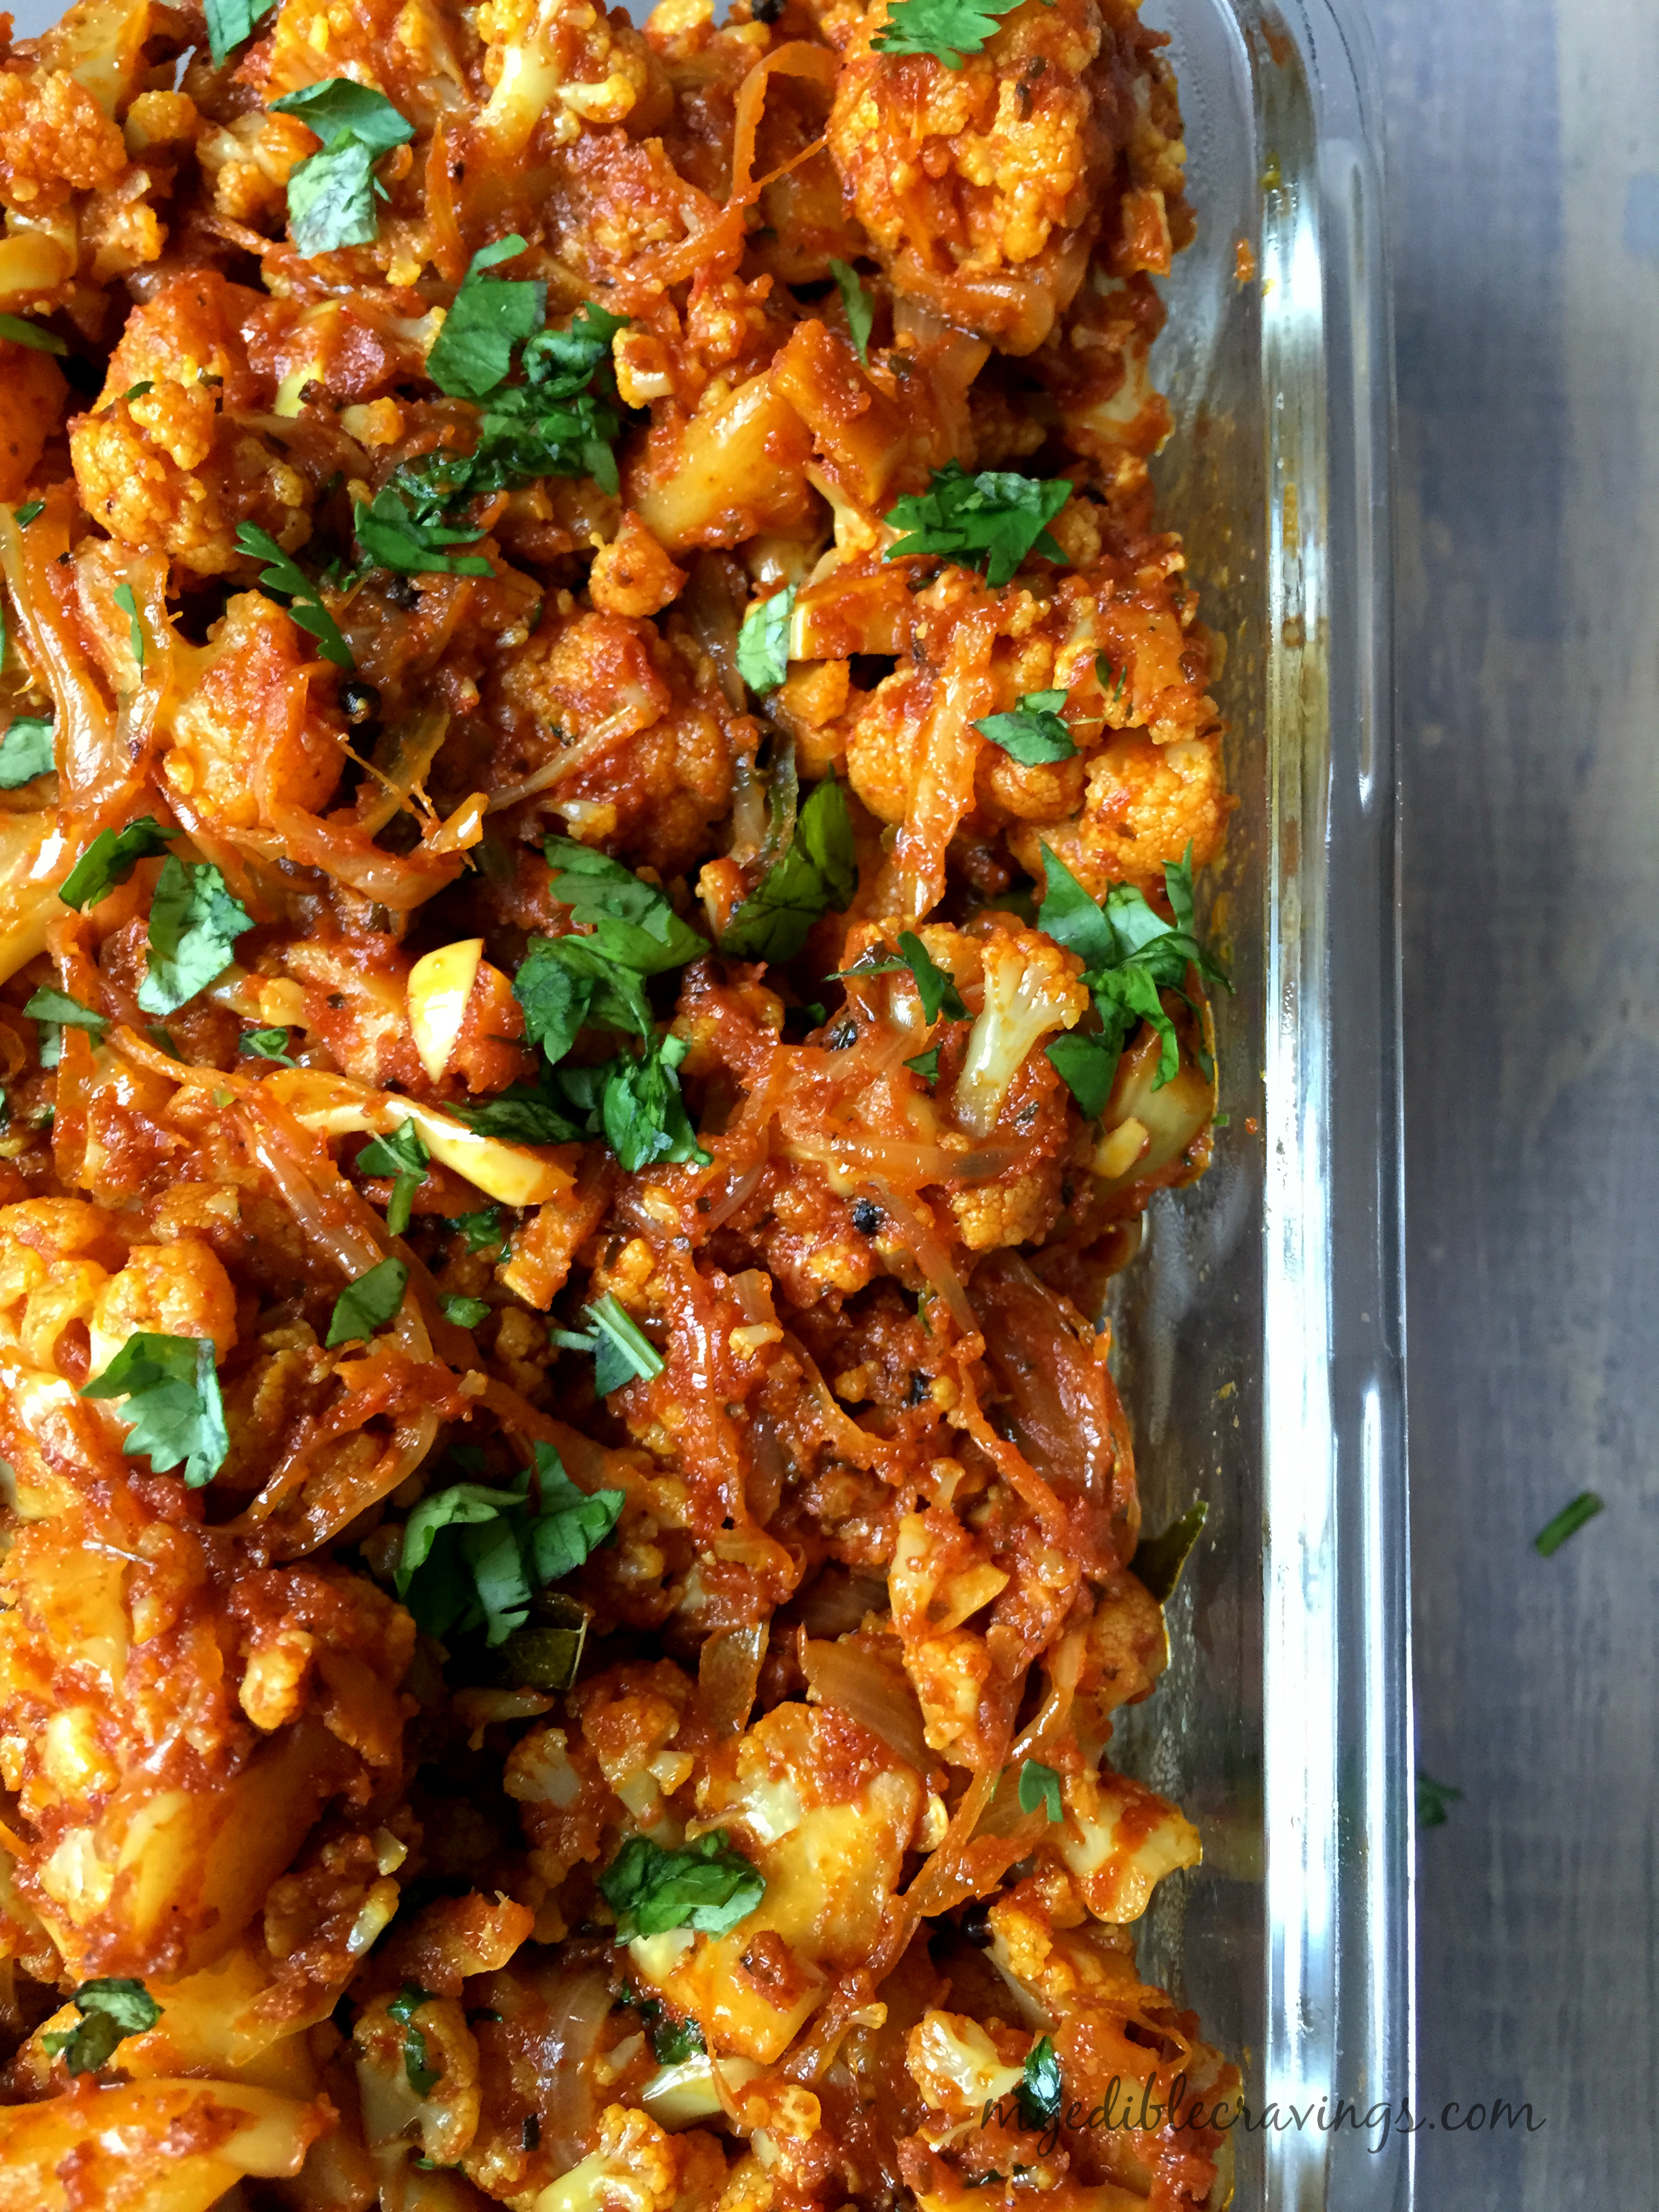
  4. Add all the powders (coriander, chilli, salt, turmeric) and kasthoori methi. Add oven baked or stove cooked cauliflower. Sauté well and cook for 10 minutes.
  5. Garnish with scallions and cilantro.
Notes
!To make tomato puree at home:
Roughly chop the tomatoes and sauté with little onion until they leave oil. Blend them to make a thick paste.

Cauliflower fry

Keerai Kootu

Keerai kootu
Keerai (also called as spinach, greens etc) is one of the most healthy foods around. It is a very good source of iron and Vitamin A. Keerai (spinach) is a very popular ingredient and is found in almost all cuisines around the world. Keerai kootu (spinach side dish) is one such item that is popular in south Indian (Tamilian in particular) cuisine. It is a simple and tasty dish that can be eaten as is with rice, or as a side dish to another gravy like sambar etc.
Keerai kootu
When ever I think of Keerai, my childhood comes to my mind. I was not a big fan of spinach (as do most other kids I would say) and would always make my mom to cook another side dish whenever Keerai kootu is made. My hate relationship with spinach continued during my college days as well and there my friends made sure that I had some just because it is healthy (thank you dears!).
Keerai kootu
In general, when you cook spinach, make sure not to cover the pot since they lose color and I believe loses some of its nutrients as well. As I had said earlier, Keerai kootu is very easy to make that it literally takes 15 minutes to prepare. Try this wonderful, healthy, simple, tasty (I am running out of adjectives here!) dish in your home and let me know your comments.

Keerai Kootu
Recipe type: Main
Cuisine: Indian
Prep time: 
Cook time: 
Total time: 
Serves: 3
 
Ingredients
  • Green leaves – a bunch
  • Moong dal – ¼ cup
  • Sambar powder – 1 tbsp
  • Turmeric powder – a pinch
  • Salt as required
  • Grated coconut – 2 tbsp
To temper :
  • Oil – 1 tbsp
  • Mustard seeds – ½ tsp
  • Urad dal – ½ tsp
  • Cumin seeds – 1 tsp
  • Shallots, finely chopped – 2 nos
  • Curry leaves – 5 nos
Instructions
  1. Wash the leaves thoroughly and chop them.
  2. Pressure cook the moong dal for 5 whistles. When done mash the dal and keep it aside.
  3. Grind the coconut to fine paste adding very little water.
  4. Boil enough water (2 cups) in a sauce pan and add sambar powder, turmeric powder,salt and green leaves. Allow them to cook for 5 to 10 minutes.
  5. Add the cooked dal and mix well. Add the ground coconut paste and bring them to boil.
  6. When done, finish it off with tempering. Serve hot with white rice.

 
Keerai kootu

Kollu Kuzhambu

Kollu Kuzhambu
Kollu Kuzhambu is a traditional gravy from my home state in India, Tamilnadu. Kollu or horse gram (in english) is a bean variety and is widely used in the cuisine of south Indian states. In Tamilnadu, kollu is widely used in a variety of chutneys, poriyals, rasam etc. In Siddha medicine, kollu is considered to be a bean with medicinal qualities.
Kollu Kuzhambu
I came across this kollu kuzhambu recipe online and as soon as I saw it, I decided to give it a try. I have never had kollu (in any form) in my life and was curious the moment I saw it. And it was worth the try because kollu kuzhambu is the best gravy variety that I have ever had in my life, hands down! The recipe that I have given here requires some ground work. You need to grow sprouts out of kollu before you use it in your recipe. Back to the medicinal properties of kollu, I recently learnt that kollu has anti-glycemic properties and prevents insulin resistence, hence an apt food for diabetic patients. I also learnt from my MIL that it increases your body heat and hence having it in moderation is advisable – as with any other food items.
Kollu Kuzhambu
Without any further delay, below is the recipe to my most favorite gravy of all time, the one and only Kollu Kuzhambu. Try it in your kitchen and let me know if it had become your favorite dish as well 😉

Kollu Kuzhambu
Recipe type: Main
Cuisine: Indian
Prep time: 
Cook time: 
Total time: 
Serves: 4
 
Ingredients
To roast & grind:
  • Oil – 1 tsp
  • Shallots, whole – 10 nos
  • Cumin seeds – 1 tsp
  • Curry leaves – 5 nos
  • Grated coconut – 1 tbsp
  • Coriander seeds – 1 tbsp
  • Red chilli powder – 1 tbsp
  • Turmeric powder – ½ tsp
Other ingredients:
  • Oil – 1 tbsp
  • Shallots, halved – 5 nos
  • Curry leaves - few
  • Tomato, sliced – 1 no (In india 2 nos)
  • Sprouted horse gram – ½ cup
Instructions
To grow bean sprouts:
  1. Soak the bean with enough water and leave it overnight or atleast 8 hours.
  2. Transfer the sprouts to a muslin or cheese cloth, drain the water completely, and tie the cloth with a knot holding the beans inside.
  3. Let it hang overnight leaving the excess water to drain.
  4. The next day you will notice tiny sprouts grown out of the beans.
  5. Let the sprouts grow more for another day which adds taste to the food.
To make gravy:
  1. Half boil the sprouted horsegram along with little salt (for 1 whistle). Keep it aside.
  2. Heat oil in a pan and add shallots. Sauté well. Add cumin seeds and curry leaves. Give a quick stir. Add grated coconut. Sauté well and add all the above given powders and switch off the flame. Allow them to cool and blend to a fine paste.
  3. Heat oil in a pan and add shallots. Sauté well and add tomato. When they turn mushy, add half cooked sprouted horsegram and give it a stir. When the horsegram is half done, add the ground paste and enough water. Add enough salt. Bring the gravy to boil for 15 minutes. Cook until all the raw smell disappears. Garnish with cilantro.
  4. Goes excellent with omelette.

Kollu Kuzhambu

TIFFIN SAMBAR

Tiffin sambar
Tiffin sambar!? I know, right! What is Tiffin sambar? Back home, in restaurants, the sambar served for tiffin items (like idli, dosa etc or to keep it simple, anything that is not rice :)) has a different consistency and taste than that is served with rice during lunches (unless the people in that restaurant is really lazy and serve the same for both tiffin and rice ;)). This variety that is served with tiffin is called as the Tiffin sambar (‘Tiffin saptaacha’ – Had your tiffin?, Tiffin saapidalama – Shall we have tiffin?, are common talk in my native, referring to either breakfast or dinner)
Tiffin Sambar
There are many different varieties of sambar like, Murungai sambar, Kathirikka sambar, Araithuvitta sambar etc and Tiffin sambar is one among them. One advantage with sambar varieties in general is that you can add any vegetable that you want to to the recipe. And in Tiffin sambar, potatoes or drumsticks are added. In my home, my mom usually prepares it for breakfast and calls it as avasara (quick) sambar since it can be prepared in a short while. I still remember my mom stacking up thin dosas with tiffin sambar poured in between for my lunch while in school. It was very popular among my friends.
Tiffin Sambar
Tiffin sambar is one of the recent recipes that I have started to cook and is fast getting to be an ‘often cooked’ recipe. Dosa with Tiffin sambar or Idlis soaked in Tiffin sambar, also called as Sambar idli are some of the dishes that you must have from Tamilian cuisine. So is it going to be Tiffin sambar for breakfast tomorrow in your home? What say? 🙂

TIFFIN SAMBAR
Recipe type: Main
Cuisine: Indian
Prep time: 
Cook time: 
Total time: 
Serves: 4
 
Ingredients
  • Toor dal – ¼ cup
  • Vegetable (potato,drumstick,carrot) - 1 no
  • Shallots – 10 nos
  • Green chilli – 2 nos
  • Tomato – 1 no
  • Tamarind – small gooseberry size
  • Turmeric powder – ¼ tsp
  • Jaggery – a small piece
  • Asafoetida – a generous pinch
  • Curry leaves – few
  • Cilantro – for garnishing
  • Ghee – 1 tsp
  • Salt as required
To roast and grind:
  • Channa dal – 1 tbsp
  • Coriander seeds – ¾ tbsp
  • Red chillies – 3 nos
  • Fenugreek seeds – ½ tsp
  • Cumin seeds – ½ tsp
To temper:
  • Oil – 2 tsp
  • Mustard seeds – ½ tsp
  • Jeera – 1 tsp
  • Curry leaves – a sprig
Instructions
  1. Soak tamarind in water for half an hour and extract the juice. Add two cups of water to it and keep it aside.
  2. Soak toor dal for an hour. Wash the potato or drumstick and cut to desired pieces. Pressure cook the dal with a cup of water, turmeric powder, asaofetida, few drops of sesame oil and potato or drumstick for 4 whistles. When done, allow it to cool, peel off the skin and set aside. Mash the dal with the help of a ladle and set aside.
  3. Now heat a kadai or a pan with few drops of oil and roast the ingredients altogether given above, stirring constantly. When they turn light brown, add cumin seeds at last and give it a stir. Do not over roast it. Let it cool and blend to a powder.
  4. Heat oil in a sauce pan and temper the above ingredients. Add a pinch of asaofetida snd shallots. Sauté until the onion turns translucent. Add green chillies and tomato and sauté for a couple of minutes.
  5. Add the tamarind juice and bring it to boil. Add few curry leaves, cilantro, salt, turmeric powder and asafoetida. Again bring it to boil.
  6. Add the potato and cook for another couple of minutes.
  7. Sprinkle the sambar powder on top stirring constantly – Do not add sambar powder as a whole as it might form lumps.
  8. Add the cooked dal and stir well. Now you can add water according to your desired consistency. Add jaggery and garnish with curry leaves and cilantro. Switch off the flame. Enjoy it with hot idlis, dosas and ven pongal! 

Tiffin Sambar

VENTHAYA KUZHAMBU

Venthaya kuzhambu is a south Indian gravy that is usually had with white rice (and rarely with idli or dosa). I learnt this dish from my MIL. She is my go-to source for all traditional south Indian (especially Tamilian) recipes. Venthaya kuzhambu is very much like puli (tamarind) kuzhambu except for the fact that we use only fenugreek seeds (venthaiyam/methi) in the recipe.
Venthaya Kuzhambu
Venthayam/Methi/Fenugreek is a healthy spice especially for new moms (for milk production) and also used for digestive problems. Fenugreek seeds in general are bitter in taste. Hence be cautious in the number for fenugreek seeds you use for the preparation of Venthaya kuzhambu. Personally, I have cooked Venthaya kuzhambu only for two, so, I use very little amount of fenugreek seeds (half in that I fry and the rest I add as is in the gravy).
Venthaya Kuzhambu
Like all those dishes that tastes better as they get older (pizza, fish gravy etc), Venthaya kuzhambu tastes excellent as it gets older. As I had mentioned above, you can have this gravy with white rice or as a side dish for curd rice, yummy! Try this healthy (for all those new moms) and tasty recipe in your home and as always let me know your comments and thoughts.

VENTHAYA KUZHAMBU
Recipe type: lunch
Cuisine: Indian
Prep time: 
Cook time: 
Total time: 
Serves: 2
 
Ingredients
  • Shallots,chopped – 6 nos
  • Garlic cloves, chopped – 4 nos
  • Fenugreek seeds - 1 tsp ( 5 to 6 nos )
  • Tamarind – big gooseberry size
  • Sambar powder – 1 tbs
  • Grated Coconut – 1 tbs
  • Gingelly oil – 2 tbs
  • Salt – as required
Instructions
  1. Soak tamarind in water for half an hour and extract the juice. Add sambar powder to the tamarind extract, mix well and set aside.
  2. Grind the coconut along with one chopped shallot and little water in to a fine paste.
  3. Dry roast the fenugreek seeds in a hot pan until golden brown. Allow them to cool. keep half of them aside and blend the remaining half to powder.
  4. Heat a pan with oil and add the shallots. Sauté until the onions turn translucent.
  5. Add garlic and sauté well.
  6. Add tamarind extract and the dry roasted fenugreek seeds.
  7. Now add the coconut paste and bring it to boil. Add the fenugreek powder. Mix well and cook until the gravy is thick and dark brown. Switch off the flame.
  8. Serve venthaya kuzhambu along with white rice and egg podimas or fryums on the side. Enjoy!
Notes
1.Be careful while roasting the fenugreek seeds as it tastes bitter when overcooked. 2.Grinding very few fenugreek seeds to powder is a difficult job. So make a batch and use very little for this gravy. Store the remaining in a small air tight container.

Venthaya Kuzhambu

KALYANA RASAM

Kalyana rasam, as the name suggests, is a special type of rasam that is served in marriage feasts (kalyanam – marriage). It is one of the many varieties of rasam out there. I learnt this recipe out of curiosity. Kalyana rasam is one of those recipes that you don’t realize their uniqueness until you actually try them.
Kalyana rasam
One fine day, while I was looking for something interesting to cook i.e., known item but not a well known recipe, I came across Kalyana rasam. First I was skeptical about the name but the name did remind me about the specific taste of rasam in marriage feasts. So, I went ahead and gave it a try. And trust me, once you have kalayana rasam, you will certainly remember those marriage feasts.
Kalyana rasam
Try this unique, flavorful and tasty kalyana rasam at your home and relive those joyous memories of marriages and the wonderful feasts that accompany them :). Don’t forget to post your comments as well.

KALYANA RASAM
Recipe type: Appetizer
Cuisine: Indian
Prep time: 
Cook time: 
Total time: 
Serves: 3 to 4
 
Ingredients
  • Tomato, medium sized– 2 nos , divided
  • Toor dal – ¼ cup (soaked in water for ½ an hour)
  • Ghee - ½ tsp
  • Mustard seeds – ¼ tsp
  • Turmeric powder – a pinch
  • Asafetida – a pinch
  • Cilantro – 1 tsp
  • Curry leaves – 1 tsp
To roast and grind:
  • Toor dal – 1 tbsp
  • Black peppercorns – ½ tsp
  • Red chilli – 1 nos
  • Cumin seeds – ¼ tsp
Instructions
  1. Pressure cook the toor dal with ½ a cup of water for 5 to six whistles.
  2. Grind ¾ th of the tomato into puree. Chop and save the remaining.
  3. Heat a seasoning ladle with few drops of ghee and roast the given ingredients by adding one by one. Do not over roast the ingredients. Allow it to cool and grind them to a fine paste.
  4. Combine the tomato puree, ground paste, turmeric powder, asafetida and salt in a sauce pan and allow it to boil for 10 minutes.
  5. Add the cooked toor dal to the mixture and cook for another 5 to 10 minutes until a froth is formed around the rim. Switch off the flame and add the remaining tomato (chopped) to the hot rasam. Garnish with curry leaves and cilantro.
  6. Temper the rasam with mustard seeds. Enjoy the kalyana rasam with white rice and scrambled eggs or any fry on the side!

Kalyana rasam

MUSHROOM PEPPER FRY

Mushroom pepper fry

Mushroom is a popular ingredient found in Asian cuisine, especially, Korean, Indian and Japanese. It is a popular item in up-scale vegetarian restaurants back home. Do you know that mushroom is actually a type of fungus?! Mushroom pepper fry is a relatively new dish in my cook book. I learned it from a recipe that I found online. Mushroom pepper fry is one of those recipes that goes well with almost all main dishes, namely, rice, chappati, dosa, poori etc.
Mushroom pepper fry
Mushroom pepper fry is what I call the vegetarian equivalent of mutton fry and trust me, it does taste similar. It is easy to cook and can be recycled to some type of gravy as well.
Mushroom pepper fry
Do try this recipe in your home and let me know of your thoughts, including any new variations that you had tried or any suggestions!

Mushroom pepper fry

5.0 from 1 reviews
MUSHROOM PEPPER FRY
Recipe type: Lunch
Cuisine: Indian
Prep time: 
Cook time: 
Total time: 
Serves: 2
 
Ingredients
  • Oil – 2 tbsp
  • Whole spices – 1 bay leaf, 2 green cardamom, 2 cloves, 1 “ cinnamon stick
  • Cumin seeds – 1 tsp, divided
  • Onion, chopped – 1 no
  • Ginger-garlic paste – 1 tbsp
  • Curry leaves – a sprig
  • Green chilli, chopped – 2 nos
  • Tomato, chopped – 1 no
  • Turmeric powder – a pinch
  • Mushroom – 150 grams
  • Salt as required
  • Cilantro – to ganish
  • Lemon juice – 1 tbsp
To crush
  • Black pepper – 1 tsp
  • Garlic – ½ tsp
  • Cumin seeds – ½ tsp
For the seasoning
  • Butter – ½ tbsp
  • Crushed items
  • Coriander powder – ½ tbsp
  • Cumin power – ½ tbsp
  • Red chilli powder - ½ tbsp
  • Cilantro – ½ tbsp
Instructions
  1. Heat oil in a wide open pan and add the whole spices. Add in half a tsp of cumin seeds, followed by chopped onion. When they turn translucent, add turmeric powder and ginger garlic paste.
  2. When the raw aroma disappears add curry leaves. Add green chillies followed by tomatoes. Sauté well and simmer. Meanwhile wash and cut the mushrooms.
  3. After the tomatoes are well cooked add the mushrooms and sauté well. Add in half a cup of water. Cover and cook for couple of minutes.
  4. While the mushrooms are getting cooked, heat a seasoning ladle (or a small pan), add butter and season with crushed garlic, pepper and cumin seeds. Also, add all the powders and cilantro to the seasoning. Give a quick stir and add to the mushroom gravy. Add salt. Cook until all the water is evaporated and you get the nice and dry mushroom fry (or make it as a semi gravy according to your choice)

Mushroom pepper fry


CHALNA |SALNA

Salna
Chalna is a popular Tamilian dish that is had mainly with parotta (again, a tamilian take on north Indian paratha). It is also known as saervai in Chennai. Chalna is also used as an ingredient for kothu parotta in restaurants. It is mainly added to compensate the dryness of parotta.
SalnaBack in my home state, Chalna served in restaurants is watery but mine is a little bit thick. I personally like to have it with dosa as well. Chalna poured over shredded parotta is a common sight in restaurants back home and having it like that tastes so good 🙂 There are different varieties of Chalna; plain, vegetarian, non-vegetarian etc. The recipe I had given here is plain. In vegetarian Chalna, potato is added and in non-vegetarian version, meat (chicken or mutton – mainly bones) is added.
SalnaThe Chalna recipe that I had given here is the end product of numerous trials and errors and is the best version to date, guaranteed! So, do try this wonderful recipe in your kitchen and let me know your experiences.

CHALNA |SALNA
Recipe type: Breakfast / Dinner
Cuisine: Indian
Prep time: 
Cook time: 
Total time: 
Serves: 2
 
Ingredients
For the powder:
  • Oil - 2 drops
  • Coriander seeds - 1 ½ tbsp
  • Cumin seeds -3/4 tbsp
  • Red chillies – 4 nos
  • Whole green chilli – 2nos (don’t cut)
  • Curry leaves- 6 to 7 nos
  • Cinnamon stick - 1 “
  • Fennel seeds- ½ tsp
For the Paste:
  • Oil - ½ tbsp
  • Big onion - 1
  • Shallots - 2 nos
  • Ginger - a small piece
  • Garlic - 2 cloves
  • Poppy seeds – 1 tbsp
  • Cashews – 3 nos
  • Green chillies – the same above sautéed ones.
  • Ripen tomato – 1 (roughly chopped)
  • Grated coconut – 1 ½ tbsp
Other ingredients:
  • Gingelly oil – 2 tbsp
  • Cinnamon – 1”
  • Clove -1
  • Fennel seeds – 2 pinch
  • curry leaves – 6 nos
  • turmeric powder – ½ tsp
  • salt as required
  • Chicken – ¼ kg
  • Water – 1 to 1 ½ cup
  • Chopped cilantro for garnishing
Instructions
Step 1:
  1. Heat oil in a pan and add in coriander seeds, cumin seeds, red chillies, whole green chillies and curry leaves one by one. Sauté for 40 seconds. Add in cinnamon and fennel seeds. Give a quick stir and switch off the flame.
  2. Remove the green chillies and keep aside. Allow the above mixture to cool and make a powder.
Step 2:
  1. Heat oil in a pan and add in roughly chopped onion, shallots, ginger and garlic. Sauté for few seconds. Add in poppy seeds and cashews and green chillies (the same above sautéed ones). Give a stir and add roughly chopped tomato. Sauté for few seconds and switch off the flame. Allow it to cool and make a paste.
Step 3:
  1. Grind coconut separately to a fine paste.
Step 4:
  1. Heat oil in a small pressure cooker and add in cinnamon, clove and fennel seeds. When they start to sizzle add in curry leaves and give a stir.
  2. Now add in the ground onion paste and sauté for few seconds. Add the ground masala powder along with turmeric powder and salt and sauté until the color changes and oil separates.
  3. Add in the chicken pieces and stir well until the paste is well blended. Add water and mix well. cover the lid and cook for a whistle. When done add in the coconut paste and bring it to a boil – at this stage you will start to notice oil in the rim. Check salt and switch off the flame. Garnish with chopped cilantro.
  4. Serve hot with plain parotta or roti or kothu parotta or idli or dosa. Enjoy!
Notes
Vegetarians can add vegetables instead of chicken or simply make plain chalna. I tried both and it tasted heavenly.

Salna

You might also like

Kothu Parotta
egg kothu parotta

MOCHAI KUZHAMBU

Mochai is a type of bean also known as field beans in English. You will find this as Val beans in Indian grocery stores across the US. Mochai Kuzhambu is a gravy dish made with Mochai beans. The search for these beans in the US must have been the longest one that I have ever undertaken to find a food item (ingredient or cooked dish).
mochai kuzhambuMochai Kuzhambu tastes somewhat similar to Puzhi Kuzhambu only that it has Mochai beans in it. An interesting fact about Mochai is that every part of the plant is edible, i.e., can be cooked and eaten. However, Indian recipes are predominantly made using the beans only. Also, Mochai is used to make Tofu and Tempeh (attention vegan lovers!).
mochai kuzhambuMochai Kuzhambu is one of the easiest dishes to make. It goes well with hot white rice and normally you don’t need a side dish since the Mochai beans serves as one. Mochai Kuzhambu also tastes good when had with Chappati or Dosa.
mochai kuzhambuHere is the recipe to Mochai Kuzhambu. Do try it in your home and let me know your thoughts.

MOCHAI KUZHAMBU
Recipe type: lunch
Cuisine: Indian
Cook time: 
Total time: 
Serves: 3
 
Ingredients
  • Mochai (Field Beans) - ¾ cup
  • Tamarind – a big gooseberry sized ball (when diluted comes to ¼ cup)
  • Small Onion – 8 nos
  • Tomato - ½
  • Garlic - 4 cloves
  • Red Chilli Powder - 1 tsp
  • Coriander powder - 2 tsp
  • Salt - to taste
To saute and grind:
  • Oil - 1 tsp
  • Shallots - 6 to 7 nos
  • Tomato – 1 no
  • Garlic - 4 cloves
  • Coriander seeds - 1 tsp
  • Fennel seeds – ½ tsp
  • Grated coconut – 2 tbsp
To temper:
  • Oil - 1 tbsp
  • Mustard seeds - 1 tsp
  • Urad dal - ½ tsp
  • Fenugreek seeds - ¼ tsp
  • Hing - a generous pinch
  • Curry leaves – a sprig
Instructions
  1. Soak the beans in water overnight or at least 8 hours and pressure cook for 6 whistles.
  2. Soak the tamarind in water for 15 minutes and extract the juice.
  3. Sauté and grind the ingredients mentioned above to a fine paste.
  4. Heat oil in a sauce pan and add the items given under tempering. When they start to sizzle, add in chopped shallots. Sauté until they turn translucent.
  5. Now add in garlic cloves and sauté until the raw smell leaves. Add the chopped tomatoes and sauté till they become mushy.
  6. Add in the cooked beans along with tamarind juice and water and bring it to boil- it should take couple of minutes.
  7. Now add in the ground paste followed by red chilli powder, coriander powder and salt. Mix well and bring it to boil- add water if needed.
  8. Simmer it in a low flame for 10 minutes until the gravy thickens.
  9. Switch off the flame and close the lid. Serve it after 30 minutes. Enjoy!
Notes
You could also dry roast the Mochai or field beans before soaking in water.
Always try adding coconut just while blending, without roasting it. As coconut has high cholesterol when roasted.
Whenever you make any type of beans gravy, try to serve it at least after 15 minutes so that the beans absorb the masalas from the gravy.

011

GRANDMA’S VELLAPOODU KUZHAMBU | POONDU KUZHAMBU | GARLIC GRAVY

Grandma’s Vellapoodu Kuzhambu, as the name suggests, is a dish from my late grandmother’s kitchen. It is more of like a family recipe, in the sense, passed on to my mom and then to me. Now I am sharing this with you.
poondu kuzhambuVellapoodu kuzhambu is a popular dish in south India and is primarily made of pepper, curry leaves and lots of garlic cloves. It is one of my favorite dishes among vegetarian recipes. It has been a mainstay in my mom’s cooking since my childhood.
The first time I made my grandma’s vellapoodu kuzhambu, it did not resemble to the one made by my mom but my perseverance paid off. So, when I say the recipe has been tried and tested, it literally means that 🙂
042As I had mentioned in my puli kuzambhu recipe, the main ingredient for my grandma’s vellapoodu kuzhambu is using whole garlic cloves; not the diced ones. This gives the unique taste found in my grandma’s recipe.
041So here is the wonderful recipe of my grandma’s vellapoodu kuzhambu and let me know how well did it go in your kitchen 🙂

POONDU KUZHAMBU|GARLIC GRAVY
Recipe type: Lunch
Cuisine: Indian
Prep time: 
Cook time: 
Total time: 
Serves: 2
 
Vellapoodu kuzhambu is a popular dish in south India and is primarily made of pepper, curry leaves and lots of garlic cloves. It is one of my favorite dishes among vegetarian recipes. It has been a mainstay in my mom’s cooking since my childhood.
Ingredients
  • Gingelly oil – 1 tbsp
  • Cumin seed – 1 tbsp
  • Red chilli – 1
  • Black Pepper – 1 tsp
  • Mustard seed – 1 tsp
  • Turmeric powder – 1 tsp
  • Raw Rice – 1 tbsp (soaked in water for 1 hour)
  • Garlic cloves – 15 nos
  • Raw rice water (kalani thanni) – 1 cup
  • Curry leaves – a sprig
  • Salt – as required
Instructions
  1. Heat a pan with half a tsp of gingelly oil. Add cumin seeds, black peeper, red chilli and half a tsp of mustard seeds and stir fry till they start to splutter. Allow it to cool and grind it with a tsp of turmeric powder, soaked rice and a garlic clove with little raw rice water and make into paste.
  2. Heat the same pan with remaining oil, add mustard seeds and curry leaves. When mustard seeds start to splutter, add in the remaining garlic cloves and sauté for a minute or until the cloves changes color.
  3. Now add ground masala along with raw rice water and salt and give it a stir. Bring it to boil or wait until the gravy thickens and garlic cloves are well cooked.
  4. Serve this gravy on side with hot rice and scrambled egg.
Notes
Raw rice water is nothing but the water you get when you wash the rice for the second time.
Adding this water is mainly because it thickens the gravy.


047